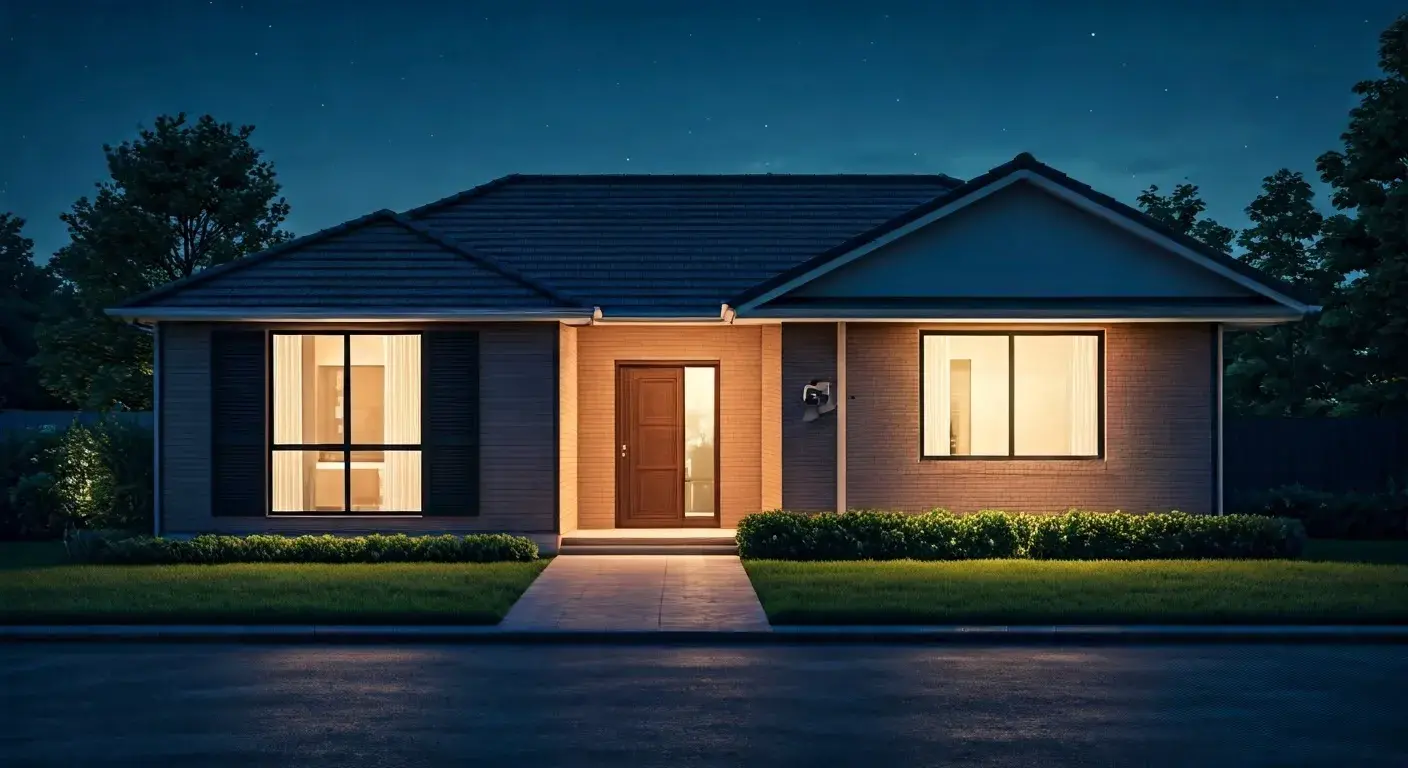
Elevate your home's safety with a custom-built DIY security system. Discover how to choose, install, and manage your own robust security solution, offering unparalleled control and peace of mind for your family and property in 2025-26.
What Are DIY Home Security Systems?
DIY home security systems, also known as do-it-yourself security systems, are a modern approach to protecting your residence. Unlike traditional professionally installed and monitored systems, DIY solutions empower homeowners to select, set up, and manage their own security infrastructure. This typically involves purchasing individual components like sensors, cameras, and a central hub, then installing them according to the manufacturer's instructions. The primary appeal lies in the flexibility, cost-effectiveness, and personalized control they offer. In 2025-26, these systems have become increasingly sophisticated, integrating seamlessly with smart home ecosystems and offering advanced features without the need for specialized technicians. They provide a tangible way for individuals to take proactive steps in safeguarding their homes, responding to a growing demand for accessible and customizable security measures.
Why Choose a DIY Approach in 2025-26?
The decision to opt for a DIY home security system in 2025-26 is driven by a confluence of factors that resonate strongly with today's homeowners. The landscape of home protection has evolved, and DIY solutions are at the forefront of this transformation, offering compelling advantages.
Cost-Effectiveness and Budget Control
One of the most significant drivers for DIY adoption is the substantial cost savings. Traditional security systems often involve hefty upfront installation fees, monthly monitoring charges, and long-term contracts. DIY systems, conversely, allow homeowners to purchase components based on their specific needs and budget. While there's an initial investment, the absence of mandatory monthly fees (or the option for self-monitoring) drastically reduces the overall expenditure over time. For instance, a basic DIY setup might cost between $200-$500, with optional professional monitoring available for $10-$30 per month, significantly less than the $40-$60+ often charged by traditional providers. This budget flexibility is particularly appealing to young families, renters, and those on a fixed income.
Unmatched Flexibility and Customization
DIY systems offer unparalleled flexibility. Homeowners are not confined to a pre-packaged solution. They can select specific types of sensors (door/window, motion, glass break), strategically place cameras, and choose a central hub that best suits their technical comfort level and desired features. Want an outdoor camera pointed at the driveway? Need extra window sensors on the ground floor? With DIY, you dictate the system's architecture. This modularity means you can start with a basic setup and expand it over time as your needs or budget evolve. This level of personalization is a stark contrast to the often rigid offerings of professional installers.
Ease of Installation and Setup
Manufacturers of DIY security systems have invested heavily in making their products user-friendly. Gone are the days of complex wiring and complicated manuals. Modern DIY systems often feature wireless components that pair easily with a central hub or smartphone app. Installation typically involves sticking sensors to surfaces, mounting cameras, and connecting the hub to your home's Wi-Fi network. Many systems provide guided setup through intuitive mobile applications, complete with video tutorials and step-by-step instructions. This accessibility opens up home security to individuals who may not have extensive technical expertise.
Smart Home Integration
In 2025-26, home security is intrinsically linked with the broader smart home ecosystem. DIY systems excel in this area, offering seamless integration with popular smart home platforms like Amazon Alexa, Google Assistant, and Apple HomeKit. This allows for voice control of your security system, automation of security tasks (e.g., arming the system when you leave), and integration with other smart devices like lights, thermostats, and smart locks. Imagine your lights turning on automatically if a motion sensor is triggered after dark, or being able to arm your system with a simple voice command. This interconnectedness enhances both convenience and security.
Empowerment and Control
Perhaps the most profound benefit of a DIY approach is the sense of empowerment it provides. Homeowners are in complete control of their security. They decide what to monitor, how to respond to alerts, and when to adjust their system. This direct control fosters a greater sense of security and peace of mind, knowing that you are actively managing your home's protection. You can choose to self-monitor, receiving alerts directly on your smartphone and deciding whether to contact authorities, or opt for affordable professional monitoring services that can be added or removed as needed.
No Long-Term Contracts
A significant advantage of most DIY security systems is the absence of restrictive long-term contracts. Traditional security companies often lock customers into 2-3 year agreements, with penalties for early termination. DIY systems typically involve a one-time purchase of equipment, allowing you to use it as long as you wish without ongoing contractual obligations. This freedom is invaluable for individuals who may be relocating, prefer month-to-month flexibility, or simply dislike being tied down by lengthy commitments.
Data Privacy and Security
With a DIY system, you often have more transparency and control over your data. While cloud storage for camera footage is common, many systems offer local storage options (e.g., SD cards) or allow you to manage your data preferences. This can be a crucial consideration for individuals concerned about privacy and who want to limit the amount of personal information shared with third-party companies.
Key Components of a DIY System
A robust DIY home security system is built from several interconnected components, each playing a vital role in safeguarding your property. Understanding these elements is the first step toward designing an effective security strategy.
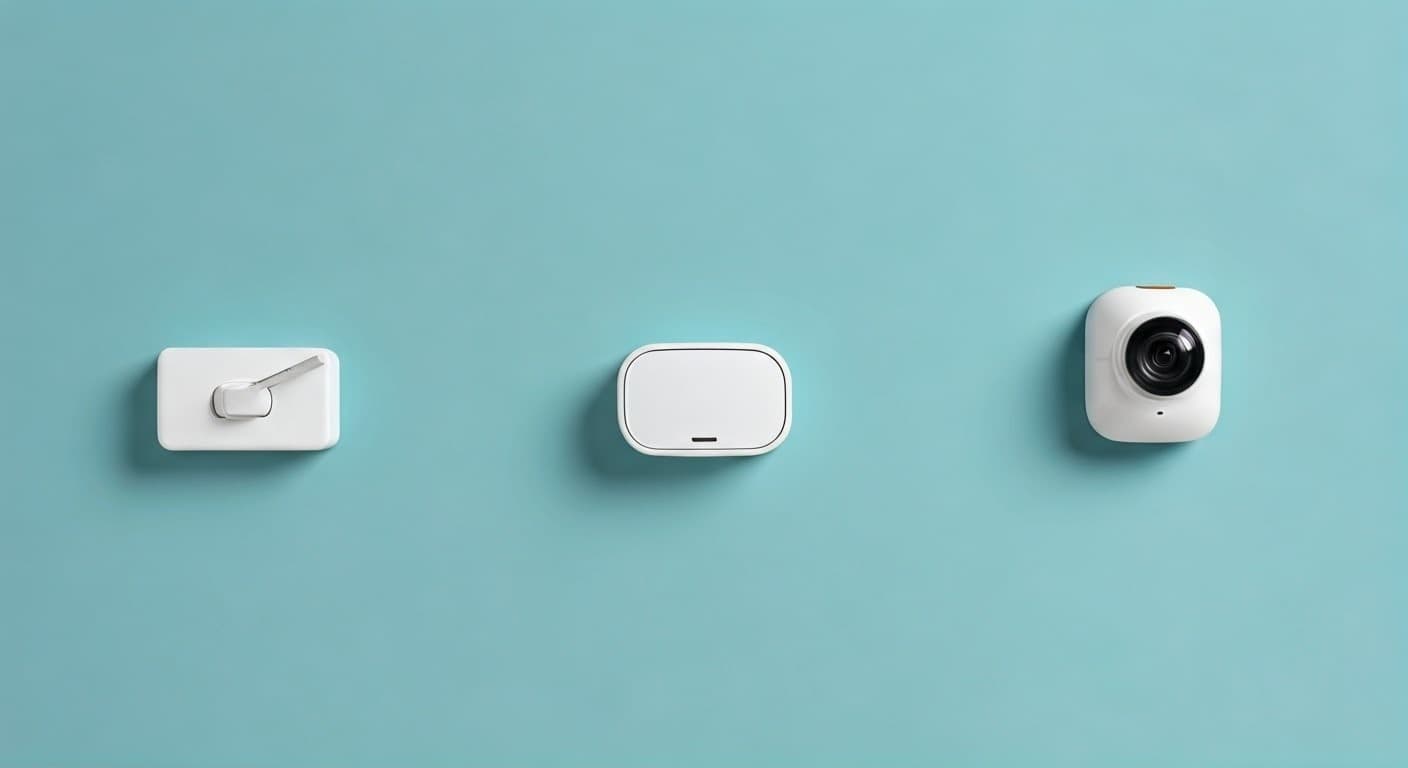
1. The Hub or Base Station
The hub is the brain of your DIY security system. It acts as the central communication point, connecting all other sensors and devices wirelessly. When a sensor is triggered (e.g., a door opens), it sends a signal to the hub, which then initiates the programmed response – sounding an alarm, sending a notification to your smartphone, or alerting a monitoring center. Hubs vary in features, with some offering built-in sirens, battery backup, and cellular backup for internet outages.
2. Door and Window Sensors
These are essential perimeter security devices. Typically consisting of two parts (a magnet and a sensor), they are installed on doors and windows. When the two parts are separated (i.e., the door or window is opened), the sensor detects the change and sends a signal to the hub. They are discreet, easy to install, and provide an immediate alert to breaches at entry points.
3. Motion Sensors
Motion sensors detect movement within a specific area, usually indoors. They are ideal for covering larger spaces like living rooms, hallways, or basements. Modern motion sensors use passive infrared (PIR) technology to detect body heat or microwave technology for more advanced detection. Many are designed with pet immunity to avoid false alarms from animals.
4. Security Cameras (Indoor and Outdoor)
Cameras provide visual verification of events.
- Indoor Cameras: Useful for monitoring common areas, checking on pets, or keeping an eye on children. They often feature two-way audio and night vision.
- Outdoor Cameras: Designed to withstand the elements, these cameras offer surveillance of your property's exterior, including driveways, yards, and entryways. Features like motion detection, night vision, and weatherproofing are crucial. Many now offer high-definition resolution (1080p or higher) and wide-angle lenses.
Connectivity is typically Wi-Fi, with footage often streamed to a mobile app and stored in the cloud or on local storage.
5. Smart Doorbell Cameras
These integrate a doorbell with a camera, allowing you to see, hear, and speak to visitors remotely via your smartphone. They provide an added layer of security by deterring package thieves and allowing you to screen visitors before opening the door.
6. Environmental Sensors
Beyond intrusion detection, DIY systems can include sensors for environmental hazards:
- Smoke and Carbon Monoxide Detectors: Smart versions can send alerts to your phone even when you're away, potentially saving lives.
- Water Leak Sensors: Placed near pipes, washing machines, or water heaters, these can detect leaks early, preventing costly water damage.
- Freeze Sensors: Useful in vacation homes or areas prone to extreme cold, these alert you if temperatures drop dangerously low.
7. Keypads and Key Fobs
While many systems are controlled via smartphone apps, keypads offer a traditional way to arm and disarm the system. Key fobs provide a convenient, button-press alternative for quick arming/disarming, especially useful for children or elderly family members.
8. Sirens
An audible siren is a critical deterrent. When triggered, it emits a loud noise (often 100+ decibels) designed to scare off intruders and alert neighbors. Some systems have integrated sirens in the hub, while others offer separate, more powerful external sirens.
9. Cellular Backup
For systems relying on Wi-Fi, an internet outage can render them useless. Cellular backup uses a cellular network to maintain communication with the hub, ensuring your system remains active even if your home internet goes down. This is a crucial feature for reliable security.
Planning Your DIY Home Security Setup
A well-planned DIY home security system is far more effective than a haphazard installation. Careful consideration of your home's layout, potential vulnerabilities, and your specific needs will ensure optimal protection.
Assess Your Home's Vulnerabilities
Walk around your property, both inside and out, and identify potential entry points and weak spots.
- Ground Floor Entry Points: Doors and windows on the ground floor are the most common targets. Ensure all are accounted for with sensors.
- Basement Windows: Often overlooked, basement windows can be an easy access point.
- Sliding Doors: These can be more vulnerable than standard doors; consider additional security measures or specific sensors.
- Garages and Attached Sheds: These can provide a stealthy way for intruders to gain access to your home.
- Areas with Poor Visibility: Dark corners, overgrown bushes, or blind spots around your property can provide cover for intruders.
Determine Your Security Goals
What do you want your system to achieve?
- Intrusion Detection: Primarily focused on detecting unauthorized entry.
- Deterrence: Using visible cameras and audible alarms to discourage criminals.
- Remote Monitoring: Being able to check on your home and receive alerts from anywhere.
- Environmental Protection: Safeguarding against fire, flood, or CO leaks.
- Smart Home Automation: Integrating security with other smart devices for convenience and enhanced safety.
Map Out Sensor Placement
Based on your vulnerability assessment and security goals, create a plan for where each component will go.
- Doors and Windows: Place sensors on all accessible entry points.
- High-Traffic Areas: Install motion sensors in hallways, stairwells, and main living areas that would be traversed if an intruder gained entry.
- Key Rooms: Consider motion sensors in rooms with valuable items or where a person might try to hide.
- Cameras: Position outdoor cameras to cover main entrances, driveways, and vulnerable perimeter areas. Indoor cameras can monitor main living spaces or entryways. Ensure they have a clear line of sight and are not easily tampered with.
- Environmental Sensors: Place smoke/CO detectors on each level and near sleeping areas. Water sensors should be near potential leak sources (sinks, toilets, water heaters, washing machines).
Consider Your Network Infrastructure
Most DIY systems rely on your home's Wi-Fi network.
- Wi-Fi Strength: Ensure you have a strong, stable Wi-Fi signal in all areas where you plan to install wireless devices, especially cameras. You may need a Wi-Fi extender or a mesh network.
- Bandwidth: Multiple high-definition cameras streaming video can consume significant bandwidth. Ensure your internet plan can handle the load.
- Router Placement: Place your router in a central location for optimal coverage.
Choose Your Monitoring Strategy
Decide how you want to be alerted and respond to events.
- Self-Monitoring: You receive alerts directly on your smartphone and are responsible for contacting emergency services if necessary. This is the most cost-effective option.
- Professional Monitoring: You can often add professional monitoring services to DIY systems for a monthly fee. A central station monitors your alerts 24/7 and can dispatch emergency services on your behalf. This offers a higher level of security and peace of mind, especially if you travel frequently or are concerned about missing alerts.
Budget Allocation
Create a realistic budget. Factor in the cost of the hub, sensors, cameras, any necessary accessories (e.g., Wi-Fi extenders), and potential optional monitoring fees. It's often better to start with essential components and add more later as needed.
Research and Compatibility
Before purchasing, research different brands and read reviews. Ensure that all components you choose are compatible with each other and with your preferred smart home ecosystem (e.g., Alexa, Google Assistant).
Installing Your DIY Security System: Step-by-Step
Installing a DIY home security system is designed to be straightforward. Follow these general steps, always referring to your specific product's manual for detailed instructions.
Step 1: Unpack and Inventory Your Components
Carefully unpack all the components you've purchased. Check them against the packing list to ensure everything is present and undamaged. Familiarize yourself with each piece.
Step 2: Download the Mobile App and Create an Account
Most DIY systems are managed through a dedicated smartphone app. Download the app from your device's app store (iOS or Android) and follow the on-screen prompts to create an account. This app will be your primary interface for setup, control, and receiving alerts.
Step 3: Set Up the Hub/Base Station
- Power Up: Plug the hub into a power outlet.
- Connect to Network: Follow the app's instructions to connect the hub to your home's Wi-Fi network. This usually involves entering your Wi-Fi password. Some hubs may offer an Ethernet port for a wired connection, which can be more stable.
- Cellular Backup (if applicable): If your hub has cellular backup, activate it by following the manufacturer's instructions, which may involve inserting a SIM card or activating a service.
- Firmware Update: The app will likely prompt you to update the hub's firmware to the latest version. Allow this process to complete.
Step 4: Install Door and Window Sensors
- Clean Surfaces: Ensure the mounting surfaces on the door/window and frame are clean and dry.
- Pair Sensor: In the app, select the option to add a new sensor. You may need to pull a battery tab or press a button on the sensor to activate it. The app will detect the sensor.
- Mount Sensor: Most sensors use adhesive backing. Mount one part of the sensor on the door/window and the other part on the frame, ensuring they are aligned and within the specified range when the door/window is closed (usually less than an inch apart).
- Test: Open and close the door/window to ensure the sensor registers correctly in the app.
Step 5: Install Motion Sensors
- Choose Location: Mount motion sensors in corners of rooms or on walls, typically 6-8 feet high, facing areas where movement is expected. Avoid pointing them directly at heat sources (vents, direct sunlight) or windows that might cause false alarms.
- Pair Sensor: Follow the app's instructions to add the motion sensor.
- Mount Sensor: Use the provided adhesive or screws to mount the sensor. Ensure it's secure.
- Test: Arm the system in "test mode" (if available) or arm and disarm it, then walk through the sensor's detection zone to verify it triggers an alert.
Step 6: Install Security Cameras
- Choose Location: Mount cameras in their intended positions (indoor or outdoor). For outdoor cameras, ensure they are protected from direct weather exposure if not fully weatherproof.
- Power: Connect cameras to power. This may involve plugging in an adapter or, for some battery-powered cameras, ensuring the battery is charged.
- Pair Camera: Follow the app's instructions to add the camera. This often involves scanning a QR code on the camera or connecting it to your Wi-Fi network.
- Adjust View: Position the camera to get the desired field of view. Many cameras allow you to adjust this through the app.
- Test Feed: Check the live video feed in the app to ensure it's clear and positioned correctly.
Step 7: Install Other Sensors and Devices
Follow similar pairing and mounting procedures for smart doorbells, environmental sensors, keypads, and sirens, always referring to the specific device's manual.
Step 8: Configure System Settings
Once all devices are installed and paired, use the mobile app to:
- Name Devices: Give each sensor and camera a descriptive name (e.g., "Front Door," "Living Room Motion").
- Set Entry/Exit Delays: Configure how much time you have to disarm the system after entry or to exit the premises after arming.
- Customize Notifications: Choose how and when you want to receive alerts (push notifications, email, SMS).
- Set Alarm Modes: Define different arming modes (e.g., "Home" – only perimeter sensors active; "Away" – all sensors active).
- Integrate with Smart Home Platforms: Link your security system to Alexa, Google Assistant, or other smart home services if desired.
Step 9: Test the Entire System
This is a crucial step. Arm the system and deliberately trigger each sensor one by one to ensure it registers correctly and sends alerts as expected. Test all camera feeds and any sirens. If you have professional monitoring, inform them you are testing the system.
Advanced DIY Security Features and Integrations
Beyond basic intrusion detection, modern DIY security systems offer a wealth of advanced features and integration capabilities that enhance both security and convenience. Leveraging these can transform your home into a truly smart and secure environment.
Video Analytics and AI
Many DIY cameras now incorporate sophisticated video analytics. Instead of just detecting any motion, these systems can differentiate between people, vehicles, animals, and even packages. This leads to more relevant alerts and fewer false alarms. AI-powered features can also enable facial recognition (in some high-end models), allowing you to receive notifications when specific family members arrive home.
Two-Way Audio
Integrated microphones and speakers in cameras and smart doorbells allow for two-way communication. This is invaluable for speaking with delivery personnel when you're not home, deterring potential intruders by announcing their presence, or communicating with family members.
Geofencing
Geofencing uses your smartphone's location to automatically arm or disarm your security system when you leave or arrive home. For example, your system could automatically switch to "Away" mode when your phone leaves a predefined radius around your house and switch back to "Home" mode when you return. This adds a layer of convenience and ensures your system is always armed when you're out.
Smart Lock Integration
Connecting your DIY security system with smart locks offers enhanced control over physical access to your home. You can remotely lock or unlock doors, grant temporary access to guests, and receive notifications when doors are opened or closed. Some systems can even be programmed to automatically lock all doors when the security system is armed in "Away" mode.
Smart Lighting Integration
Integrating with smart lights can create a powerful deterrent. If a motion sensor is triggered outside at night, your exterior lights can automatically turn on, illuminating the area and potentially scaring off an intruder. Similarly, interior lights can be programmed to turn on when an alarm is triggered, making it appear as though someone is home.
Smart Thermostat and Appliance Control
While less directly related to security, integrating with smart thermostats and appliances can contribute to overall home management and safety. For example, if a water leak sensor is triggered, the system could potentially be programmed to shut off the main water supply valve (if connected to a smart valve).
Professional Monitoring Add-ons
As mentioned, most DIY systems offer the option to add professional monitoring services. This provides 24/7 oversight by a dedicated team who can dispatch emergency services. The advantage here is the flexibility – you can often subscribe to this service only when you need it, such as during extended vacations, without being locked into a long-term contract.
Customizable Automation Rules
Many platforms allow you to create custom automation rules. This goes beyond simple geofencing. For example, you could set a rule: "If the front door sensor is opened between 10 PM and 6 AM, turn on the porch light, send me a notification, and start recording on the front door camera." The possibilities are vast and depend on the specific system's capabilities.
Voice Control Integration
Seamless integration with voice assistants like Amazon Alexa and Google Assistant allows for hands-free control. You can ask your assistant to arm the system, check camera feeds, or even unlock doors (with appropriate security measures in place).
Battery Backup and Cellular Backup
While basic, these are critical advanced features for ensuring system reliability. Battery backup for the hub ensures operation during power outages, while cellular backup maintains connectivity if your home internet fails. Many modern DIY systems include both.
Comparing DIY vs. Professionally Installed Systems
Choosing between a DIY and a professionally installed home security system is a significant decision. Both have their merits, and the best choice depends on individual needs, budget, and technical comfort. Here's a comparative look:
| Feature | DIY Home Security Systems | Professionally Installed Systems |
|---|---|---|
| Initial Cost | Lower to moderate. Purchase individual components. | Higher upfront costs for equipment and installation. |
| Installation | Self-installation, typically wireless and app-guided. | Professional installation by trained technicians. |
| Monthly Fees | Optional (for professional monitoring). Often self-monitored with no monthly fees. | Mandatory monthly fees for monitoring and often equipment lease. |
| Contracts | Typically no long-term contracts. | Often require long-term contracts (2-3 years). |
| Customization | Highly customizable; choose components and expand as needed. | Limited customization; often choose from pre-set packages. |
| Flexibility | High flexibility; easy to move or reconfigure. | Less flexible; difficult and costly to move or change. |
| Technology & Features | Rapidly evolving, often cutting-edge smart home integration. | Can be advanced, but may lag behind DIY in some areas due to installation complexity. |
| Troubleshooting & Support | Self-troubleshooting with online resources, community forums, and manufacturer support. | Dedicated customer support and technician dispatch. |
| Control & Privacy | Greater control over data and system settings. | Data and system control often managed by the provider. |
| Ideal For | Budget-conscious individuals, renters, tech-savvy users, those wanting maximum control. | Homeowners seeking a hands-off approach, complex home layouts, those prioritizing immediate professional support. |
Key Takeaway: If you're comfortable with technology, want to save money, and prefer to have full control over your security setup, a DIY system is likely the better choice. If you prefer a completely hands-off experience and don't mind higher costs and contracts, professional installation might be more suitable.
Popular DIY Home Security Brands in 2025-26
The DIY home security market is competitive, with several brands consistently offering innovative and reliable solutions. As of 2025-26, these brands stand out for their feature sets, ease of use, and overall value.
1. SimpliSafe
SimpliSafe is a perennial favorite in the DIY space. It's known for its user-friendly setup, robust sensor options, and optional 24/7 professional monitoring without long-term contracts. Their systems are highly scalable, allowing users to add components as needed. They offer a good balance of features, reliability, and affordability.
2. Ring Alarm
From Amazon, Ring Alarm offers an integrated ecosystem that works seamlessly with Ring's popular video doorbells and security cameras. It's exceptionally easy to set up and offers competitive pricing, especially for its professional monitoring plan (Ring Protect Pro). Its strong integration with Alexa makes it a top choice for Amazon-centric smart homes.
3. Abode
Abode differentiates itself with its focus on smart home integration and compatibility with a wider range of third-party devices, including Z-Wave and Zigbee. It offers both self-monitoring and professional monitoring options, along with robust automation capabilities. Abode is often favored by users who want a more advanced and customizable smart home experience.
4. Wyze Home Monitoring
Wyze has made a name for itself by offering incredibly affordable smart home devices. Their Wyze Home Monitoring system follows suit, providing a low-cost entry point for a comprehensive security setup. While the components are budget-friendly, they still offer essential features and optional professional monitoring at a very competitive price.
5. Google Nest Secure (Discontinued but influential)
While Google has discontinued the Nest Secure alarm system, its influence on the DIY market remains. It pioneered features like motion sensing technology and a sleek, modern design. Many users still operate their Nest Secure systems, and its legacy has paved the way for other brands to innovate in design and functionality. Google's focus has shifted to individual Nest Cams and Doorbells, which can be integrated into other DIY systems.
6. Eufy Security
Eufy, from Anker, emphasizes local storage and privacy, offering systems that don't require mandatory cloud subscriptions for basic functionality. Their cameras and alarm systems often feature advanced AI for person detection and a user-friendly app. This focus on privacy is a significant draw for many consumers.
When selecting a brand, consider factors like the types of sensors offered, camera quality, smart home compatibility, app user experience, and the cost of optional monitoring services. Reading recent reviews from 2025-26 will provide the most up-to-date insights into performance and reliability.
Troubleshooting Common DIY Security Issues
Even the best DIY security systems can encounter occasional hiccups. Fortunately, most common issues are resolvable with a bit of patience and systematic troubleshooting.
Issue: Sensor Not Registering or Offline
- Check Battery: The most common cause is a dead or low battery. Replace the battery with a fresh one of the correct type.
- Check Range: Ensure the sensor is within the hub's wireless range. Walls and large metal objects can interfere. Try moving the sensor closer or consider a range extender.
- Re-pair Sensor: Remove the sensor from the app and re-pair it following the setup instructions.
- Check for Interference: Other wireless devices operating on similar frequencies (e.g., some cordless phones, baby monitors) can cause interference.
- Inspect Mounting: Ensure the sensor and its magnet (for door/window sensors) are properly aligned and close enough when the door/window is closed.
Issue: False Alarms
- Motion Sensors:
- Pet Immunity: Ensure pet-immune sensors are properly configured for the weight of your pets, or consider placement to avoid pet pathways.
- Environmental Factors: Check for drafts from vents, direct sunlight, or moving curtains that might trigger the sensor.
- Placement: Re-evaluate sensor placement. Avoid pointing them at heat sources or areas with rapid temperature changes.
- Door/Window Sensors: Ensure doors and windows are fully closed and latched. Loose frames or vibrations can sometimes trigger them.
- Cameras: Adjust motion detection zones and sensitivity settings. Ensure outdoor cameras aren't triggered by trees swaying or passing vehicles if not intended.
Issue: Hub Not Connecting to Wi-Fi
- Check Wi-Fi Password: Double-check that you've entered the correct Wi-Fi password.
- Router Reboot: Restart your Wi-Fi router and modem.
- Hub Reboot: Power cycle the security hub.
- Signal Strength: Ensure the hub is within a strong Wi-Fi signal area. Consider moving it closer to the router or using a Wi-Fi extender.
- Network Settings: Ensure your router isn't blocking the hub's MAC address or using unusual network configurations (like captive portals).
- 2.4GHz vs. 5GHz: Most DIY security devices operate on the 2.4GHz band. Ensure your router is broadcasting this band and that the hub is connecting to it.
Issue: App Not Responding or Showing Incorrect Status
- Check Internet Connection: Ensure your smartphone has a stable internet connection (Wi-Fi or cellular).
- App Update: Make sure you have the latest version of the security system's app installed.
- Force Close and Reopen: Close the app completely and then reopen it.
- Log Out and Log In: Log out of your account within the app and then log back in.
- System Reboot: Reboot the main hub/base station.
Issue: Camera Feed is Laggy or Unavailable
- Check Wi-Fi: This is almost always a Wi-Fi issue. Ensure the camera has a strong connection.
- Bandwidth Congestion: If multiple devices are using your internet heavily, it can impact camera performance.
- Router Load: Reboot your router.
- Camera Reboot: Power cycle the camera.
- Firmware Update: Ensure both the camera and your router have the latest firmware.
When to Contact Support: If you've tried these steps and are still experiencing issues, consult your system's user manual for specific troubleshooting guides or contact the manufacturer's customer support.
Future Trends in DIY Home Security
The DIY home security market is dynamic, with innovation constantly pushing the boundaries of what's possible. As we look towards the coming years, several key trends are shaping the future of home protection.
Enhanced AI and Machine Learning
Expect AI to become even more sophisticated. Beyond simple object recognition, AI will enable predictive analytics, identifying subtle patterns that might indicate a developing threat before it materializes. This could include analyzing unusual activity patterns, detecting potential vulnerabilities, or even predicting equipment failure.
Greater Integration with Smart Home Ecosystems
The lines between security systems and broader smart home platforms will continue to blur. Deeper integration with voice assistants, smart appliances, lighting, and even energy management systems will create more seamless and automated home environments where security is an intrinsic part of the overall experience.
Advanced Biometric Authentication
While facial recognition is emerging, future systems may incorporate more advanced biometric security, such as fingerprint scanners integrated into hubs or even voiceprint analysis for arming/disarming the system, offering highly secure and convenient access control.
Edge Computing and Local Processing
To improve speed, privacy, and reliability, more processing will move from the cloud to the device itself (edge computing). This means cameras and hubs will perform more analysis locally, reducing reliance on internet connectivity and cloud servers, and enhancing data privacy.
Drone and Robotic Integration
While still in its nascent stages for consumer markets, the concept of security drones or robots that can patrol property or investigate alerts is being explored. These could offer a proactive and mobile layer of security for larger properties.
Cybersecurity Focus
As systems become more connected, cybersecurity will remain a paramount concern. Manufacturers will continue to invest in robust encryption, secure authentication methods, and regular software updates to protect against hacking and unauthorized access.
Modular and Expandable Designs
The trend towards modularity will likely continue, allowing homeowners to easily upgrade or replace individual components without needing to overhaul their entire system. This promotes longevity and adaptability.
Sustainability and Energy Efficiency
Expect to see more DIY security devices designed with energy efficiency in mind, utilizing low-power components and solar charging options for outdoor devices, aligning with broader consumer demand for sustainable technology.
These trends indicate a future where DIY home security is not only more intelligent and integrated but also more personalized, secure, and user-friendly than ever before.
In conclusion, embracing a DIY home security system in 2025-26 offers a powerful, flexible, and cost-effective way to protect your home and loved ones. By understanding the components, planning meticulously, and following straightforward installation steps, you can build a robust security network tailored to your specific needs. The continuous advancements in smart technology, AI, and seamless integration with your existing smart home ecosystem mean that DIY security is no longer a compromise but a leading-edge solution. Take control of your home's safety today by exploring the DIY path and enjoying the unparalleled peace of mind it provides.