Installing security cameras significantly enhances home and business safety, offering peace of mind and deterring potential threats. This comprehensive guide will walk you through every step, from choosing the right system to ensuring optimal placement and setup, empowering you to effectively secure your property.
Choosing the Right Security Camera System
The first crucial step in learning "how can I install security cameras?" is selecting the system that best fits your needs. The market offers a wide array of options, from basic standalone cameras to complex, integrated surveillance networks. Understanding the different types and features available will help you make an informed decision. As of 2025, the security camera landscape is dominated by smart, interconnected devices that leverage AI for enhanced functionality.
Types of Security Cameras
Security cameras can be broadly categorized by their connectivity, power source, and primary function. Each type has its advantages and disadvantages, making it essential to consider your specific requirements.
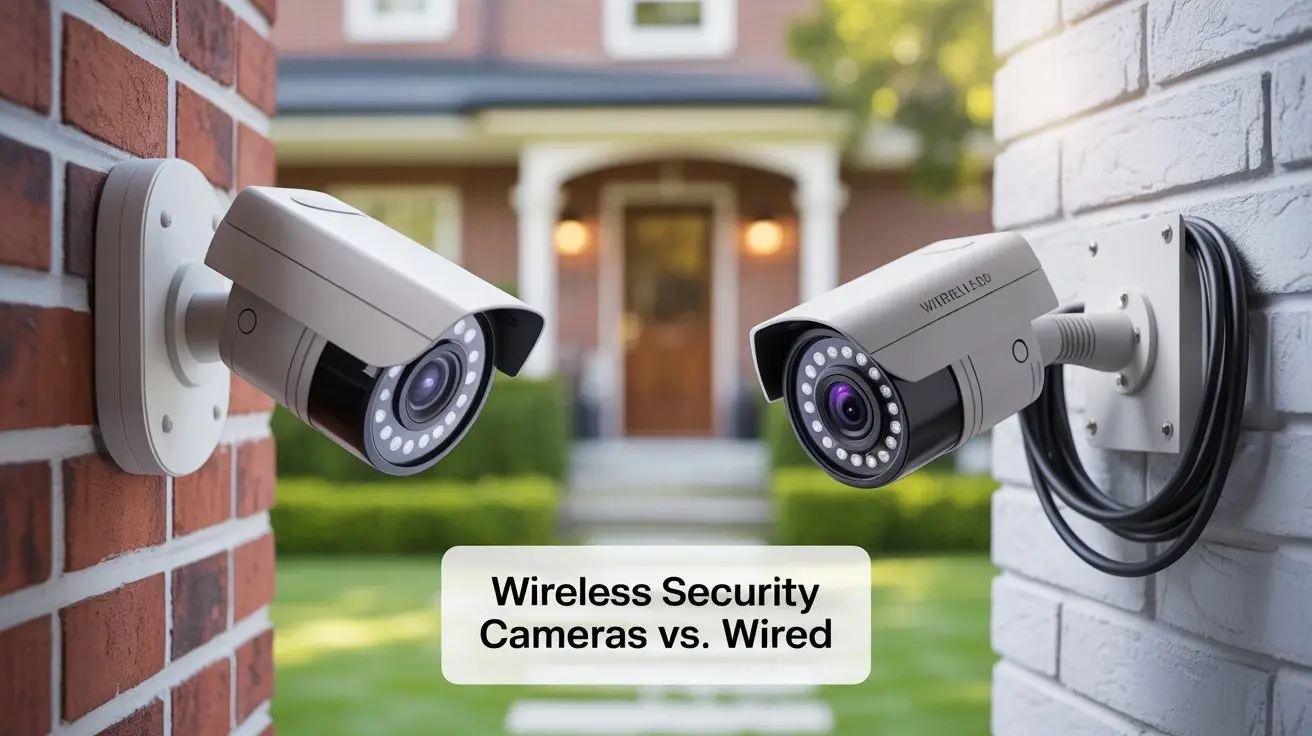
Wired vs. Wireless Cameras
Wired cameras typically offer more stable connections and higher bandwidth, which can translate to better video quality and reliability. They often require running cables through walls and ceilings, which can be labor-intensive. Common wired systems include Analog (CCTV) and IP (Internet Protocol) cameras. IP cameras are the modern standard, offering higher resolutions and network integration.
Wireless cameras offer greater flexibility in placement and are easier to install, especially in existing structures. However, they rely on Wi-Fi signals, which can be susceptible to interference, and may require battery replacements or charging. Many wireless systems are also IP-based.
Power Over Ethernet (PoE)
PoE is a technology that allows IP cameras to receive both data and power through a single Ethernet cable. This simplifies installation significantly by eliminating the need for separate power outlets near each camera. PoE is a popular choice for wired IP camera systems.
Power Sources
Cameras can be powered via AC adapters, DC adapters, Power over Ethernet (PoE), or batteries. Battery-powered cameras offer the ultimate in wireless flexibility but require regular battery maintenance. Wired and PoE cameras offer continuous power, eliminating this concern.
Camera Features to Consider
When evaluating systems, look for these key features:
- Resolution: Higher resolutions (e.g., 1080p, 4K) provide clearer images, essential for identifying details. 4K resolution is becoming increasingly common and affordable in 2025.
- Field of View (FoV): This determines how wide an area the camera can see. Wide-angle lenses cover more ground but may distort images at the edges.
- Night Vision: Infrared (IR) LEDs allow cameras to see in complete darkness. The range of IR illumination is a critical factor.
- Motion Detection: Most modern cameras include motion detection, triggering recordings or alerts when movement is detected. Advanced AI-powered motion detection can differentiate between people, vehicles, and animals, reducing false alarms.
- Two-Way Audio: Allows you to hear and speak through the camera, useful for communication or deterring intruders.
- Weatherproofing: For outdoor cameras, look for IP ratings (e.g., IP65, IP66, IP67) indicating resistance to dust and water.
- Storage: Options include local storage (SD cards, NVR/DVR) or cloud storage. Cloud storage offers remote access and off-site backup but usually involves a subscription fee.
- Smart Home Integration: Compatibility with platforms like Amazon Alexa, Google Assistant, or Apple HomeKit can enhance convenience.
Types of Security Systems
The core of your security camera setup will likely be one of these system types:
Analog (CCTV) Systems
These older systems use coaxial cables to transmit video signals to a Digital Video Recorder (DVR). While still in use, they are generally superseded by IP systems due to lower resolution and fewer advanced features.
IP (Internet Protocol) Systems
IP cameras transmit data over a network, typically using Ethernet cables or Wi-Fi. They connect to a Network Video Recorder (NVR) for wired systems or are managed via software/cloud for wireless systems. IP systems offer higher resolutions, greater flexibility, and advanced features like AI analytics.
Hybrid Systems
Some systems can accommodate both analog and IP cameras, offering a pathway for upgrading older CCTV setups.
Top Security Camera Brands and Technologies (2025-26 Outlook)
Leading brands in 2025-26 continue to focus on AI, ease of use, and robust cloud integration. Expect to see further advancements in facial recognition, package detection, and predictive analytics from companies like:
- Reolink: Known for feature-rich, affordable IP cameras, including PoE and Wi-Fi options with excellent resolution.
- Arlo: Popular for wire-free, battery-powered cameras with strong AI detection and cloud services.
- Ring: Integrates well with its ecosystem of smart doorbells and alarms, offering a comprehensive home security solution.
- Google Nest: Focuses on smart home integration and AI-powered features for ease of use.
- Lorex: Offers a wide range of NVR/DVR systems and IP cameras, often with professional-grade features.
- Eufy: Emphasizes local storage options and user privacy, with AI features.
When choosing, consider not just the hardware but also the ongoing costs (cloud subscriptions) and the user interface for managing your cameras.
Planning Your Camera Placement
Effective camera placement is as critical as the camera quality itself. A well-planned layout maximizes coverage, deters intruders, and ensures you capture the most useful footage. This section guides you through strategic planning for your security camera installation.
Identifying Vulnerable Areas
Walk around your property and identify potential entry points and blind spots. Common areas to focus on include:
- Front Door: The primary entry point for visitors and potential intruders.
- Back Door/Patio Doors: Often less visible and more accessible.
- Ground Floor Windows: Especially those that are easily accessible from the outside.
- Driveways and Garages: To monitor vehicle activity and potential break-ins.
- Side Gates and Pathways: To cover access routes to the rear of the property.
- Perimeter Fences: To detect unauthorized access.
- Valuable Assets: Areas where expensive equipment or items are stored.
Determining Camera Angles and Coverage
The goal is to achieve overlapping fields of view to eliminate blind spots. Consider the following:
- Height: Mount cameras high enough to be out of easy reach (e.g., 8-10 feet) but not so high that they lose detail or become ineffective at identifying faces.
- Angle: Angle cameras downwards to capture faces and activities. Avoid pointing them directly at bright light sources like the sun, which can wash out the image.
- Overlapping Fields: Ensure that the coverage areas of adjacent cameras overlap. This provides a continuous view and allows you to follow a subject if they move between camera zones.
- Key Features: Position cameras to capture faces clearly at entry points. For driveways, ensure license plates can be read if possible.
Indoor vs. Outdoor Considerations
Placement strategies differ for indoor and outdoor installations:
Outdoor Placement
- Weather Protection: Ensure cameras are rated for outdoor use (IP65 or higher). Mount them under eaves or overhangs for added protection from direct rain and sun.
- Deterrence: Visible cameras can act as a deterrent. Place them in prominent locations where they are easily seen.
- Power and Network: Plan for how you will run power and network cables (if applicable) to outdoor locations. Consider weather-sealed junction boxes.
- Lighting: Be mindful of ambient light. Night vision effectiveness depends on the camera's IR range and the absence of excessive light pollution.
Indoor Placement
- Discreetness: Indoor cameras can be more discreet, blending into the decor.
- Coverage: Focus on high-traffic areas, entry points, and rooms with valuable items.
- Power: Indoor outlets are usually readily available, simplifying power needs.
- Privacy: Be mindful of privacy laws and personal comfort levels. Avoid placing cameras in bedrooms or bathrooms.
Utilizing Site Plans and Layouts
For larger properties or complex installations, using a floor plan or site map is highly recommended. Mark potential camera locations, their fields of view, and cable routing paths. This visual aid helps in optimizing coverage and identifying potential installation challenges before you begin.
Considering Lighting Conditions
Lighting plays a crucial role in video quality, especially at night.
- Natural Light: Position cameras to take advantage of natural light during the day. Avoid pointing them directly into the sun.
- Artificial Light: Consider the placement of existing outdoor lighting. Motion-activated lights can complement security cameras by illuminating an area when motion is detected, enhancing night vision.
- Night Vision Range: Ensure the camera's IR night vision range is sufficient for the area you need to cover. Some cameras offer color night vision, which provides more detail in low-light conditions.
Example Placement Strategy (Residential Home)
A typical residential setup might include:
- Front Door Camera: Mounted above the door, angled to capture faces.
- Driveway Camera: Positioned on the garage or a side wall, overlooking the driveway.
- Backyard Camera: Mounted on the house or a detached garage, covering the patio and yard.
- Side Gate Camera: To monitor access to the backyard.
- Optional Indoor Cameras: In the main living area or near entry points.
By carefully planning these placements, you create a robust surveillance network that addresses your specific security concerns.
Understanding Installation Types
The method you choose for installing security cameras depends heavily on the type of system, your technical skills, and your budget. Understanding these options is key to a successful "how can I install security cameras?" journey.
DIY (Do-It-Yourself) Installation
This involves purchasing a security camera system and installing it yourself. It's often the most cost-effective option, especially for simpler wireless systems. DIY installation requires time, patience, and some basic technical aptitude. It's ideal for individuals comfortable with tools, basic wiring, and network configuration.
Professional Installation
This involves hiring a professional security company or an independent contractor to install your system. While more expensive, it offers convenience, expertise, and often a warranty on the installation work. It's recommended for complex wired systems, large properties, or when you lack the time or skills for DIY installation.
Hybrid Installation
Some homeowners opt for a hybrid approach. They might purchase a system themselves and then hire a professional for specific, more challenging parts of the installation, such as running cables through walls or setting up the NVR/DVR. This can be a good compromise to save costs while ensuring critical components are installed correctly.
Factors Influencing Your Choice
Consider these factors when deciding between DIY and professional installation:
- System Complexity: Wireless systems are generally easier for DIY. Complex wired systems with multiple cameras and long cable runs are better suited for professionals.
- Technical Skill Level: Are you comfortable with basic tools, drilling, running cables, and configuring network settings?
- Time Availability: DIY installation can be time-consuming, especially for larger systems.
- Budget: Professional installation adds labor costs, typically ranging from $100 to $500 or more, depending on the system size and complexity.
- Property Type: Older homes with difficult-to-access walls or attics might make DIY cable runs challenging.
- Warranty and Support: Professional installers often provide warranties on their work, offering peace of mind.
Pros and Cons of Each Type
Here's a comparative look:
| Feature | DIY Installation | Professional Installation |
|---|---|---|
| Cost | Lower (labor is free) | Higher (includes labor costs) |
| Time Commitment | Significant | Minimal (for the homeowner) |
| Flexibility | Full control over timing and process | Schedule dictated by the installer |
| Expertise | Relies on user's knowledge and research | Provided by experienced technicians |
| System Complexity | Best for simpler systems (wireless, fewer cameras) | Ideal for complex wired systems, large properties |
| Troubleshooting | User is responsible | Often included in service or warranty |
| Warranty | Usually limited to hardware | Often includes installation warranty |
For many homeowners in 2025, the increasing prevalence of user-friendly wireless systems makes DIY a viable and attractive option. However, for businesses or those seeking a comprehensive, high-end wired system, professional installation remains the gold standard.
DIY Installation: A Step-by-Step Guide
For those opting for a DIY approach, this section provides a detailed walkthrough. Successfully answering "how can I install security cameras?" yourself requires careful planning and execution.
Step 1: Unboxing and System Check
Before you begin, carefully unbox all components. Check the user manual against the contents to ensure everything is present and undamaged. Familiarize yourself with each part: cameras, power adapters, network cables (if applicable), mounting hardware, and the NVR/DVR or base station.
Step 2: Charging Batteries (if applicable)
If your cameras are battery-powered, ensure the batteries are fully charged according to the manufacturer's instructions. This is crucial for initial setup and testing.
Step 3: Setting Up the Base Station/NVR/DVR
For systems with a central hub (like an NVR for IP cameras or a base station for some wireless systems):
- Connect to Network: Connect the NVR/DVR or base station to your home router using an Ethernet cable.
- Connect to Power: Plug in the power adapter.
- Connect to Monitor (Optional but Recommended): For NVR/DVR systems, connect a monitor and mouse for initial configuration.
- Initial Configuration: Follow the on-screen prompts or the user manual to set up the device. This usually involves creating a password, setting the date/time, and configuring network settings.
Step 4: Installing Software/Mobile App
Download the manufacturer's mobile app or desktop software. Create an account and link it to your security system. This app will be your primary interface for viewing live feeds, reviewing recordings, and managing settings.
Step 5: Mounting the Cameras
This is where your planning pays off. Follow these guidelines:
- Drill Pilot Holes: Use a drill to create pilot holes for mounting screws. For exterior walls, use appropriate anchors for a secure fit.
- Attach Mounts: Securely attach the mounting bracket to the wall or ceiling using the provided screws.
- Connect Cables (Wired): If using wired cameras, run the Ethernet or power cables. For PoE cameras, connect the Ethernet cable to the camera and the NVR/switch. For non-PoE wired cameras, run both a video/data cable and a separate power cable to the camera's location. Ensure all connections are weather-sealed if outdoors.
- Position and Secure Camera: Attach the camera to the mount. Adjust the angle to achieve the desired field of view. Tighten any adjustment screws to hold the camera in place.
- Connect Power (Wireless/Non-PoE Wired): For wireless cameras, ensure they are within Wi-Fi range. Connect power adapters for non-PoE wired cameras.
Step 6: Connecting Cameras to the System
The process varies by system type:
- Wireless Cameras: Most wireless cameras pair with a base station or directly to your Wi-Fi network via the mobile app. Follow the app's instructions to add each camera.
- Wired IP Cameras (PoE): Once connected to the NVR via Ethernet, the NVR should automatically detect and configure the cameras. You may need to manually add them in the NVR interface if auto-detection fails.
- Analog Cameras (DVR): Connect the coaxial cable from each camera to a corresponding port on the DVR. Ensure the power adapters are connected.
Step 7: Configuring Camera Settings
Using the mobile app or NVR/DVR interface:
- Name Cameras: Assign descriptive names (e.g., "Front Door," "Driveway").
- Adjust Resolution and Frame Rate: Optimize for quality vs. storage space.
- Set Motion Detection Zones: Define areas within the camera's view where motion should trigger alerts or recordings.
- Configure Recording Schedules: Set cameras to record continuously, only on motion, or during specific times.
- Enable Notifications: Set up push notifications for motion alerts.
Step 8: Testing and Troubleshooting
This is a critical phase. Test each camera thoroughly:
- Live View: Check that each camera provides a clear live feed.
- Motion Detection: Walk through the camera's field of view to ensure motion is detected and alerts are received.
- Night Vision: Test the cameras after dark to confirm night vision is working effectively.
- Recording Playback: Review recorded footage to ensure quality and that it captured the intended events.
- Wi-Fi Signal Strength: For wireless cameras, check the signal strength in the app. If weak, consider a Wi-Fi extender or repositioning the camera/router.
- Cable Connections: For wired systems, ensure all cables are securely connected and protected from the elements.
If you encounter issues, consult the troubleshooting section of your manual or the manufacturer's online support resources. Common problems include connectivity issues, poor video quality, or cameras not being detected.
When to Consider Professional Installation
While DIY installation is increasingly accessible, there are specific scenarios where hiring a professional is the smarter choice for your security camera setup.
Complex Wired Systems
For larger homes, multi-story buildings, or businesses requiring extensive wired camera networks (e.g., 8+ cameras), running cables can be a significant undertaking. Professionals have the tools and experience to efficiently and discreetly route cables through walls, attics, and crawl spaces, ensuring a clean and durable installation.
Lack of Technical Expertise or Time
If you're not comfortable with tools, drilling, network configuration, or troubleshooting technical issues, a professional installation saves you frustration and potential mistakes. Similarly, if you have limited free time, outsourcing the installation allows you to get your system up and running quickly and correctly.
High-Value Properties or Critical Surveillance Needs
For businesses with high-value assets, sensitive areas, or situations where reliable, uninterrupted surveillance is paramount, professional installation ensures the system is set up to optimal standards. This includes proper camera positioning for maximum detail, robust cable management, and correct configuration of recording and storage solutions.
Warranty and Insurance Benefits
Many professional installation services offer a warranty on their workmanship. This means if something goes wrong with the installation shortly after completion, they will fix it. Some insurance providers may also offer discounts or benefits for professionally installed security systems.
Integration with Existing Security Systems
If you're integrating new security cameras with an existing alarm system or smart home network, a professional installer can ensure seamless compatibility and optimal performance across all devices. This is particularly relevant for advanced systems that require sophisticated integration.
Accessing Difficult Areas
Installing cameras in hard-to-reach locations, such as high ceilings, exterior facades, or industrial settings, often requires specialized equipment (like scaffolding or lifts) and safety training. Professionals are equipped to handle these challenges safely and effectively.
Peace of Mind and Reliability
Ultimately, professional installation provides peace of mind. Knowing that your system has been installed by experts who understand the nuances of surveillance technology can be invaluable, ensuring optimal performance and reliability.
Finding a Reputable Professional Installer
When seeking a professional installer:
- Get Multiple Quotes: Compare pricing and services from at least three different companies.
- Check Reviews and References: Look for online reviews and ask for references from past clients.
- Verify Licenses and Insurance: Ensure the company is properly licensed and insured.
- Understand the Scope of Work: Get a detailed written estimate outlining exactly what the installation will include.
- Ask About Warranties: Clarify the warranty on both the equipment and the installation labor.
For many, the investment in professional installation is justified by the assurance of a correctly implemented and reliable security system.
Testing and Finalizing Your Setup
Once your cameras are installed, the crucial final steps involve thorough testing and fine-tuning. This ensures your system functions as intended and provides the security you expect.
Comprehensive Camera Testing
Go through each camera individually:
- Live Feed Quality: Check the live stream on your mobile app or monitor. Ensure the image is clear, in focus, and the color is accurate during the day.
- Field of View Verification: Confirm that each camera covers the intended area and that there are no significant blind spots between cameras.
- Motion Detection Accuracy: Trigger motion in the camera's view and verify that an alert is sent and a recording is initiated. Test different types of motion (e.g., person walking, car driving).
- Night Vision Performance: Test the cameras in low-light and complete darkness. Check the clarity of the image and the effectiveness of the IR illumination. Note the range and any potential issues like glare from nearby surfaces.
- Audio Functionality (if applicable): Test two-way audio to ensure sound can be heard and transmitted clearly.
- Recording Playback: Review several recorded clips to assess the quality, frame rate, and whether they accurately capture events.
Network and Connectivity Checks
For both wired and wireless systems, network stability is key:
- Wi-Fi Signal Strength (Wireless): Use the app's signal strength indicator for each wireless camera. If a camera has a weak signal, consider moving the router, adding a Wi-Fi extender, or repositioning the camera.
- Network Stability (Wired): Ensure your router and NVR/DVR are functioning correctly. Check for any network errors reported by the NVR/DVR.
- Remote Access: Test viewing your cameras remotely from outside your home network (e.g., using your mobile data). Ensure this feature is enabled and working reliably.
Storage and Recording Settings Optimization
Fine-tune your recording settings based on your testing:
- Recording Resolution: Balance video quality with storage capacity. 1080p is often sufficient for identification, while 4K offers more detail but uses more storage.
- Frame Rate (FPS): Higher frame rates (e.g., 30 FPS) provide smoother video but consume more storage. Lower rates (e.g., 15 FPS) save space but can result in choppier video.
- Motion Detection Sensitivity: Adjust sensitivity levels to minimize false alerts (e.g., from trees swaying) while still capturing genuine events. Many modern systems allow for AI-based detection (person, vehicle) which significantly reduces false positives.
- Recording Duration: Set how long recordings should be after motion stops or configure continuous recording schedules.
- Storage Capacity: Monitor your available storage space (SD card, NVR/DVR hard drive, cloud). If you're running out of space, consider upgrading your storage, reducing recording quality, or adjusting your recording schedule.
Security and Privacy Configuration
Ensure your system is secure:
- Strong Passwords: Use unique, strong passwords for your NVR/DVR, Wi-Fi network, and any associated accounts. Change default passwords immediately.
- Firmware Updates: Regularly check for and install firmware updates for your cameras, NVR/DVR, and router. These updates often include critical security patches.
- Privacy Zones: If your cameras have the option, set up privacy zones to mask out areas you don't want to record (e.g., a neighbor's property).
- Two-Factor Authentication (2FA): Enable 2FA on your security system accounts if available for an extra layer of security.
Documentation and Labeling
Keep a record of your system's configuration:
- Camera Locations: Note down where each camera is installed.
- Passwords: Store your passwords securely (e.g., in a password manager).
- Network Settings: Document your IP addresses and network configurations if you have a complex setup.
- Manuals: Keep user manuals for all components readily accessible.
By diligently testing and configuring your system, you ensure that your investment in security cameras provides reliable protection and valuable peace of mind.
Ongoing Maintenance and Best Practices
Installing security cameras is not a one-time task. Regular maintenance and adherence to best practices are essential to ensure your system continues to operate effectively and reliably over time.
Regular Cleaning
Camera lenses can accumulate dust, dirt, pollen, and cobwebs, which can significantly degrade image quality. Clean your camera lenses periodically (monthly or quarterly, depending on your environment) using a soft, lint-free cloth and a lens-cleaning solution. For outdoor cameras, ensure the housing is also clean.
Firmware and Software Updates
Manufacturers regularly release firmware updates for cameras, NVRs/DVRs, and mobile apps. These updates often include:
- Security Patches: Crucial for protecting your system from cyber threats.
- Performance Improvements: Enhancements to video quality, motion detection, and connectivity.
- New Features: Added functionalities that can improve your user experience.
Make it a habit to check for and install these updates regularly. Many systems offer automatic update options.
Checking Connections and Cables
For wired systems, periodically inspect all cables and connections. Ensure that:
- Cables are Secure: No cables have come loose from the camera, NVR/DVR, or junction boxes.
- Weatherproofing is Intact: For outdoor connections, check that seals and protective coverings are in good condition to prevent water ingress.
- No Damage: Look for any signs of wear, tear, or damage to the cables that could lead to signal loss or failure.
Monitoring Storage Capacity
Keep an eye on your recording storage. Whether using an SD card, internal hard drive, or cloud storage, ensure you have sufficient space. If your storage is consistently full, you may need to:
- Upgrade Storage: Install a larger hard drive or SD card.
- Adjust Recording Settings: Reduce resolution, frame rate, or motion detection sensitivity.
- Manage Storage: Configure the system to overwrite old footage automatically (if applicable).
Testing Motion Detection and Alerts
Periodically test your motion detection and alert system to ensure it's still functioning correctly. This is especially important after significant weather events or if you notice a decrease in alerts. Adjust sensitivity settings as needed to adapt to changing environmental conditions (e.g., more foliage in summer).
Battery Management (for Wireless Cameras)
If you have battery-powered cameras, monitor battery levels closely. Replace or recharge batteries promptly to avoid missing footage. Consider having spare batteries on hand.
Reviewing Footage Regularly
Beyond checking for alerts, make it a habit to periodically review footage from key cameras. This can help you:
- Identify Potential Issues: Notice subtle changes in activity or potential blind spots you might have missed.
- Ensure System is Working: Confirm that recordings are being captured as expected.
- Familiarize Yourself: Stay familiar with the normal activity around your property, making it easier to spot anomalies.
Cybersecurity Best Practices
Security cameras connected to your network are potential entry points for cyber threats. Maintain good cybersecurity hygiene:
- Use Strong, Unique Passwords: For your Wi-Fi, router, and camera system accounts.
- Enable Two-Factor Authentication (2FA): Whenever available.
- Keep Firmware Updated: As mentioned, this is critical for patching vulnerabilities.
- Secure Your Wi-Fi Network: Use WPA2 or WPA3 encryption.
- Consider a VPN: For enhanced security when accessing your cameras remotely.
Environmental Considerations
Be aware of how environmental factors can affect your cameras:
- Extreme Temperatures: Ensure your cameras are rated for the temperatures in your region.
- Sun Glare: Adjust camera angles to minimize direct sunlight, which can degrade image quality and damage sensors over time.
- Obstructions: Trim trees or bushes that may grow to obstruct camera views.
By incorporating these maintenance routines into your schedule, you ensure your security camera system remains a reliable guardian of your property, providing continuous protection and peace of mind.
Conclusion
Mastering "how can I install security cameras?" involves a thoughtful approach from selection to ongoing upkeep. You've learned to choose the right system based on connectivity, features, and your specific needs, and to strategically plan camera placement for optimal coverage. Whether you opt for a DIY installation, appreciating the cost savings and control, or decide professional installation offers the expertise and peace of mind you require, the steps are now clear. Thorough testing, meticulous configuration, and consistent maintenance are paramount to ensuring your system's reliability and effectiveness. By implementing these practices, you significantly enhance your property's security, deterring threats and providing invaluable surveillance for a safer environment.