Experiencing a low battery alert on your ADT security system? This guide provides a clear, step-by-step process for how to change an ADT battery, ensuring your home remains protected. We cover common ADT panel types and offer essential tips for a smooth and safe battery replacement.
Understanding ADT Battery Alerts
Receiving a notification that your ADT system's battery is low can be a cause for concern, but it's a standard part of maintaining your security system. These alerts are designed to proactively inform you before a critical component fails, preventing potential gaps in your home's security coverage. Understanding what these alerts signify is the first step towards addressing them effectively. ADT systems, like most electronic devices, rely on a consistent power source. While they are designed to operate on AC power from your home's electrical grid, a backup battery is integrated to ensure continuous operation during power outages. When the system detects that this backup battery is nearing the end of its lifespan or is unable to hold a sufficient charge, it will trigger a low battery alert. This alert typically manifests as a blinking light on the control panel, a specific audible beep or tone, or a message displayed on the panel's screen. In some cases, you might also receive a notification through the ADT mobile app if you have a connected system. Ignoring these alerts can lead to a situation where your system may not function correctly during a power interruption, compromising your home's safety. Therefore, prompt action is essential to maintain the integrity and reliability of your ADT security setup.
Why Battery Replacement is Crucial for Your ADT System
The backup battery in your ADT security system is a critical component that ensures uninterrupted protection. Its primary function is to power your system when the main AC power source is unavailable, whether due to a local power outage, a tripped breaker, or even intentional tampering. In 2025-26, with an increasing reliance on smart home technology and the potential for unpredictable weather events leading to power disruptions, the role of a fully functional backup battery is more significant than ever. A dead or failing battery means your system will cease to operate during these crucial times. This could leave your home vulnerable to burglaries, fires, or other emergencies. For instance, if a power outage occurs and your backup battery is depleted, your alarm system will not be able to detect motion, open doors, or trigger alarms. This renders the entire system ineffective until power is restored. Furthermore, ADT's professional monitoring service relies on a continuously powered system to communicate with their response centers. If your system loses power and has no backup, it cannot send distress signals, meaning help might not be dispatched when you need it most. The lifespan of these batteries typically ranges from 3 to 5 years, depending on usage, environmental factors, and the specific model. Proactive replacement, triggered by low battery alerts, prevents unexpected system failures and ensures that your ADT system continues to provide the reliable security you depend on. Statistics from security industry reports in 2025 indicate that a significant percentage of security system failures during emergencies are directly attributable to depleted or absent backup batteries.
Identifying Your ADT Panel Type
ADT offers a variety of security systems, and the process for changing the battery can vary slightly depending on the specific control panel model you have. Recognizing your panel is the first crucial step before attempting any maintenance. The most common ADT systems include the ADT Command, ADT Control, and older Honeywell/Resideo Vista panels.
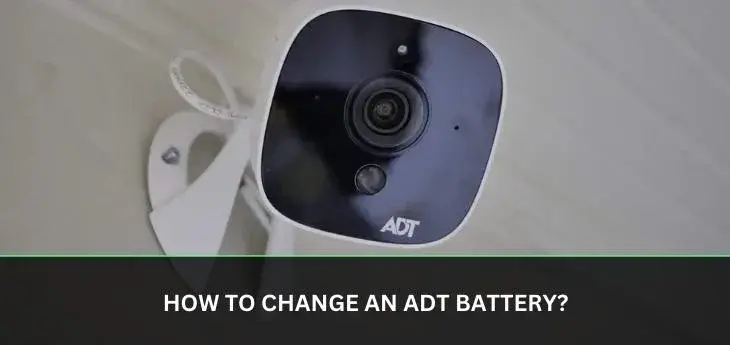
ADT Command and ADT Control Panels
These are ADT's newer, more advanced systems often featuring touchscreen interfaces. The Command panel is typically a standalone unit with a prominent touchscreen, while the Control panel might be integrated with a touchscreen keypad. To identify these, look for a sleek, modern design, often with a large, responsive screen. These systems usually have their main control board and battery located within the main panel unit itself. The battery is typically a sealed lead-acid (SLA) battery, similar to what you might find in a UPS or a motorcycle.
Older Honeywell/Resideo Vista Panels
Many homes still utilize older, but very reliable, ADT systems based on Honeywell or Resideo Vista panels. These panels are often characterized by a more traditional keypad with physical buttons rather than a touchscreen. Common models include the Vista 15P, Vista 20P, and Vista 128BPT. These panels usually have a separate metal or plastic box, often mounted in a closet, basement, or utility room, which houses the main control board and the backup battery. The battery in these systems is also typically a sealed lead-acid type, but its location might be more concealed.
How to Locate Your Panel
If you're unsure where your main control panel is located, it's often found in a central, discreet location within your home. Common spots include a master bedroom closet, a utility room, a basement, or a hallway. Look for a wall-mounted box or a prominent touchscreen unit. If you have your ADT installation manual, it will specify the panel model. Alternatively, you can often find the model number printed on the front or back of the panel itself. Knowing your panel type will help you determine the exact battery needed and the specific steps for accessing and replacing it. For example, the ADT Command battery replacement might involve accessing a compartment on the back of the touchscreen, while a Vista panel battery is usually found in a separate box connected to the main keypad.
Tools and Materials Needed for Battery Replacement
Before you begin the process of changing your ADT battery, it's essential to gather the necessary tools and materials. Having everything on hand will ensure a smooth and efficient replacement, minimizing the time your system might be offline. The specific tools required can vary slightly depending on your ADT panel model, but a general list includes:
- Replacement Battery: This is the most critical item. For most ADT systems, especially the Command, Control, and older Vista panels, you'll need a 12-volt sealed lead-acid (SLA) battery. The amperage-hour (Ah) rating is important; common sizes are 4Ah, 7Ah, or even 12Ah. Check your panel's manual or the old battery for the exact specifications. Using the wrong Ah rating can affect performance. For example, a 2025 ADT system upgrade might specify a 7Ah battery, whereas an older system might use a 4Ah.
- Screwdriver Set: You'll likely need a Phillips head screwdriver to open the panel housing or battery compartment. Some systems might require a flathead screwdriver for prying or specific screws.
- Wire Strippers/Cutters (Optional but Recommended): If the terminals on the new battery are different or if you need to trim wires, these can be useful.
- Pliers (Optional): For gripping and disconnecting wires if they are tight.
- Gloves: To protect your hands from potential battery acid or sharp edges.
- Safety Glasses: Essential for protecting your eyes from any debris or accidental sparks.
- Clean Cloth: To wipe down the battery compartment and the new battery.
- Zip Ties or Cable Management (Optional): To keep wires tidy after replacement.
- A Small Container or Tray: To hold screws and small parts so they don't get lost.
Important Note on Battery Types: While sealed lead-acid batteries are standard, some newer wireless sensors within an ADT system might use different types of batteries (e.g., CR123A lithium batteries for motion detectors or door/window sensors). This guide focuses on the main system backup battery. If you are replacing a sensor battery, the process will be different and typically requires smaller, specialized batteries.
Step-by-Step Guide to Changing Your ADT Battery
Replacing the backup battery in your ADT system is a manageable DIY task if you follow these steps carefully. The exact procedure can vary slightly based on your ADT panel model (ADT Command, ADT Control, or older Honeywell Vista panels), but the general principles remain the same. Always prioritize safety and ensure your system is properly disarmed and powered down before you begin.
Step 1: Disarm Your ADT System
The very first step is to disarm your ADT security system using your keypad or the ADT mobile app. This prevents the alarm from sounding when you disconnect the battery or tamper with the system. If you have a professional monitoring service, you might consider notifying ADT that you will be performing maintenance to avoid a false alarm dispatch.
Step 2: Locate and Access the Battery
For ADT Command/Control Touchscreen Panels:
- These panels often have the battery located within the main unit. Look for a compartment on the back or bottom of the touchscreen.
- You might need to gently pry open a cover or unscrew a small panel. Refer to your specific model's manual if unsure.
- The battery is usually a rectangular, sealed unit.
For Older Honeywell/Resideo Vista Panels:
- These systems typically have a separate metal or plastic box that houses the main control board and the backup battery. This box is often mounted on a wall in a discreet location (closet, basement, utility room).
- Open the box by locating the screws or latches that secure the cover. These are often on the bottom or sides.
- Once open, you will see the main circuit board and the battery, which is usually a black, rectangular unit.
Step 3: Disconnect AC Power and System Power
Crucially, before touching the battery, you must disconnect the AC power to the panel.
- Locate the Transformer: Find the small plug-in transformer that powers your ADT system. It's usually plugged into a wall outlet near the main control panel or the battery box.
- Unplug the Transformer: Carefully unplug the transformer from the wall outlet.
- Disconnect Battery (Optional but Recommended for Safety): You may also need to disconnect the main system wiring from the control board. Look for wires leading to the main power input on the circuit board. Gently pull them off.
Note: Some guides suggest leaving the AC power connected until the battery is disconnected to avoid system reboots, but for absolute safety, unplugging the transformer is the recommended first step. Always refer to your specific panel's documentation.
Step 4: Disconnect the Old Battery
The battery is typically connected via two wires: a red wire (positive) and a black wire (negative). These wires usually attach to terminals on the battery.
- Remove the Red Wire First: Using pliers or by hand, carefully disconnect the red wire from the positive (+) terminal of the old battery.
- Remove the Black Wire: Next, disconnect the black wire from the negative (-) terminal.
- Remove the Battery: The battery might be held in place by straps or clips. Remove any securing mechanisms and lift the old battery out. Dispose of the old battery responsibly at a local battery recycling center.
Step 5: Install the New Battery
Ensure your new battery is the correct type and voltage (usually 12V) and has the appropriate Ah rating as specified by ADT or your panel manual.
- Place the New Battery: Position the new battery in the compartment, ensuring it fits securely.
- Connect the Black Wire First: Attach the black wire to the negative (-) terminal of the new battery.
- Connect the Red Wire: Attach the red wire to the positive (+) terminal of the new battery. Ensure the connections are firm.
Step 6: Reconnect AC Power and Test
Once the new battery is securely connected, you can restore power to the system.
- Plug in the Transformer: Plug the AC power transformer back into the wall outlet.
- Reconnect System Wires (if disconnected): If you disconnected system wires from the control board, reconnect them now.
- Observe the Panel: The ADT panel should power up. You may hear a chirp or see lights indicating it's receiving power. The low battery indicator should disappear.
- Arm and Disarm: Arm and then disarm your system to ensure it's functioning correctly. Check the ADT app or keypad for any error messages.
Step 7: Secure the Panel
Close and secure the panel cover or battery compartment, ensuring all screws are tightened and the unit is properly sealed.
Important Considerations for 2025-26: With the increasing complexity of smart home systems, always consult your ADT manual or the ADT website for model-specific instructions. If you are uncomfortable at any step, it's best to contact ADT or a qualified security technician.
Troubleshooting Common Battery Issues
Even with careful installation, you might encounter issues after replacing your ADT battery. Understanding these common problems and their solutions can save you time and frustration. Many of these are consistent across ADT systems in 2025-26 as the underlying technology remains similar.
Issue 1: Low Battery Light Persists
Possible Causes:
- Loose Connections: The most common culprit. The wires might not be securely attached to the battery terminals.
- Faulty New Battery: Although rare, the new battery could be defective.
- Incorrect Battery Type: You may have installed a battery with the wrong voltage or Ah rating.
- AC Power Issue: The system might not be receiving AC power, so it's relying solely on the battery, which might not be fully charged yet.
- System Fault: An underlying issue with the control panel itself.
Solutions:
- Check Connections: Power down the system (unplug transformer). Re-check that the red wire is firmly on the positive (+) terminal and the black wire on the negative (-) terminal. Ensure no corrosion is present.
- Test Battery: If you have a multimeter, you can test the new battery's voltage. It should be around 12-13 volts.
- Verify Battery Specs: Double-check that the installed battery matches the recommended voltage (12V) and Ah rating for your ADT panel.
- Verify AC Power: Ensure the transformer is plugged in and working. Try plugging another device into the same outlet to confirm the outlet has power. Check your circuit breaker.
- Allow Charging Time: After installation, allow the battery several hours to charge fully from the AC power.
- Reset System: Sometimes a full system reset is required. Consult your manual or ADT support.
Issue 2: System Not Powering On After Battery Replacement
Possible Causes:
- No AC Power: The transformer is unplugged, the outlet has no power, or the transformer is faulty.
- Incorrect Wiring: Wires may be connected to the wrong terminals or not connected at all.
- Battery Not Seated Properly: The battery might be loose or not making good contact.
- Main Board Issue: A rare but possible issue with the control panel's motherboard.
Solutions:
- Confirm AC Power: As above, verify the outlet and transformer are functional.
- Double-Check Wiring: Power down the system. Ensure red wire is on (+) and black wire is on (-). Ensure wires are fully inserted into terminals.
- Reseat Battery: Remove and re-insert the battery to ensure it's firmly in place.
- Contact Support: If none of the above work, there might be a more significant issue with the panel itself.
Issue 3: System Beeping Continuously or Showing Error Codes
Possible Causes:
- System Reset Needed: The system may need to be reset after a power interruption or battery change.
- Tamper Alert: If the panel cover was not properly secured, it might trigger a tamper alarm.
- Communication Failure: The system might be having trouble communicating with ADT's monitoring center.
- Specific Error Code: The panel might display a code indicating a particular fault.
Solutions:
- Consult Manual for Error Codes: Look up any displayed error codes in your ADT panel manual.
- System Reset: Follow your panel's specific procedure for a system reset. This often involves powering down, disconnecting the battery, waiting a minute, and then reconnecting power and battery.
- Check Panel Cover: Ensure the panel cover is securely fastened.
- Contact ADT: If the issue persists or you see specific error codes you can't resolve, contact ADT support.
General Tip: Always keep your ADT panel's user manual handy. It's an invaluable resource for troubleshooting specific error messages and procedures. For 2025-26 systems, many manuals are available digitally on the ADT website.
When to Call a Professional for ADT Battery Replacement
While changing an ADT battery is often a straightforward DIY task, there are specific situations where it's highly recommended to contact ADT or a certified security technician. Attempting to fix a complex issue yourself can sometimes lead to further damage or compromise your system's security. Here are key indicators that you should call a professional:
1. Unfamiliarity with Your System
If you've recently moved into a home with an ADT system or are unsure about your panel model, trying to replace the battery without proper guidance can be risky. Professionals have the experience to identify your system quickly and perform the replacement correctly. For instance, understanding the nuances between a wired and wireless ADT system battery replacement is crucial.
2. Persistent Error Codes or System Malfunctions
If, after attempting a DIY battery replacement, your system continues to display error codes, refuses to arm, or behaves erratically, it's a sign of a deeper issue. This could be a faulty control board, a wiring problem, or a sensor malfunction that requires expert diagnosis.
3. Complex System Architecture
Some ADT installations are more complex, involving multiple zones, wireless repeaters, or integrated smart home devices. If your system is extensive, a professional can ensure that replacing the main battery doesn't inadvertently affect other components or communication pathways.
4. Concerns About Warranty or Service Agreements
If your ADT system is still under warranty or you have a service agreement, attempting DIY repairs might void certain clauses. A professional technician can perform the service while ensuring compliance with your contract.
5. Lack of Necessary Tools or Confidence
While the required tools are usually basic, if you don't have them or feel uncomfortable working with electrical components, it's safer to let a professional handle it. They have specialized tools and the expertise to work safely and efficiently.
6. Repeated Battery Failures
If your ADT battery seems to die prematurely, or you're frequently getting low battery alerts, it could indicate a problem with the charging system within the panel or a power fluctuation issue in your home. A technician can diagnose the root cause rather than just replacing the battery repeatedly.
7. After a Power Surge or Electrical Event
If your battery replacement attempt follows a significant power surge, lightning strike, or other electrical incident, the control panel itself might have sustained damage. Professionals can assess this damage and recommend appropriate repairs or replacements.
Cost-Benefit Analysis: While professional service incurs a cost, it can prevent more expensive repairs down the line by ensuring the job is done right the first time. For 2025-26, ADT offers various service plans that may cover battery replacements or offer discounted rates for these services.
ADT Battery Maintenance and Longevity Tips
Ensuring your ADT system's backup battery lasts as long as possible and functions reliably is key to continuous home security. While batteries have a finite lifespan, proper maintenance and understanding can extend their service life and prevent premature failure. Here are some essential tips for 2025-26:
1. Respond Promptly to Low Battery Alerts
This is the most crucial tip. Do not ignore low battery warnings. Replacing the battery as soon as you receive the alert prevents the system from operating on a critically low charge, which can sometimes cause system glitches or put unnecessary strain on the remaining battery capacity. It also ensures your system is ready for power outages.
2. Use the Correct Replacement Battery
Always use a battery that meets ADT's specifications for your particular panel model. This includes the correct voltage (typically 12V) and amperage-hour (Ah) rating. Using an underpowered battery will reduce its lifespan and performance, while an overpowered one might not fit or could potentially cause issues with charging. Refer to your manual or the old battery for exact specifications.
3. Ensure Proper Installation
Incorrect installation is a common cause of premature battery failure or system errors. Make sure the battery is securely seated, and the red (+) and black (-) wires are firmly connected to the correct terminals. Loose connections can lead to intermittent power loss and system malfunctions.
4. Maintain Stable AC Power
Your backup battery relies on the AC power from your home to recharge. Ensure the transformer is plugged into a reliable outlet that is not prone to frequent power interruptions or voltage fluctuations. Consider using a surge protector for the outlet powering your ADT transformer, especially in areas prone to electrical storms.
5. Avoid Extreme Temperatures
Batteries, especially sealed lead-acid types, are sensitive to extreme temperatures. Avoid installing your ADT panel or battery housing in areas that experience significant heat or cold, such as uninsulated attics, garages, or direct sunlight. Consistent, moderate temperatures (around 65-75°F or 18-24°C) are ideal for battery longevity.
6. Regular System Checks
Periodically arm and disarm your system, and check for any unusual beeps or error messages. While the system will alert you to low batteries, regular checks can help catch other potential issues early on.
7. Understand Battery Lifespan
Most ADT backup batteries are designed to last between 3 to 5 years. This lifespan can be affected by factors like the frequency of power outages in your area, the age of the system, and environmental conditions. Knowing this expected lifespan helps you proactively plan for replacement.
8. Professional Inspection
If you're nearing the 3-year mark or have experienced frequent power outages, consider having a professional technician inspect your battery and system during a routine service call. They can assess its condition and recommend replacement if necessary.
By following these maintenance tips, you can maximize the lifespan of your ADT backup battery, ensuring your security system remains operational and reliable when you need it most.
Cost Considerations for ADT Battery Replacement
The cost associated with replacing your ADT system's backup battery can vary depending on several factors. Understanding these can help you budget effectively and make informed decisions. As of 2025-26, here's a breakdown of potential costs:
1. DIY Battery Replacement Costs
Battery Cost: This is the primary expense if you choose to replace the battery yourself. The cost of a 12-volt sealed lead-acid battery typically ranges from $20 to $60. The price depends on the battery's amperage-hour (Ah) rating (e.g., 4Ah, 7Ah, 12Ah) and the brand. Higher Ah ratings generally cost more. You can find these batteries at electronics stores, online retailers, or specialized battery shops.
Tool Costs (if needed): If you don't already own basic tools like screwdrivers or pliers, you might need to purchase them. These are usually inexpensive, costing between $10 to $30 for a basic set.
Total DIY Cost: For a DIY replacement, you can expect to spend approximately $30 to $90.
2. Professional ADT Service Call
Service Fee: If you opt for ADT to perform the battery replacement, you will incur a service call fee. This fee can range significantly based on your location, your ADT service plan, and whether it's considered an emergency call. Typical service call fees can range from $75 to $150.
Battery Cost (if included): ADT technicians will usually charge for the replacement battery itself, which might be slightly higher than retail prices. They often use specific, certified batteries for their systems. The battery cost within a service call could be anywhere from $30 to $80.
Labor Costs: The service fee often includes the labor for the technician to diagnose the issue, replace the battery, and test the system.
Total Professional Cost: For a professional replacement by ADT, expect to pay between $100 to $230 or more, depending on your specific agreement and ADT's current pricing structure.
3. Third-Party Security Technicians
You might also consider hiring an independent security technician. Their rates can be competitive with ADT's service fees, potentially ranging from $60 to $120 for labor, plus the cost of the battery.
Factors Influencing Cost:
- ADT Service Plan: If you have a comprehensive ADT service plan, battery replacement might be included or offered at a discounted rate. Check your contract details.
- System Type: Some older or more complex systems might require specialized batteries or take longer to service, potentially increasing costs.
- Urgency: Requesting an emergency service call outside of normal business hours will likely incur higher fees.
- Geographic Location: Service costs can vary by region due to differences in labor rates and cost of living.
Recommendation: For most homeowners, if the system is out of warranty and you are comfortable with basic DIY tasks, purchasing a compatible battery and performing the replacement yourself is the most cost-effective option. However, if you have any doubts about your ability to perform the task safely or if the system is complex, investing in a professional service call is a wise decision to ensure your security remains intact.
In conclusion, while the process of changing an ADT battery might seem daunting, it's a crucial maintenance task that ensures your home's security system functions optimally. By understanding your system, gathering the right tools, and following the step-by-step guide, you can confidently replace the battery yourself, saving money and maintaining peace of mind. Always prioritize safety, consult your manual, and don't hesitate to call a professional if you encounter any difficulties or if your system presents persistent issues. Regular battery maintenance is key to reliable protection in 2025-26 and beyond.


