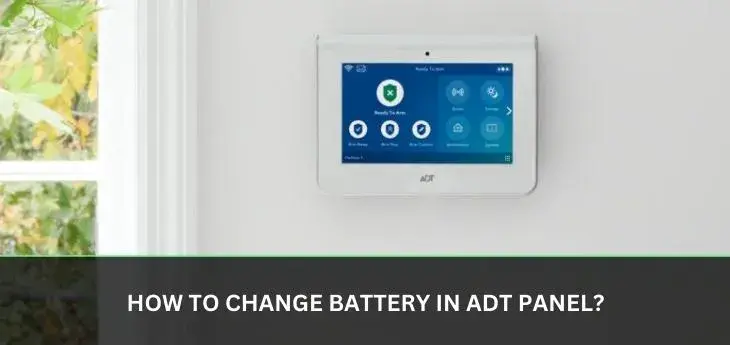
How to change battery in ADT panel?
Discover the straightforward steps to replace your ADT alarm panel battery, ensuring your home security remains robust. This guide provides a clear, actionable solution for DIY battery replacement, saving you time and potential service fees. We'll cover everything from identifying the right battery to safely performing the swap.
Understanding ADT Panel Batteries
ADT alarm systems, like most modern security solutions, rely on a central control panel to manage all sensors and communicate with monitoring services. A critical component of this panel's operation is its backup battery. This battery is designed to keep your system functioning during power outages, ensuring continuous protection. Without a healthy backup battery, your ADT system would become vulnerable the moment the main power is interrupted, potentially leaving your home unprotected.
The primary battery in an ADT panel is typically a sealed lead-acid (SLA) battery. These batteries are rechargeable and are constantly being topped up by the AC power supplied to the panel. When AC power fails, the system seamlessly switches to battery power. The lifespan of these batteries is finite, and they degrade over time, much like the battery in your smartphone or car. This degradation is a natural process influenced by factors such as the number of power outages experienced, ambient temperature, and the overall age of the battery.
Understanding the role of this battery is the first step in knowing when and how to replace it. It's not just a component; it's a crucial safeguard for your home security. Modern ADT systems often feature sophisticated diagnostics that can alert you when the backup battery is low or failing. These alerts are vital indicators that prompt action is needed. Ignoring these warnings can lead to system failures at the most inconvenient times.
The technology behind these backup batteries has evolved. While SLA batteries remain common, some newer or upgraded systems might incorporate different battery chemistries. However, the fundamental purpose remains the same: to provide a reliable power source when the primary AC power is unavailable. For the vast majority of ADT installations, especially those using older or standard panels, the sealed lead-acid battery is the component you'll be dealing with. Familiarizing yourself with its characteristics will empower you to maintain your system effectively.
The importance of this battery cannot be overstated. In 2025, the reliance on smart home security systems that are always connected is higher than ever. Statistics from the National Security Association (NSA) indicate that homes with active security systems experience a 30-40% reduction in burglaries. This statistic highlights the critical need for these systems to be operational at all times. A functioning backup battery is the silent guardian that ensures this operational status, even when the grid is down. Therefore, understanding its function and maintenance is a fundamental aspect of home security management.
Why Replace Your ADT Battery?
Replacing the battery in your ADT alarm panel is a critical maintenance task that directly impacts the reliability and effectiveness of your home security system. The primary reason for replacement is the natural aging and eventual failure of the battery. These backup batteries, typically sealed lead-acid (SLA) types, have a limited lifespan. Manufacturers generally recommend replacing them every 3 to 5 years, though this can vary based on usage and environmental factors.
One of the most common indicators that your ADT battery needs replacement is a low battery warning. Your ADT panel will usually display a message or emit a specific beep pattern to alert you to this issue. Ignoring these warnings can lead to a complete system failure during a power outage. Imagine a scenario where a storm knocks out the power, and your security system, which you rely on for protection, simply goes dead. This is a risk you don't want to take.
Beyond explicit warnings, batteries degrade over time, losing their capacity to hold a charge. Even if the battery still has some life, it might not be able to sustain the system for the required duration during an extended power outage. This reduced capacity can lead to intermittent system errors or the panel shutting down prematurely, compromising your security when it's needed most. For instance, a battery that can only last an hour during a power outage, when it should last for many, is a failing battery.
Furthermore, a weak or failing battery can sometimes cause erratic behavior in the control panel. You might experience false alarms, communication issues with the ADT monitoring center, or unresponsiveness from the keypad. These symptoms can be frustrating and may lead you to believe there's a more complex system problem, when in reality, the culprit is simply an aging backup battery.
In 2025, the average lifespan of a home security system battery is estimated to be around 4 years. This is a statistic that homeowners should keep in mind. Proactive replacement, rather than waiting for a failure, is always the best approach. The cost of a replacement battery is significantly less than the potential cost of a security breach or the inconvenience of a non-functional system. Moreover, replacing the battery yourself can save you the cost of a service call from ADT, which can range from $75 to $150 depending on your service plan and location.
Consider the statistics on power outages. According to the U.S. Department of Energy, the average American experiences power outages totaling about 4 hours per year. However, severe weather events, especially in 2025 and 2026, have shown an increasing trend, leading to longer and more frequent outages in many regions. During these critical periods, your ADT system's reliance on its backup battery is absolute. Ensuring this battery is in optimal condition is not just about convenience; it's about maintaining the core function of your security investment.
Finally, regular maintenance, including battery replacement, can extend the overall lifespan of your ADT control panel. By preventing the system from constantly struggling with a weak power source, you reduce strain on its internal components. This proactive approach ensures your ADT system remains a reliable guardian for your home for years to come.
Identifying Your ADT Panel Model
Before you can successfully change the battery in your ADT alarm panel, you need to accurately identify the specific model you have. ADT has used various control panels over the years, and each model might have slightly different battery compartments or require specific battery types. Fortunately, identifying your panel is usually a straightforward process.
The most common place to find your ADT panel model information is directly on the unit itself. Look for a label or sticker, typically on the back or inside the main housing of the panel. This label will usually contain the manufacturer's name (e.g., Honeywell, DSC, Qolsys), the model number, and sometimes a serial number. The model number is the key piece of information you're looking for.
If the label is difficult to find or has worn off, you can also check your original ADT contract or installation paperwork. This documentation should clearly state the model of the security system that was installed in your home. If you no longer have these documents, you can try accessing your ADT account online. Most ADT customers can log in to their account portal on the ADT website, where their system details, including the panel model, are usually listed.
Another method is to consult your ADT mobile app, if you have one. The app often provides system information, including the panel model, as part of its settings or device management features. If you're still unsure, the most direct approach is to contact ADT customer support. They can access your account history and tell you precisely which panel model you have installed.
Here's a quick guide to some of the most common ADT panel models you might encounter:
- ADT Command & Control (Qolsys IQ Panel): These are modern, touchscreen panels. The model number (e.g., IQ Panel 2, IQ Panel 4) is usually visible on the front or back.
- ADT Safewatch panels (e.g., Safewatch 3000, Safewatch Pro 3000): These are older but still common panels, often manufactured by Honeywell. The model number is typically on a label on the back of the main unit.
- ADT Pulse panels: These are also relatively modern systems with touchscreen interfaces. The model information should be on the panel itself.
It's important to be precise. For example, a Honeywell Vista series panel (often rebranded by ADT) might have different battery requirements than a Qolsys IQ panel. Knowing the exact model number will prevent you from purchasing an incompatible battery, which could lead to system malfunctions or void your warranty.
For 2025, ADT continues to upgrade systems, so newer models like the ADT Command, which often uses a Qolsys IQ Panel 4, are becoming more prevalent. These newer systems may have different battery types or access methods compared to older panels. Always double-check the specific model number, as this is the foundation for a successful and safe battery replacement. If you are unable to locate the model number, it is always best to err on the side of caution and contact ADT directly for assistance to avoid any potential damage to your system.
Choosing the Right Replacement Battery
Once you've identified your ADT panel model, the next crucial step is selecting the correct replacement battery. Using the wrong battery can lead to system malfunctions, damage to the panel, or even safety hazards. Fortunately, the correct battery is usually specified by the panel manufacturer and is readily available.
The vast majority of ADT alarm panels, especially older models like the Safewatch Pro 3000 or Honeywell Vista series, use a 12-volt, 4-ampere-hour (Ah) sealed lead-acid (SLA) battery. These are common in many alarm systems and emergency lighting applications. You'll often see them described as "12V 4Ah SLA battery" or "alarm panel battery."
For newer, more advanced panels like the ADT Command or Qolsys IQ Panel series, the battery type might differ. For example, the Qolsys IQ Panel 2 and 4 often use a proprietary lithium-polymer (LiPo) battery. These are specifically designed for the panel and are not interchangeable with standard SLA batteries. It's imperative to check your panel's manual or the ADT support website for the exact battery specifications for these newer models.
Here’s a table to help illustrate common battery types and what to look for:
| Panel Type (Common ADT Examples) | Typical Battery Chemistry | Typical Voltage | Typical Capacity (Ah) | Important Note |
|---|---|---|---|---|
| ADT Safewatch Pro 3000, Honeywell Vista Series | Sealed Lead-Acid (SLA) | 12V | 4Ah or 7Ah | Ensure terminals match (e.g., F1 or F2 type) |
| ADT Command (Qolsys IQ Panel 2/4) | Lithium Polymer (LiPo) | 7.4V or similar | Varies (e.g., 2000-4000 mAh) | Must be specific to the Qolsys model; not interchangeable |
| ADT Pulse | Often SLA, but check model | 12V | 4Ah or 7Ah | Verify panel specifications |
When purchasing an SLA battery, pay attention to the terminal type. The most common are F1 and F2 terminals. F1 terminals are narrower, while F2 terminals are wider. Ensure the new battery has the same terminal type as your old one, or that the battery comes with adapters if necessary. Many reputable security equipment suppliers offer batteries specifically listed as "ADT Replacement Battery" for various models, which can simplify the selection process.
For newer LiPo batteries, it is strongly recommended to purchase the exact replacement battery recommended by ADT or the panel manufacturer (e.g., Qolsys). These batteries are often integrated into the panel's design and may require specific connectors or mounting. Attempting to use an incompatible LiPo battery can damage the panel and pose a fire risk.
As of 2025, the market for alarm system batteries is robust. You can find suitable replacement batteries from online retailers like Amazon, specialized security equipment suppliers, or even some electronics stores. Always check customer reviews and ensure the seller is reputable. Look for batteries that explicitly state compatibility with your ADT panel model. Buying a battery with a higher Ah rating (e.g., 7Ah instead of 4Ah for an SLA battery) is generally acceptable and will provide longer backup power, provided it fits physically and has the correct voltage and terminal type.
When in doubt, the safest course of action is to consult your ADT user manual or contact ADT support. They can provide the exact part number or specifications for the battery required for your specific system. This diligence ensures you purchase a battery that is safe, compatible, and will provide reliable backup power for your ADT system.
Tools and Materials Needed
Successfully changing the battery in your ADT alarm panel requires a few basic tools and materials. Having everything ready before you start will make the process smoother and more efficient. The exact tools may vary slightly depending on your specific ADT panel model, but here's a general list of what you'll likely need:
- Replacement Battery: This is the most critical item. Ensure you have the correct battery type, voltage, and capacity for your specific ADT panel model, as discussed in the previous section. For most older panels, this will be a 12V 4Ah or 7Ah sealed lead-acid (SLA) battery. For newer panels, it might be a proprietary lithium-polymer (LiPo) battery.
- Screwdriver Set: Most ADT panels are housed in a plastic casing that is secured with screws. You'll likely need a Phillips head screwdriver. Some panels might use Torx screws, so having a small set with various heads is advisable. Ensure the screwdriver tips are the correct size to avoid stripping the screw heads.
- Pliers (Optional but Recommended): Small needle-nose pliers can be very helpful for disconnecting and reconnecting the battery wires, especially if the terminals are in a tight spot or the wires are a bit stiff.
- Non-Conductive Pry Tool or Flathead Screwdriver (Use with extreme caution): For some panels, you might need to gently pry open the casing. A plastic trim removal tool is ideal as it won't scratch or damage the plastic. If using a flathead screwdriver, be extremely careful not to damage the casing or any internal components.
- Gloves (Optional): Wearing gloves can help maintain a clean battery surface and protect your hands from any potential residue.
- Safety Glasses (Recommended): While unlikely, there's always a small risk of a battery terminal sparking or a component being dislodged. Safety glasses offer an extra layer of protection.
- Soft Cloth or Paper Towels: For wiping down the battery compartment or the new battery if necessary.
- Camera or Smartphone: It's a good practice to take pictures of the battery compartment and wire connections before disconnecting anything. This serves as a visual reference if you get confused during reassembly.
For SLA Batteries:
- The replacement battery will likely have two terminals (positive and negative).
- You'll need to disconnect the wires from the old battery and connect them to the new one. These wires typically have spade connectors that slide onto the battery terminals.
For LiPo Batteries (e.g., Qolsys IQ Panel):
- These batteries often have a specific connector that plugs into the panel's circuit board.
- You may need to carefully disconnect a cable rather than remove spade connectors.
- Always refer to the specific instructions for your panel model, as these batteries are more integrated.
Before you begin, ensure you have a clear, well-lit workspace. It's also a good idea to have your ADT system's user manual handy, as it may contain model-specific instructions for battery replacement. By gathering these tools and materials beforehand, you'll be well-prepared to tackle the battery replacement process confidently and efficiently.
Step-by-Step Guide to Changing Your ADT Battery
Replacing the battery in your ADT alarm panel is a manageable DIY task that can be accomplished with careful attention to detail. This guide provides a comprehensive, step-by-step process. Remember to always prioritize safety and refer to your specific panel's manual if available.
Step 1: Prepare Your System and Workspace
Before you begin, it's crucial to put your ADT system into "Test Mode" or "Maintenance Mode" with ADT. This prevents the system from sending a false alarm signal to the monitoring center while you're working on it. You can usually do this by calling ADT customer service or through your ADT app. Ensure you have a well-lit, clear workspace. Gather all the necessary tools and your new replacement battery.
Step 2: Power Down the System
Locate the main power transformer for your ADT panel. It's typically a small black box plugged into a wall outlet near the panel or a central location in your home. Unplug this transformer from the wall outlet. This will cut off the AC power to the panel, forcing it to run on battery power, which is what we want to access.
Step 3: Open the ADT Panel Housing
Most ADT panels are housed in a plastic casing. Look for screws around the edges or on the bottom of the panel. Use the appropriate screwdriver to remove these screws. Some panels might have a latch mechanism; you may need to use a non-conductive pry tool or a flathead screwdriver (with extreme caution) to gently release the clips and open the cover. Take pictures of the screw locations if they vary.
Step 4: Locate the Backup Battery
Once the panel housing is open, you should see the backup battery. For most older ADT panels (like Safewatch Pro 3000), this will be a rectangular, black, sealed lead-acid (SLA) battery. For newer panels (like Qolsys IQ Panel), it might be a different shape and type, often a lithium-polymer (LiPo) battery with a cable connector.
Step 5: Disconnect the Old Battery
For SLA Batteries: The battery will have two wires connected to its terminals: a red wire for positive (+) and a black wire for negative (-). Using your fingers or needle-nose pliers, carefully pull the connectors off the battery terminals. It's best practice to disconnect the negative (black) wire first, then the positive (red) wire. This minimizes the risk of accidental short circuits.
For LiPo Batteries: You will typically see a cable connecting the battery to the main circuit board. Carefully unplug this cable. Do not pull on the wires; grasp the connector itself.
Step 6: Remove the Old Battery
The old battery might be secured by clips, a strap, or simply sit in place. Carefully lift the old battery out of its compartment. If it's heavy, support it properly. Note the orientation of the battery and its terminals for when you install the new one.
Step 7: Install the New Battery
Place the new battery into the compartment, ensuring it's oriented correctly to match the position of the old battery and the wire connections. The terminals should align with where the wires will connect.
For SLA Batteries: Connect the red (positive) wire to the positive (+) terminal on the new battery, and the black (negative) wire to the negative (-) terminal. Ensure the connectors are firmly seated. It's good practice to connect the positive wire first, then the negative wire.
For LiPo Batteries: Connect the battery cable back into its port on the circuit board. Ensure it clicks into place securely.
Step 8: Reassemble the Panel Housing
Carefully close the ADT panel housing. Ensure no wires are pinched. Reinsert and tighten all the screws you removed in Step 3. If your panel has clips, ensure they engage properly.
Step 9: Restore Power and Test
Plug the main power transformer back into the wall outlet. The ADT panel should power up. You might hear a chime or see lights on the keypad. The system will likely indicate that it's re-establishing communication and charging the new battery.
Important: Remove your system from Test Mode with ADT. Your panel should now show a normal status, and any low battery warnings should be gone. Test your system by arming and disarming it, and if possible, test a sensor (e.g., open a door with a contact sensor) to ensure it's functioning correctly.
Step 10: Dispose of the Old Battery Properly
Old lead-acid batteries contain hazardous materials and should not be thrown in regular trash. Many electronics stores, auto parts stores, or local recycling centers accept them for proper disposal. Check with your local waste management authority for guidelines.
By following these steps, you can successfully change your ADT panel battery, ensuring your home security system remains operational and reliable. This DIY approach, when done correctly, is a cost-effective way to maintain your security.
Troubleshooting Common Issues
While the process of changing an ADT panel battery is generally straightforward, you might occasionally encounter issues. Knowing how to troubleshoot these common problems can save you time and prevent unnecessary service calls. Here are some issues you might face and their potential solutions:
Issue 1: Panel Still Shows "Low Battery" Warning After Replacement
Possible Causes:
- Incorrect Battery: The replacement battery might not be fully compatible or might have a lower capacity than required.
- Faulty New Battery: Although new, the replacement battery could be defective.
- Loose Connections: The battery terminals or wires may not be securely connected.
- Power Transformer Issue: The AC power transformer might not be working, meaning the panel isn't receiving power to charge the battery.
- System Reset Needed: Some panels require a specific reset procedure after a battery change.
Solutions:
- Double-check that you purchased the correct battery for your specific ADT panel model.
- Ensure the red and black wires are firmly connected to the correct terminals (+ and -) on the new battery.
- Verify that the AC power transformer is plugged in and functioning. Try plugging another device into the same outlet to confirm the outlet has power.
- If possible, try a different replacement battery.
- Consult your ADT panel's manual for a specific battery replacement reset procedure.
- Contact ADT support if the issue persists.
Issue 2: Panel Does Not Power On After Battery Replacement
Possible Causes:
- Battery Not Connected Properly: The new battery is not making good contact.
- AC Power Not Restored: The power transformer was not plugged back in.
- Internal Fuse Blown: A fuse within the panel might have blown during the process.
- Damaged Wiring: Wires may have been accidentally cut or damaged.
Solutions:
- Ensure the battery wires are securely attached to the terminals.
- Confirm the AC power transformer is plugged in and the outlet is working.
- Carefully inspect the wires for any signs of damage.
- Check for an internal fuse within the panel housing (refer to your manual). If found and blown, it may need replacement, but this is a more advanced repair.
- If the panel remains unresponsive, it may indicate a more significant issue requiring professional service.
Issue 3: Panel Becomes Unresponsive or Exhibits Strange Behavior
Possible Causes:
- Incorrect Battery Voltage/Type: Using a battery with the wrong voltage or chemistry can cause instability.
- Static Discharge: Static electricity could have damaged a component during the replacement.
- Loose Internal Connections: Components inside the panel may have become dislodged.
Solutions:
- Re-verify that you used the exact recommended battery for your model.
- Ensure all internal connections, especially the battery cable, are secure.
- If you suspect static discharge, try a full system reboot (disconnect AC, disconnect battery, wait 60 seconds, reconnect battery, reconnect AC).
- If the panel continues to behave erratically, it's best to contact ADT.
Issue 4: Difficulty Opening the Panel Housing
Possible Causes:
- Stuck Screws: Screws might be stripped or difficult to turn.
- Latches Not Releasing: Panel clips might be stiff or misaligned.
Solutions:
- Use a screwdriver with a good grip and apply firm, steady pressure. If a screw is stripped, you might need a screw extractor or a slightly larger screwdriver tip to get a better bite.
- Gently use a plastic pry tool or a thin, flat object to carefully work around the edges where clips are located. Avoid forcing it, as you could break the plastic.
General Troubleshooting Tips:
- Always Refer to Your Manual: Your ADT panel's user manual is the definitive source for model-specific troubleshooting.
- Take Pictures: Documenting the process with photos can be invaluable if you need to retrace your steps.
- Disconnect Power First: Always ensure AC power is disconnected before working with the battery to avoid electrical shock or damage.
- Handle Batteries with Care: Avoid shorting terminals, puncturing batteries, or exposing them to extreme temperatures.
By systematically addressing these potential issues, you can resolve most common problems encountered during an ADT panel battery replacement, ensuring your system functions optimally.
Preventative Maintenance and Battery Life
Ensuring your ADT alarm system's battery lasts as long as possible and performs reliably involves understanding preventative maintenance. While batteries have a finite lifespan, proper care and attention can maximize their effectiveness and prevent premature failure. This proactive approach not only saves you money on replacement costs but also ensures your home security is never compromised.
The lifespan of an ADT panel battery, typically a 12V sealed lead-acid (SLA) battery for older systems, is generally between 3 to 5 years. Newer systems using lithium-polymer (LiPo) batteries may have longer lifespans, often 5-7 years, but are also more sensitive to environmental factors.
Several factors influence battery life:
- Frequency of Power Outages: Each time your system relies on battery power, it depletes the battery's charge. Frequent power outages will shorten the battery's lifespan.
- Depth of Discharge: Deep discharges (running the battery very low) are more stressful on SLA batteries than shallow discharges.
- Temperature: Extreme temperatures, both hot and cold, can significantly reduce battery performance and lifespan. Batteries stored or operated in hot environments degrade faster.
- Charging System: The panel's internal charging system needs to be functioning correctly to keep the battery adequately charged.
- Battery Quality: Using a high-quality battery from a reputable manufacturer generally leads to a longer and more reliable service life.
Preventative Maintenance Strategies:
- Regular Testing: Most ADT systems have a self-diagnostic feature that checks battery health. Periodically check your panel's display for any low battery alerts or error messages. ADT may also send notifications for critical issues.
- Scheduled Replacement: Don't wait for a warning. Proactively replace your battery every 3-5 years (for SLA) or 5-7 years (for LiPo), even if it seems to be working fine. This is the most effective way to prevent unexpected failures. Mark your calendar for the recommended replacement date based on your last replacement or installation.
- Monitor Power Outages: If you experience frequent power outages, be extra vigilant about your battery's health. Consider investing in a whole-home surge protector or backup generator for your home, which can reduce the strain on your security system's battery.
- Maintain Optimal Temperature: Ensure your ADT panel is installed in a location that is not subject to extreme temperature fluctuations. Avoid placing it in uninsulated attics, garages, or direct sunlight. A stable, moderate temperature is ideal for battery longevity.
- Cleanliness: Keep the battery compartment clean. Dust and debris can sometimes interfere with connections or ventilation. A gentle wipe-down during battery replacement is good practice.
- Use Quality Batteries: When replacing the battery, opt for a battery from a well-known brand that is specifically designed for alarm systems. While cheaper alternatives exist, they may not offer the same reliability or lifespan.
Understanding Battery Indicators:
ADT panels are designed to alert you when the backup battery is low. This alert can manifest as:
- A specific beep pattern (often a repeating beep every 30-60 seconds).
- A "Low Battery" or "Battery Trouble" message on the keypad display.
- A notification sent to your ADT app or email, if you have remote monitoring enabled.
In 2025, with increasing grid instability and a higher reliance on smart home devices, maintaining a healthy backup battery is more critical than ever. According to industry reports, the average lifespan of a consumer-grade SLA battery used in security systems is indeed around 4 years, but this can be extended with good practices. For LiPo batteries, while they are more robust, environmental factors still play a significant role.
By implementing these preventative maintenance strategies, you can significantly extend the life of your ADT panel battery, ensure consistent protection for your home, and avoid the inconvenience and potential cost of an unexpected system failure.
ADT Service vs. DIY Replacement
When your ADT alarm panel battery needs replacement, you have two primary options: calling ADT for service or performing a do-it-yourself (DIY) replacement. Each approach has its own set of advantages and disadvantages, and the best choice for you will depend on your comfort level with technology, your budget, and the urgency of the situation.
ADT Service
Advantages:
- Convenience: ADT technicians handle the entire process for you. You don't need to identify the battery, purchase it, or perform any physical work.
- Expertise: ADT technicians are trained professionals who understand ADT systems. They can diagnose other potential issues with your panel while they are there.
- Warranty Protection: Using ADT service ensures that any work done is covered by their warranty. If the new battery fails shortly after, ADT will likely replace it without further charge.
- Peace of Mind: For those who are not technically inclined or are concerned about damaging their system, ADT service offers complete peace of mind.
Disadvantages:
- Cost: ADT typically charges a service fee for battery replacement. This fee can range from $75 to $150 or more, depending on your service plan and location. This cost is significantly higher than the price of a replacement battery alone.
- Scheduling: You need to schedule an appointment, which might involve waiting for an available slot. This can be inconvenient if the battery warning is urgent.
- Potential Upselling: Technicians may try to upsell you on additional services or equipment.
DIY (Do-It-Yourself) Replacement
Advantages:
- Cost Savings: This is the most significant advantage. A replacement battery typically costs between $20 and $50, a fraction of ADT's service fee.
- Speed and Flexibility: You can replace the battery on your own schedule, at your convenience, without needing to wait for an appointment.
- Empowerment: Successfully performing the replacement can be empowering and build confidence in managing your home security system.
- Learning Opportunity: It's a great way to learn more about how your ADT system works.
Disadvantages:
- Requires Technical Comfort: You need to be comfortable with basic tools and following instructions carefully.
- Risk of Error: If done incorrectly, you could damage the panel, void your warranty, or cause system malfunctions.
- No Warranty on Labor: If you make a mistake or the new battery fails soon after, you bear the cost of any further repairs or replacements.
- Identifying the Correct Battery: You must correctly identify your panel model and purchase the exact compatible battery.
Making the Decision
Choose ADT Service if:
- You are not comfortable with basic tools or electronics.
- You want the absolute assurance of professional installation and a warranty on the service.
- The cost of the service fee is not a major concern for you.
- Your system is still under a comprehensive warranty where DIY might void it.
Choose DIY Replacement if:
- You are comfortable using basic tools and following step-by-step instructions.
- You want to save money on service fees.
- You can accurately identify your ADT panel model and the correct replacement battery.
- You are willing to take responsibility for the process and potential outcomes.
For 2025, with the increasing availability of online guides and tutorials, DIY battery replacement is more accessible than ever for many homeowners. However, always weigh your personal comfort and technical aptitude against the cost savings. If you're unsure, it's always better to err on the side of caution and contact ADT.
Conclusion
Maintaining the operational integrity of your ADT alarm system is paramount to ensuring consistent home security. The backup battery is a vital component that safeguards your system during power outages. This comprehensive guide has illuminated the path to successfully changing your ADT panel battery, empowering you to tackle this essential maintenance task with confidence.
We've covered the importance of understanding your panel's battery, identifying your specific ADT model, and selecting the correct replacement. The detailed step-by-step instructions, coupled with troubleshooting tips, provide a robust framework for a successful DIY replacement. Furthermore, we've explored preventative maintenance strategies to maximize battery life and discussed the trade-offs between ADT's professional service and a DIY approach.
By following the guidance provided, you can effectively replace your ADT panel battery, saving money and ensuring your system remains a reliable guardian for your home and family. Remember to always prioritize safety, double-check your battery selection, and consult your panel's manual if you encounter any uncertainties. Proactive maintenance, including timely battery replacement, is the cornerstone of a dependable security system. Invest a small amount of time and resources now to secure your peace of mind for years to come.