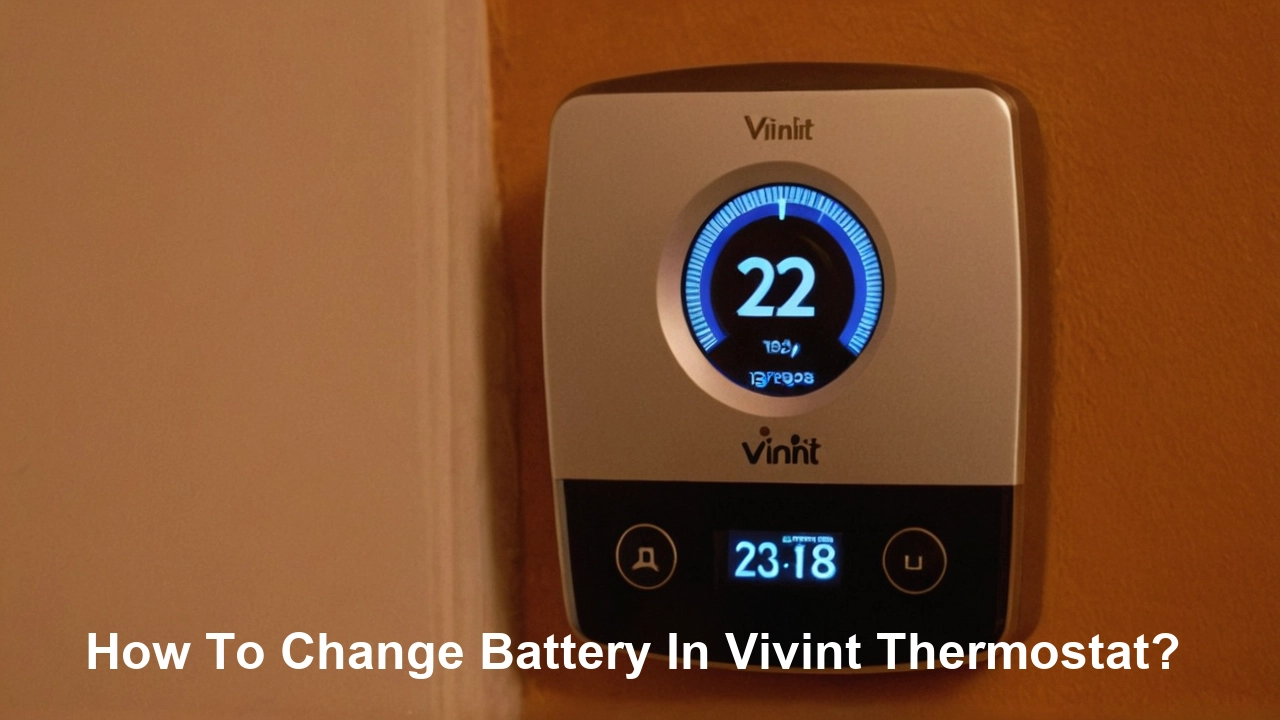
Struggling with a dying Vivint thermostat battery? This comprehensive guide provides a clear, step-by-step process for replacing your Vivint thermostat battery, ensuring your smart home system remains operational. We'll cover everything from identifying the right battery to troubleshooting common issues, empowering you to tackle this simple yet crucial maintenance task with confidence.
Understanding Your Vivint Thermostat and Battery Needs
Vivint smart thermostats are central to managing your home's climate efficiently and conveniently. They integrate seamlessly with your Vivint security and home automation system, offering remote control, energy savings, and personalized comfort settings. While most Vivint thermostats are hardwired to your home's electrical system for continuous power, many models also incorporate a backup battery. This backup battery serves a critical purpose: it ensures your thermostat continues to function, maintain settings, and communicate with the Vivint panel even during power outages or when the main power supply is interrupted. Understanding this dual power source is key to proactive home maintenance.
The need to change the battery in your Vivint thermostat typically arises when the backup battery is depleted. Modern smart thermostats, including Vivint's offerings, are designed to alert you when the battery is low. This proactive notification is a valuable feature, preventing unexpected system failures. Ignoring these alerts can lead to a thermostat that intermittently loses power, fails to maintain schedules, or disconnects from your Vivint system, impacting your ability to control your home's temperature remotely or automatically. For instance, a low battery might cause the screen to dim or become unresponsive, or you might receive a notification on your Vivint app or panel.
In 2025, the smart home market continues to expand, with an estimated 70% of households in North America expected to have at least one smart home device by the end of the year. Thermostats are consistently among the most popular smart home gadgets, valued for their energy-saving potential and convenience. Vivint, a prominent player in this market, emphasizes reliability and user-friendliness. Their thermostats are designed with user maintenance in mind, making tasks like battery replacement relatively straightforward. This guide aims to demystify the process, ensuring you can maintain your Vivint thermostat's optimal performance without needing to rely on a technician for this common task.
Identifying the Right Battery for Your Vivint Thermostat
The first crucial step in successfully changing your Vivint thermostat battery is identifying the correct type of battery required. Vivint has offered several thermostat models over the years, and while many share common battery types, there can be variations. The most common battery types used in Vivint thermostats are standard AA or AAA alkaline batteries. However, some older or specialized models might use different types, such as coin cell batteries or even rechargeable battery packs. It's essential to confirm the exact battery specification for your particular Vivint thermostat model to avoid purchasing the wrong type.
How do you find out which battery you need? The most reliable method is to consult your thermostat's user manual. If you no longer have the physical manual, Vivint's website usually provides digital versions of manuals for all their products. You can typically find your model number on the back of the thermostat unit or its wall plate. Once you have the model number, search for it on the Vivint support site. The manual will explicitly state the battery type and quantity required.
Alternatively, and often the quickest way, is to physically inspect the battery compartment. Once you've gently removed the thermostat's faceplate (which we'll cover in detail later), the battery compartment is usually visible. The batteries themselves are often labeled with their type (e.g., "AA," "AAA"), or the compartment might have indicators. If you're unsure, taking a picture of the battery compartment or the old batteries to a local electronics or hardware store can help you find a suitable replacement.
For 2025, the trend in smart home devices is towards longer-lasting, more efficient power solutions. While AA and AAA alkaline batteries remain prevalent due to their availability and cost-effectiveness, some manufacturers are exploring higher-capacity alkaline variants or even lithium-ion alternatives for devices that require more frequent power. However, for the typical backup battery function in a Vivint thermostat, standard alkaline batteries are still the industry norm. It's always best practice to use reputable brands known for their reliability and longevity. Buying multi-packs can also be economical if you have multiple devices that use the same battery type.
Here’s a quick comparison table to help illustrate common battery types and their typical applications in smart thermostats:
| Battery Type | Common in Vivint Models | Typical Quantity | Notes |
|---|---|---|---|
| AA Alkaline | Yes (Most common) | 2-4 | Standard, widely available, good for backup power. |
| AAA Alkaline | Yes (Less common than AA) | 2-3 | Similar to AA, but smaller. |
| CR2032 Coin Cell | Rare (More common in older/simpler thermostats) | 1 | Small, flat, typically used for memory retention. |
| Rechargeable Battery Pack | Very Rare (More in specialized systems) | 1 | Requires specific charging mechanism. |
Always prioritize the manufacturer's recommendation found in your manual or on the device itself. Using the wrong battery type can lead to poor performance, damage to the thermostat, or even safety hazards.
Step-by-Step Guide: How to Change Battery in Vivint Thermostat
Changing the battery in your Vivint thermostat is a straightforward process that most homeowners can perform themselves. By following these detailed steps, you can ensure a smooth and successful battery replacement, keeping your smart thermostat functioning optimally.
Preparation and Safety First
Before you begin, gather the necessary supplies and take a moment to ensure a safe working environment.
- Gather Your Supplies: You will need the new batteries (ensure they are the correct type and from a reputable brand), a small Phillips head screwdriver (though many Vivint thermostats don't require tools for faceplate removal), and a clean, dry cloth for wiping down surfaces.
- Identify Your Thermostat Model: As discussed, knowing your model number is crucial for selecting the right batteries.
- Check for Power Interruption: While the backup battery is designed to maintain operation during power loss, it's good practice to be aware of your home's power status. However, for battery replacement, you typically do not need to turn off power to the HVAC system, as the thermostat is primarily powered by low-voltage wiring. The backup battery is just that – a backup.
- Work in a Well-Lit Area: Ensure you have adequate lighting to see clearly, especially when handling small components.
- Handle Components Gently: Smart thermostats are electronic devices. Treat all parts with care to avoid damage.
Safety is paramount. While this is a low-voltage task, it's always wise to be mindful of your surroundings. Ensure the area around the thermostat is clear of clutter.
Removing the Old Battery
This is the core of the process. Most Vivint thermostat models are designed for easy access to the battery compartment.
- Detaching the Thermostat Faceplate:
- Look for Release Points: Most Vivint thermostats have a faceplate that snaps onto a wall-mounted base. Gently examine the edges of the thermostat unit. You might find small notches or indentations where you can insert your fingers or a flathead screwdriver (used very carefully) to pry it away.
- Gentle Pull: In many cases, you can simply grip the sides of the thermostat faceplate and pull it straight away from the wall. It should detach with a slight click or pop. Avoid excessive force.
- Tool-Assisted Removal (If Necessary): If it's stuck, look for a small screw at the bottom or top of the unit, or use a thin, flat tool (like a putty knife or credit card) to carefully work around the edges to release the clips. Do not force it.
- Locating the Battery Compartment: Once the faceplate is removed, you will see the internal components. The battery compartment is usually located on the back of the faceplate or within the main unit itself. It will typically be a plastic housing with clearly visible batteries.
- Removing the Batteries:
- Standard AA/AAA: If you have AA or AAA batteries, they are usually held in place by spring clips. You can typically push the battery slightly towards the negative (-) terminal to release it from the spring, then pull it out.
- Other Types: If you have a different battery type, it might be held in place by a clip or simply sit in a designated slot. Carefully remove it without bending any wires or damaging the compartment.
- Note Battery Orientation: Before removing the old batteries, pay close attention to how they are oriented (which end is positive (+) and which is negative (-)). This is crucial for installing the new batteries correctly. Often, there are + and - symbols marked in the battery compartment.
If your thermostat is hardwired and has no visible battery compartment on the faceplate, it's possible the battery is integrated into the main unit or managed differently. In such cases, consulting the specific manual for your model is essential. However, for most common Vivint models, the battery replacement process is as described above.
Installing the New Battery
With the old batteries removed and the correct new ones in hand, it's time to install them.
- Insert New Batteries: Carefully place the new batteries into the compartment, ensuring they are oriented correctly according to the markings (+ and -). The positive (+) end usually connects to a spring, and the negative (-) end connects to a flat terminal.
- Secure the Batteries: Ensure the batteries are seated firmly in the compartment. They should not be loose or wobbly.
- Reattach the Thermostat Faceplate:
- Align the Faceplate: Carefully align the faceplate with the base unit mounted on the wall. Ensure any connectors or clips line up correctly.
- Snap into Place: Gently push the faceplate back onto the base until it snaps securely into place. You should hear or feel a click.
- Secure with Screws (If Applicable): If your model uses screws to secure the faceplate, reinsert and tighten them gently. Do not overtighten.
The thermostat screen should illuminate shortly after the new batteries are installed and the faceplate is reattached, indicating it has power.
Testing and Confirmation
Once the new batteries are installed and the thermostat is reassembled, it's time to verify that everything is working correctly.
- Check the Display: The thermostat's screen should power on. Look for a clear display showing the current temperature, mode, and fan settings.
- Verify Connectivity: Check if the thermostat is connected to your Vivint system. You can usually see a connectivity icon on the thermostat screen or check the Vivint app on your smartphone or the main Vivint panel.
- Test Basic Functions: Try adjusting the temperature up or down. Ensure the system responds as expected. If you have the ability to remotely control your thermostat via the Vivint app, try changing the temperature through the app to confirm remote access is working.
- Confirm No Low Battery Warning: The low battery warning indicator (if it was previously displayed) should now be gone.
- Monitor for a Few Hours: It's a good idea to monitor the thermostat's performance for a few hours or a day to ensure it's stable and all functions are operating correctly.
If the thermostat does not power on or you encounter issues, double-check the battery orientation and ensure the batteries are fully seated. If problems persist, consult the troubleshooting section below.
Troubleshooting Common Vivint Thermostat Battery Issues
While changing a Vivint thermostat battery is usually straightforward, occasional issues can arise. Understanding these common problems and their solutions can save you time and frustration.
Issue 1: Thermostat Screen Remains Blank After Battery Replacement
- Possible Cause: Incorrect battery orientation.
- Solution: Remove the faceplate again and double-check that the positive (+) and negative (-) ends of each battery are correctly aligned with the markings in the compartment. Even a slight misalignment can prevent power flow.
- Possible Cause: Dead new batteries.
- Solution: Although unlikely with new batteries, it's possible they are faulty. Try a different set of brand-new batteries.
- Possible Cause: Dirty battery contacts.
- Solution: Gently clean the battery contacts in the compartment and on the batteries themselves with a pencil eraser or a cotton swab lightly dampened with rubbing alcohol. Ensure contacts are dry before reinserting batteries.
- Possible Cause: Loose battery connection.
- Solution: Ensure the batteries are firmly seated and that the clips or housing are holding them securely.
Issue 2: Low Battery Warning Persists or Returns Quickly
- Possible Cause: Batteries not fully seated or a poor connection.
- Solution: Re-seat the batteries firmly. Ensure the battery compartment cover is closed properly.
- Possible Cause: Using low-quality or old batteries.
- Solution: Always use reputable brands of fresh alkaline batteries. Avoid using rechargeable batteries unless specifically recommended by Vivint, as their voltage can differ and cause issues.
- Possible Cause: Excessive power draw from the thermostat.
- Solution: This is less common for backup batteries but could indicate a deeper issue with the thermostat's power management. If the problem persists with multiple sets of high-quality batteries, it might be time to contact Vivint support.
- Possible Cause: Incorrect battery type used.
- Solution: Verify that you are using the exact battery type specified in your thermostat's manual. Using a battery with lower voltage or capacity than required will lead to premature depletion.
Issue 3: Thermostat Functions Intermittently or is Unresponsive
- Possible Cause: Weak battery connection or low battery power.
- Solution: Ensure batteries are correctly installed and making good contact. If the warning light was on, even new batteries might not fully resolve intermittent issues if the system has been running on very low power for a while. A full power cycle (removing batteries, waiting a minute, then reinserting) might be necessary.
- Possible Cause: Interference or software glitch.
- Solution: Try a soft reset by removing and reinserting the batteries. If the issue continues, a system reboot via the Vivint panel might be required, or you may need to contact Vivint support.
- Possible Cause: Faulty thermostat hardware.
- Solution: If none of the above solutions work, the thermostat itself might be malfunctioning. This would require professional diagnosis from Vivint.
Issue 4: Thermostat Not Connecting to Vivint System After Battery Change
- Possible Cause: Loss of connection during the battery change.
- Solution: The thermostat might have briefly lost its connection to the Vivint hub. Check the Vivint app or panel to see if the thermostat is listed and online. If not, try a system re-sync or reboot through the Vivint panel.
- Possible Cause: Low battery power still affecting communication.
- Solution: Even if the screen is on, the battery might not have enough power to sustain robust communication. Ensure you have fresh, high-quality batteries.
- Possible Cause: Network issues.
- Solution: Ensure your home Wi-Fi network is stable, as this can affect smart device communication.
For 2025, smart home systems are becoming more robust in self-diagnostics. However, basic troubleshooting often remains the first line of defense. If you've exhausted these steps, don't hesitate to reach out to Vivint's customer support. They can remotely diagnose many issues and guide you through more advanced troubleshooting or schedule a technician if needed.
Maximizing Vivint Thermostat Battery Life and Maintenance
Proactive maintenance and understanding battery usage can significantly extend the life of your Vivint thermostat's backup batteries, saving you the hassle of frequent replacements. While batteries are consumables, several factors influence how long they last.
1. Use High-Quality Batteries: This is perhaps the most critical factor. Opt for reputable brands known for their reliability and longevity, such as Duracell, Energizer, or Panasonic. Cheaper, unbranded batteries may have lower capacity and leak corrosive materials, potentially damaging your thermostat. For 2025, premium alkaline batteries are engineered for longer shelf life and consistent power output, making them ideal for backup power applications.
2. Understand Your Thermostat's Power Consumption: Vivint thermostats, especially newer models with advanced features like color screens, Wi-Fi connectivity, and occupancy sensors, consume more power than basic digital thermostats. The backup battery is primarily for maintaining settings and basic functionality during power interruptions or for short periods. It's not designed to power the thermostat indefinitely.
3. Respond Promptly to Low Battery Alerts: Your Vivint system is designed to alert you well in advance of the battery failing completely. Treat these alerts seriously. Replacing the battery as soon as you receive a notification prevents unexpected shutdowns and potential issues with system connectivity. Waiting until the last minute can sometimes lead to the thermostat entering a low-power state where some functions might be compromised even before the battery dies.
4. Minimize Unnecessary Power Drain: While you can't control the core functions, ensure your thermostat's screen brightness isn't set to maximum if it's adjustable, and disable any non-essential features if your model allows. However, for most Vivint thermostats, these settings are optimized for efficiency. The main drain comes from maintaining Wi-Fi connectivity and screen activity.
5. Regular System Checks: Periodically check your Vivint app or panel for any unusual behavior from your thermostat. While the system usually self-monitors, a quick visual check can catch minor issues before they become major problems.
6. Environmental Factors: Extreme temperatures can affect battery performance and lifespan. While your thermostat is designed to operate within typical indoor temperature ranges, prolonged exposure to very hot or very cold conditions (e.g., if the thermostat is located near a drafty window or a heat source) can slightly reduce battery efficiency. Ensure your thermostat is installed in a location with a stable, moderate temperature.
7. Battery Disposal: Dispose of used batteries responsibly. Many retailers offer battery recycling programs. Do not throw used batteries in regular trash, as they can contain hazardous materials.
8. Consider Battery Type for Longevity: While alkaline batteries are standard, some users might inquire about lithium batteries for extended life. However, it's crucial to check your Vivint thermostat's manual. Lithium batteries have a different voltage and discharge curve, which can sometimes cause compatibility issues or inaccurate battery level reporting in devices not specifically designed for them. For most Vivint models, high-quality alkaline batteries are the recommended and safest choice for optimal performance and longevity.
By following these maintenance tips, you can ensure your Vivint thermostat's backup battery serves its intended purpose effectively, providing peace of mind and reliable operation for your smart home climate control system.
When to Consider Calling a Professional
While changing the battery in a Vivint thermostat is designed to be a user-friendly task, there are specific situations where seeking professional assistance from Vivint support or a certified technician is the wisest course of action. Understanding these scenarios can prevent further damage or unnecessary complications.
1. Persistent Issues After Battery Replacement: If you've followed all the troubleshooting steps, replaced the batteries with the correct type from a reputable brand, and the thermostat still exhibits problems—such as a blank screen, intermittent operation, or failure to connect—it's highly probable that the issue lies beyond a simple battery replacement. This could indicate a faulty thermostat unit, a problem with the wiring, or a more complex system integration issue.
2. Unfamiliarity or Discomfort with DIY Tasks: If you are not comfortable working with electronic devices, or if the thought of handling even minor technical tasks makes you uneasy, it's perfectly acceptable to call a professional. Vivint offers support services, and their technicians are trained to handle all aspects of their equipment. Attempting a task you're not comfortable with could inadvertently lead to damage.
3. Damage to the Thermostat or Wall Plate: If, during the process of removing the faceplate or batteries, you accidentally break a clip, crack the casing, or damage any internal wiring, it's best to stop and call for professional help. Continuing to force a damaged component can exacerbate the problem.
4. Complex Wiring or System Integration Issues: While most Vivint thermostats are plug-and-play in terms of battery replacement, if your installation is particularly complex, or if you suspect issues with the HVAC system wiring connected to the thermostat, a professional diagnosis is recommended. They have the tools and expertise to safely assess and resolve such problems.
5. Recurring Battery Drain Problems: If you find yourself replacing batteries much more frequently than expected (e.g., every few months instead of annually or longer), it suggests an underlying issue. This could be a faulty thermostat drawing excessive power or a problem with the main power supply to the thermostat. A technician can identify the root cause.
6. Concerns About System Warranty: If your Vivint system is still under warranty, attempting complex repairs yourself might void certain aspects of the warranty. Consulting Vivint support first can clarify whether a DIY attempt is permissible or if professional service is required to maintain warranty coverage.
7. When the Manual is Unclear or Unavailable: If you cannot locate your thermostat's manual, or if the instructions within it are confusing, it's safer to seek guidance from Vivint's customer support. They can provide specific instructions for your model or arrange for a technician.
In 2025, the interconnectedness of smart home systems means that a seemingly simple issue like a thermostat battery can sometimes be a symptom of a larger problem. Vivint's customer support is equipped to handle these situations, offering remote diagnostics and scheduling on-site visits when necessary. Prioritizing professional help when in doubt ensures the longevity and optimal performance of your Vivint smart home ecosystem.
In conclusion, changing the battery in your Vivint thermostat is a manageable DIY task that ensures the continuous operation and connectivity of your smart climate control system. By understanding your thermostat model, using the correct batteries, and following the step-by-step guide, you can confidently perform this essential maintenance. Remember to address low battery alerts promptly and utilize troubleshooting tips for any unexpected issues. For persistent problems or if you're uncomfortable with the process, Vivint's professional support is readily available. Keeping your thermostat powered correctly is a small step towards a more comfortable, efficient, and seamlessly connected smart home.