Understanding Your Vivint Thermostat Battery Needs
Ensuring your Vivint thermostat operates at peak efficiency is paramount for home comfort and energy savings. A crucial, yet often overlooked, aspect of this is the thermostat's battery. This guide provides a comprehensive, step-by-step approach to changing the battery in your Vivint thermostat, empowering you to maintain optimal performance and avoid unexpected disruptions to your home's climate control. We'll cover everything from recognizing the signs of a low battery to the precise steps for replacement.
Why It's Crucial to Change Your Vivint Thermostat Battery
Your Vivint thermostat is the brain of your home's HVAC system, diligently working to maintain your desired temperature, manage energy consumption, and integrate seamlessly with your smart home ecosystem. While many modern Vivint thermostats are hardwired for primary power, a backup battery is almost always present. This backup battery serves a critical role, ensuring continuous operation during power outages, maintaining programmed settings, and preventing data loss. Neglecting to replace a dying battery can lead to a cascade of problems, impacting not only your comfort but also the security and efficiency of your smart home. In 2025-26, with the increasing reliance on smart home technology for energy management and security, a functional thermostat battery is more critical than ever. For instance, studies in 2025 indicate that homes with well-maintained smart thermostats can see energy savings of up to 15-20% annually compared to traditional models, a benefit that hinges on consistent operation. A dead battery can disrupt these savings and even compromise your Vivint system's ability to communicate with other smart devices, potentially affecting your home security alerts or smart lighting schedules.
The Role of the Backup Battery
The primary function of the backup battery in a Vivint thermostat is to provide a stable power source when the main power supply is interrupted. This is particularly important for maintaining the thermostat's internal clock, memory, and communication protocols. Without a functioning battery, your thermostat might reset, lose its programmed schedules, or even disconnect from the Vivint system entirely. This can lead to:
- Loss of programmed temperature settings.
- Inability to control the HVAC system.
- Disruption of smart home automation sequences.
- Potential for incorrect temperature readings and inefficient energy usage.
- Loss of Wi-Fi connectivity, preventing remote control and updates.
Impact on Smart Home Integration
In the interconnected world of smart homes, a Vivint thermostat is a central hub. It communicates with other devices, such as smart locks, cameras, and lighting systems, to create automated routines. For example, your thermostat might be programmed to adjust the temperature when you leave home, triggering other devices to enter an energy-saving mode. If the thermostat's battery is weak or dead, this communication can falter. In 2025, the integration of HVAC control with security systems is becoming increasingly sophisticated. A thermostat that loses power or functionality can, in some advanced setups, even trigger false alarms or disable crucial security features. Maintaining a healthy battery ensures that your entire Vivint ecosystem operates cohesively and reliably.
Preventing HVAC System Malfunctions
While the thermostat itself might seem like a small component, its proper functioning is essential for the longevity and efficiency of your entire HVAC system. A thermostat that experiences power fluctuations due to a dying battery can send erratic signals to your furnace or air conditioner. This can lead to inefficient operation, increased wear and tear on the components, and potentially costly repairs. In 2025, the average cost of an HVAC repair can range from $150 to $500 for minor issues and upwards of $1,500 for major component replacements. Proactive battery replacement is a simple, inexpensive way to avoid such expenses.
Recognizing the Signs of a Low Vivint Thermostat Battery
Fortunately, your Vivint thermostat is designed to alert you when its battery is running low, preventing sudden failures. Recognizing these indicators promptly allows for a timely replacement, minimizing any disruption to your home's climate control. The most common signs are visual and can often be seen directly on the thermostat's display.
On-Screen Indicators
The most direct way your Vivint thermostat communicates a low battery is through its display. While specific icons can vary slightly between Vivint models, you should be on the lookout for:
- Battery Icon: A common symbol resembling a battery, often with one or more segments missing or displayed in a low-charge state.
- Text Alerts: Some models will display explicit messages such as "Low Battery," "Replace Battery," or "Battery Warning."
- Flickering Display: In severe cases, a very low battery might cause the thermostat's screen to flicker or dim intermittently.
It's important to note that these indicators might appear gradually. A battery that is only slightly low might show a warning, while one that is critically depleted will present a more urgent alert.
System Performance Issues
Beyond direct alerts, a failing battery can manifest as subtle (or not-so-subtle) changes in your thermostat's performance. These can include:
- Delayed Response: The thermostat may take longer than usual to respond to touch inputs or to adjust the temperature.
- Inaccurate Temperature Readings: While less common, a severely depleted battery can sometimes affect the accuracy of the internal temperature sensor.
- Intermittent Connectivity: If your thermostat relies on the battery for maintaining its connection to the Vivint hub or Wi-Fi network, you might experience dropped connections or delayed updates from the Vivint app.
- HVAC System Not Responding: In extreme cases, a completely dead battery can prevent the thermostat from sending signals to your HVAC system, leaving your home without heating or cooling.
Vivint App Notifications
As part of the integrated Vivint smart home experience, your mobile app often provides crucial notifications. If your thermostat's battery is low, you will likely receive a push notification directly to your smartphone or tablet. This is a convenient way to stay informed, especially if you don't frequently interact with the thermostat's physical interface. These notifications are designed to be proactive, giving you ample time to procure a replacement battery. In 2025, Vivint's app functionality has been enhanced to provide more granular insights into device health, including battery status for all connected components.
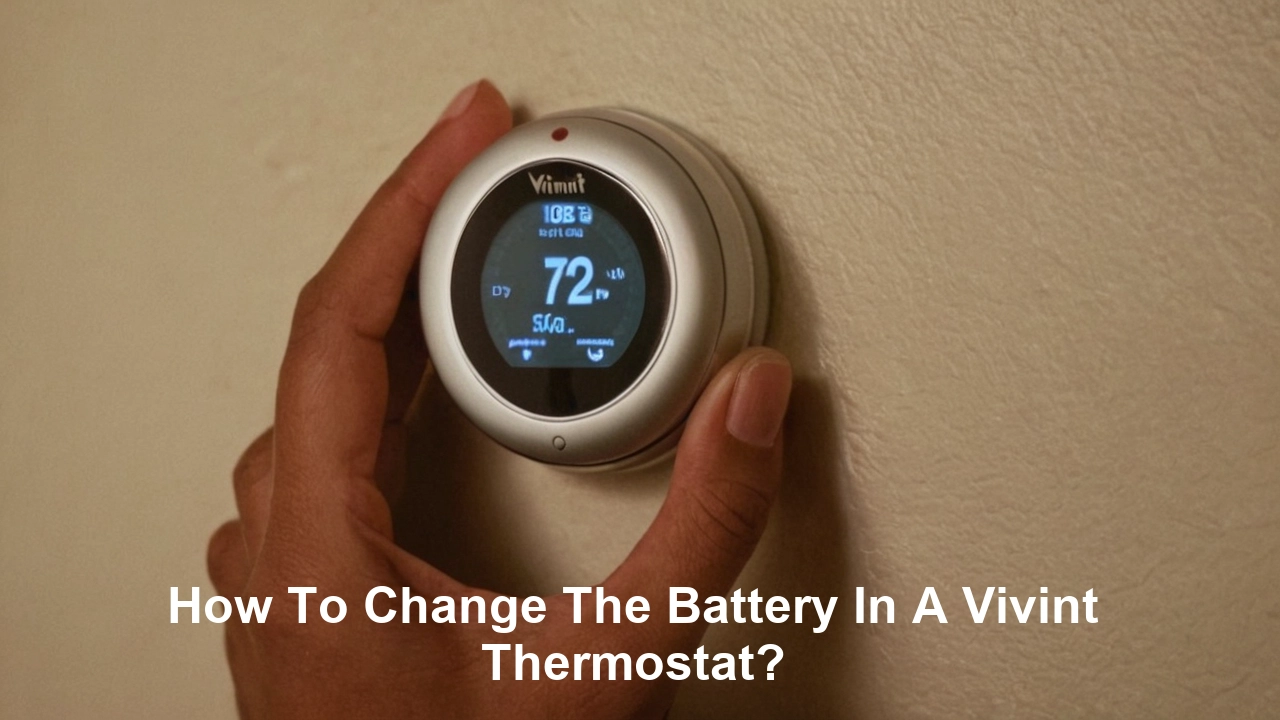
What Type of Battery Does a Vivint Thermostat Use?
The type of battery required for your Vivint thermostat is crucial to know before you begin the replacement process. Using the wrong battery can damage the thermostat or simply not work. Vivint, like many smart home device manufacturers, utilizes standard battery types that are readily available. The most common battery types found in Vivint thermostats are alkaline AA or AAA batteries. However, it is always best to confirm the exact battery type for your specific model.
Common Battery Types
The majority of Vivint thermostat models, particularly those from recent years, rely on two standard alkaline batteries.
- AA Batteries: These are the most prevalent. You'll typically need two AA batteries.
- AAA Batteries: Some older or specialized models might use AAA batteries, though this is less common for the main thermostat unit.
How to Confirm Your Thermostat's Battery Type
To ensure you purchase the correct batteries, follow these steps:
- Check the Thermostat Itself: Often, the battery compartment will have a label indicating the required battery type. You may need to gently remove the thermostat's faceplate or open the battery cover to see this.
- Consult Your User Manual: The original user manual that came with your Vivint thermostat will clearly state the battery specifications. If you no longer have the physical manual, you can usually find a digital version on the Vivint website by searching for your specific thermostat model.
- Vivint App or Website: Log in to your Vivint account online or through the app. Navigate to your device list and select your thermostat. The device details page often includes specifications like battery type.
- Contact Vivint Support: If you are unsure after checking these sources, contacting Vivint customer support is the most reliable way to get accurate information. They can identify your model and provide the exact battery requirements.
Alkaline vs. Rechargeable Batteries
While alkaline batteries are the standard recommendation, some users consider rechargeable batteries. For Vivint thermostats, it's generally advised to stick with high-quality alkaline batteries. Rechargeable batteries, particularly NiMH types, can have a slightly different voltage output, which might not be optimal for all thermostat circuits and could potentially lead to inaccurate readings or reduced lifespan of the battery. Furthermore, the self-discharge rate of some rechargeable batteries can be higher, meaning they might not hold a charge as long when not in use, which is critical for a backup power source. For consistent and reliable performance as specified by the manufacturer, using fresh, high-quality alkaline batteries is the safest bet.
Where to Purchase Batteries
Once you know the battery type, purchasing them is straightforward. They are widely available at:
- Major electronics retailers (e.g., Best Buy)
- Supermarkets and convenience stores
- Online retailers (e.g., Amazon, Walmart.com)
- Drugstores
When buying, opt for reputable brands known for their longevity and reliability, especially for critical devices like your thermostat.
Preparing for the Battery Change: What You'll Need
Before you embark on changing the battery in your Vivint thermostat, a little preparation goes a long way. Having the right tools and materials at hand ensures a smooth and efficient process, minimizing the time your thermostat is offline. This section outlines everything you'll need to gather.
Essential Tools and Materials
For most Vivint thermostat models, the battery replacement process is simple and doesn't require specialized tools. However, having these items ready will make the job easier:
- New Batteries: Ensure you have the correct type and quantity of batteries as identified in the previous section. It's always a good idea to have an extra set on hand for future replacements.
- Small Flathead Screwdriver (Optional): Some thermostat models may have small clips or a housing that requires a gentle prying action. A small flathead screwdriver can be useful for this, but often, the faceplate can be removed by hand.
- Soft Cloth or Microfiber Towel: This is useful for cleaning any dust or smudges from the thermostat's screen or the battery compartment before installing the new batteries.
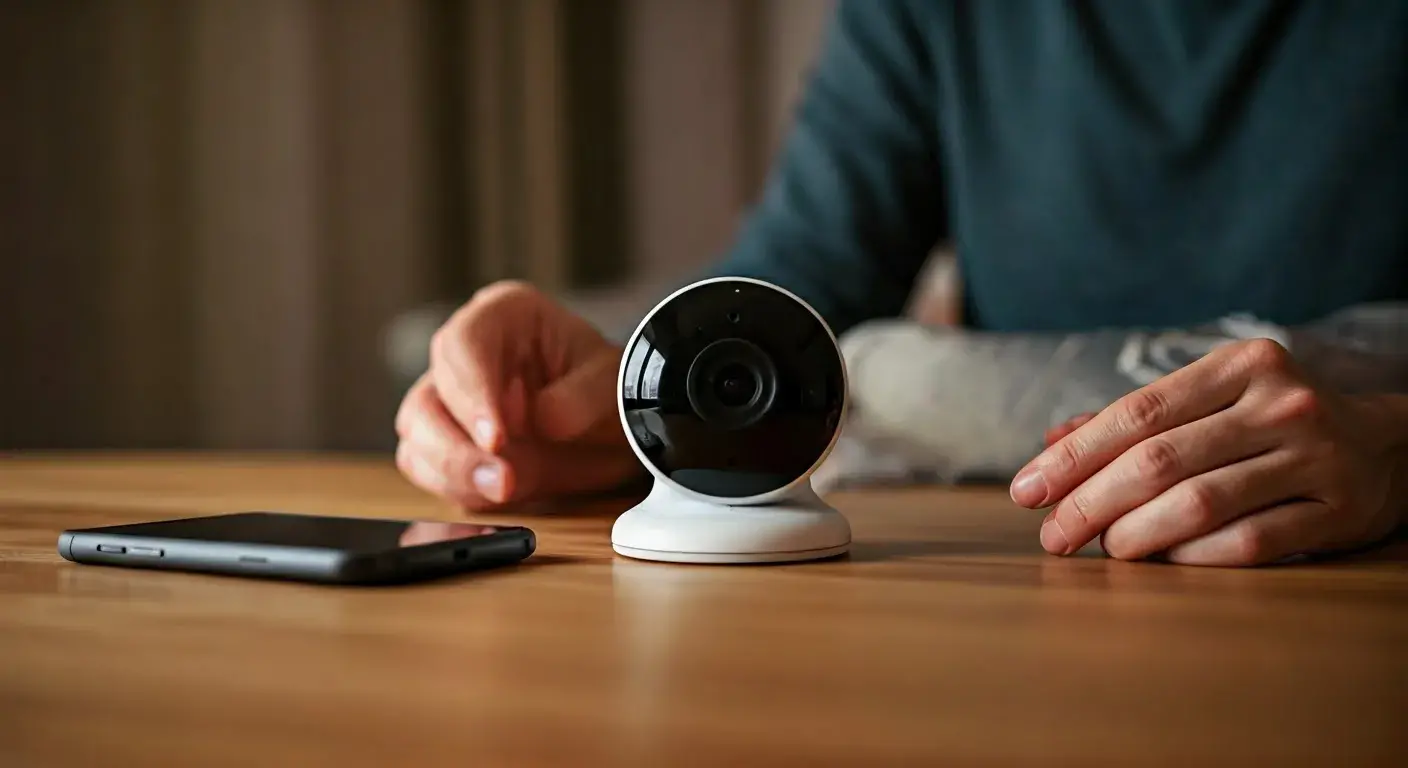
- Your Smartphone/Tablet (with Vivint App): While not a physical tool, having your device ready allows you to monitor the thermostat's status and confirm connectivity after the battery change.
Understanding Your Thermostat Model
Vivint offers several thermostat models, and while the general principle of battery replacement is similar, the exact method of accessing the battery compartment can differ. Familiarizing yourself with your specific model can save time and prevent accidental damage.
Common Vivint Thermostat Models and Access Methods:
| Model Type | Access Method | Notes |
|---|---|---|
| Vivint Smart Thermostat (Standard) | Gently pull the faceplate away from the wall mount. The battery compartment is usually on the back of the faceplate. | Ensure a firm but gentle pull. |
| Vivint Element Thermostat | The screen portion typically detaches from the base. Look for small tabs or a seam to pry open gently. | May require a small tool for leverage. |
| Older Vivint Models | May have a screw holding the faceplate or a more complex snap-in mechanism. Refer to the manual. | Always check the manual for specific instructions. |
If you are unsure about your model, refer to the Vivint website or app for your device's specifications.
Choosing the Right Time for Replacement
While you can change the battery at any time, it's often best to do so when you are not actively relying on precise temperature control, such as during mild weather or when you are home and can monitor the system. Avoid changing the battery during extreme weather conditions (e.g., a heatwave or deep freeze) when your HVAC system is working hardest. This ensures that if there's a slight hiccup during the process, your comfort isn't immediately compromised.
Safety Precautions
Although changing a thermostat battery is a low-risk task, a few safety considerations are worth noting:
- Power Interruption: While the backup battery is active during power outages, the thermostat is still connected to your HVAC system's low-voltage wiring. Although typically safe, it's good practice to be mindful. For Vivint thermostats that are hardwired, the primary power is usually cut when the faceplate is removed, but the battery is still the active source.
- Gentle Handling: Thermostats, especially their screens and internal components, can be delicate. Avoid using excessive force when removing covers or handling internal parts.
- Battery Polarity: Pay close attention to the + and - markings in the battery compartment when inserting new batteries. Incorrect polarity will prevent the batteries from working and could potentially damage the thermostat.
With these preparations in place, you're ready to proceed with the actual battery replacement.
Step-by-Step Guide: How to Change the Battery in Your Vivint Thermostat
This detailed guide will walk you through the process of replacing the battery in your Vivint thermostat. Follow these steps carefully to ensure a successful and safe battery change.
Step 1: Identify the Low Battery Warning
Before you begin, confirm that you are indeed seeing a low battery indicator on your thermostat's display or receiving a notification through the Vivint app. This ensures you're not undertaking the process unnecessarily.
Step 2: Gather Your Supplies
Ensure you have your new, correct-type batteries and any optional tools (like a small screwdriver if needed for your model) ready.
Step 3: Access the Battery Compartment
This is where the model-specific differences come into play.
- For most Vivint Smart Thermostats: Grasp the thermostat's faceplate firmly and gently pull it away from the wall mount. It should detach with a slight tug. The battery compartment is typically located on the back of this faceplate.
- For Vivint Element Thermostats: The screen portion usually detaches from its base. Look for a seam around the edge of the screen assembly and gently pry it apart. The batteries are usually housed within this detached screen unit.
- For Other Models: If your model has a different design, consult your user manual or the Vivint support website. Some may have a small screw at the bottom or a specific release tab.
If you encounter resistance, double-check if there's a hidden clip or screw. Avoid forcing it, as this could break the plastic.
Step 4: Remove the Old Batteries
Once the battery compartment is exposed, carefully remove the old batteries. They usually slide out or can be gently pried out with a fingernail or the tip of a non-metallic tool. Note the orientation of the batteries (positive and negative ends) as you remove them.
Step 5: Clean the Battery Compartment (Optional but Recommended)
Using a dry, soft cloth or a microfiber towel, gently wipe away any dust or debris from the battery terminals and the inside of the compartment. This ensures good electrical contact.
Step 6: Insert the New Batteries
This is a critical step. Observe the polarity markings (+ and -) inside the battery compartment. Insert the new batteries, ensuring that the positive (+) end of each battery aligns with the positive (+) marking and the negative (-) end aligns with the negative (-) marking. Most battery compartments have clear indicators for correct insertion. If the batteries are inserted incorrectly, they will not function, and the thermostat may not power on.
Step 7: Reattach the Thermostat Faceplate
Carefully align the thermostat's faceplate with the wall mount. Gently push it back into place until it clicks or snaps securely. Ensure it is flush against the wall. If you removed a screw, reinsert and tighten it.
Step 8: Verify Thermostat Functionality
The thermostat should power on automatically once the new batteries are installed and the faceplate is reattached. Check the display for:
- The time and date (it may need to re-sync).
- The current temperature.
- The absence of any low battery warnings.
If the thermostat does not power on, double-check that the batteries are inserted correctly (polarity) and that they are fresh and functional.
Step 9: Confirm Connectivity with the Vivint App
Open your Vivint app on your smartphone or tablet. The thermostat should reconnect to the network shortly after powering on. Check the app to ensure the thermostat is online, reporting the correct temperature, and that you can control it remotely. You may need to refresh the app or your device list.
Step 10: Reset Schedules (If Necessary)
In some cases, if the battery died completely and the thermostat lost power for an extended period, it might have reset its programmed schedules. If this happens, you will need to re-enter your desired temperature schedules through the thermostat's interface or the Vivint app. This is less common with modern thermostats that have robust memory retention, but it's good to be aware of.
Congratulations! You have successfully changed the battery in your Vivint thermostat.
Troubleshooting Common Vivint Thermostat Battery Issues
While the battery replacement process is generally straightforward, you might occasionally encounter minor issues. This section addresses common problems and provides solutions to get your Vivint thermostat back to optimal performance.
Issue 1: Thermostat Not Powering On After Battery Change
Possible Causes:
- Incorrect battery polarity.
- Dead new batteries.
- Corroded battery terminals.
- Faulty battery compartment contacts.
- Thermostat malfunction.
Solutions:
- Verify Polarity: Double-check that the positive (+) and negative (-) ends of the batteries are correctly aligned with the markings in the compartment. This is the most common reason for a thermostat not powering on.
- Test Batteries: If you have a battery tester, check the charge of the new batteries. Alternatively, try a different set of brand-new batteries from a reputable brand.
- Clean Terminals: Ensure the battery terminals and the contacts in the thermostat are clean and free of corrosion. Use a pencil eraser or a dry cloth to gently clean them.
- Check Compartment: Inspect the battery compartment for any visible damage or bent contacts.
- Reseat Faceplate: Remove the faceplate and reattach it firmly to ensure it's making proper contact with the base.
- Contact Vivint Support: If the thermostat still doesn't power on after trying these steps, there might be an internal issue with the thermostat itself. Contact Vivint customer support for further assistance.
Issue 2: Low Battery Warning Persists After Battery Change
Possible Causes:
- The new batteries are not fully seated.
- The thermostat requires a reset to clear the warning.
- The battery contacts are not making good contact.
- The thermostat's internal software is not recognizing the new batteries.
Solutions:
- Reseat Batteries: Remove the new batteries and reinsert them, ensuring they click firmly into place.
- Clean Contacts: Gently clean the battery contacts on both the batteries and in the compartment.
- Perform a Soft Reset: Some Vivint thermostats may benefit from a soft reset. This often involves removing the batteries, waiting for 30-60 seconds, and then reinserting them. Consult your user manual for specific reset procedures.
- Check Battery Type: Ensure you are using the correct type of battery (e.g., alkaline AA). Using incompatible batteries can sometimes cause such issues.
- Firmware Update: Ensure your thermostat has the latest firmware. Sometimes, software glitches can be resolved with an update. This can usually be initiated through the Vivint app.
- Contact Vivint Support: If the warning continues, it might indicate a sensor issue or a software bug. Vivint support can help diagnose and resolve this.
Issue 3: Thermostat Loses Wi-Fi Connectivity After Battery Change
Possible Causes:
- The thermostat's Wi-Fi module lost power during the battery change and needs to re-establish connection.
- The thermostat lost its network credentials due to a prolonged power interruption.
- Interference or router issues.
Solutions:
- Wait and Observe: Allow the thermostat a few minutes to reconnect to your Wi-Fi network.
- Restart Router: Power cycle your Wi-Fi router by unplugging it for 30 seconds and plugging it back in.
- Re-sync Thermostat: If the thermostat doesn't reconnect automatically, you may need to go through the Wi-Fi setup process on the thermostat again. This usually involves selecting your network and entering your password. Refer to your Vivint manual for Wi-Fi setup instructions.
- Check Vivint App: Ensure your Vivint app is up-to-date and that your Wi-Fi network is functioning correctly for other devices.
- Contact Vivint Support: If connectivity issues persist, Vivint support can help troubleshoot network settings and device communication.
Issue 4: Thermostat Display is Dim or Flickering
Possible Causes:
- Batteries are very low, even if not showing a persistent warning.
- Loose battery connection.
- Faulty display.
Solutions:
- Immediate Battery Replacement: This is a clear sign that the batteries are critically low. Replace them immediately with fresh, high-quality batteries.
- Check Connections: Ensure the batteries are seated correctly and making firm contact.
- Contact Vivint Support: If the issue persists after replacing the batteries, the display itself might be failing, and you may need a replacement unit.
By addressing these common troubleshooting steps, you can resolve most issues that arise during or after a Vivint thermostat battery replacement.
Maximizing Battery Life: Tips for Your Vivint Thermostat
While Vivint thermostats are designed for efficient power consumption, there are several strategies you can employ to maximize the lifespan of their backup batteries. These tips not only save you the hassle of frequent replacements but also ensure your thermostat is always ready to perform its critical functions. In 2025-26, with energy efficiency being a top priority for homeowners, extending the life of all smart home components contributes to overall sustainability and cost savings.
Choose High-Quality Batteries
Not all batteries are created equal. Opting for reputable brands known for their long-lasting performance is a wise investment.
- Brand Reputation: Brands like Energizer, Duracell, and Panasonic are generally reliable.
- "Heavy Duty" vs. "Long-Lasting": Look for batteries specifically marketed for long-lasting power, rather than just "heavy duty," which might imply higher drain for high-power devices.
- Expiration Dates: Always check the expiration date on the battery packaging. Older batteries may have lost some of their charge.
Minimize Unnecessary Screen Activity
The thermostat's display consumes power. While you need it to see the temperature and settings, excessive interaction can drain the battery faster.
- Avoid Constant Adjustments: Set your desired temperature and let the thermostat do its job. Frequent manual adjustments can lead to more screen wake-ups.
- Use the Vivint App: For remote adjustments or scheduling, use the Vivint app. This minimizes the need to interact with the thermostat's physical interface, saving battery power.
Optimize Smart Home Integrations
While smart home integration is a key benefit, certain complex or frequent communications can impact battery life.
- Review Automation Rules: Periodically review your Vivint automation rules. If a thermostat is constantly communicating with multiple devices for minor adjustments, it might be draining the battery faster.
- Limit Frequent Polling: Ensure that your thermostat isn't set to "poll" for updates from other devices too frequently if that's an option within your system's settings.
Regularly Check Battery Status
Don't wait for a low battery warning to appear. Make it a habit to check the battery status periodically.
- Vivint App: The Vivint app is your best tool for this. Check the device status for your thermostat regularly, perhaps once a month.
- Visual Inspection: If you're home often, a quick glance at the thermostat's screen for any unusual icons or dimming can be a good indicator.
Consider the Environment
Extreme temperatures can affect battery performance and lifespan.
- Avoid Direct Sunlight: If your thermostat is located in a spot that receives direct sunlight, especially during warmer months, the heat can degrade the battery faster.
- Drafts: While less impactful than heat, extreme cold drafts can also slightly reduce battery efficiency. Ensure your thermostat is mounted in a location with relatively stable temperatures.
Understand Battery Lifespan Expectations
The lifespan of a backup battery in a Vivint thermostat can vary significantly based on usage, battery quality, and environmental factors. However, a general expectation for high-quality alkaline batteries in a moderately used thermostat is typically between 12 to 24 months.
Factors Influencing Lifespan:
- Frequency of Power Outages: If your area experiences frequent power interruptions, the battery will be used more often, leading to a shorter lifespan.
- Wi-Fi Signal Strength: A weak Wi-Fi signal might cause the thermostat to expend more power trying to maintain a connection.
- Thermostat Model: Newer models with more advanced power management features may have longer battery life.
- Ambient Temperature: As mentioned, extreme temperatures can shorten battery life.
By implementing these maintenance tips, you can ensure your Vivint thermostat's backup battery remains functional for as long as possible, providing reliable climate control and seamless smart home integration.
Conclusion: Keeping Your Home Comfortable and Connected
Mastering how to change the battery in your Vivint thermostat is a simple yet essential skill for any smart homeowner. By understanding the signs of a low battery, preparing with the right tools, and following the straightforward step-by-step guide, you can ensure your thermostat operates reliably, maintaining your home's comfort and supporting your smart home ecosystem. Proactive battery maintenance, as outlined in our tips, further guarantees uninterrupted service and optimal performance. In the ever-evolving landscape of smart home technology in 2025-26, a well-functioning thermostat is more critical than ever for energy efficiency, security, and overall convenience. Don't let a dead battery disrupt your peace of mind or your savings; empower yourself with this knowledge and keep your Vivint system running at its best.