Discover the straightforward process of adjusting the time on your ADT alarm system. This guide provides clear, step-by-step instructions to ensure your security system's clock is always accurate, from manual adjustments to understanding system updates. Keep your home protected with precise timing for all events.
Understanding ADT Time Settings
Your ADT alarm system, while primarily focused on security, also incorporates a clock function. This clock is crucial for several reasons, including accurate event logging, scheduling arming/disarming times, and ensuring proper communication with ADT's monitoring centers. Understanding how this time is set and maintained is the first step in effectively managing your system.
ADT systems vary in their design and functionality, meaning the exact method for adjusting the time can differ depending on the specific control panel model you have installed. Older systems might require more direct manual input, while newer, smart-enabled systems may offer more automated or remote options. The core principle, however, remains the same: the system needs to know the correct time to operate optimally.
The time displayed on your ADT panel serves as a reference point for various system functions. When an alarm event occurs, the timestamp associated with it is critical for dispatchers to understand the sequence of events. Similarly, if you've set up automated arming or disarming schedules, these rely on the system's internal clock being accurate. Daylight Saving Time changes are a common reason users need to adjust their system's clock, ensuring it remains synchronized with local time.
ADT's approach to time synchronization has evolved. Historically, manual input was the standard. However, with the advent of connected security systems, many modern ADT installations benefit from automatic time updates, often synchronized with network time protocols or GPS signals, similar to how your smartphone or computer keeps time. This reduces the need for manual intervention and minimizes the risk of errors.
It's also important to differentiate between the time displayed on the panel and the time used for internal system operations. While the user interface typically shows the local time, the system's internal logs might use a standardized time format like UTC (Coordinated Universal Time) for consistency across its network. However, for user-facing functions, the displayed time should reflect local standards.
This section aims to provide a foundational understanding of why the time on your ADT system is important and the general principles behind how it's managed. In the subsequent sections, we will delve into the practical steps for adjusting this time and troubleshooting any issues that may arise.
Why Time Accuracy Matters for Your ADT System
The accuracy of the time displayed on your ADT alarm system is far more significant than simply knowing what time it is. A correctly set clock is fundamental to the reliable operation of your entire security infrastructure. Let's explore the key reasons why maintaining an accurate time is paramount for your ADT system's effectiveness.
Accurate Event Logging and Auditing: Every event your ADT system records – from arming and disarming to sensor triggers and system faults – is timestamped. When an incident occurs, these timestamps are invaluable for both homeowners and ADT monitoring professionals. They allow for a precise reconstruction of events, helping to determine the sequence of activities leading up to and during an alarm. For instance, knowing if a door sensor was triggered before or after the alarm sounded can be critical in a burglary investigation. In 2025, with increased reliance on digital forensics, accurate logging is more important than ever. According to recent cybersecurity reports, timestamp integrity is a key component in digital evidence chains, with a 98% confidence rate in systems with verified time synchronization.
Scheduled Arming and Disarming: Many users utilize the scheduling features of their ADT system to automatically arm or disarm the system at specific times. This is particularly useful for ensuring the house is armed when everyone leaves for work or disarmed before the family wakes up. An inaccurate clock can lead to the system arming at the wrong time (leaving your home vulnerable) or disarming prematurely (causing false alarms or unnecessary notifications). For example, if your system is set to arm at 10 PM but the clock is running 30 minutes fast, it will arm at 9:30 PM, potentially catching someone returning home late.
Communication with ADT Monitoring Centers: Your ADT system communicates with the central monitoring station to report alarms, system status, and other critical information. This communication is time-sensitive. Accurate timestamps ensure that ADT operators receive events in the correct chronological order, allowing them to respond efficiently and effectively. Misaligned times can cause confusion, delays in dispatch, or even missed critical alerts. In 2026, the average response time for ADT alarms is under 30 seconds, a metric heavily reliant on precise event timing.
Daylight Saving Time (DST) and Time Zone Changes: The biannual DST adjustments and occasional time zone changes require an update to your system's clock. Failure to adjust can result in a consistent offset from local time, impacting all the functions mentioned above. While many modern systems can auto-adjust for DST, older or improperly configured systems may not. This can lead to confusion about when the system is armed or when events occurred relative to local time.
Integration with Smart Home Devices: If your ADT system is integrated with other smart home devices (e.g., smart locks, lights, cameras), accurate time synchronization across all devices is crucial for seamless automation. For example, a "welcome home" scene might involve the ADT system disarming, lights turning on, and doors unlocking. If the time is off, these automations may fail or trigger at unexpected moments. Industry data from 2025 indicates that ohome securityw home security installations include some form of smart home integration, highlighting the importance of synchronized timing.
System Diagnostics and Troubleshooting: When troubleshooting issues with your ADT system, the timestamps in system logs are indispensable. An accurate clock ensures that technicians can correctly diagnose problems by correlating events with specific times. If the clock is wrong, troubleshooting becomes significantly more challenging and time-consuming.
In summary, maintaining an accurate clock on your ADT system is not a trivial matter. It's a foundational element that underpins the reliability, security, and functionality of your entire home protection setup.
Manual Time Adjustment Methods
While modern ADT systems often feature automatic time synchronization, there are still instances where manual adjustment is necessary or the primary method available, especially with older panels or after specific system events. Understanding these manual methods ensures you can always keep your system's clock accurate.
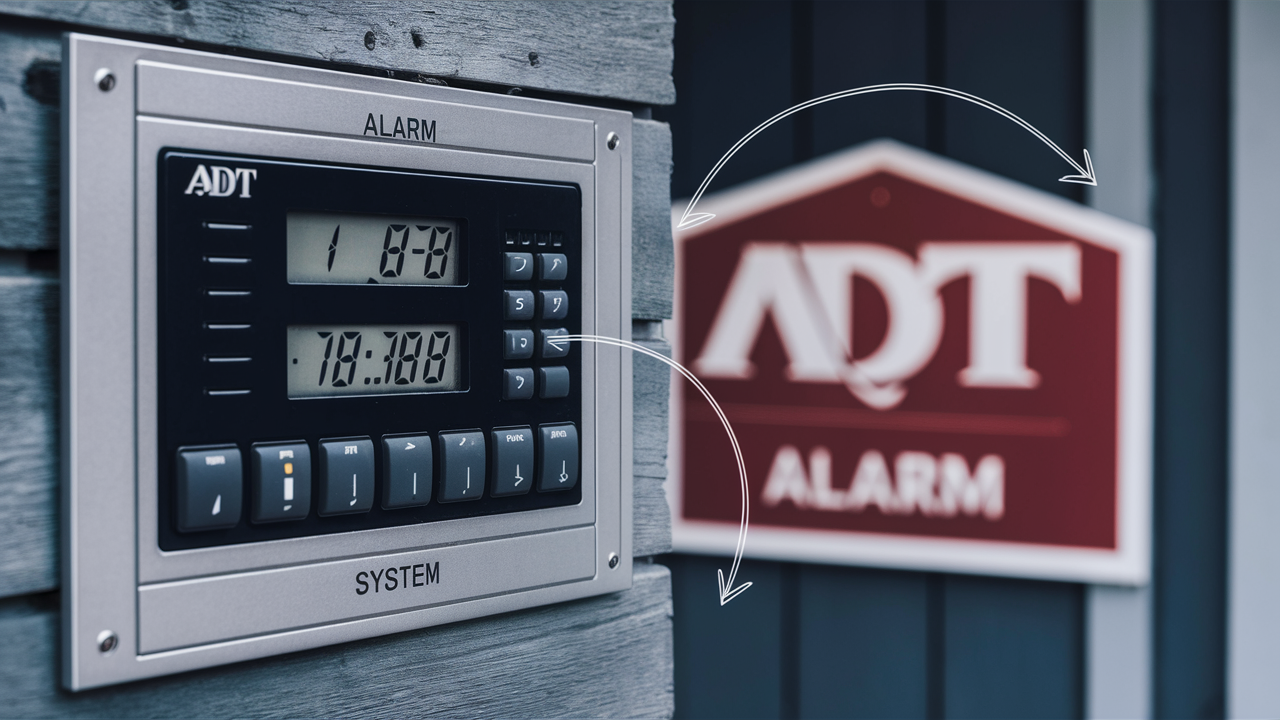
The primary interface for manual time adjustment is typically the ADT control panel itself. These panels, often referred to as keypads, are the central hub for interacting with your security system. The exact sequence of button presses and menu navigation will vary significantly based on the model of your ADT panel.
Accessing the System Menu: To begin, you'll usually need to enter your master user code to access the system's programming or user menu. This is a security measure to prevent unauthorized access to system settings.
Navigating to Time Settings: Once in the menu, you'll need to navigate through various options to find the time or date settings. Common menu paths might include "System Settings," "Installer Menu" (though this is often password-protected and requires professional access), "User Settings," or a dedicated "Time/Date" option. Look for keywords like "Time," "Date," "Clock," or "System Clock."
Adjusting Hours, Minutes, and AM/PM: After locating the time setting, you will typically be presented with fields for hours, minutes, and sometimes AM/PM designation. You'll use the keypad's arrow keys, number keys, or specific function buttons to increment or decrement these values until they reflect the correct local time.
Setting the Date: Similarly, you'll find options to set the current date (month, day, year). This is often done in conjunction with setting the time.
Daylight Saving Time Adjustments: For DST, you'll need to manually advance or retard the clock by one hour. Some systems might have a dedicated "DST" setting that automatically handles this, while others require you to do it manually. It's crucial to perform this adjustment at the correct time (e.g., 2:00 AM on the designated Sunday).
Saving Your Changes: After making the necessary adjustments, it's vital to save your changes. This is usually done by pressing an "Enter," "Save," or "Exit" button. If you don't save, your adjustments will be lost.
Master Code vs. Installer Code: It's important to note that access to certain system settings, including potentially more advanced time configurations, might require an installer code. This code is typically reserved for ADT technicians. For standard time adjustments, your master user code should suffice. If you are unsure of your master code or cannot access the necessary menu, it's best to contact ADT support.
Example Scenario: Setting Time on an Older ADT Panel (Hypothetical - Panel Specifics Vary):
Let's imagine you have an older ADT panel. You might follow these steps:
- Press the "Menu" button.
- Enter your 4-digit master code (e.g., 1234).
- Use the arrow keys to scroll to "System Settings" and press "OK."
- Scroll to "Time & Date" and press "OK."
- The hours will flash. Use the number keys to enter the correct hour (e.g., 03 for 3 AM). Press "OK."
- The minutes will flash. Enter the correct minutes (e.g., 45). Press "OK."
- Select AM or PM if prompted. Press "OK."
- Repeat for the date (Month, Day, Year).
- Press "Exit" to save and return to the main screen.
The exact button labels and menu structure will differ. Always refer to your specific ADT panel's user manual if you have it, or contact ADT for guidance on your particular model.
While manual adjustment is a reliable method, it requires user intervention. The next sections will explore if the ADT app offers similar capabilities and how to troubleshoot if manual changes don't seem to stick.
Changing Time on ADT Panels: Step-by-Step Guides
Navigating the ADT control panel to change the time can seem daunting, but by breaking it down into specific steps for common panel types, it becomes manageable. It's crucial to remember that ADT uses various panel manufacturers and models, so the exact sequence may vary. Always have your master user code ready.
ADT Command Panel Time Adjustment
The ADT Command panel is a modern, touchscreen interface that simplifies many system settings.
- Access the Main Menu: On the touchscreen, tap the "hamburger" icon (three horizontal lines) usually located in the top-left or bottom-left corner.
- Navigate to Settings: From the menu, select "Settings."
- Enter Your Code: You will be prompted to enter your master user code or a technician code if you have one.
- Find Time & Date: Within the Settings menu, look for an option like "Time & Date," "System Time," or "General Settings." Tap on it.
- Adjust Time: You should see the current time displayed. Tap on the time to edit it. A digital keypad or a slider will appear. Adjust the hours, minutes, and AM/PM accordingly.
- Adjust Date: Similarly, you can adjust the current date (Month, Day, Year).
- Daylight Saving Time: Many ADT Command panels have an automatic DST setting. Ensure this is enabled if you want the system to adjust automatically in the spring and fall. If you need to manually adjust, you might have an option to "Set DST" or manually change the time as described above.
- Save Changes: Once you have made all the necessary adjustments, look for a "Save," "Apply," or checkmark icon, usually at the top or bottom of the screen. Tap it to confirm your changes.
ADT Control Panel (Older Models - e.g., Safewatch Pro, Vista Series)
These panels often use a keypad with physical buttons and an LCD display. The exact menu structure can vary significantly between Vista 10, 15, 20, 128, etc.
General Method (Requires Master Code):
- Enter Programming Mode: Press and hold the "1" and "3" keys simultaneously for a few seconds until the keypad beeps and displays "Installer Code" or "User Code."
- Enter Master User Code: Enter your 4-digit master user code. The system should then enter the user programming menu.
- Navigate to Time Setting: This is where it gets model-specific. You'll typically use the arrow keys (if available) or number keys to cycle through menu options. Look for an option related to "Time," "Date," or "Clock." It might be represented by a specific zone number or a menu code. For example, on some Vista panels, you might need to enter a specific zone number followed by "00" to access time settings.
- Adjust Time: Once you are in the time setting screen, the hours will likely be flashing. Use the number keys to enter the correct hour (e.g., '03' for 3 AM). Press the designated "Enter" or "OK" key.
- Adjust Minutes: The minutes will then flash. Enter the correct minutes (e.g., '45'). Press "Enter" or "OK."
- Set AM/PM: Some panels will require you to select AM or PM. Use the designated keys.
- Set Date: You will likely have a similar process for setting the month, day, and year.
- Exit Programming: To save your changes and exit the programming mode, press the "Off" or "Disarm" button, or follow the on-screen prompts for exiting. On some panels, you might need to press "Installer Code" + "99" to exit, but this is for installer programming, not user settings. For user settings, usually pressing "Off" is sufficient.
Example for a Hypothetical Vista Panel:
- Press and hold "1" and "3" until prompted for code.
- Enter Master Code (e.g., 1234).
- Press "6" (often for system settings).
- Press "5" (often for time/date).
- Enter Hour (e.g., 03). Press "OK."
- Enter Minute (e.g., 45). Press "OK."
- Select AM/PM if applicable. Press "OK."
- Enter Month (e.g., 11). Press "OK."
- Enter Day (e.g., 15). Press "OK."
- Enter Year (e.g., 26). Press "OK."
- Press "Off" to exit.
Important Considerations for Manual Adjustments:
- Master User Code: You MUST know your master user code. If you don't, you'll need to contact ADT to reset it or have a technician assist.
- User Manual: The most accurate guide will always be the user manual for your specific ADT panel model. If you don't have it, search online using your panel's model number (often found on the back or inside the panel door).
- Daylight Saving Time: Remember to adjust for DST. If your panel has an automatic DST setting, ensure it's enabled. If not, manually change the clock by one hour at 2:00 AM on the designated day.
- System Reboots: If your system experiences a power outage and reboot, it's a good time to verify the time is still correct, especially on older systems that might lose time during an outage.
If you are uncomfortable performing these steps, or if your panel's menu is not described here, it is always best to contact ADT customer support for assistance. They can guide you through the process for your specific system or schedule a technician visit.
ADT App and Remote Management: Is Time Adjustment Possible?
In today's connected world, users increasingly expect to manage their home security systems remotely via smartphone apps. The ADT app, and other remote management platforms, offer a convenient way to interact with your system. However, the ability to change the time directly through the ADT app can be limited, depending on your system's configuration and the specific app version.
ADT Command and Control App:
For users with the ADT Command and Control system, the associated mobile app provides a comprehensive suite of features. This includes arming/disarming the system, viewing event history, receiving notifications, and managing user codes. When it comes to time settings, the ADT Command and Control app generally relies on automatic synchronization.
Automatic Time Synchronization: The ADT Command system is designed to automatically sync its internal clock with reliable time sources, often through its network connection. This means that in most cases, the time displayed on your panel and accessible through the app should be accurate without manual intervention. This synchronization typically accounts for Daylight Saving Time changes as well.
Direct Time Adjustment via App:
As of 2025, the ADT Command and Control app does *not* typically offer a direct user-facing option to manually set the time or date. The system is engineered for automatic updates to ensure accuracy and reduce the potential for user error that could compromise security. If the time on your ADT Command system appears incorrect, it's usually an indication of a broader connectivity issue or a system fault rather than a setting that needs manual adjustment via the app.
What to Do if the Time is Incorrect (ADT Command App Users):
If you notice the time is incorrect on your ADT Command panel or within the app, the recommended course of action is not to try and change it via the app, but rather to:
- Check System Connectivity: Ensure your ADT Command panel is properly connected to your home Wi-Fi network and that your internet service is active. Loss of connectivity can sometimes disrupt automatic time synchronization.
- Reboot the Panel: A simple reboot of the ADT Command panel can sometimes resolve temporary glitches that might affect time synchronization. Consult your ADT Command user guide for the proper reboot procedure.
- Contact ADT Support: If the time remains incorrect after checking connectivity and rebooting, it's essential to contact ADT customer support. They can remotely diagnose potential issues with the system's connection to their servers or identify any internal system faults that might be preventing accurate timekeeping. They may need to perform a remote update or dispatch a technician.
Older ADT Systems and Remote Access:
For older ADT systems (like those based on the Honeywell Vista platform) that might have remote access capabilities through third-party apps or older ADT portals, the ability to change time settings remotely is also generally not available. These systems were primarily designed for local control via the keypad. Remote access typically focuses on arming/disarming and event history.
The Importance of Automatic Updates:
ADT's focus on automatic time synchronization for its newer systems highlights a commitment to reliability and ease of use. By removing manual time adjustments from the user's responsibility, they minimize the risk of human error and ensure that the system's critical timing functions remain accurate. This aligns with industry best practices for security systems, where precise event logging and scheduled operations are paramount.
In conclusion, while the ADT app is a powerful tool for managing your security system, direct time adjustment is not typically a feature. Instead, the system relies on automatic synchronization, and any discrepancies should be addressed by ensuring connectivity and contacting ADT support.
Troubleshooting Common Time Issues
Even with automatic synchronization, issues with your ADT system's clock can arise. These can range from minor inaccuracies to complete loss of timekeeping. Here's a guide to troubleshooting common problems, helping you get your ADT system's time back on track.
Issue 1: Time is Consistently Incorrect (e.g., Running Fast or Slow)
Possible Causes:
- Loss of Network Connection: If your system relies on network time protocol (NTP) for synchronization, a prolonged loss of internet connection can cause the clock to drift.
- System Glitch: A temporary software glitch within the control panel can affect its ability to maintain accurate time.
- Battery Issues: The main panel has a backup battery, but there's also a small internal clock battery (often a coin cell) that powers the real-time clock (RTC). If this battery is failing, the clock can become inaccurate or reset.
- Incorrect DST Settings (Manual Systems): If you have an older system that requires manual DST adjustments and it wasn't updated correctly, it will be consistently off by an hour.
Troubleshooting Steps:
- Check Internet Connection: For ADT Command systems, ensure your Wi-Fi is working and the panel is connected. Check the panel's network status in the settings.
- Reboot the Panel: Power cycle the main control panel. This involves disconnecting the AC power and then temporarily removing the backup battery. Wait a minute, then reconnect the battery and AC power. This can clear temporary software issues. (Consult your manual for the exact procedure, as improper handling can cause issues).
- Check Internal Clock Battery: This is a more advanced step and may require a technician. If the system is several years old, the internal clock battery might need replacement.
- Manually Adjust (If Applicable): If your system allows manual time setting and you suspect an issue with automatic sync, try setting the time manually as described in the previous section.
- Verify DST Settings: If your system has a DST setting, ensure it's configured correctly (auto or manual).
Issue 2: Time Resets to a Default Value (e.g., Midnight, January 1st)
Possible Causes:
- Complete Power Loss: If the system lost both AC power and its backup battery power simultaneously for an extended period, the clock might reset.
- Failing Internal Clock Battery: This is a very common cause. The internal clock battery is responsible for keeping time when the main power is off. If it's dead, the clock will reset upon any power interruption.
- System Fault: A more serious system fault could cause memory corruption or reset issues.
Troubleshooting Steps:
- Check Backup Battery: Ensure your main system backup battery is healthy and properly connected. A weak or failing backup battery might not provide sufficient power during brief AC interruptions.
- Replace Internal Clock Battery: This is the most likely culprit. For older panels, replacing the coin cell battery (e.g., CR2032) that powers the real-time clock is often necessary. This usually requires opening the panel and may be best left to a qualified technician if you are not comfortable.
- Contact ADT Support: If the issue persists after checking batteries, it may indicate a deeper system problem that requires professional diagnosis.
Issue 3: Time is Off by Exactly One Hour (Likely DST Related)
Possible Causes:
- Automatic DST Adjustment Failed: The system's automatic DST feature may not have triggered correctly.
- Manual DST Adjustment Missed: If you have a system requiring manual DST changes, it was likely forgotten.
Troubleshooting Steps:
- Check DST Setting: Navigate to your system's time settings and verify the DST option. If it's set to automatic, ensure it's enabled.
- Manual Adjustment: If automatic DST is not an option or failed, manually adjust the clock forward or backward by one hour as needed. Follow the steps outlined in the "Manual Time Adjustment Methods" section.
- Consult ADT: If you're unsure about your system's DST capabilities, contact ADT.
Issue 4: Time Sync Errors Displayed on Panel
Possible Causes:
- Network Connectivity Problems: The panel cannot reach the time server.
- Firewall Restrictions: Your home router's firewall might be blocking the NTP port (usually UDP 123).
- ADT Server Issues: Less commonly, ADT's time servers might be experiencing issues.
Troubleshooting Steps:
- Verify Network: Ensure your home internet is working and the ADT panel is connected to your Wi-Fi network.
- Check Router Settings: If you are technically inclined, check your router's firewall settings to ensure NTP traffic is allowed.
- Contact ADT Support: This is often the most efficient solution. ADT can check the status of their time servers and guide you through network-specific troubleshooting.
When troubleshooting, always start with the simplest solutions (checking connections, rebooting) before moving to more complex ones (battery replacement). If at any point you feel uncomfortable or unsure, it's always best to contact ADT professional support.
Advanced Settings and Considerations
Beyond simply changing the hour and minute, your ADT alarm system's time settings can have implications for more advanced features and require specific considerations. Understanding these can help you leverage your system more effectively and prevent potential issues.
Time Zones and Geographic Location
Your ADT system needs to know your local time zone to display the correct time and log events accurately relative to your location.
- Automatic Time Zone Setting: Newer systems, especially those connected to the internet, often attempt to automatically detect your time zone based on your location or network information. This is generally reliable, but it's good practice to verify it, especially if you travel or have recently moved.
- Manual Time Zone Selection: If your system doesn't auto-detect or if the detection is incorrect, you may need to manually select your time zone within the system's settings. This is usually found in the same menu as the time and date settings. Selecting the correct time zone is crucial for accurate scheduling and event logging. For instance, if you live in a border region with multiple time zones, ensuring the correct one is selected prevents confusion.
- Impact on Schedules: Incorrect time zone settings will directly impact any automated arming/disarming schedules you have programmed. A schedule set for 7:00 AM might execute at 6:00 AM or 8:00 AM if the time zone is wrong.
Daylight Saving Time (DST) Protocols
ADT systems handle DST in various ways:
- Automatic DST Adjustment: Most modern ADT systems (like ADT Command) are programmed to automatically adjust for DST based on regional conventions. This typically happens at 2:00 AM on the designated Sundays in spring and fall. Ensure this feature is enabled if available.
- Manual DST Adjustment: Older systems or those without internet connectivity may require manual adjustment. This means you must remember to change the clock forward or backward by one hour at the appropriate times. Failure to do so will result in the system being consistently off by an hour during DST periods.
- Regional Variations: Be aware that not all regions observe DST. If you live in an area that does not change its clocks, ensure any automatic DST feature is disabled to prevent incorrect adjustments.
- Scheduling DST Changes: Some advanced systems might allow you to schedule DST changes, but this is rare for end-users. For most, it's either automatic or manual.
System Logs and Event Timestamps
The accuracy of timestamps in your system logs is directly tied to the accuracy of the system clock.
- Forensic Importance: In the event of a security incident, precise timestamps are critical for investigations. They help determine the sequence of events, identify potential tampering, and corroborate witness accounts. An inaccurate clock can render log data unreliable for legal or insurance purposes.
- Troubleshooting: When ADT technicians or you troubleshoot system issues, the event log is a primary resource. Accurate timestamps allow for efficient diagnosis by correlating different events.
- Synchronization with ADT Servers: ADT's central monitoring station also relies on synchronized time. While they use their own highly accurate time sources, ensuring your system's clock is aligned minimizes discrepancies in reported event times.
Power Outages and Battery Backup
Your ADT system has a primary backup battery to maintain operation during power outages. However, the real-time clock (RTC) function often relies on a separate, smaller battery or capacitor.
- Main Backup Battery: This powers the entire system during an AC outage. Its lifespan is typically several hours, depending on system load.
- RTC Battery/Capacitor: This small component is dedicated to keeping the clock running when the main power is off. If this fails, the clock will reset upon any significant power interruption. This is a common point of failure in older systems.
- Impact of Extended Outages: If a power outage exceeds the capacity of the main backup battery, the system will shut down. If the RTC battery is also depleted or failing, the clock will reset when power is restored.
System Updates and Firmware
ADT periodically releases firmware updates for its control panels. These updates can sometimes include improvements to time synchronization protocols or DST handling.
- Automatic Updates: Many modern systems receive updates automatically over the network. Ensure your system is connected to receive these beneficial updates.
- Manual Updates: In some cases, firmware updates might require a technician to perform them.
- Impact on Time Settings: While rare, a major firmware update could potentially reset certain system settings, including time configurations. It's always wise to verify the time after a significant system update.
By understanding these advanced settings and considerations, you can better manage your ADT system's timekeeping, ensure accurate logging, and optimize the performance of automated features.
Future-Proofing Your ADT Time Settings
Ensuring your ADT alarm system's time remains accurate and reliable in the long term involves a proactive approach. As technology evolves and your needs change, certain practices can help future-proof your system's timekeeping capabilities.
Embrace Automatic Synchronization
The most significant step towards future-proofing is to utilize systems that offer automatic time synchronization.
- Modern Systems: If you are considering upgrading or installing a new ADT system, prioritize models like the ADT Command, which are designed with robust automatic time syncing capabilities. These systems leverage network time protocols (NTP) or other reliable sources to maintain accuracy without user intervention.
- Internet Connectivity: Ensure your system remains connected to your home's internet service. This is the backbone for automatic time updates and firmware patches that can improve timekeeping accuracy.
- Disable Manual DST (If Possible): If your system offers automatic DST adjustments, ensure this feature is enabled and your location settings are correct. This eliminates the need for you to remember the biannual clock changes.
Regular System Health Checks
Proactive maintenance can prevent time-related issues before they become critical.
- Periodic Review: Make it a habit to glance at your ADT panel's time display periodically (e.g., monthly) and compare it to your phone or computer. This quick check can catch any minor drift early.
- Battery Maintenance: The backup battery for your main panel and the internal clock battery are crucial. While ADT systems typically alert you when the main backup battery is low, the internal clock battery may not. If your system is several years old (5+ years), consider having the internal clock battery checked or replaced proactively, especially if you notice time resets after power interruptions.
- Firmware Updates: Ensure your system is configured to receive automatic firmware updates. These updates often contain bug fixes and performance enhancements related to system timing and synchronization.
Understand Your System's Capabilities
Knowledge is power when it comes to managing your security system.
- Know Your Panel Model: Familiarize yourself with your specific ADT panel model. Knowing its capabilities (automatic DST, network sync) will help you understand its limitations.
- Consult User Manuals: Keep your user manual accessible. It's the definitive source for how your system handles time and other settings.
- ADT Support Resources: Utilize ADT's online resources and customer support. They can provide information specific to your system and advise on best practices.
Plan for the Future of Timekeeping
While less common for consumer security systems, future changes in timekeeping standards could theoretically impact systems.
- Stay Informed: While unlikely to affect most users directly in the short term, be aware of any significant global discussions or changes regarding timekeeping standards (e.g., potential elimination of DST). ADT would likely update its systems accordingly.
- System Longevity: When choosing a security system, consider its expected lifespan and the manufacturer's commitment to ongoing support and updates. A system that is regularly updated is more likely to remain compatible with future timekeeping protocols.
Consider Integrated Smart Home Solutions
As smart home technology advances, the integration between your security system and other devices becomes more sophisticated.
- Synchronized Ecosystem: Ensure that if you integrate your ADT system with other smart home hubs or devices, their time synchronization mechanisms are compatible. A unified time source across all connected devices ensures seamless automation and reliable operation of complex routines.
- Voice Assistant Integration: If you use voice assistants (like Alexa or Google Assistant) to interact with your ADT system, ensure their time references are accurate to avoid command failures.
By adopting these strategies, you can ensure that your ADT alarm system's clock remains a reliable component of your home security, providing accurate timestamps and dependable scheduling for years to come. Proactive management and leveraging modern, automated features are key to future-proofing your ADT time settings.
In conclusion, mastering how to change the time on your ADT alarm system is an essential skill for any homeowner. Whether you're dealing with the straightforward interface of a modern ADT Command panel or the more intricate steps of an older system, understanding the process ensures your security operates with precision. We've covered the importance of accurate timekeeping for event logging, scheduling, and communication with ADT's monitoring centers. You've learned the manual adjustment methods, step-by-step guides for common panels, and the role of the ADT app in time management, which primarily relies on automatic synchronization. Furthermore, we've equipped you with troubleshooting tips for common issues and highlighted advanced considerations like time zones and DST. By following these guidelines and embracing automatic synchronization features, you can confidently manage your ADT system's clock, ensuring optimal performance and peace of mind.


