Adjusting the time on your ADT alarm panel is a straightforward process that ensures your system accurately logs events, adheres to schedules, and functions optimally. This guide provides a comprehensive walkthrough, covering common scenarios and specific panel types for 2025-26.
Understanding ADT Time Settings
Your ADT alarm panel's internal clock is more than just a display; it's a critical component that governs the timing of various system functions. From logging alarm events with precise timestamps to managing scheduled arming and disarming, the accuracy of this clock is paramount for effective security monitoring and system management. In 2025-26, with the increasing integration of smart home technology and remote access, the precise synchronization of your alarm system's time with real-world events is more important than ever. An incorrect time can lead to confusion during emergencies, inaccurate historical data for review, and potential conflicts with automated routines. Understanding how this time is set and maintained is the first step to ensuring your ADT system operates flawlessly.
The Importance of Accurate Timekeeping
The primary function of an alarm system is to detect and report security breaches. When an event occurs – a sensor is tripped, a panic button is pressed, or a system fault is detected – the panel records the exact time of that event. This timestamp is crucial for several reasons:
- Emergency Response: In the event of an actual emergency, law enforcement or ADT monitoring personnel rely on accurate timestamps to understand the sequence of events, which can be vital for response strategies and investigations.
- System Diagnostics and Troubleshooting: When troubleshooting system issues, reviewing the event log with accurate times helps pinpoint when a problem began or when specific actions were taken.
- Scheduled Operations: Many modern ADT systems allow for scheduled arming and disarming, or the activation of specific features at certain times. An incorrect clock can disrupt these automated functions.
- User Accountability: For businesses or larger households, accurate time logs can help track who armed or disarmed the system and when.
- Integration with Smart Home Devices: As ADT systems increasingly integrate with other smart home devices, accurate time synchronization ensures seamless operation and automation across platforms. For instance, if your alarm system is set to disarm automatically when your smart lock indicates you've arrived home, precise timing is essential.
How ADT Panels Typically Set Time
ADT alarm panels, depending on their model and installation, can receive time synchronization in a few primary ways:
- Manual Setting: The most direct method, where a user or installer manually inputs the correct date and time via the panel's keypad or interface.
- Network Time Protocol (NTP): For IP-connected panels (common in newer installations in 2025-26), the system can automatically synchronize its clock with internet time servers. This is the most reliable method for maintaining accuracy.
- Cellular/Radio Signal: Some older or specialized systems might receive time updates through their cellular or radio communication modules.
The method used often depends on the panel's capabilities and how it's configured by the ADT technician during installation. Understanding your specific panel's capabilities is key to knowing the best way to manage its time settings.
Why You Might Need to Change Your ADT Alarm Panel Time
While ADT alarm panels are designed for robust and continuous operation, there are several common scenarios that necessitate adjusting the system's time. Recognizing these situations will help you proactively maintain your system's accuracy and functionality throughout 2025-26.
Daylight Saving Time (DST) Adjustments
This is perhaps the most frequent reason for needing to change the time on your alarm panel. Both in the spring (when clocks spring forward) and in the fall (when clocks fall back), your ADT system's clock will need to be adjusted to remain synchronized with local time. While some modern, internet-connected panels might automatically adjust for DST if configured correctly, older models or those without automatic updates will require manual intervention. Failing to adjust for DST can lead to confusion regarding when the system is armed or disarmed, and can affect any scheduled events.
Power Outages and System Resets
Significant power outages, especially those that lead to a complete system shutdown and subsequent reboot, can sometimes cause the internal clock of your alarm panel to lose its time setting. While most panels have a battery backup to maintain essential functions, the clock might be a component that requires re-synchronization after a prolonged or deep power disruption. If your system has been offline for an extended period, it's a good practice to verify and reset the time once power is restored.
Installation or Service Updates
Following a new installation, a system upgrade, or even routine maintenance by an ADT technician, it's always wise to confirm that the time on your panel is set correctly. While technicians strive for accuracy, occasional oversights can occur. Verifying the time ensures that all system functions, especially those related to scheduling or event logging, are accurate from the outset.
Relocation or Travel
If you've moved your ADT system to a new location within a different time zone, or if you're traveling and using a portable system (less common for ADT but possible with some integrated solutions), you will absolutely need to update the time zone and clock settings. Even within the same time zone, if your system was moved and reinstalled, a time reset might be necessary.
System Malfunctions or Glitches
Although rare, electronic devices can sometimes experience glitches. If you notice that your ADT panel's clock is consistently running fast, slow, or has suddenly jumped to an incorrect time, it might indicate a minor system malfunction. In such cases, resetting the time is often the first troubleshooting step. If the problem persists, it may require a service call from ADT.
Integration with Other Smart Devices
As smart home ecosystems become more interconnected, the precise timing of your security system can impact other devices. For example, if you have a rule set up where your lights turn on when your alarm is disarmed, and the disarming event is logged with an incorrect time, this automation might not trigger as expected or at the right moment. Ensuring your ADT panel's time is accurate is crucial for the seamless operation of your entire smart home.
General Steps to Change ADT Alarm Panel Time
While specific button sequences and menu navigation can vary significantly between ADT panel models, the fundamental process for changing the time on most ADT alarm systems follows a general pattern. This section outlines these common steps, applicable to a wide range of ADT security panels in 2025-26. Always refer to your specific panel's user manual for precise instructions.
Accessing the System Menu
The first step is almost always to enter the system's programming or installer menu. This usually requires a specific code or sequence of button presses.
- Installer Code: Most ADT panels are programmed with an installer code, which is different from the user's master code. This code is typically required to access advanced settings like time and date. If you don't know the installer code, you will likely need to contact ADT for assistance.
- User Code (Limited Access): Some panels might allow basic time adjustments using the master user code, but this is less common for full date and time programming.
- Button Sequences: Some older panels might require pressing a combination of buttons simultaneously or in a specific order to enter programming mode.
Example: On many systems, you might need to press and hold a specific button (like '2' or '0') while entering your installer code.
Navigating to Time and Date Settings
Once you've accessed the programming menu, you'll need to navigate through various options to find the time and date settings. This is usually done using the arrow keys, the number pad, or specific function keys on the keypad.
- Menu Structure: Look for options like "System Settings," "Date & Time," "Clock," or "Programming."
- Field Selection: You'll likely encounter fields for hours, minutes, AM/PM (or 24-hour format), month, day, and year.
Example: After entering the installer code, you might see a prompt like "Installer Menu." You would then navigate to an option labeled "System Settings" and then select "Time/Date."
Entering the Correct Time and Date
With the time and date fields selected, you'll use the keypad to input the current, correct information.
- Format: Pay close attention to the required format (e.g., MM/DD/YY for date, HH:MM for time). Some systems use a 12-hour format with AM/PM indicators, while others use a 24-hour format.
- AM/PM: If using a 12-hour format, ensure you select the correct AM or PM designation.
- Daylight Saving Time: Some panels have a specific setting for DST. If available, ensure it's configured correctly (often set to "Auto" or requires manual toggling when DST begins/ends).
Example: To set the time to 3:45 PM on October 26, 2025, you might enter "03" for hours, "45" for minutes, and then select "PM." For the date, you might enter "10" for month, "26" for day, and "25" for year.
Saving Your Changes
After entering the correct time and date, it's crucial to save your changes. Failure to do so will result in the panel reverting to its previous settings.
- Exit/Save Command: Look for an "Exit," "Save," "Done," or similar command. This might involve pressing a specific key (like 'Enter' or '#') or navigating to an "Exit Programming" option.
- Confirmation: The panel may provide a confirmation message or beep to indicate that the changes have been successfully saved.
Example: After inputting the time and date, you might press the '#' key to exit programming mode and save the settings.
Verifying the New Time
The final and most important step is to verify that the time has been set correctly.
- Check the Display: Look at the main display of your ADT alarm panel to see if the current time and date are shown accurately.
- Review Event Log: If possible, access the system's event log and check the timestamp of the most recent event (e.g., when you exited programming mode). This provides a definitive confirmation.
Example: After saving, observe the panel's idle screen to ensure the clock is ticking correctly and showing the right time.
Important Considerations:
- User Manual: Always prioritize the instructions in your specific ADT panel's user manual.
- Installer Code: If you do not have the installer code, you will need to contact ADT. Attempting to guess or bypass security codes can lock you out of the system or void warranties.
- System Type: The complexity of these steps can vary greatly. Simpler systems might have a dedicated "Set Time" button, while more advanced systems require deep menu navigation.
Specific ADT Panel Models and Time Adjustment
ADT offers a range of alarm panels, and the method for changing the time can differ between them. Understanding your specific model is key to a smooth adjustment. Here, we'll look at common ADT panel series and their typical time-setting procedures for 2025-26.
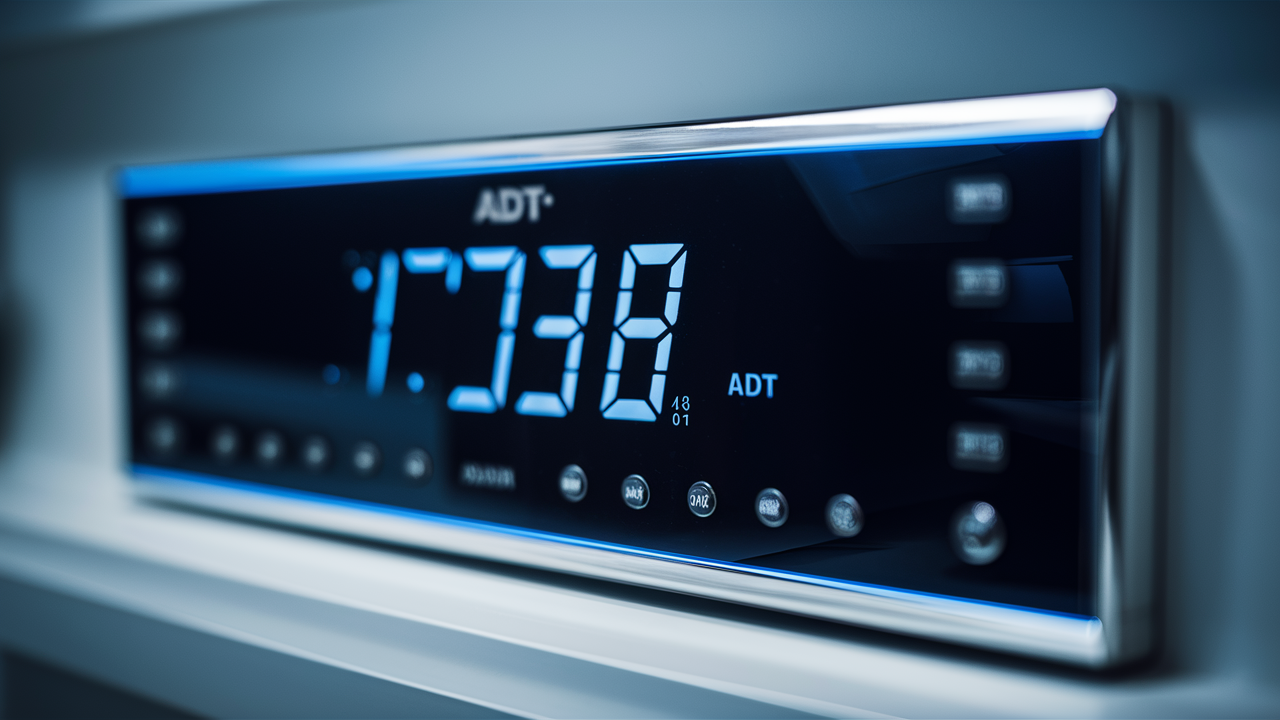
ADT Command & Control Panels (e.g., ADT Command)
These are modern, touchscreen-enabled systems that often integrate with smart home features.
Steps for ADT Command:
- Access Settings: On the main touchscreen interface, tap the "Settings" icon (often a gear or wrench).
- Enter Master Code: You will likely be prompted to enter your master user code.
- Navigate to Date & Time: Look for a menu option like "System Settings" or "General Settings," and then select "Date & Time" or "Clock."
- Adjust Time and Date: Use the on-screen controls (often sliders or number input fields) to set the correct hour, minute, AM/PM, and date.
- Daylight Saving Time: Ensure the "Automatic Daylight Saving Time" setting is enabled if available.
- Save: Tap "Save" or "Done" to confirm your changes.
Note: These panels often sync with network time if connected to Wi-Fi, which can automatically handle DST. If not connected, manual adjustment is required.
ADT Safewatch / Honeywell Vista Panels (e.g., Vista 20P, Vista 15P)
These are traditional keypads with alphanumeric displays, common in many ADT installations.
Steps for Vista Panels (using keypad):
- Enter Programming Mode: Press and hold the '2' key for two seconds, then enter the installer code (default is often 4112, but ADT may change this).
- Navigate to Time Setting: Once in installer programming, you'll typically need to enter a zone or field number. For time, this is often field `05` (for time) and `06` (for date). Enter `*15` to set time.
- Set Time: Enter the time in HH:MM format (24-hour clock). For example, 3:45 PM would be entered as `1545`.
- Set Date: Enter the date in MM/DD/YY format. For example, October 26, 2025, would be `102625`.
- Exit Programming: Press the '#' key twice to exit programming mode and save settings.
Note: Some Vista panels may have specific programming options for DST. Consult your panel's specific programming guide.
ADT Pulse Systems
ADT Pulse systems often combine a physical panel with a mobile app for control.
Steps for ADT Pulse:
- Via the ADT Pulse App:
- Open the ADT Pulse mobile app.
- Navigate to "System" or "Devices."
- Select your security panel.
- Look for "Settings" or "Configuration."
- Find "Date & Time" or "Time Zone" settings.
- Adjust the time zone or manually set the time if prompted.
- Save changes.
- Via the Panel (if applicable): Some Pulse panels have a touchscreen interface similar to ADT Command. Follow the steps outlined for ADT Command panels.
Note: ADT Pulse systems typically rely on network time synchronization, so ensuring your system is connected to the internet is crucial for automatic time updates and DST adjustments.
ADT Encore Panels
These systems might be found in older installations.
Steps for ADT Encore (typical):
- Access Menu: Look for a "Menu" button or a sequence to enter programming.
- Enter User Code: You may need to enter your master user code.
- Find Time Settings: Navigate through menus like "Settings," "System Options," or "Clock."
- Adjust Time: Use arrow keys or number pad to set hours, minutes, and AM/PM.
- Save: Confirm changes.
Note: For older panels like Encore, manual adjustment is almost always required.
Comparison of Time Setting Methods
Here's a simplified comparison for 2025-26:
| Panel Type | Primary Method | DST Handling | Ease of Adjustment |
|---|---|---|---|
| ADT Command | Touchscreen (App/Panel) | Automatic (if networked) or Manual | High |
| Safewatch/Vista | Keypad (Installer Code) | Manual or Specific Programming | Medium |
| ADT Pulse | Mobile App / Networked Panel | Automatic (if networked) | High |
| ADT Encore (older) | Keypad (User/Installer Code) | Manual | Medium to Low |
Crucial Advice: Always consult your specific ADT panel's user manual or the documentation provided by ADT. If you are unsure about any step, especially when dealing with installer codes or programming menus, it is best to contact ADT customer support. Incorrect programming can lead to system malfunctions.
Troubleshooting Common Time Setting Issues
Even with clear instructions, you might encounter issues when trying to change the time on your ADT alarm panel. This section addresses common problems and provides solutions for 2025-26.
Installer Code Issues
Problem: The panel does not accept the installer code, or you don't know it.
- Solution: ADT typically assigns a unique installer code during installation. If you don't have it, you must contact ADT. They will either provide it (if you are the account holder and verify your identity) or schedule a technician to make the adjustment. Do not attempt to guess installer codes repeatedly, as this can lock the system.
- Note: The default installer code (like 4112 for Vista) is often changed by ADT for security reasons.
Inability to Access Programming Mode
Problem: You follow the steps, but the panel doesn't enter programming mode.
- Solution:
- Verify the Sequence: Double-check the exact button presses and hold times required for your specific model. Even a slight deviation can prevent entry.
- Check User Code Restrictions: Some systems may restrict access to programming mode based on the user code entered. Ensure you are using the correct code (usually the installer code for advanced settings).
- System Lockout: If too many incorrect attempts have been made, the system might be temporarily locked. Wait a period (e.g., 15-30 minutes) and try again.
- Contact ADT: If all else fails, ADT support or a technician is the best recourse.
Time Not Saving or Reverting
Problem: You enter the correct time, save it, but the panel reverts to the old time or an incorrect time shortly after.
- Solution:
- Incomplete Save: Ensure you are completing the save/exit procedure correctly. Sometimes a specific key press (like '#') needs to be held or pressed multiple times.
- Battery Issues: The system's backup battery might be failing. A weak backup battery can sometimes cause settings to be lost after power interruptions or even during normal operation. If your system is old, consider having the battery checked.
- Panel Malfunction: In rare cases, the panel's internal memory or clock module might be faulty. This would require a service call from ADT.
- Network Sync Conflicts: If the panel is networked and configured for automatic time updates, it might be trying to resync with an incorrect time source, overriding your manual setting. Check network settings and time server configurations if applicable.
Incorrect AM/PM or 24-Hour Format
Problem: The time is displayed in the wrong format (e.g., 15:00 instead of 3:00 PM, or vice versa).
- Solution: This is usually a setting within the programming menu. Look for an option related to "Time Format" or "12/24 Hour." Adjust this setting to your preferred format and save. For example, on some Vista panels, field `07` controls this.
Daylight Saving Time Not Adjusting Automatically
Problem: The panel did not automatically adjust for DST.
- Solution:
- Check DST Setting: Verify that the "Automatic Daylight Saving Time" or similar setting is enabled in the panel's programming.
- Network Connection: Ensure the panel is properly connected to the internet or its time source. Automatic DST adjustments often rely on network synchronization.
- Manual Adjustment: If automatic adjustment isn't an option or isn't working, you'll need to manually adjust the time as described in the general steps.
Time Drifting (Running Fast or Slow)
Problem: The panel's clock consistently runs fast or slow.
- Solution: This is often indicative of a hardware issue with the panel's internal clock or a power regulation problem.
- Check Power Supply: Ensure the panel is receiving stable power.
- Battery Check: A failing backup battery can sometimes lead to erratic behavior.
- Contact ADT: This type of issue usually requires professional diagnosis and repair by an ADT technician.
General Troubleshooting Tips:
- Restart the System: Sometimes, a simple system reboot can resolve minor glitches. This usually involves disconnecting AC power and briefly removing the backup battery, then reconnecting them in reverse order. Consult your manual for the correct reboot procedure.
- Document Everything: Keep notes of the codes you use, the menu options you navigate, and the settings you change. This is invaluable if you need to contact ADT support.
- Stay Calm: Troubleshooting can be frustrating, but approaching it methodically will yield better results.
Preventative Measures and Best Practices for ADT Time Settings
Maintaining accurate time on your ADT alarm panel is crucial for its effective operation. By adopting a few preventative measures and best practices, you can minimize the need for frequent adjustments and ensure your system is always reliable in 2025-26.
Regular System Checks
Make it a habit to glance at your ADT panel's display periodically. This quick check can help you spot any time discrepancies early on, before they become a problem.
- Weekly Glance: Simply observe the time displayed on your keypad or touchscreen at least once a week.
- After Power Events: Always check the time after any significant power outage or interruption.
Understand Your Panel's Capabilities
Familiarize yourself with whether your ADT panel supports automatic time synchronization (via network) or if it relies solely on manual input.
- Networked Systems: If your panel is connected to the internet, ensure this connection is stable. Networked systems often sync with Network Time Protocol (NTP) servers, which automatically handle time zone and DST changes.
- Manual Systems: For panels that require manual input, be prepared to make adjustments at the start and end of Daylight Saving Time.
Keep Your User Manual Handy
The user manual for your specific ADT panel is your most valuable resource. It contains detailed instructions for all system functions, including time settings.
- Digital Copies: Many manuals are available online on the ADT website or the manufacturer's site (e.g., Honeywell). Save a digital copy for easy access.
- Physical Copy: Keep the printed manual in a safe, accessible place.
Schedule DST Adjustments
If your system requires manual DST adjustments, mark your calendar for the dates when clocks spring forward and fall back. This proactive approach prevents you from forgetting the change.
- Calendar Reminders: Set up digital or physical calendar reminders for the weekends when DST changes occur.
- Note the Times: Be aware of whether the change happens at 2 AM or another specific time.
Maintain System Power
Ensure your ADT panel has a reliable power source and a healthy backup battery.
- AC Power: Verify that the transformer is plugged in and functioning correctly.
- Backup Battery: ADT alarm system backup batteries typically last 3-5 years. If your system is older or you've experienced frequent power interruptions, consider having the battery tested or replaced by ADT. A failing battery can lead to various system issues, including timekeeping problems.
Know When to Call ADT
While many time adjustments can be done by the user, some situations require professional intervention.
- Unknown Installer Code: If you don't have the installer code and need to access programming.
- Persistent Issues: If the time keeps reverting, the clock drifts significantly, or you suspect a hardware malfunction.
- System Lockout: If you've inadvertently locked yourself out of the system.
- Uncertainty: If you are uncomfortable performing any of the programming steps.
A proactive approach, combined with a good understanding of your system, will ensure your ADT alarm panel's time is always accurate, contributing to your overall home security.
Conclusion: Mastering Your ADT System's Time
Effectively managing the time on your ADT alarm panel is a fundamental aspect of maintaining a secure and efficiently operating home security system. As we've explored throughout this comprehensive guide for 2025-26, the accurate synchronization of your panel's clock impacts everything from emergency response logging to the reliability of automated schedules and smart home integrations. Whether you're adjusting for Daylight Saving Time, recovering from a power outage, or simply ensuring optimal performance, understanding the general steps and specific nuances of your ADT panel model is key.
We've detailed how to access programming modes, navigate menus, input correct time and date information, and crucially, save your changes. We also delved into troubleshooting common issues like forgotten installer codes and persistent time-setting problems, emphasizing the importance of consulting your user manual and knowing when to seek professional assistance from ADT. By implementing the preventative measures and best practices discussed, such as regular system checks and understanding your panel's capabilities, you empower yourself to keep your system running smoothly. Mastering your ADT system's time settings is not just about convenience; it's about ensuring the integrity and responsiveness of your security at all times.


