Thinking about upgrading your home security with a Ring Video Doorbell? This guide provides a comprehensive, step-by-step walkthrough on how to install your Ring Camera Doorbell, ensuring a secure and functional setup. We cover everything from choosing the right model to troubleshooting common issues, empowering you to complete the installation with confidence.
Understanding Ring Doorbells: Choosing the Right Model
The Ring ecosystem offers a variety of video doorbells, each designed to meet different needs and installation preferences. Understanding these differences is crucial for a smooth installation process and optimal performance. As of 2025, Ring continues to innovate, offering enhanced features like improved motion detection, clearer audio, and longer battery life.
Key Ring Doorbell Series
Ring's product line can be broadly categorized into a few main series:
- Ring Video Doorbell (Entry-Level): This is often the most affordable option, typically battery-powered, and provides essential features like HD video, two-way talk, and motion detection. It's a great starting point for those new to smart doorbells.
- Ring Video Doorbell 3/3 Plus: These models offer enhanced features over the basic version, including improved Wi-Fi connectivity, customizable motion zones, and the "Plus" version often includes a built-in privacy guard. They can be battery-powered or hardwired.
- Ring Video Doorbell 4: This iteration builds upon the previous models, often featuring color night vision and a quick-release rechargeable battery pack for easier charging. It supports both battery and wired power.
- Ring Video Doorbell Pro/Pro 2: These are the premium, wired-only options. They boast advanced features such as 3D Motion Detection for more precise alerts, dual-band Wi-Fi, and often higher resolution video. The Pro 2 introduces features like radar-based motion detection and a wider field of view.
- Ring Door View Cam: This unique model is designed for apartments or homes where traditional doorbell wiring isn't feasible. It replaces an existing peephole and is entirely battery-powered.
Factors to Consider When Choosing
Before you begin your "how to install a Ring Camera Doorbell" journey, consider these factors:
- Power Source: Do you have existing doorbell wiring, or will you need a battery-powered option? Wired doorbells offer continuous power, while battery-powered ones offer flexibility but require periodic charging or battery replacement.
- Connectivity: Ensure your Wi-Fi signal is strong enough at your front door. Some models offer dual-band Wi-Fi (2.4GHz and 5GHz) for better performance.
- Features: What features are most important to you? Consider motion detection capabilities (zones, 3D motion), video resolution, night vision quality (color vs. black and white), and field of view.
- Installation Complexity: If you're not comfortable with basic electrical work, a battery-powered model might be simpler.
- Budget: Prices vary significantly across the Ring Doorbell lineup.
For 2025, Ring has seen a significant uptake in users opting for the battery-powered options due to their ease of installation and flexibility, especially in older homes or rental properties. However, for users seeking the most advanced features and a seamless, uninterrupted power supply, the wired Pro models remain the top choice.
Preparation: What You Need Before You Start
A successful Ring Doorbell installation hinges on thorough preparation. Gathering all necessary tools and understanding the process beforehand will save you time and frustration. This section covers everything you'll need to have on hand.
Essential Tools and Materials
Regardless of the model you choose, some basic tools are universally required:
- Drill with various drill bits: For pilot holes and mounting screws.
- Screwdriver set: Phillips head and flathead screwdrivers are essential.
- Level: To ensure your doorbell is mounted straight.
- Pencil: For marking drilling points.
- Wire strippers (for wired installations): If you need to expose wire ends.
- Wire nuts (for wired installations): To connect doorbell wires securely.
- Hammer: For gently tapping in anchors.
- Safety glasses: Always protect your eyes when drilling.
- Ladder (if mounting high): Ensure it's stable and used safely.
- Your Ring Doorbell kit: This will include the doorbell itself, mounting bracket, screws, anchors, and often a screwdriver.
- Smartphone or tablet: For downloading the Ring app and completing the setup.
- Wi-Fi network name (SSID) and password: You'll need these to connect the doorbell to your network.
Understanding Your Existing Doorbell Wiring (for Wired Installations)
If you're opting for a wired installation, it's crucial to understand your existing doorbell system.
- Transformer Voltage: Ring doorbells typically require a transformer that outputs between 16-24V AC. You can usually find the voltage printed on your existing doorbell transformer, often located near your breaker box or in your basement/attic. If your transformer is below this range, you may need to replace it.
- Chime Compatibility: Most Ring doorbells are compatible with existing mechanical or digital chimes. However, some older or unusually wired chimes might not work. The Ring app provides a compatibility checker.
Downloading the Ring App
The Ring app is your command center for setup, monitoring, and managing your doorbell.
- Download the Ring app from the App Store (iOS) or Google Play Store (Android).
- Create a Ring account or log in if you already have one.
- Follow the in-app prompts to add a new device.
Testing Your Wi-Fi Signal
A weak Wi-Fi signal at the installation location is a common cause of performance issues.
- Use your smartphone to check the Wi-Fi signal strength at the exact spot where the doorbell will be mounted.
- If the signal is weak (one or two bars), consider repositioning your router, using a Wi-Fi extender, or upgrading to a mesh Wi-Fi system. For 2025, mesh systems are increasingly popular for ensuring robust connectivity for smart home devices.
Installation Methods: Wired vs. Battery-Powered
The primary distinction in how to install a Ring Camera Doorbell lies in its power source: wired or battery-powered. Each method has its own set of advantages, disadvantages, and installation steps. Understanding these differences will help you choose the best approach for your home.
Wired Installation
Wired Ring Video Doorbells connect directly to your home's existing doorbell wiring. This provides a continuous power supply, eliminating the need for battery charging.
- Pros: Continuous power, no battery charging required, often offers more advanced features (like the Pro models), can power your existing chime.
- Cons: Requires existing doorbell wiring, can be more complex to install if wiring is faulty or non-existent, transformer voltage needs to be compatible.
Battery-Powered Installation
Battery-powered Ring Video Doorbells use a rechargeable battery pack. This offers the most flexibility in placement, as you don't need to worry about proximity to existing wiring.
- Pros: Easy installation, no need for existing wiring, flexible placement, ideal for apartments or renters.
- Cons: Battery needs to be recharged periodically (frequency depends on usage and settings), may have slightly fewer advanced features compared to top-tier wired models, won't power a traditional chime without an add-on.
Hybrid Models
Some Ring Doorbell models (like the Ring Video Doorbell 3, 4, and some versions of the standard Video Doorbell) offer a hybrid approach. They come with a battery pack but can also be hardwired. If hardwired, the battery acts as a backup power source. This offers the best of both worlds: flexibility and continuous power.
Choosing the Right Method for You
The choice between wired and battery-powered largely depends on your home's infrastructure and your comfort level with DIY electrical work.
- If you have existing doorbell wiring that functions correctly and you want the most seamless experience, a wired installation is recommended.
- If you don't have existing wiring, or if you want maximum flexibility in placement, a battery-powered model is the way to go.
- If you have wiring but want the option of easy battery replacement or backup, consider a hybrid model.
As of 2025, the market sees a strong demand for hybrid models, catering to homeowners who appreciate the convenience of battery power but also want the option to hardwire for uninterrupted power.
Wired Installation Guide
Installing a wired Ring Video Doorbell requires a bit more technical know-how, but by following these steps carefully, you can achieve a professional and secure installation. This guide assumes you have existing doorbell wiring in place.
Step 1: Turn Off Power
Crucially, before you begin any work on your doorbell wiring, you must turn off the power to your doorbell circuit at your home's breaker box. Failure to do so can result in electric shock or damage to your Ring device.
- Locate your breaker box.
- Identify the breaker that controls your doorbell circuit (it might be labeled "Doorbell," "Chime," or be part of a general lighting circuit).
- Flip the breaker to the "OFF" position.
- Test your existing doorbell button to ensure the power is indeed off.
Step 2: Remove Your Existing Doorbell Button
- Carefully unscrew and remove your old doorbell button from the wall.
- You will see two wires connected to the back of the button.
- Gently disconnect these wires. They are usually held in place by screws.
Step 3: Install the Ring Mounting Bracket
- Hold the Ring mounting bracket against the wall where your old doorbell was located.
- Use a level to ensure the bracket is perfectly straight.
- Mark the screw hole positions on the wall with a pencil.
- If you are mounting on brick, stucco, or concrete, you will need to drill holes and insert the provided anchors. Use a drill bit appropriate for the anchors.
- If mounting on wood or siding, you may be able to screw directly into the surface, but pilot holes are recommended.
- Feed the existing doorbell wires through the large opening in the center of the Ring mounting bracket.
- Secure the mounting bracket to the wall using the provided screws.
Step 4: Connect the Wires
This is a critical step. You will connect the two existing doorbell wires to the terminals on the back of your Ring Video Doorbell.
- Ensure the power is still OFF.
- Loosen the terminal screws on the back of your Ring Doorbell.
- Wrap one doorbell wire around each terminal screw. It doesn't matter which wire goes to which terminal.
- Tighten the terminal screws securely to ensure a good connection.
- If the wires are too short or the ends are frayed, use wire strippers to expose about half an inch of fresh wire before connecting.
Step 5: Mount the Ring Doorbell
- Carefully align the Ring Doorbell with the mounting bracket.
- Push the doorbell onto the bracket until it clicks into place.
- Secure the doorbell to the bracket using the small security screw at the bottom. The Ring kit usually includes a special screwdriver for this.
Step 6: Restore Power
- Go back to your breaker box and turn the power back ON for the doorbell circuit.
- The Ring Doorbell should power up. The light on the front will typically pulse or change color to indicate it's booting up.
Step 7: Test Your Chime (Optional but Recommended)
- If you have an existing chime, press your Ring Doorbell button.
- Your existing chime should ring. If it doesn't, check the wiring connections and the compatibility settings within the Ring app. Some wired Ring models require a bypass wire to be connected to the chime unit itself to prevent buzzing or damage. Consult your specific model's manual.
Important Note for Wired Installations: Ensure your transformer voltage is within the 16-24V AC range. If it's too low, the doorbell may not power on reliably or may not function correctly. If you're unsure, consult an electrician or replace the transformer with a compatible one.
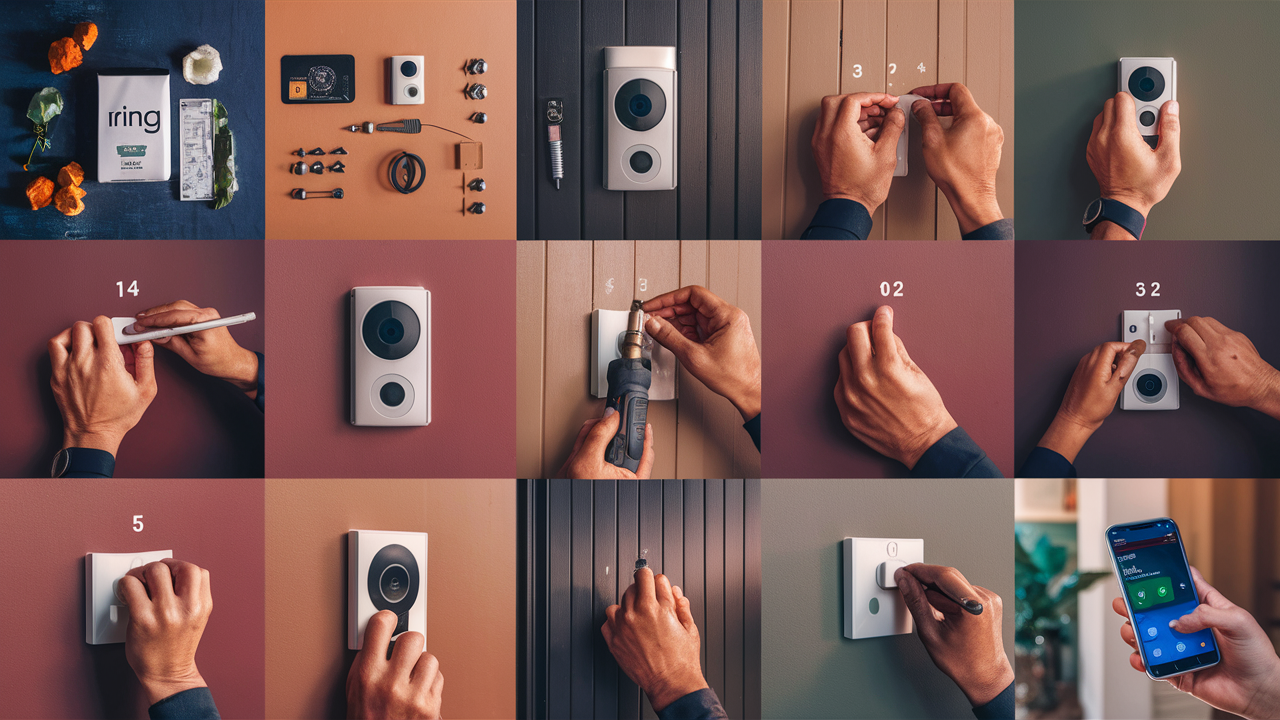
Battery-Powered Installation Guide
Battery-powered Ring Video Doorbells are celebrated for their ease of installation, making them an excellent choice for DIYers of all skill levels. The process is straightforward and typically takes less than 15 minutes.
Step 1: Charge the Battery
- Your Ring Doorbell comes with a rechargeable battery pack.
- Before installation, connect the battery pack to a power source using the provided USB charging cable.
- The indicator light on the battery will turn green when fully charged. This can take several hours.
- For continuous operation, you can purchase an additional battery pack so one is always charged and ready to swap.
Step 2: Download the Ring App and Set Up Your Device
- Ensure you have the Ring app downloaded and your account set up.
- In the app, tap "Set Up a Device" and select "Doorbells."
- Follow the on-screen instructions to scan the QR code on your Ring Doorbell or its packaging.
- The app will guide you through connecting the doorbell to your Wi-Fi network. You'll need your Wi-Fi name and password.
- The app will also prompt you to insert the charged battery into the doorbell.
Step 3: Install the Mounting Bracket
- Determine the best location for your doorbell. It should be mounted at a height of approximately 4 feet (1.2 meters) from the ground for optimal viewing angles.
- Hold the Ring mounting bracket against the wall at your chosen location.
- Use a level to ensure the bracket is straight.
- Mark the screw hole positions with a pencil.
- If mounting on brick, stucco, or concrete, drill holes and insert the provided anchors.
- If mounting on wood or siding, pilot holes are recommended.
- Secure the mounting bracket to the wall using the provided screws.
Step 4: Attach the Faceplate and Insert the Battery
- If your model has a removable faceplate, attach it to the doorbell unit.
- Ensure the charged battery pack is securely inserted into the back of the Ring Doorbell.
Step 5: Mount the Ring Doorbell
- Align the Ring Doorbell with the mounting bracket.
- Push the doorbell onto the bracket until it clicks into place.
- Secure the doorbell to the bracket using the small security screw at the bottom.
Step 6: Test the Device
- Once mounted, the doorbell should power on automatically.
- Open the Ring app on your smartphone.
- You should see your new doorbell listed. Tap on it to perform a live view test.
- Press the button to ensure it registers the press and sends a notification to your phone.
- Check the video and audio quality.
Tips for Battery-Powered Installation:
- Angle Mount: If your doorbell is mounted in a location where the view is obstructed by a wall or if you want to capture a wider area, consider using an optional angle mount (sold separately) to adjust the doorbell's viewing angle.
- Battery Management: In the Ring app, you can adjust motion detection settings and video recording quality to help conserve battery life. For instance, reducing the motion detection frequency or setting up specific motion zones can extend the time between charges.
- Weather Protection: While Ring doorbells are designed to withstand various weather conditions, extreme temperatures can affect battery performance.
Post-Installation Setup and Testing
You've successfully installed your Ring Camera Doorbell – congratulations! Now, it's time to fine-tune its settings within the Ring app to maximize its effectiveness and ensure it meets your security needs. This phase is just as crucial as the physical installation.
Configuring Motion Settings
Motion detection is a cornerstone of your doorbell's functionality. Properly configuring it will reduce false alerts and ensure you're notified of genuine events.
- Motion Zones: Within the Ring app, you can draw custom zones to monitor specific areas in front of your door. This allows you to ignore activity on the street or in your neighbor's yard, focusing only on your property.
- Motion Sensitivity: Adjust the sensitivity level to balance capturing all relevant motion with avoiding nuisance alerts from passing cars or swaying branches. Start with a medium setting and adjust as needed.
- Motion Frequency: Some models allow you to set how often the doorbell records after detecting motion. A shorter interval means more frequent recordings, while a longer one conserves battery and storage.
- People Only Mode: Newer Ring models offer "People Only Mode," which uses AI to detect human shapes, significantly reducing alerts from pets, cars, or other non-human movement. This is a highly recommended feature for 2025 users.
Adjusting Notification Preferences
You want to be alerted when someone is at your door or when motion is detected, but you don't want to be overwhelmed.
- Motion Alerts: Toggle motion alerts on or off for specific times of day or days of the week.
- Doorbell Press Alerts: Ensure these are always enabled so you never miss a visitor.
- Notification Sounds: Customize the alert sounds on your smartphone for different events.
- Rich Notifications: Enable rich notifications to see a snapshot or live view preview directly from your notification.
Video and Audio Settings
Fine-tuning your video and audio settings ensures you have clear footage and communication.
- Video Quality: Choose between different video quality settings (e.g., HD, Standard Definition). Higher quality provides clearer images but uses more bandwidth and battery.
- Night Vision: For models with infrared night vision, ensure it's set to "Auto." If you have color night vision, explore its settings for optimal performance in low light.
- Two-Way Talk: Test the microphone and speaker to ensure clear communication. You can adjust volume levels in the app.
Linking to Existing Chimes (Wired Installations)
If you've performed a wired installation, you'll want to ensure your existing chime works.
- Open the Ring app and navigate to your doorbell's settings.
- Look for "Chime Settings" or "Doorbell Tone."
- Follow the prompts to configure your chime. This might involve identifying whether you have a mechanical or digital chime.
- If your chime isn't working, re-check the wiring at the doorbell and the chime unit. For some models, a bypass wire might be necessary for the chime to function correctly.
Testing the System
Perform a comprehensive test to ensure everything is working as expected.
- Motion Test: Walk in front of the doorbell at different distances and angles to test the motion detection and zone accuracy.
- Doorbell Press Test: Have someone ring the doorbell from the outside while you are inside with your phone. Confirm you receive the alert and can see and speak to the person.
- Live View Test: Open the Ring app and initiate a live view to check video quality, audio, and Wi-Fi connection stability.
- Night Vision Test: Test the night vision by observing the feed after dark or by covering the lens with your hand to simulate low light conditions.
By dedicating time to these post-installation steps, you ensure your Ring Camera Doorbell is not just installed, but optimized for your specific environment and needs, providing enhanced security and convenience.
Advanced Tips and Troubleshooting
Even with careful installation, you might encounter minor issues or want to optimize your Ring Doorbell further. This section provides advanced tips and common troubleshooting solutions to keep your device running smoothly.
Troubleshooting Common Issues
No Power (Wired Installation)
- Verify Breaker: Double-check that the correct breaker is switched ON.
- Check Transformer: Ensure your transformer is providing the correct voltage (16-24V AC). Use a multimeter if possible.
- Wire Connections: Re-inspect the wire connections at the doorbell and the transformer. Ensure they are secure and not corroded.
- Bypass Wire: For some models, if the doorbell is hardwired, you may need to install a bypass wire at the chime. Consult your specific model's manual.
Weak Wi-Fi Signal
- Signal Strength: Check the Wi-Fi signal strength in the Ring app's device health section.
- Router Placement: Move your router closer to the doorbell, or consider a Wi-Fi extender or mesh system. Mesh networks are highly recommended for comprehensive coverage in 2025 smart homes.
- 5GHz Band: If your router supports it, try connecting the doorbell to the 5GHz band for potentially faster speeds, though 2.4GHz offers better range.
- Router Reboot: Sometimes, simply rebooting your router can resolve connectivity issues.
False Motion Alerts
- Adjust Zones: Refine your motion zones to exclude areas with frequent, irrelevant activity (e.g., busy sidewalks, trees that sway).
- Lower Sensitivity: Decrease the motion sensitivity setting.
- People Only Mode: Enable this feature if available on your model.
- Check for Obstructions: Ensure nothing is constantly triggering the motion sensor (e.g., a reflective surface, a flag).
Battery Draining Too Quickly (Battery-Powered)
- Motion Frequency: Reduce the frequency of motion recordings.
- Motion Zones: Make zones tighter to detect motion less often.
- Wi-Fi Signal: A weak Wi-Fi signal forces the device to work harder, draining the battery faster.
- Temperature Extremes: Very cold or very hot weather can impact battery performance.
- Frequent Live Views: Excessive manual live viewing will also drain the battery.
- Consider a Second Battery: For continuous coverage, have a spare charged battery ready to swap.
Chime Not Ringing (Wired)
- Wiring: Re-check all wire connections at the doorbell and the chime unit.
- Chime Type: Ensure the Ring app is configured for the correct chime type (mechanical vs. digital).
- Bypass Wire: If your model requires it, ensure the bypass wire is correctly installed at the chime.
- Transformer Voltage: An underpowered transformer might not be able to power both the doorbell and the chime.
Advanced Tips for Optimization
- Firmware Updates: Keep your Ring Doorbell's firmware up to date through the Ring app. Ring regularly releases updates to improve performance, security, and add new features.
- Utilize Modes: Explore the "Modes" feature in the Ring app (Home, Away, Disarmed). This allows you to quickly adjust motion detection and alert settings for different scenarios.
- Integrate with Alexa/Google Assistant: If you use smart home assistants, link your Ring Doorbell for voice control (e.g., "Alexa, show me the front door").
- Shared Users: Grant access to family members or trusted individuals through the "Shared Users" feature in the app, allowing them to receive alerts and view live feeds.
- Check Device Health: Regularly review the "Device Health" section in the Ring app for Wi-Fi signal strength, battery level, and firmware status.
By proactively addressing these common issues and implementing advanced tips, you can ensure your Ring Camera Doorbell provides reliable security and convenience for years to come.
Ring Doorbell Security and Privacy in 2025-26
In an era where smart home devices are increasingly integrated into our lives, understanding the security and privacy implications of devices like the Ring Video Doorbell is paramount. Ring has made significant strides in enhancing its security protocols and offering users greater control over their data. As of 2025-26, these features are more robust than ever.
Ring's Security Measures
Ring employs a multi-layered approach to security:
- End-to-End Encryption: Video streams between your Ring device and the Ring app are protected with end-to-end encryption, meaning only you and authorized users can access your footage.
- Two-Factor Authentication (2FA): Ring strongly encourages and supports 2FA for Ring accounts. This adds an extra layer of security by requiring a code from your phone in addition to your password when logging in from a new device.
- Security Dashboard: The Ring app features a Security Dashboard that provides a centralized view of your account's security settings, including connected devices, linked accounts, and recent activity.
- Regular Security Audits: Ring states that it conducts regular security audits and penetration testing to identify and address potential vulnerabilities.
- Privacy Zones: Beyond motion zones, some Ring devices offer "Privacy Zones" which are areas within the camera's field of view that the camera will not record from. This is crucial for respecting neighbor privacy.
User Control Over Data
Ring provides users with significant control over their data and privacy settings:
- Video Storage: Videos are stored securely in the cloud (with a Ring Protect subscription) or can be downloaded by the user. Users have the ability to delete recordings at any time.
- Sharing Controls: Users control who they share their device access with (Shared Users) and can revoke access at any time.
- Customizable Alerts: As discussed in the setup section, users can tailor motion alerts and notification preferences to their specific needs, reducing unnecessary data capture and notifications.
- "Lights On" Feature: For Ring cameras with integrated lights, users can control when these lights are active, balancing security with discretion.
Addressing Privacy Concerns
While Ring has improved its security and privacy features, it's essential for users to be informed and proactive.
- Strong Passwords and 2FA: Always use a strong, unique password for your Ring account and enable two-factor authentication. This is the most critical step any user can take.
- Review Shared Users: Periodically review who has access to your Ring devices and remove any unnecessary users.
- Understand Privacy Zones: Properly configure privacy zones to avoid inadvertently recording sensitive areas, especially those belonging to neighbors.
- Be Aware of Neighbors: If your Ring camera's field of view captures a neighbor's property, consider discussing it with them to ensure mutual comfort.
- Stay Informed: Keep up-to-date with Ring's privacy policies and security updates.
The Future of Ring Security (2025-26 Outlook)
The trend in smart home security for 2025-26 is towards greater AI integration for enhanced threat detection and even more granular user control. Ring is expected to continue investing in these areas, potentially offering features like:
- Advanced AI for Threat Assessment: Moving beyond "people only" detection to identify specific types of suspicious activity.
- Decentralized Processing: Exploring on-device processing for certain tasks to further enhance privacy and reduce reliance on cloud servers.
- Interoperability and Standards: Adherence to emerging smart home security standards for better integration and security across different brands.
By understanding and utilizing Ring's security features, and by practicing good digital hygiene, users can confidently integrate a Ring Video Doorbell into their home security system, enjoying peace of mind in 2025 and beyond.
Conclusion
Installing a Ring Camera Doorbell is a rewarding DIY project that significantly enhances your home's security and convenience. Whether you opt for a wired or battery-powered model, following these detailed steps ensures a successful setup. From understanding your model's power source and preparing your tools to carefully mounting the device and configuring its smart features, each stage is crucial for optimal performance. Remember to prioritize safety by always turning off power during wired installations and to leverage the Ring app for fine-tuning motion detection, notifications, and video settings. With proper installation and configuration, your Ring Doorbell will provide reliable monitoring and peace of mind.