This comprehensive guide will walk you through every step of installing your Blink doorbell camera, from unboxing to enjoying enhanced home security. We'll cover wired and battery-powered options, troubleshooting, and integration, ensuring a smooth setup process for optimal peace of mind.
Understanding Your Blink Doorbell Camera
Blink offers a range of smart home security devices, with their doorbell cameras being a popular choice for homeowners seeking an accessible and effective way to monitor their front door. Understanding the different models and their installation requirements is the first crucial step. Blink primarily offers two main types of doorbell cameras: the Blink Video Doorbell (which can be wired or battery-powered) and older, now discontinued, battery-only models. For the purpose of this guide, we will focus on the current Blink Video Doorbell, as it represents the latest technology and most common installation scenarios for 2025-26.
The Blink Video Doorbell is designed for easy DIY installation, catering to both those who have existing doorbell wiring and those who prefer a completely wireless setup. This flexibility is a significant advantage, allowing a wider audience to adopt smart doorbell technology without needing professional help. The device itself offers HD video recording, two-way audio, motion detection, and integration with the Blink ecosystem, which includes cloud storage (with a subscription) and local storage via a Blink Sync Module 2.
In 2025, the smart home security market continues to grow, with doorbell cameras being a leading product category. Statistics from industry analysts indicate that by the end of 2025, over 30% of households in North America will own a smart doorbell. Blink has carved out a significant niche in this market due to its competitive pricing and user-friendly interface. Understanding these market trends highlights the importance of a reliable and straightforward installation process, which is precisely what this guide aims to provide.
Key features to be aware of for the Blink Video Doorbell include:
- HD Video Quality: Clear, crisp video for identifying visitors and monitoring activity.
- Two-Way Audio: Communicate with visitors remotely through the Blink app.
- Motion Detection: Receive alerts when motion is detected at your doorstep.
- Night Vision: Clear visibility even in low-light conditions.
- Battery or Wired Power: Flexibility in how you power your doorbell.
- Blink Sync Module 2 Compatibility: Enables local storage of recordings.
- Blink App Integration: Centralized control and monitoring of all your Blink devices.
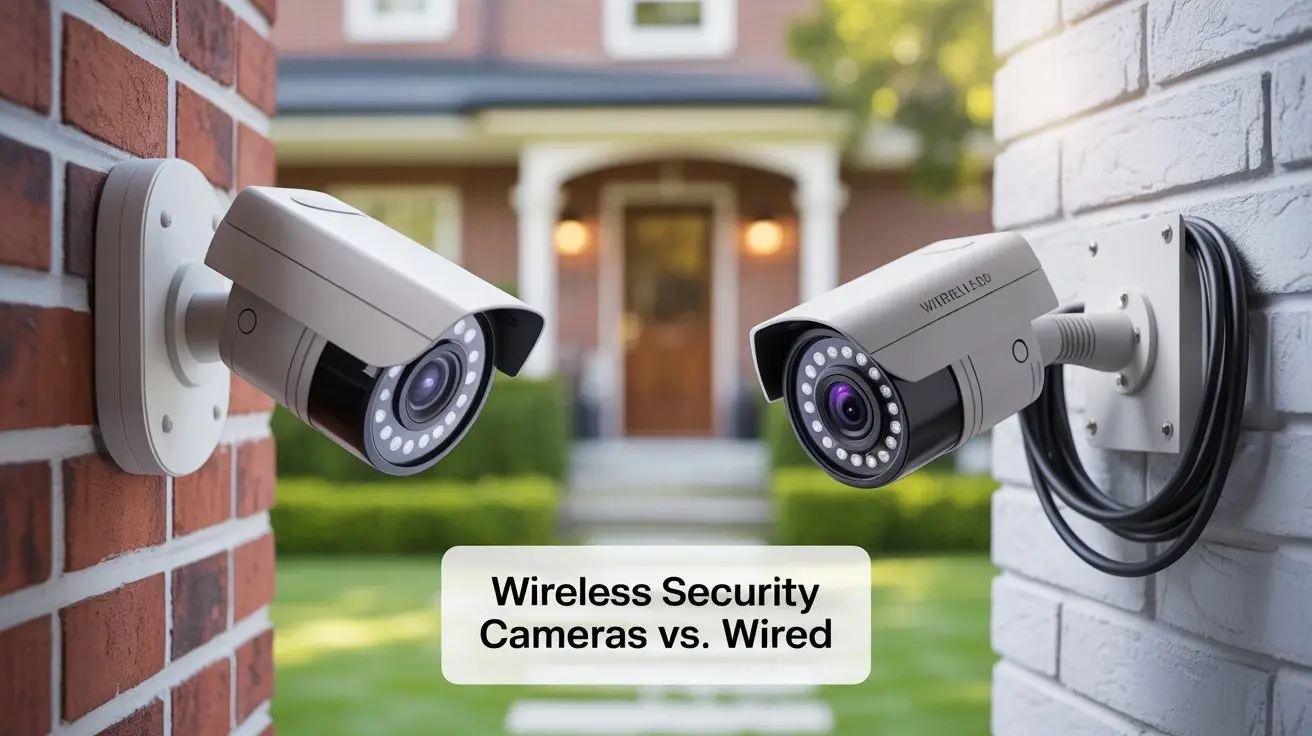
Choosing between wired and battery installation depends on your existing home infrastructure and personal preference. If you have existing doorbell wiring, leveraging it can provide a more consistent power supply and eliminate the need for battery changes. However, if you don't have wiring or prefer the utmost simplicity, the battery-powered option is a fantastic alternative. We will detail both approaches comprehensively.
Before You Begin: Preparation is Key
A successful installation hinges on thorough preparation. Rushing into the physical setup without understanding the prerequisites can lead to frustration and errors. For 2025-26, the core preparation steps remain consistent, emphasizing safety and proper tool selection.
Gathering Your Tools and Materials
Before you even touch your new Blink doorbell, ensure you have the following items readily available:
- Blink Video Doorbell: Ensure all components are present in the box (doorbell unit, mounting bracket, screws, anchors, user manual, wire extensions if applicable).
- Smartphone or Tablet: Running a compatible version of the Blink app (iOS or Android).
- Wi-Fi Network: A stable 2.4 GHz Wi-Fi network with a strong signal at your doorbell's intended location. Test your Wi-Fi strength using your smartphone.
- Screwdriver Set: Including Phillips head screwdrivers of various sizes.
- Drill and Drill Bits: For creating pilot holes and mounting the bracket.
- Pencil: For marking drilling points.
- Level: To ensure your doorbell is mounted straight.
- Wire Strippers (for wired installation): If your existing doorbell wires need to be exposed.
- Wire Nuts or Connectors (for wired installation): To secure connections.
- Safety Glasses: To protect your eyes when drilling.
- Ladder (if necessary): To safely reach your current doorbell location.
Checking Your Existing Doorbell Wiring (for Wired Installation)
If you plan to use the wired installation method, it's crucial to verify your existing doorbell wiring is compatible. Blink Video Doorbell is designed to work with standard doorbell systems that provide between 16-24V AC power. Attempting to connect it to a DC power source or a system outside this voltage range can damage the doorbell.
How to Check:
- Locate Your Transformer: Your doorbell transformer is typically found near your home's electrical panel, in the basement, or in a utility closet. It's usually a small metal box with screw terminals.
- Read the Transformer's Label: The label on the transformer will indicate the output voltage (e.g., 16V, 24V).
- Check Your Existing Doorbell Button: Carefully remove the existing doorbell button from your wall. You should see two wires connected to it.
If your transformer is rated between 16-24V AC and you have two wires connected to your current doorbell, you are likely good to go. If you are unsure, it's best to consult an electrician or refer to your home's electrical documentation.
Choosing the Right Mounting Location
The placement of your Blink doorbell is critical for optimal performance and security. Consider the following:
- Field of View: Mount the doorbell at a height that captures the entire face of visitors. The recommended height is typically around 4 feet (1.2 meters) from the ground.
- Wi-Fi Signal Strength: Ensure a strong Wi-Fi signal reaches the chosen location. A weak signal will result in poor video quality and connectivity issues.
- Door Frame or Wall: The doorbell can be mounted directly to a door frame, a wall, or a brick surface. The included mounting bracket and hardware are designed for most common surfaces.
- Avoid Direct Sunlight: While the doorbell has night vision, prolonged direct sunlight can sometimes cause glare or overheating.
- Accessibility: Ensure you can easily access the doorbell for any future maintenance, like battery replacement (if applicable) or manual resets.
Blink provides angled mounting plates in some kits, which can be useful if your door is set back from the main wall or if you need to adjust the camera's view slightly to avoid obstructions.
Downloading and Setting Up the Blink App
The Blink app is your command center for the doorbell. Download it from the Apple App Store or Google Play Store. Once downloaded, create a Blink account or log in if you already have one. You'll be prompted to add a new device later in the installation process.
Important App Settings to Note:
- Wi-Fi Credentials: Have your Wi-Fi network name (SSID) and password ready.
- Notifications: Familiarize yourself with how to manage motion detection alerts and doorbell press notifications.
- Subscription Options: Understand the Blink Subscription Plan for cloud storage and other advanced features. While not mandatory for basic functionality, it enhances the experience.
By completing these preparatory steps, you'll be well-equipped to proceed with the physical installation of your Blink Video Doorbell, whether you choose the wired or battery-powered route.
Installing Your Blink Video Doorbell (Wired)
The wired installation method offers continuous power and is generally preferred if your home supports it. This section details the step-by-step process for a wired setup, assuming you have compatible doorbell wiring.
Step 1: Power Off Your Existing Doorbell System
Safety First! Before touching any wires, it is absolutely critical to turn off the power to your existing doorbell system at your home's circuit breaker. Locate the breaker that controls your doorbell and switch it to the "OFF" position. If you are unsure which breaker it is, it's safer to turn off the main breaker for your entire home, though this is less convenient.
Verification: After turning off the power, press your existing doorbell button. If it no longer rings, the power is successfully cut. If it still rings, you have not identified the correct breaker or it's not properly switched off. Do not proceed until power is confirmed to be off.
Step 2: Remove Your Existing Doorbell Button
Carefully unscrew and remove your current doorbell button from the wall or door frame. Gently pull it away from the surface. You should see two wires connected to the back of the button. These are your power wires.
Important: Do not let the wires fall back into the wall cavity. If they do, you may need to use a piece of tape to secure them temporarily or retrieve them with a tool.
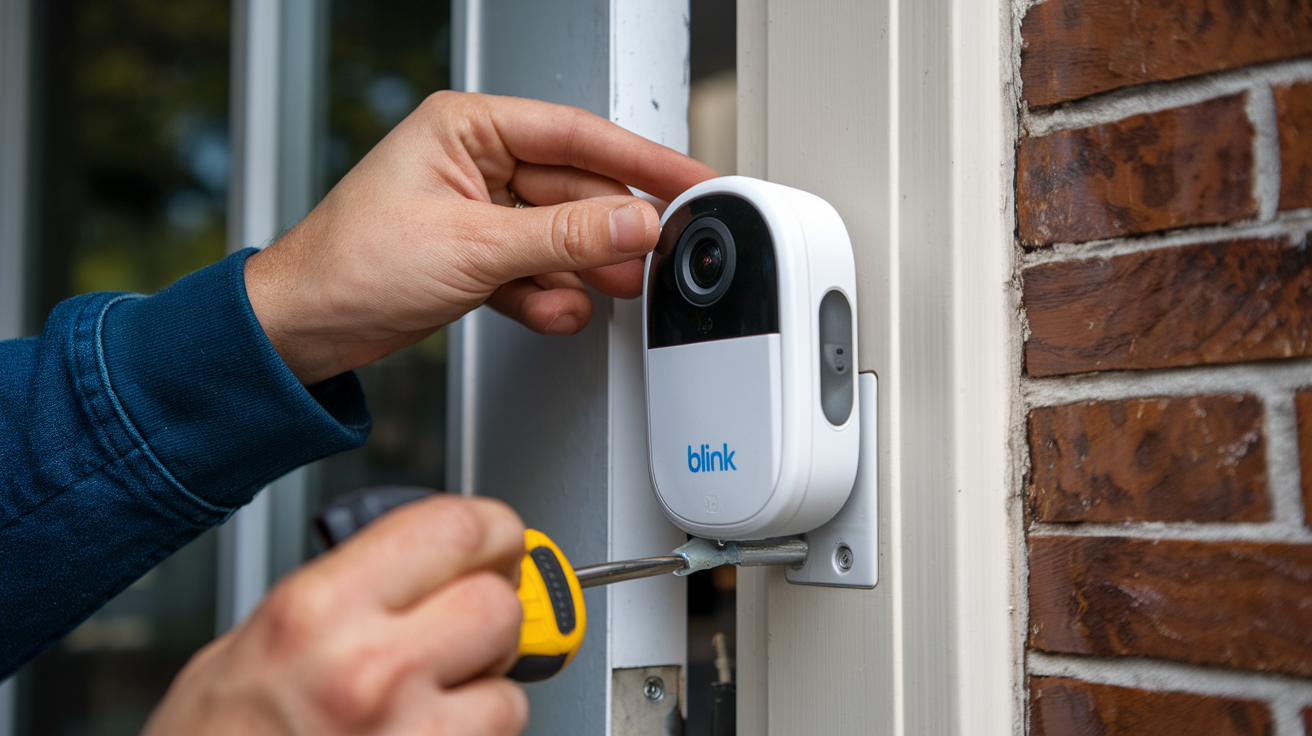
Step 3: Connect the Blink Video Doorbell Mounting Bracket
The Blink Video Doorbell comes with a mounting bracket. You'll need to attach this bracket to the wall or door frame where your old doorbell was. Use the included screws and anchors (if needed for your wall material). A level can help ensure the bracket is mounted straight, which will make the doorbell itself look better and function optimally.
Using the Included Angle Mount (Optional): If your Blink kit includes an angled mounting plate, consider using it now. This plate can help direct the camera's view towards your visitors and away from unwanted angles. Attach the angle mount to the wall first, then attach the main bracket to the angle mount.
Step 4: Connect the Wires to the Blink Video Doorbell
This is the most critical wiring step. Take the two wires that were connected to your old doorbell button. These wires will connect to the terminals on the back of the Blink Video Doorbell unit.
Procedure:
- Identify Terminals: On the back of the Blink Video Doorbell, you'll see two screw terminals.
- Secure the Wires: Loosen the screws on the terminals. Wrap one wire around each screw terminal. It doesn't matter which wire goes to which terminal for AC power.
- Tighten Screws: Firmly tighten the screws to ensure a secure connection. The wires should be held in place without any exposed copper strands sticking out. If your wires are short or frayed, you may need to use the included wire extension clips and wire nuts to extend them.
Troubleshooting Wire Connections: If the wires are too short, use the provided wire extensions and wire nuts. Strip a small portion of the extension wire and the existing doorbell wire, then twist them together before securing with a wire nut. Connect the extended wire to the doorbell terminal.
Step 5: Mount the Blink Video Doorbell Unit
Once the wires are securely connected to the back of the Blink Video Doorbell, carefully slide the doorbell unit onto the mounted bracket. It should click into place. Ensure it feels secure and is properly aligned.
Step 6: Restore Power and Test
Return to your circuit breaker and turn the power back on to your doorbell system. The Blink Video Doorbell should power up. You will typically see an LED indicator light up on the doorbell. The next step is to set up the Blink app, which we will cover in a later section.
Initial Test: Once the app is set up, you can test the doorbell by pressing it. It should trigger a notification on your phone and ring your indoor chime (if you have one connected and it's compatible). If your indoor chime doesn't work, it might be due to compatibility issues or wiring problems, which can often be resolved through the Blink app settings or by consulting Blink's support resources.
This completes the physical installation for a wired Blink Video Doorbell. The next steps involve app setup and configuration.
Installing Your Blink Wireless Doorbell
The wireless installation offers maximum flexibility, allowing you to place the doorbell almost anywhere without the need for existing wiring. This method relies on batteries for power.
Step 1: Charge the Blink Battery Pack
Your Blink Video Doorbell comes with a removable battery pack. Before you begin installation, ensure this battery pack is fully charged. Use the included USB cable and a compatible USB power adapter (not always included, so use a standard phone charger). The charging indicator light on the battery pack will change color when fully charged.
Battery Life Considerations (2025-26): Blink batteries are designed for longevity, typically lasting up to two years on a single charge under normal usage. However, frequent motion events, long video recordings, and poor Wi-Fi signal can drain the battery faster. It's wise to have a spare battery pack charged and ready for quick swaps when needed.
Step 2: Insert the Battery Pack
Once charged, slide the battery pack into the designated compartment on the back of the Blink Video Doorbell unit until it clicks securely into place.
Step 3: Choose Your Mounting Location
Select a location for your wireless doorbell. Considerations include:
- Wi-Fi Signal: This is paramount for a wireless setup. Ensure a strong 2.4 GHz Wi-Fi signal reaches the chosen spot.
- Height: Mount at approximately 4 feet (1.2 meters) for optimal facial recognition.
- Visibility: Ensure a clear line of sight to the area you want to monitor.
- Door Frame or Wall: The mounting bracket can be attached to various surfaces.
Step 4: Attach the Mounting Bracket
Use the included screws and anchors to attach the Blink mounting bracket to your chosen surface. Use a level to ensure it's straight. If you have an angled mounting plate, attach it first, then the main bracket.
Step 5: Mount the Blink Video Doorbell
Align the Blink Video Doorbell unit with the mounting bracket and slide it down until it clicks securely into place. The doorbell should feel firmly attached.
Step 6: Power On and App Setup
The Blink Video Doorbell should automatically power on when the battery is inserted. The next crucial step is to set up the Blink app, which will guide you through connecting the doorbell to your Wi-Fi network and configuring its settings.
Initial Test: After the app setup, press the doorbell button. It should trigger a notification on your phone. For wireless setups, there is no internal chime unless you purchase a separate Blink Sync Module and compatible chime accessory.
The wireless installation is generally quicker and simpler than the wired method, making it an excellent choice for renters or those without existing doorbell wiring.
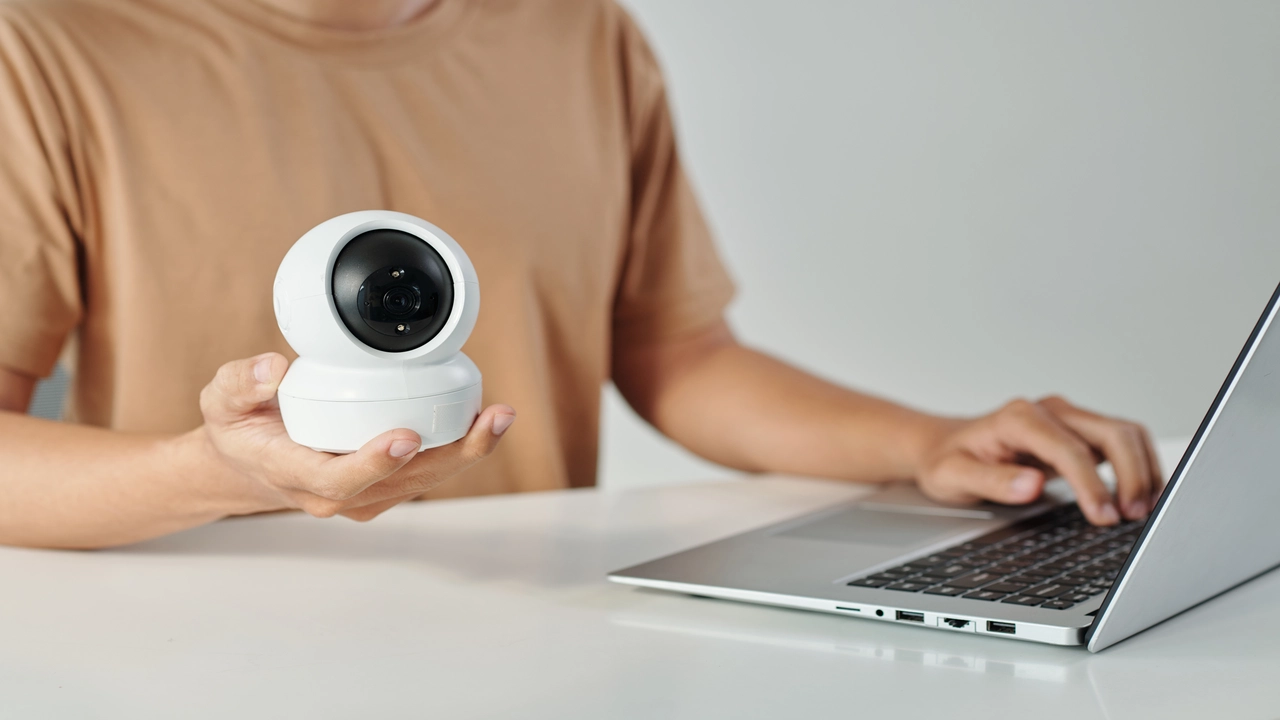
Setting Up Your Blink App and Camera
Once the physical installation is complete, the next vital step is configuring your Blink Video Doorbell through the Blink mobile application. This process is largely the same for both wired and wireless installations.
Step 1: Add a New Device in the Blink App
Open the Blink app on your smartphone or tablet. If you haven't already, create an account or log in. Tap the "+" icon (usually in the top right corner) to add a new device.
Select "Video Doorbell" from the list of devices. The app will then guide you through the pairing process.
Step 2: Scan the QR Code
The Blink Video Doorbell has a QR code located on the back of the device (usually near the battery compartment) or on a sticker within the product packaging. The Blink app will prompt you to scan this QR code using your phone's camera. Ensure good lighting and hold the phone steady.
If scanning fails, you can manually enter the serial number found below the QR code.
Step 3: Connect to Your Wi-Fi Network
The app will guide you to connect your Blink Video Doorbell to your home's 2.4 GHz Wi-Fi network. You will need to select your network name (SSID) and enter your Wi-Fi password. Ensure you are connecting to a 2.4 GHz network, as Blink devices do not support 5 GHz networks.
Wi-Fi Signal Strength Check: During this step, the app may perform a Wi-Fi signal strength test. If the signal is weak, you might need to reposition your router, install a Wi-Fi extender, or consider a Blink Sync Module 2 placed closer to the doorbell location.
Step 4: Configure Motion Settings
This is where you customize how and when your doorbell detects motion.
- Motion Detection Sensitivity: Adjust this slider to control how sensitive the motion sensor is. Lower sensitivity means fewer, less significant movements will trigger an alert. Higher sensitivity means more movements will trigger alerts.
- Motion Zones: You can define specific areas within the camera's view where motion detection should be active. This is useful for ignoring areas like passing cars or trees swaying in the wind.
- Motion Frequency: Set how often the doorbell will check for motion after an event has been detected.
In 2025, advancements in AI-powered motion detection are becoming more prevalent, and Blink is continuously updating its algorithms to reduce false alerts. Experiment with these settings to find the optimal balance for your environment.
Step 5: Set Up Notifications
Decide how you want to be notified when motion is detected or when the doorbell button is pressed.
- Push Notifications: These will appear on your smartphone or tablet.
- In-App Alerts: You can receive alerts directly within the Blink app.
You can also choose to receive notifications only when the system is armed or when specific events occur.
Step 6: Configure Video Settings
Customize the video recording settings:
- Recording Length: Set how long each video clip should be when motion is detected or the button is pressed.
- Video Quality: Choose between different quality settings, balancing clarity with data usage.
- Night Vision: Ensure night vision is enabled for clear footage after dark.
Step 7: Integrate with Sync Module 2 (Optional but Recommended)
If you have a Blink Sync Module 2, you can connect your doorbell to it. This allows for local storage of your video clips on a USB flash drive, reducing reliance on cloud subscriptions. Follow the in-app instructions to link your doorbell to the Sync Module.
Why Sync Module 2 is Important: For 2025-26, local storage is a key feature for privacy-conscious users and those looking to save on subscription costs. The Sync Module 2 acts as a central hub for multiple Blink devices, improving their performance and enabling local storage.
Step 8: Test the Doorbell
Press the doorbell button. You should receive an immediate notification on your phone. Check the live view in the Blink app to ensure you have a clear picture and good audio. Walk in front of the doorbell to test motion detection and verify you receive alerts.
This comprehensive app setup ensures your Blink Video Doorbell is configured to your specific needs, providing effective home security and convenient monitoring.
Advanced Tips and Troubleshooting
Even with a smooth installation, you might encounter occasional issues or wish to optimize your Blink doorbell's performance. This section covers common troubleshooting steps and advanced tips for 2025-26.
Common Troubleshooting Scenarios
1. Doorbell Not Powering On (Wired Installation):
- Check Breaker: Ensure the circuit breaker is on.
- Verify Wiring: Double-check that the wires are securely connected to the terminals on the back of the doorbell and that there are no loose connections.
- Transformer Voltage: Confirm your transformer is providing 16-24V AC. If it's lower, the doorbell might not power on or function correctly.
- Faulty Unit: In rare cases, the doorbell unit itself may be faulty. Contact Blink support.
2. Weak Wi-Fi Signal / Connectivity Issues:
- Router Proximity: Move your Wi-Fi router closer to the doorbell, or vice versa.
- Wi-Fi Extender/Mesh System: Consider using a Wi-Fi extender or a mesh Wi-Fi system to improve coverage in dead zones.
- 2.4 GHz Network: Ensure you are connected to a 2.4 GHz network, not 5 GHz.
- Interference: Other electronic devices (microwaves, cordless phones) can interfere with Wi-Fi signals.
- Sync Module 2: Placing a Sync Module 2 closer to the doorbell can act as a bridge, improving the connection.
3. Motion Detection Not Working or Too Many False Alerts:
- Sensitivity Adjustment: Fine-tune the motion detection sensitivity in the Blink app.
- Motion Zones: Use motion zones to exclude areas that frequently trigger false alerts (e.g., busy streets, swaying trees).
- Firmware Updates: Ensure your doorbell and app are running the latest firmware. Blink regularly releases updates to improve performance.
- Environmental Factors: Changes in lighting (sun glare, headlights) can sometimes trigger motion.
4. No Sound or Poor Audio Quality:
- App Permissions: Ensure the Blink app has microphone and speaker permissions enabled on your smartphone.
- Volume Settings: Check the volume levels in your phone's settings and within the Blink app.
- Wi-Fi Stability: Poor Wi-Fi can significantly impact audio quality.
- Obstructions: Ensure the microphone and speaker on the doorbell are not obstructed.
5. Doorbell Not Ringing Indoor Chime (Wired):
- Chime Compatibility: Not all mechanical or digital chimes are compatible with smart doorbells. Check Blink's compatibility list.
- Chime Settings: In the Blink app, there's usually a setting to enable or disable the indoor chime. Ensure it's turned on.
- Wiring to Chime: Ensure the wires from the doorbell transformer are correctly connected to both the doorbell and the indoor chime.
Optimizing Performance with Blink Sync Module 2
The Blink Sync Module 2 is a valuable addition for any Blink user, especially for doorbell installations in 2025-26. Its benefits include:
- Local Storage: Store video clips directly on a USB flash drive, providing a backup and reducing cloud storage costs.
- Improved Wi-Fi Performance: The Sync Module acts as a Wi-Fi bridge, potentially improving the connection stability for devices within its range.
- Multiple Device Support: It can manage multiple Blink cameras and doorbells simultaneously.
- Faster Wake-Up Times: Devices connected to the Sync Module often wake up faster for motion events.
To set up the Sync Module 2, follow the in-app instructions to add it as a device and then link your Blink Video Doorbell to it.
Firmware Updates
Blink frequently releases firmware updates to enhance security, fix bugs, and introduce new features. Ensure your Blink app is set to automatically download and install these updates, or manually check for them within the app's settings. Keeping your firmware up-to-date is crucial for optimal performance and security.
Using Blink Subscription Plans
While the Blink Video Doorbell functions without a subscription, a Blink Subscription Plan (available in various tiers for 2025-26) offers significant advantages:
- Extended Cloud Storage: Store more video clips in the cloud for longer periods.
- Live View Recording: Record live view sessions.
- Person Detection: AI-powered alerts that distinguish between people and other motion.
- Extended Warranties: Some plans offer extended device warranties.
Evaluate your needs and budget to determine if a subscription plan is beneficial for you.
By understanding these troubleshooting tips and leveraging advanced features like the Sync Module 2, you can ensure your Blink Video Doorbell operates reliably and effectively.
Integrating with Other Smart Home Devices
In the interconnected world of smart homes in 2025-26, your Blink Video Doorbell can do more than just send alerts. It can be integrated with other smart devices to create automated routines and enhance your home's overall functionality and security.
Amazon Alexa Integration
Blink devices are owned by Amazon, making integration with Amazon Alexa seamless. If you have an Amazon Echo device (like Echo Dot, Echo Show, etc.), you can enable the Blink SmartHome skill.
How to Integrate:
- Enable Blink Skill: Open the Alexa app, go to "Skills & Games," search for "Blink SmartHome," and enable the skill.
- Link Accounts: You'll be prompted to link your Blink account to your Amazon account.
- Discover Devices: Ask Alexa to "discover devices." Your Blink Video Doorbell should appear.
What You Can Do with Alexa:
- Voice Commands: "Alexa, show me the front door." This will display the live feed on compatible Echo Show devices.
- Arm/Disarm System: "Alexa, arm Blink" or "Alexa, disarm Blink." (Note: Disarming may require a voice code for security).
- Motion Alerts: Receive motion alerts through your Echo devices.
- Two-Way Audio: Initiate two-way conversations through your Echo Show.
This integration is a significant advantage for Blink users, consolidating control and providing voice-activated access to your doorbell's features.
Google Assistant Integration (Limited)
While not as deeply integrated as Alexa, Blink devices can offer some level of compatibility with Google Assistant. This often involves using IFTTT (If This Then That) or specific integrations that may become available.
Using IFTTT:
- Create an IFTTT Account: Sign up for an IFTTT account.
- Connect Blink and Google Assistant: Search for Blink and Google Assistant applets on IFTTT.
- Create Applets: For example, you could create an applet that says "If Blink detects motion, then send a notification to my Google Home device."
Check the IFTTT platform for the latest available Blink and Google Assistant applets, as these integrations can evolve.
Creating Smart Home Routines
By combining Blink with Alexa, you can create powerful smart home routines. For example:
- "Welcome Home" Routine: When you disarm your Blink system, your smart lights could turn on, and your thermostat could adjust.
- "Away" Routine: When you arm your Blink system, all lights could turn off, and your smart locks could engage.
- "Visitor Detected" Routine: When your Blink doorbell detects motion or is pressed, a specific light could flash, or a notification could be sent to all family members' phones.
These routines leverage the "If This Then That" logic, where the Blink event acts as the "This" and the actions on other smart devices are the "That."
Other Potential Integrations
As the smart home landscape evolves, Blink may offer further integrations. Keep an eye on Blink's official announcements and third-party smart home platforms for new compatibility updates. For 2025-26, the focus remains on robust Alexa integration and exploring more advanced capabilities with other platforms.
Integrating your Blink Video Doorbell into your existing smart home ecosystem unlocks its full potential, transforming it from a standalone security device into a key component of your connected home.
Maintenance and Best Practices
To ensure your Blink Video Doorbell continues to function optimally and reliably for years to come, regular maintenance and adherence to best practices are essential. This applies to both wired and battery-powered installations in 2025-26 and beyond.
Regular Cleaning
The lens of your doorbell camera can accumulate dust, dirt, and water spots, which can degrade video quality. Periodically clean the lens using a soft, lint-free microfiber cloth. For stubborn smudges, you can slightly dampen the cloth with water or a lens-cleaning solution specifically designed for electronics.
Avoid using abrasive materials or harsh chemicals, as these can scratch or damage the lens coating.
Battery Management (for Wireless)
If you have the wireless Blink Video Doorbell, managing the battery is key:
- Monitor Battery Levels: The Blink app will show the current battery level for each device. Keep an eye on this, especially if you notice a rapid decline.
- Keep Spare Batteries Charged: As mentioned earlier, having a fully charged spare battery pack ready can minimize downtime when a replacement is needed.
- Optimize Settings: Reduce motion detection sensitivity or recording lengths if you find the battery draining faster than expected.
Wi-Fi Network Health
Your doorbell's performance is directly tied to your Wi-Fi network. Ensure your router is functioning correctly, has a strong signal at the doorbell's location, and is running the latest firmware. Periodically rebooting your router can also help resolve minor connectivity glitches.
Reviewing and Managing Recordings
Regularly check your Blink app to review recorded clips. This helps you:
- Identify Potential Issues: Notice if there are frequent false alerts or if the camera is missing important events.
- Manage Storage: If you are using cloud storage, delete clips you no longer need to free up space (though Blink's cloud storage is typically managed automatically). If using local storage with a USB drive, periodically back up important clips and format the drive when it's nearly full.
- Familiarize Yourself: Stay aware of the activity around your home.
Physical Inspection
Occasionally, visually inspect the doorbell unit and its mounting bracket. Ensure it is still securely attached and hasn't been tampered with or damaged by weather. Check for any signs of wear and tear on the wires (for wired installations).
Firmware and App Updates
As highlighted in the troubleshooting section, keeping your Blink app and device firmware up-to-date is paramount. These updates often contain crucial security patches and performance enhancements that can prevent issues before they arise.
Security Best Practices
Strong Passwords: Use a strong, unique password for your Blink account and your Wi-Fi network. Enable two-factor authentication on your Blink account if available.
Privacy Zones: If available through firmware updates or specific settings, consider using privacy zones to exclude sensitive areas from recording.
Secure Your Wi-Fi: Ensure your Wi-Fi network uses WPA2 or WPA3 encryption.
By incorporating these maintenance tasks and best practices into your routine, you can maximize the lifespan and effectiveness of your Blink Video Doorbell, ensuring it continues to provide reliable security and peace of mind for your home.
In conclusion, installing a Blink Video Doorbell is a straightforward process that can significantly enhance your home security. Whether you opt for the convenience of a wired connection or the flexibility of a battery-powered setup, following these detailed steps will ensure a successful installation. From the initial preparation and tool gathering to the meticulous wiring or battery insertion, and finally, the crucial app configuration, each stage is designed to be manageable for the average DIYer. By understanding your device, preparing thoroughly, and following the step-by-step guides, you can confidently mount and set up your Blink doorbell. Furthermore, leveraging advanced features like the Sync Module 2, integrating with smart home assistants like Amazon Alexa, and performing regular maintenance will ensure your Blink Video Doorbell provides optimal performance and long-term reliability. Invest a little time in understanding the process, and you'll gain a powerful tool for monitoring and securing your home.