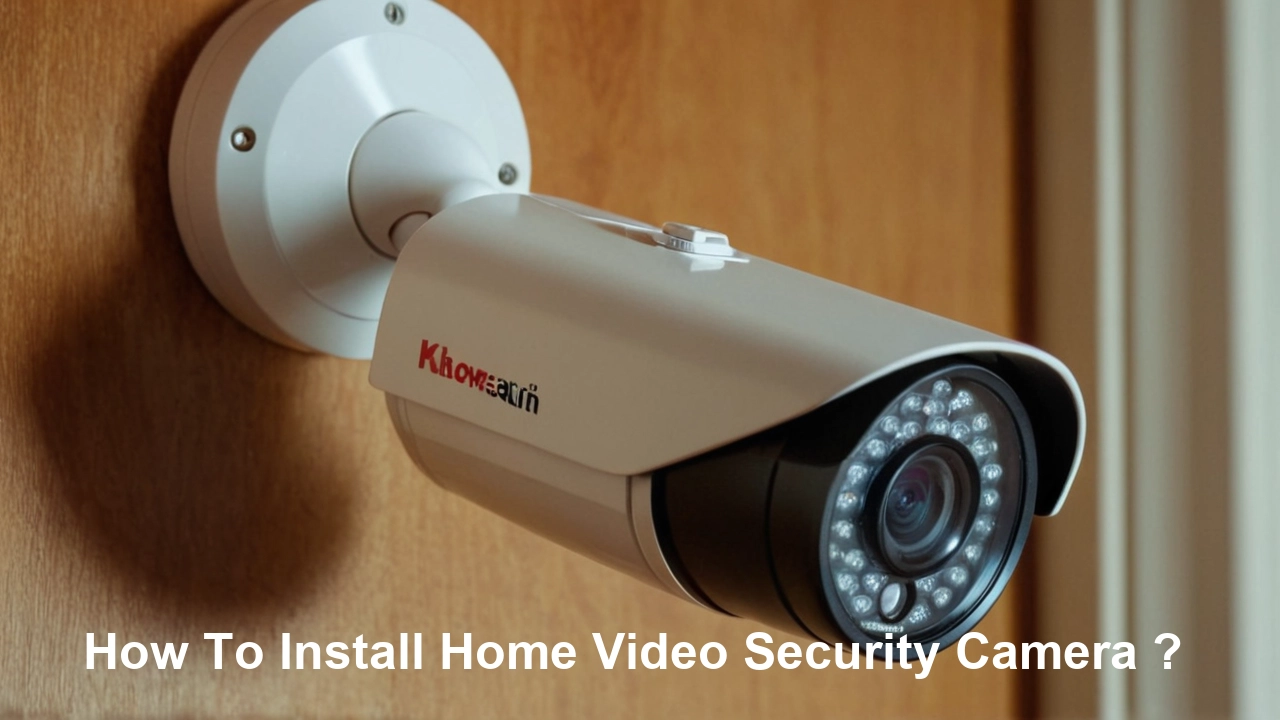
Installing a home video security camera system empowers you with peace of mind, deterring potential threats and providing crucial evidence if an incident occurs. This comprehensive guide will walk you through every step, from choosing the right cameras to ensuring a seamless setup for robust home protection in 2025-26.
Understanding Your Home Security Camera Options
The market in 2025-26 offers a diverse range of home video security cameras, each with its unique strengths. Understanding these types is the first crucial step in selecting the right system for your needs. We'll explore the most common categories, from basic standalone units to sophisticated networked systems.
Wired Security Cameras (CCTV)
Traditional wired systems, often referred to as CCTV (Closed-Circuit Television), rely on physical cables for power and data transmission. These systems typically connect to a Digital Video Recorder (DVR) or Network Video Recorder (NVR) for storage and management.
- Pros: Generally offer more stable connections, higher video quality, and are less susceptible to interference. They are often preferred for permanent installations and where reliable, high-resolution footage is paramount.
- Cons: Installation can be more complex and invasive, requiring drilling through walls and running cables. Upgrades or relocation can also be more challenging.
Wireless Security Cameras
Wireless cameras transmit data via Wi-Fi or other wireless protocols. They still require a power source, which can be either a battery or a wired connection to an outlet. Some advanced wireless cameras are completely wire-free, running solely on batteries.
- Pros: Offer greater flexibility in placement, easier installation, and a cleaner aesthetic without visible wires. Battery-powered options provide ultimate placement freedom.
- Cons: Can be susceptible to Wi-Fi signal interference, potentially leading to dropped connections or lower video quality. Battery life needs regular monitoring and replacement/recharging.
Smart Home Integrated Cameras
These cameras are designed to work seamlessly with other smart home devices like voice assistants (e.g., Alexa, Google Assistant), smart locks, and lighting systems. They often offer features like motion detection alerts sent to your smartphone, two-way audio, and cloud storage options.
- Pros: Enhanced convenience, remote access, and the ability to create automated security routines.
- Cons: May require a subscription for full functionality or cloud storage. Compatibility issues can sometimes arise between different smart home ecosystems.
Dome Cameras
Characterized by their dome-shaped housing, these cameras are often discreet and vandal-resistant. They are popular for indoor and outdoor use, offering a wide field of view and often featuring pan-tilt-zoom (PTZ) capabilities.
- Pros: Discreet appearance, durable construction, and wide coverage area.
- Cons: The dome can sometimes cause glare or reflections, affecting video quality in certain lighting conditions.
Bullet Cameras
These are the classic, cylindrical-shaped cameras. They are highly visible, acting as a deterrent, and are typically mounted on walls or ceilings. Many bullet cameras are weather-resistant, making them ideal for outdoor surveillance.
- Pros: Highly visible deterrent, straightforward mounting, and often robust weatherproofing.
- Cons: Less discreet than dome cameras, and their fixed position might require multiple units for comprehensive coverage.
PTZ (Pan-Tilt-Zoom) Cameras
PTZ cameras offer remote control over their movement, allowing you to pan horizontally, tilt vertically, and zoom in on specific areas. This makes them highly versatile for monitoring large areas or tracking moving subjects.
- Pros: Extensive coverage with a single camera, ability to follow movement, and detailed zoomed-in views.
- Cons: More expensive than fixed cameras, and their complexity might require more advanced setup and management.
Factors to Consider When Choosing
Beyond the camera type, several other factors are critical for your selection:
- Resolution: Aim for at least 1080p (Full HD) for clear images. 2K or 4K offers even greater detail, crucial for identifying faces or license plates.
- Field of View (FoV): A wider FoV covers more area, but may sacrifice detail at a distance.
- Night Vision: Infrared (IR) LEDs are standard for low-light conditions. Look for cameras with good IR range and clarity. Some offer color night vision for better detail in darkness.
- Weatherproofing: For outdoor cameras, an IP rating (e.g., IP65, IP66, IP67) indicates resistance to dust and water.
- Audio: Two-way audio allows you to speak and listen through the camera.
- Storage: Options include local storage (SD card, DVR/NVR) or cloud storage (often subscription-based).
- Connectivity: Wi-Fi, Ethernet, or Power over Ethernet (PoE) for wired systems.
Strategic Planning: Where to Install Your Cameras
Effective camera placement is as important as the camera itself. A well-planned layout maximizes coverage, deters intruders, and minimizes blind spots. In 2025-26, with increased awareness of home security, strategic placement is key to deterring opportunistic crime. Consider the following high-priority areas:
Entry Points
These are the most vulnerable areas of your home and should be your primary focus. Criminals often target doors and windows.
- Front Door: A camera here can capture visitors, deliveries, and anyone approaching your home. Consider a camera with a wide field of view to cover the porch and walkway.
- Back Door/Patio Doors: Often less visible from the street, these are common entry points for burglars. Ensure clear coverage of the door and surrounding yard.
- Garage Door: If your garage is attached to your home, securing the garage door is vital. Cameras inside or facing the garage door can monitor activity.
- Ground Floor Windows: Especially those that are secluded or easily accessible.
Perimeter and Yard
Monitoring the exterior of your property can deter potential intruders before they reach your home and provide valuable footage of their approach.
- Driveway: Captures vehicles entering and leaving, useful for identifying suspicious activity or tracking visitors.
- Side Yards: Especially if they offer concealment for someone trying to approach the house undetected.
- Backyard: Can monitor for unauthorized access, activity near sheds or outbuildings, or potential trespassers.
- Gates: If you have a fenced yard, cameras covering gates are essential.
Interior Monitoring (Optional but Recommended)
While outdoor cameras are primary for deterring and capturing external threats, indoor cameras offer an extra layer of security and can be invaluable for monitoring children, pets, or elderly family members.
- Hallways: To monitor movement within the house.
- Main Living Areas: For general surveillance.
- Areas with Valuables: If you have specific items you want to monitor.
- Baby's Room/Nursery: For parental monitoring.
Factors Influencing Placement
- Power Source: Wireless cameras need to be within Wi-Fi range and accessible for battery changes. Wired cameras require proximity to power outlets or Ethernet cables.
- Wi-Fi Signal Strength: For wireless cameras, ensure a strong and stable Wi-Fi signal at the desired mounting location. You might need a Wi-Fi extender or mesh system.
- Field of View: Position cameras to maximize their coverage area without significant overlap or blind spots.
- Lighting Conditions: Avoid pointing cameras directly at bright light sources (sun, strong lamps) which can cause glare. Consider how light changes throughout the day and night.
- Height and Angle: Mount cameras high enough to be out of easy reach (typically 8-10 feet) but low enough to capture facial details. Angle them downwards to capture faces rather than just the tops of heads.
- Deterrence vs. Evidence: Highly visible cameras can deter criminals. Discreet cameras might be better for capturing evidence without alerting potential suspects. A combination is often ideal.
- Weather Protection: Ensure outdoor cameras are mounted under eaves or in protected areas if they are not fully weatherproof.
Example Scenario: For a typical suburban home, a good starting point would be a camera covering the front door and porch, another for the driveway and garage, and a third for the backyard. If you have a detached garage or shed, consider cameras for those as well.
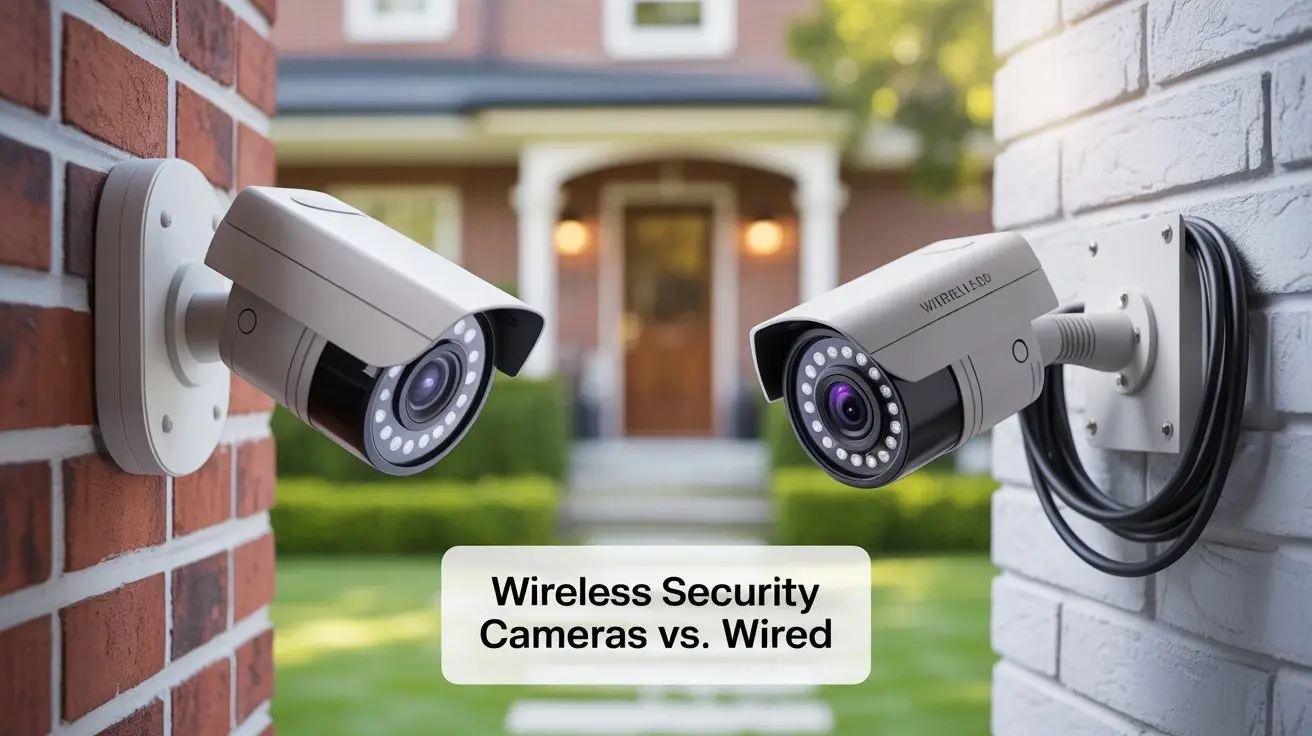
Wired vs. Wireless Installation: Pros and Cons
The choice between wired and wireless installation significantly impacts the complexity, cost, and flexibility of your home security camera system. Understanding these differences is crucial for making an informed decision in 2025-26.
Wired Installation (CCTV/PoE)
Wired systems, whether traditional CCTV using coaxial cables or modern PoE (Power over Ethernet) systems, offer a robust and reliable connection. PoE is increasingly popular for its ability to transmit both power and data over a single Ethernet cable.
Pros of Wired Installation:
- Reliability: Wired connections are generally more stable and less prone to interference from other devices or environmental factors. This means consistent video feeds and fewer dropped connections.
- Higher Quality: Wired systems often support higher resolutions and frame rates without bandwidth limitations, leading to superior video clarity.
- No Battery Worries: Cameras are powered directly by the cable, eliminating the need for battery replacements or recharging.
- Enhanced Security: Tampering with wired connections is more difficult for intruders compared to disrupting Wi-Fi signals.
- PoE Simplicity: Power over Ethernet simplifies installation by requiring only one cable for both power and data, reducing clutter and installation time compared to separate power and data cables.
Cons of Wired Installation:
- Complex Installation: This is the biggest drawback. Running cables through walls, attics, or crawl spaces can be time-consuming, labor-intensive, and may require professional help.
- Less Flexible: Once installed, relocating wired cameras can be difficult and may involve re-running cables.
- Aesthetics: Visible cables can be unsightly if not properly managed.
- Initial Cost: While the cameras themselves might be comparable, the cost of professional installation or the DIY effort can be higher.
Wireless Installation
Wireless cameras transmit data over Wi-Fi, offering significant advantages in terms of ease of setup and flexibility.
Pros of Wireless Installation:
- Easy Installation: Significantly simpler and faster to set up. Often involves mounting the camera, connecting it to power (if not battery-powered), and configuring it via a smartphone app.
- Flexibility: Cameras can be easily relocated as your needs change or if you move.
- Aesthetics: No visible wires (especially for battery-powered models) contribute to a cleaner, more discreet look.
- Lower Installation Cost: DIY installation is straightforward, and professional installation is generally less expensive than for wired systems.
Cons of Wireless Installation:
- Potential for Interference: Wi-Fi signals can be affected by distance, walls, other electronic devices, and even weather, potentially leading to dropped frames or connection loss.
- Battery Management: Battery-powered wireless cameras require regular charging or replacement, which can be inconvenient, especially for hard-to-reach locations.
- Bandwidth Limitations: High-resolution video streams can consume significant Wi-Fi bandwidth, potentially impacting other devices on your network.
- Security Vulnerabilities: Wi-Fi networks can be more susceptible to hacking if not properly secured with strong passwords and encryption.
- Power Source Dependency: Even if wireless for data, most still need a power outlet, limiting placement options unless battery-powered.
Comparison Table: Wired vs. Wireless Installation
| Feature | Wired Installation | Wireless Installation |
|---|---|---|
| Installation Complexity | High (requires drilling, cable running) | Low (simple setup, app-driven) |
| Flexibility/Relocation | Low | High |
| Reliability | Very High | Good (can be affected by interference) |
| Video Quality | Excellent (consistent) | Good to Excellent (can vary) |
| Power Source | Continuous (via cable) | Outlet or Battery (requires management) |
| Aesthetics | Can be less appealing if cables are visible | Cleaner, more discreet |
| Cost (Installation) | Higher (professional) or more time (DIY) | Lower (DIY friendly) |
Recommendation for 2025-26: For new installations where flexibility and ease of setup are paramount, wireless cameras are often the preferred choice. However, for maximum reliability and quality in permanent setups, wired PoE systems remain the gold standard.
Step-by-Step Installation Guide
This guide provides a general framework for installing a home video security camera system. Specific steps may vary slightly depending on the brand and type of camera you choose (wired vs. wireless, NVR/DVR vs. cloud-based). Always refer to your camera's user manual for detailed instructions.
Phase 1: Preparation and Planning
- Gather Your Equipment: Ensure you have all cameras, mounting hardware, cables (if wired), power adapters, NVR/DVR (if applicable), and any necessary tools (drill, screwdriver, ladder, cable clips, etc.).
- Read the Manuals: Familiarize yourself with the installation and setup guides for each component.
- Test Cameras Indoors: Before mounting, connect each camera to its power source and test its Wi-Fi connection or video output. Ensure you can view the feed on your chosen device (smartphone, monitor). This helps identify any faulty units early.
- Confirm Wi-Fi Coverage (for Wireless): Use your smartphone or a Wi-Fi analyzer app to check signal strength at each planned mounting location. If the signal is weak, consider repositioning your router, adding a Wi-Fi extender, or opting for a wired solution.
- Charge Batteries (for Wireless): If using battery-powered cameras, ensure all batteries are fully charged before installation.
Phase 2: Mounting the Cameras
This is the most physically demanding part of the installation.
- Determine Mounting Height: Generally, 8-10 feet off the ground is recommended for optimal viewing angles and to prevent easy tampering.
- Mark Mounting Holes: Hold the camera or its mounting bracket in the desired position and mark the screw holes. Ensure the camera is angled correctly to cover the intended area.
- Drill Pilot Holes: Use a drill bit slightly smaller than your screws to create pilot holes. For mounting on brick or concrete, you'll need appropriate masonry bits and wall anchors.
- Secure the Mounting Bracket: Screw the mounting bracket firmly into the wall or ceiling.
- Attach the Camera: Mount the camera to the bracket according to the manufacturer's instructions.
- Run Cables (for Wired Systems):
- For PoE/Ethernet: Drill a hole from the mounting location towards your NVR or router. Feed the Ethernet cable through the wall cavity, attic, or crawl space. Use cable clips to secure the cable neatly along walls or baseboards.
- For Traditional CCTV: Run both coaxial (video) and power cables. This is more complex and often requires professional installation.
- For Power Cables: If your camera requires a separate power adapter, ensure the cable can reach the nearest outlet without being a tripping hazard or exposed to the elements. Consider using outdoor-rated extension cords if necessary.
- Weatherproof Connections: For outdoor installations, ensure all cable connections are properly sealed and protected from moisture. Use weatherproof junction boxes or silicone sealant where necessary.
Phase 3: Connecting and Configuring the System
Once cameras are physically installed, it's time to connect them to your recording and viewing devices.
- Connect to NVR/DVR (for Wired Systems):
- Plug the Ethernet cables from your PoE cameras into the PoE ports on your NVR.
- If using a separate power supply for cameras, connect them to their respective adapters and then to a power source.
- Connect the NVR/DVR to your router using an Ethernet cable for remote access.
- Connect the NVR/DVR to a monitor and power it on.
- Connect Wireless Cameras:
- Power on the wireless camera.
- Download the manufacturer's app on your smartphone or tablet.
- Follow the app's instructions to add the camera. This usually involves connecting to the camera's temporary Wi-Fi network and then providing your home Wi-Fi credentials.
- The camera will then connect to your home Wi-Fi network.
- Initial Setup and Configuration:
- NVR/DVR: Access the NVR/DVR's interface via the connected monitor or through its web interface/app. The system will typically detect connected cameras. You may need to format the hard drive for recording.
- Wireless Cameras: Use the app to name your cameras, adjust motion detection zones, set recording schedules, and configure notification settings.
- Testing and Adjustment:
- Walk in front of each camera to test its motion detection and recording capabilities.
- Check the live view on your app or monitor to ensure the field of view is optimal. Adjust camera angles as needed.
- Verify that notifications are being received for motion events.
- Secure Your System:
- Change default passwords for your cameras, NVR/DVR, and Wi-Fi network to strong, unique passwords.
- Enable two-factor authentication (2FA) if available.
- Ensure your Wi-Fi network uses WPA2 or WPA3 encryption.
Example: For a wireless setup, you might mount a camera above your front door. After charging its battery, you power it on. Open the app, tap "Add Camera," and follow prompts to connect it to your home Wi-Fi. Once connected, you'd adjust the motion sensitivity and recording duration via the app.
Advanced Features and Integration
Modern home security camera systems in 2025-26 offer more than just basic recording. Integrating advanced features and connecting with your smart home ecosystem can significantly enhance your security and convenience.
AI-Powered Motion Detection
Traditional motion detection can trigger false alarms from passing cars, swaying trees, or pets. Advanced AI capabilities can differentiate between people, vehicles, animals, and general motion, sending more accurate alerts.
- Person Detection: Alerts you only when a human is detected, reducing nuisance notifications.
- Vehicle Detection: Useful for monitoring driveways and identifying unfamiliar vehicles.
- Package Detection: Notifies you when a package is delivered or removed from your doorstep.
Benefit: Significantly reduces false alarms, allowing you to focus on genuine security events. This is a major leap from the basic motion sensors of previous years.
Two-Way Audio
Many modern cameras include built-in microphones and speakers. This allows you to not only hear what's happening around the camera but also to speak through the camera via your smartphone app.
- Deterrence: Speak to a potential intruder to scare them off.
- Communication: Greet visitors, instruct delivery personnel, or talk to family members remotely.
Benefit: Adds an interactive layer to your security system, enabling real-time communication and deterrence.
Cloud Storage and Subscription Services
While local storage (SD cards, NVRs) is common, cloud storage offers off-site backup and accessibility from anywhere. Most services require a monthly or annual subscription.
- Features: Often include extended recording history, advanced AI features, and easier sharing of footage.
- Considerations: Ongoing costs, reliance on internet connectivity, and privacy concerns related to data storage.
Benefit: Provides a secure backup of your footage, accessible even if your local storage is compromised.
Smart Home Integration
Connecting your security cameras to platforms like Amazon Alexa, Google Assistant, or Apple HomeKit unlocks powerful automation and control.
- Voice Control: "Hey Google, show me the front door camera."
- Automation: Trigger other smart devices based on camera events. For example, turn on porch lights when motion is detected after dark, or lock smart doors when a person is detected entering the property.
- Integration with Security Systems: Some systems can arm/disarm based on your location or camera activity.
Benefit: Creates a more cohesive and intelligent home security ecosystem.
Video Doorbell Cameras
These combine a doorbell with a camera, offering a clear view of who is at your door, even when you're not home. Many include two-way audio and motion detection.
- Benefit: Enhanced front-door security, package theft deterrence, and convenience for screening visitors.
Local vs. Cloud Storage Comparison
| Feature | Local Storage (SD Card/NVR/DVR) | Cloud Storage |
|---|---|---|
| Initial Cost | Higher upfront for hardware (NVR/DVR) | Lower upfront, ongoing subscription fees |
| Ongoing Cost | Minimal (electricity) | Monthly/Annual subscription |
| Accessibility | Requires access to the local device or network | Accessible from any internet-connected device |
| Data Security | Dependent on physical security of the device | Dependent on cloud provider's security measures |
| Storage Capacity | Limited by hard drive size or SD card capacity | Scalable, often with tiered plans |
| Redundancy | None (unless using RAID on NVR) | High (data often replicated across multiple servers) |
Statistics for 2025-26: It's estimated that over 60% of new smart home security camera installations in 2025 will include AI-powered features, and cloud subscription services will be adopted by nearly 75% of users seeking extended video history and advanced analytics.
Troubleshooting Common Installation Issues
Even with careful planning, you might encounter issues during or after installation. Here are solutions to common problems encountered when installing home video security cameras.
Problem 1: Poor or No Wi-Fi Signal for Wireless Cameras
- Cause: Distance from router, thick walls, interference from other devices.
- Solutions:
- Reposition Router: Move your router to a more central location in your home.
- Use a Wi-Fi Extender/Booster: These devices amplify your Wi-Fi signal to reach further areas.
- Mesh Wi-Fi System: For larger homes, a mesh system provides consistent coverage throughout.
- Check Camera Settings: Ensure the camera is configured to connect to the correct Wi-Fi network and that the password is entered correctly.
- Consider Wired: If signal issues persist, a wired PoE system might be a more reliable option for that location.
Problem 2: Camera Not Powering On
- Cause: Loose power connection, faulty power adapter, dead battery, incorrect power supply.
- Solutions:
- Check Connections: Ensure the power adapter is securely plugged into both the camera and the wall outlet.
- Test Power Outlet: Plug another device into the same outlet to confirm it's working.
- Use Correct Power Adapter: Verify that the power adapter's voltage and amperage match the camera's requirements.
- Replace Battery (Wireless): If it's a battery-powered camera, try a fresh set of batteries or recharge the existing ones.
- Try a Different Adapter: If possible, test with a known working power adapter.
Problem 3: No Video Feed or Intermittent Feed (Wired)
- Cause: Loose cable connections, damaged cable, faulty NVR/DVR port, incorrect camera configuration.
- Solutions:
- Check Cable Connections: Ensure all Ethernet or coaxial cables are firmly seated at both the camera and the NVR/DVR end.
- Inspect Cables: Look for any visible damage, kinks, or cuts in the cables.
- Test Different Ports: Try connecting the camera to a different port on the NVR/DVR.
- Test Camera Individually: If possible, connect the camera directly to the NVR/DVR with a known good cable to isolate the issue.
- Restart NVR/DVR: Power cycle the NVR/DVR and the cameras.
Problem 4: Motion Detection Not Working or False Alarms
- Cause: Incorrect sensitivity settings, poor camera angle, environmental factors, lack of AI detection.
- Solutions:
- Adjust Sensitivity: Lower the motion detection sensitivity if you're getting too many false alarms. Increase it if it's not detecting motion.
- Refine Motion Zones: Use the app or software to define specific areas within the camera's view where motion should be detected. Exclude areas like busy streets or trees.
- Check Camera Angle: Ensure the camera isn't pointing directly at sources of movement like busy roads or swaying branches.
- Utilize AI Features: If your camera supports AI detection (person, vehicle), enable these features for more accurate alerts.
- Update Firmware: Ensure your camera's firmware is up to date, as updates often improve motion detection algorithms.
Problem 5: Difficulty Connecting to Remote View (App/Web)
- Cause: Incorrect network configuration, firewall issues, outdated app, server issues.
- Solutions:
- Verify Local Connection: Ensure you can view the cameras on your local network first.
- Check Internet Connection: Confirm your home internet is working properly.
- Router Settings: Ensure UPnP is enabled on your router (if required by the camera system) or that necessary ports are forwarded.
- Update App/Software: Make sure you're using the latest version of the camera's mobile app or desktop software.
- Check Manufacturer's Status: Visit the manufacturer's website to see if there are any known server outages.
- Restart Devices: Power cycle your router, modem, NVR/DVR, and cameras.
Pro Tip: Keep a log of any issues encountered and the steps taken to resolve them. This can be invaluable for future troubleshooting.
Legal and Privacy Considerations
Installing home security cameras comes with responsibilities regarding privacy and legal compliance. Understanding these aspects is crucial in 2025-26, as regulations continue to evolve.
Recording Audio
In many jurisdictions, it is illegal to record audio conversations without the consent of all parties involved. Be mindful of this:
- Check Local Laws: Laws vary significantly by state and country.
- Disable Audio Recording: If unsure, it's safest to disable audio recording on your cameras, especially if they can capture conversations from outside your property or inside common areas.
- Inform Visitors: If you do record audio, consider posting a notice informing visitors that audio is being recorded.
Privacy of Neighbors
Your cameras should primarily focus on your own property. Avoid pointing them directly into your neighbors' homes, yards, or private spaces.
- Respect Boundaries: Ensure your camera's field of view is limited to your property line.
- Neighborly Communication: If a neighbor expresses concern, discuss the camera placement and explain its purpose. Open communication can prevent disputes.
Data Security and Storage
Protecting the footage captured by your cameras is essential.
- Strong Passwords: Use unique, strong passwords for your cameras, NVR/DVR, and Wi-Fi network.
- Secure Network: Employ WPA2 or WPA3 encryption for your Wi-Fi.
- Cloud Privacy Policies: If using cloud storage, review the provider's privacy policy to understand how your data is handled and protected.
- Regular Updates: Keep camera firmware and associated apps updated to patch security vulnerabilities.
Public Areas
Be cautious about recording public sidewalks or streets. While incidental capture might be unavoidable, the primary focus should be your private property.
- Incidental Capture: Recording a public sidewalk that is directly in front of your home is generally acceptable, but avoid extensive recording of public spaces.
- Business vs. Residential: Regulations for businesses are often stricter than for private residences.
When to Seek Professional Advice
If you are unsure about the legal implications in your specific area, or if you are installing a complex system for a large property, consider consulting with a legal professional or a professional security installer who is knowledgeable about local regulations.
Statistics for 2025-26: A growing number of municipalities are implementing stricter guidelines on residential surveillance, with over 30% of US states having specific laws regarding audio recording consent. Homeowners are increasingly aware of these issues, with 85% of new security camera buyers researching privacy implications before purchase.
Conclusion
Installing a home video security camera system is a proactive step towards safeguarding your property and loved ones. By understanding the diverse camera options, meticulously planning your placement, and following a clear installation process, you can create a robust surveillance network tailored to your needs. Remember to weigh the benefits of wired versus wireless solutions, consider advanced features like AI detection and smart home integration for enhanced functionality, and always prioritize robust security practices and legal compliance. With the right approach, your security cameras will provide invaluable peace of mind and a critical layer of protection for your home in 2025 and beyond.