Installing security cameras can significantly enhance your home or business security. This comprehensive guide will walk you through every step, from choosing the right system to final setup, ensuring you achieve optimal protection and peace of mind. We cover everything you need to know for a successful DIY installation.
Choosing the Right Security Camera System
Selecting the appropriate security camera system is the foundational step to effective surveillance. In 2025, the market offers a vast array of options, from simple DIY kits to complex professional installations. Your choice will depend on your specific needs, budget, and technical comfort level. Consider the size of the area you need to cover, the level of detail required (e.g., facial recognition vs. general area monitoring), and whether you prefer wired or wireless solutions. For businesses, scalability and integration with other security systems are crucial. For homeowners, ease of use and remote access are often top priorities. According to recent industry reports, the global video surveillance market is projected to reach over $130 billion by 2027, indicating a strong and growing demand for robust security solutions.
Assessing Your Security Needs
Before diving into product specifications, conduct a thorough assessment of your security requirements. For a residential property, this might involve identifying vulnerable entry points like doors and ground-floor windows, as well as areas of high traffic such as driveways and backyards. For a business, consider customer entrances, cash registers, stock rooms, and parking areas. Think about the resolution needed – higher resolution (e.g., 4K) provides more detail, crucial for identifying individuals or license plates, while lower resolutions might suffice for general perimeter monitoring. Night vision capabilities are essential for continuous surveillance, and the range of this feature can vary significantly between models. Environmental factors also play a role; if cameras will be exposed to the elements, you'll need weather-resistant (IP-rated) models.
Budget Considerations
Security camera systems range from under $100 for a basic two-camera wireless kit to several thousand dollars for a multi-camera, high-resolution wired system with professional recording capabilities. For DIY installations, budget-friendly options are abundant. However, investing a bit more upfront can often lead to better image quality, greater durability, and more advanced features. Consider the total cost of ownership, including potential subscription fees for cloud storage or advanced monitoring services, which are becoming increasingly common in 2025. Many systems offer tiered subscription plans, so evaluate what features you truly need before committing.
Key Features to Look For
When comparing systems, pay close attention to these critical features:
- Resolution: Aim for at least 1080p (Full HD) for clear images. 2K or 4K offers superior detail.
- Field of View (FoV): A wider FoV covers more area, reducing the number of cameras needed.
- Night Vision: Infrared (IR) LEDs are standard. Look for the effective range (e.g., 30ft, 100ft). Color night vision technology is also emerging as a premium feature.
- Storage Options: Local storage (SD card, NVR/DVR) or cloud storage. Cloud storage offers convenience and off-site backup but usually involves recurring fees.
- Connectivity: Wi-Fi for wireless systems, Ethernet for wired. Ensure strong signal strength for Wi-Fi cameras.
- Durability: Weatherproofing (IP ratings) for outdoor cameras.
- Motion Detection: Advanced motion detection can reduce false alerts by distinguishing between people, vehicles, and general movement.
- Two-Way Audio: Allows for communication through the camera.
- Remote Access: Mobile app for viewing live feeds and recordings from anywhere.
Planning Your Security Camera Installation
A well-planned installation is crucial for maximizing the effectiveness of your security cameras and ensuring a smooth setup process. Rushing this stage can lead to blind spots, poor image quality, or connectivity issues. Take the time to map out your camera placements, consider power sources, and plan cable runs if you're opting for a wired system. This proactive approach will save you time and frustration down the line.
Creating a Site Map
Start by sketching a simple map of your property. Mark all potential entry points (doors, windows), driveways, garages, and any areas you want to monitor closely. For businesses, include entrances, exits, reception areas, sensitive zones, and parking lots. On this map, indicate where you envision placing each camera. Consider the camera's field of view to ensure adequate coverage and overlap where necessary. Think about potential obstructions like trees or buildings that might block the view. Also, note existing power outlets or network ports that you can utilize, or identify areas where new power sources or network cables will be required.
Determining Camera Placement
Strategic placement is key to effective surveillance. Here are some general guidelines:
- Entry Points: Cover all main entrances and exits. Position cameras high enough to deter tampering but low enough to capture clear facial details.
- Vulnerable Areas: Ground-floor windows, back doors, and secluded areas should be monitored.
- High-Traffic Zones: Driveways, walkways, and common areas within a business.
- Blind Spots: Identify areas not covered by existing cameras and place new ones to fill these gaps.
- Height and Angle: Mount cameras at least 8-10 feet high to prevent easy access. Angle them downwards to capture faces and avoid capturing too much sky, which can wash out images.
- Lighting: Consider how natural and artificial light will affect the camera's view, especially at different times of day and night. Avoid pointing cameras directly into bright light sources.
Power and Connectivity Considerations
For wired systems, you'll need to run cables for both power and data. This might involve drilling through walls, running cables through attics or crawl spaces, or using outdoor-rated conduit. Plan these routes carefully to minimize visible wiring and ensure they are protected. For wireless cameras, you'll still need a power source for each camera (unless they are battery-powered). Wi-Fi cameras require a strong and stable wireless signal in their intended location. Test your Wi-Fi strength in these areas before purchasing or installing. Consider a Wi-Fi extender or mesh network if signal strength is an issue.
Understanding Different Types of Security Cameras
The security camera market in 2025 offers a diverse range of camera types, each designed for specific applications and environments. Understanding these differences will help you select the best cameras for your needs.
Dome Cameras
Dome cameras are popular for their discreet design and vandal-resistant housings. They are often mounted on ceilings or walls and their curved shape makes it difficult for intruders to tell which way they are pointing, adding a layer of deterrence. They are commonly used indoors in commercial settings like retail stores, offices, and restaurants, but outdoor-rated versions are also available.
Bullet Cameras
Bullet cameras are easily recognizable by their cylindrical shape. They are typically mounted on walls or poles and are often used outdoors due to their robust, weather-resistant construction. Their visible presence can act as a deterrent. They offer good flexibility in terms of aiming and are effective for monitoring specific areas like entryways, driveways, or perimeters.
Turret Cameras (Eyeball Cameras)
Turret cameras, also known as eyeball cameras, combine features of dome and bullet cameras. They have a spherical lens housed in a dome-like structure but are mounted on a bracket, similar to a bullet camera. This design allows for easy adjustment of the viewing angle and often provides better performance in low light than traditional dome cameras. They are suitable for both indoor and outdoor use.
PTZ (Pan-Tilt-Zoom) Cameras
PTZ cameras offer advanced functionality, allowing users to remotely control their pan (horizontal movement), tilt (vertical movement), and zoom capabilities. This makes them ideal for monitoring large areas or tracking moving subjects. They are often used in security control rooms or for comprehensive surveillance of expansive properties. While more expensive, their versatility can reduce the need for multiple fixed cameras.
Fisheye Cameras
Fisheye cameras provide an ultra-wide, 360-degree view, eliminating blind spots. They are perfect for covering large open areas like warehouses, retail floors, or public spaces with a single camera. The "fisheye" distortion can be corrected in software, allowing for a de-warped, panoramic view.
Specialty Cameras
This category includes cameras with unique features such as thermal imaging (for detecting heat signatures), license plate recognition (LPR) cameras, and cameras designed for extreme environments. Thermal cameras are useful for detecting intruders in complete darkness or through smoke, while LPR cameras are essential for monitoring vehicle access.
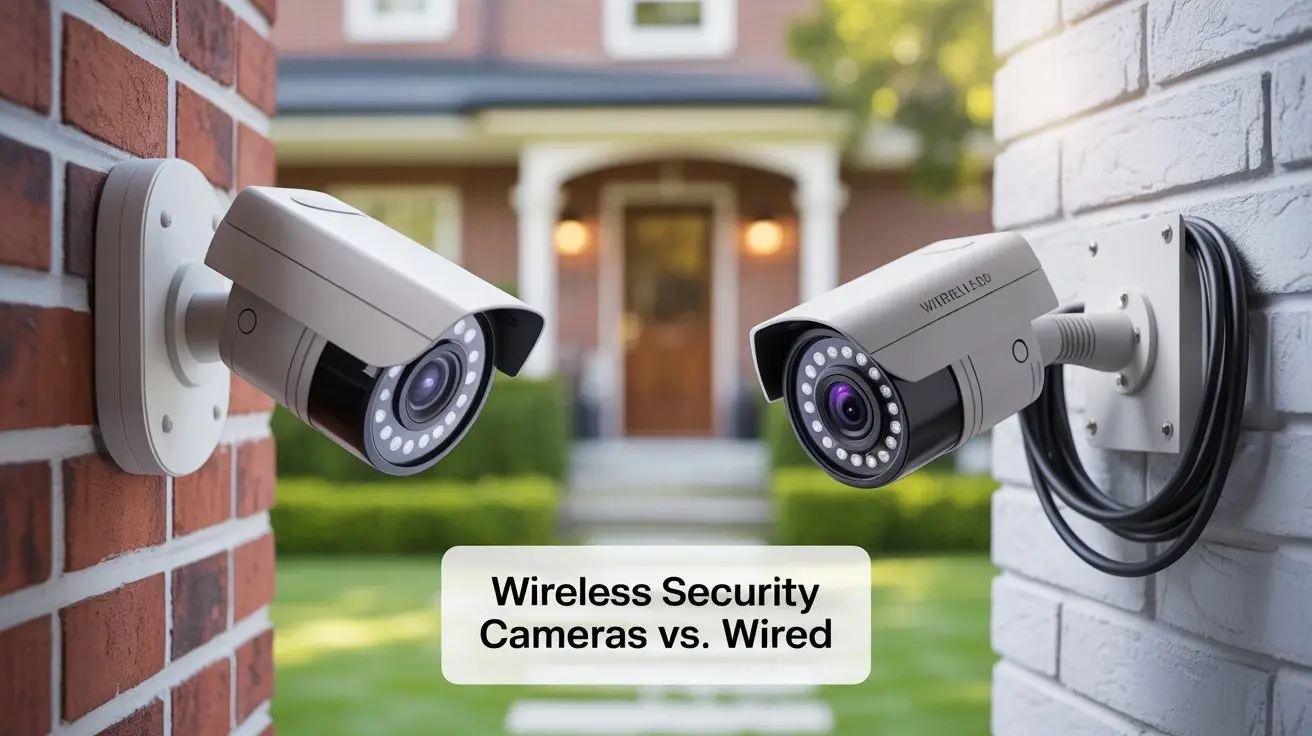
Wired vs. Wireless Security Cameras: A Comparison
The choice between wired and wireless security camera systems is a significant one, impacting installation complexity, reliability, and cost. Both have their pros and cons, and the best option depends on your specific circumstances.
Wired Security Cameras (Analog/IP)
Wired systems, whether analog (using coaxial cables) or IP (using Ethernet cables), generally offer greater reliability and a more stable connection. IP cameras are the modern standard, transmitting both video data and power (via Power over Ethernet - PoE) over a single Ethernet cable. This simplifies installation compared to older analog systems that required separate cables for video and power. Wired systems are less susceptible to interference and hacking compared to wireless counterparts.
Pros:
- Reliability: Stable connection, less prone to interference.
- Security: More difficult to hack or jam.
- Power over Ethernet (PoE): Simplifies wiring for IP cameras.
- Consistent Performance: Not dependent on Wi-Fi signal strength.
Cons:
- Installation Complexity: Requires running cables, which can be labor-intensive and may require drilling through walls.
- Limited Placement Flexibility: Camera placement is constrained by cable reach and availability of network ports.
- Higher Initial Cost: Often more expensive upfront due to the need for NVRs (Network Video Recorders) and cabling infrastructure.
Wireless Security Cameras (Wi-Fi)
Wireless cameras connect to your home or business network via Wi-Fi. They still require a power source, either from a plugged-in adapter or batteries. The primary advantage is ease of installation and flexibility in placement, as you don't need to run data cables. However, their performance is dependent on the strength and stability of your Wi-Fi network.
Pros:
- Ease of Installation: No data cables to run, making setup quicker and simpler.
- Placement Flexibility: Can be placed almost anywhere with Wi-Fi coverage and a power source.
- Scalability: Easy to add more cameras to the system.
- Cost-Effective for Simple Setups: Often cheaper for basic home security needs.
Cons:
- Reliability Issues: Susceptible to Wi-Fi interference, signal drops, and dead zones.
- Security Risks: More vulnerable to hacking if the network is not secured properly.
- Power Dependency: Still requires a power outlet or battery charging/replacement.
- Bandwidth Consumption: Multiple high-resolution wireless cameras can consume significant Wi-Fi bandwidth.
Hybrid Systems
Many modern systems offer hybrid solutions, allowing you to mix and match wired and wireless cameras to leverage the benefits of both. For example, you might use wired IP cameras for critical entry points and wireless cameras for less critical areas or where running cables is impractical.
Step-by-Step Security Camera Installation Guide
This section provides a detailed, step-by-step guide to installing your security camera system. Whether you're using a wired or wireless setup, the fundamental principles remain similar. Remember to always follow the manufacturer's specific instructions for your chosen system.
Step 1: Unboxing and Inventory
Carefully unbox your security camera system. Lay out all components and check them against the packing list. Ensure you have all cameras, cables (if applicable), power adapters, mounting hardware, the NVR/DVR or base station, and any included tools. Familiarize yourself with each component before proceeding.
Step 2: System Setup (NVR/DVR or Base Station)
For wired systems, connect your NVR (Network Video Recorder) or DVR (Digital Video Recorder) to your router using an Ethernet cable. Connect it to a monitor and power source. For wireless systems, set up the base station or hub according to the manufacturer's instructions. This often involves connecting it to your router and powering it on.
Step 3: Software and App Installation
Download and install the corresponding mobile app or desktop software for your security camera system. Create an account and follow the prompts to connect the app to your NVR/DVR or base station. This will be essential for remote viewing and configuration.
Step 4: Network Configuration (for IP/Wireless)
For IP Cameras: If your IP cameras don't support PoE, you'll need to connect them to your router or a PoE switch via Ethernet cables. Some systems allow for Wi-Fi setup of IP cameras as well. Follow the manufacturer's guide for pairing cameras to the NVR.
For Wireless Cameras: Power on each camera and follow the app's instructions to connect it to your Wi-Fi network. This usually involves putting the camera in pairing mode and selecting your Wi-Fi network and entering the password. Ensure the camera is within good Wi-Fi range of your router or extender.
Step 5: Testing Connectivity
Before permanently mounting cameras, test their connectivity. Power them on and ensure they appear in your NVR/DVR interface or mobile app. Check the live video feed from each camera. If a camera isn't connecting, troubleshoot your network, power source, or the camera's pairing process. For wireless cameras, check the Wi-Fi signal strength at the intended mounting location using your smartphone.
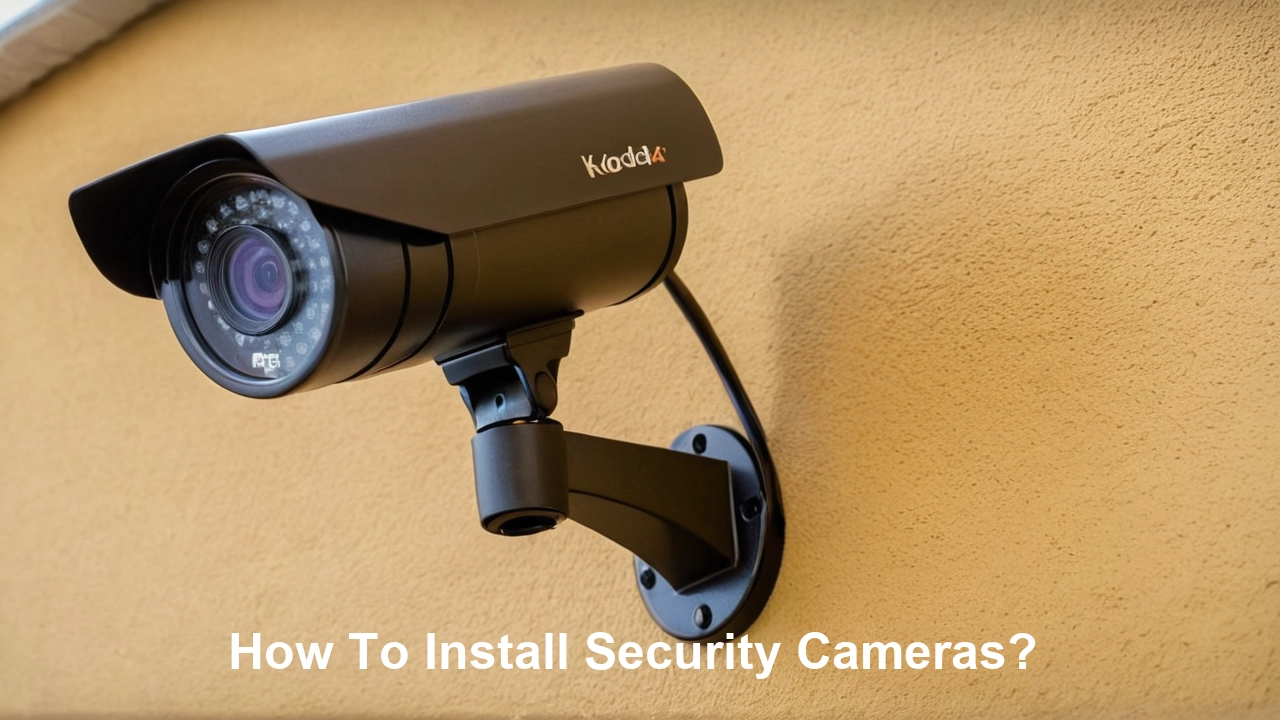
Mounting Your Security Cameras
Proper mounting ensures optimal field of view, durability, and security of your cameras. This step requires careful consideration of your site map and the camera's capabilities.
Tools and Materials Needed
You will typically need:
- Drill and drill bits (including masonry bits if drilling into brick or concrete)
- Screwdriver set
- Ladder (ensure it's stable and appropriate for the height)
- Pencil or marker for marking drill holes
- Wire strippers and crimpers (for wired systems if custom cable lengths are needed)
- Caulking or sealant for weatherproofing drilled holes
- Mounting screws and anchors (often included, but you might need different ones for your wall material)
- Conduit or cable clips for securing wires
Mounting Procedures
- Mark the Location: Hold the camera mount against the wall or ceiling at your chosen spot. Use a pencil to mark the screw hole locations. Ensure the camera will have a clear view of the desired area.
- Drill Pilot Holes: Drill pilot holes at the marked locations. If mounting on drywall, use appropriate anchors. For brick or concrete, use masonry bits and anchors.
- Run Cables (Wired Systems): If using a wired system, carefully run the Ethernet or coaxial cable from the camera location to your NVR/DVR. This might involve drilling through exterior walls or running cables through attics or crawl spaces. Use conduit for outdoor runs to protect the cables from weather and damage.
- Connect Cables: Connect the cable to the camera and the other end to the NVR/DVR or PoE switch. Ensure connections are secure.
- Mount the Bracket: Secure the camera's mounting bracket to the wall or ceiling using the provided screws and anchors.
- Attach the Camera: Mount the camera onto the bracket. Most cameras can be attached and then adjusted.
- Adjust Camera Angle: Carefully position the camera to achieve the desired field of view. Ensure it captures the intended area without significant blind spots.
- Secure Wiring: Use cable clips or ties to neatly secure any exposed wiring, preventing it from being a tripping hazard or an eyesore.
- Weatherproof (Outdoor Installations): For outdoor cameras, apply sealant around the mounting holes and any cable entry points to prevent water ingress.
Battery-Powered Camera Installation
For battery-powered wireless cameras, the mounting process is simpler. Once you've identified the optimal location with good Wi-Fi coverage, you typically just need to attach the mounting bracket and then the camera. Ensure you have fully charged batteries or a plan for regular charging/replacement.
Connecting Your Security Camera System
This stage involves finalizing the connections between your cameras, recorder, and network. The specifics vary greatly between wired and wireless systems.
Wired System Connections
NVR/DVR Setup: Connect the NVR/DVR to your router via an Ethernet cable. Connect a monitor (HDMI or VGA) and a mouse for initial setup and configuration. Power on the NVR/DVR.
Camera to NVR/PoE Switch: If using PoE, connect each IP camera to a PoE-enabled port on your NVR or a separate PoE switch using Ethernet cables. If not using PoE, you'll need separate power adapters for each camera, and they will connect to your router or network switch.
Initial Configuration: Once powered on, the NVR/DVR will typically detect connected cameras. You may need to assign IP addresses or activate cameras through the NVR interface. Follow your NVR's setup wizard.
Wireless System Connections
Base Station/Hub: Connect the base station or hub to your router via an Ethernet cable and power it on. Follow the app's instructions to set up the base station.
Camera Pairing: Power on each wireless camera. Using the mobile app, initiate the pairing process. This usually involves scanning a QR code on the camera or the app guiding you through connecting the camera to your Wi-Fi network. Ensure the camera is within range and has a strong signal.
Network Integration: Once paired, the cameras will communicate wirelessly with the base station or directly with your router, and their feeds will be accessible through the app.
Connecting to the Internet for Remote Access
For remote viewing, your NVR/DVR or wireless base station needs to be connected to the internet. Ensure your router has an active internet connection. Most systems will guide you through enabling remote access via their app, which may involve creating an account and linking your device. For wired NVRs, ensure UPnP is enabled on your router, or you may need to configure port forwarding manually (consult your router's manual for this advanced step).
Testing and Initial Setup
With all cameras physically installed and connected, the next crucial step is to test their functionality and configure their settings for optimal performance.
Verifying Camera Feeds
Open your mobile app or NVR/DVR interface and check the live view for each camera. Ensure all cameras are displaying a clear image. Rotate each camera slightly to confirm its field of view is as intended. Check for any obstructions or blind spots that might have been missed during planning.
Configuring Recording Settings
Continuous Recording: Records footage 24/7. This provides the most comprehensive data but requires significant storage space.
Adjust these settings based on your storage capacity and surveillance needs. For example, you might set continuous recording for critical areas and motion-activated for less sensitive zones.
Setting Up Motion Detection and Alerts
Most modern systems offer advanced motion detection features. Configure these to minimize false alerts from environmental factors like swaying trees or passing cars. Many systems allow you to define specific detection zones within a camera's view. Set up push notifications or email alerts to be notified immediately when motion is detected in critical areas. Test these alerts to ensure they are working correctly.
Adjusting Image Quality
Fine-tune camera settings like brightness, contrast, and exposure. For cameras with night vision, check the IR illumination and ensure it's sufficient for the area. If your system offers it, experiment with different resolution settings to balance image clarity with storage requirements. For outdoor cameras, ensure the white balance is set correctly to accurately represent colors.
Remote Access Testing
From outside your home or business network (e.g., using your mobile phone's cellular data), try accessing the live camera feeds. This confirms that remote access is properly configured and working. If you encounter issues, re-check your network settings and the remote access configuration in the app or NVR/DVR.
Leveraging Advanced Features and Maintenance
To get the most out of your security camera system and ensure its longevity, explore advanced features and establish a regular maintenance routine.
Smart Detection Features
Many 2025-26 systems offer AI-powered smart detection, which can differentiate between people, vehicles, pets, and even package deliveries. This significantly reduces false alerts and allows for more targeted notifications. Some systems can also detect facial recognition, loitering, or line crossing, providing more sophisticated security monitoring.
Two-Way Audio
If your cameras have two-way audio, use it to your advantage. You can communicate with visitors, deter potential intruders with your voice, or even speak to family members or pets remotely.
Cloud Storage vs. Local Storage
Understand the differences between cloud and local storage. Cloud storage offers off-site backup, protecting your footage from theft or damage to your recording device. However, it often comes with monthly subscription fees. Local storage (SD card, NVR/DVR) is a one-time cost but is vulnerable to physical theft or damage. Consider a hybrid approach for maximum security.
Regular Maintenance Schedule
Clean Lenses: Periodically clean the camera lenses with a soft, lint-free cloth to ensure clear images. For outdoor cameras, this might be needed more frequently due to dust, pollen, or spiderwebs.
A proactive maintenance approach will prevent unexpected failures and ensure your security system remains reliable.
Legal and Privacy Considerations
Installing security cameras comes with legal and privacy responsibilities. It's crucial to be aware of these to avoid potential issues.
Recording Laws and Regulations
Laws regarding video surveillance vary by location. In many areas, it is legal to record public areas and areas on your own property. However, recording audio without consent can be illegal in some jurisdictions (one-party consent vs. two-party consent states). Be mindful of privacy laws when placing cameras, especially if they might inadvertently capture footage of neighboring properties or public spaces.
Privacy of Others
Avoid pointing cameras directly into neighbors' windows or private yards. If you are installing cameras in a business, clearly inform employees and customers that surveillance is in operation, typically through signage. Transparency is key to respecting privacy and avoiding legal disputes.
Data Security
Ensure your security system is secured with strong passwords. For wireless systems, use WPA2 or WPA3 encryption for your Wi-Fi network. Regularly update firmware to patch any security vulnerabilities. This protects your footage from unauthorized access.
Signs and Notifications
In many commercial settings, it is legally required to post signs indicating that video surveillance is in use. Even for residential properties, clear signage can be a deterrent and inform visitors that they are being recorded.
Consult Local Laws
It is always advisable to consult your local laws and regulations regarding video surveillance and recording. If you are unsure, seek advice from a legal professional.
By following these guidelines, you can effectively install and manage a security camera system that provides robust protection for your home or business. Remember that thorough planning, careful installation, and ongoing maintenance are key to maximizing the benefits of your investment. Stay vigilant, and enjoy the enhanced security and peace of mind that comes with a well-protected property.
Conclusion:
Installing security cameras is a proactive step towards safeguarding your property and loved ones. This comprehensive guide has navigated you through every essential phase, from the critical decision of selecting the right system and meticulous planning of camera placement to the practical steps of mounting, connecting, and configuring your cameras. We've highlighted the importance of understanding different camera types, the trade-offs between wired and wireless solutions, and the necessity of robust testing and ongoing maintenance. By adhering to these detailed instructions and considering the legal and privacy implications, you are well-equipped to achieve a professional-grade installation. Empower yourself with the knowledge to enhance your security, deter potential threats, and gain invaluable peace of mind. Your commitment to a secure environment starts with informed action, and this guide provides the roadmap to success.