Setting up your Ring Doorbell camera can significantly enhance your home security and convenience. This comprehensive guide will walk you through every step, from unboxing to advanced customization, ensuring a smooth and successful installation process. We'll cover wired and battery-powered models, troubleshooting common issues, and optimizing your device for peak performance.
Introduction: Why a Ring Doorbell?
In today's world, home security and smart technology are increasingly intertwined. A Ring Doorbell camera offers a compelling solution for homeowners and renters alike, providing peace of mind by allowing you to see, hear, and speak to anyone at your front door from anywhere in the world. With advanced motion detection, two-way talk, and HD video, it's more than just a doorbell; it's a vigilant guardian for your home. This guide will equip you with the knowledge to set up your Ring Doorbell camera seamlessly, ensuring you leverage its full potential.
Choosing the Right Ring Doorbell for Your Home
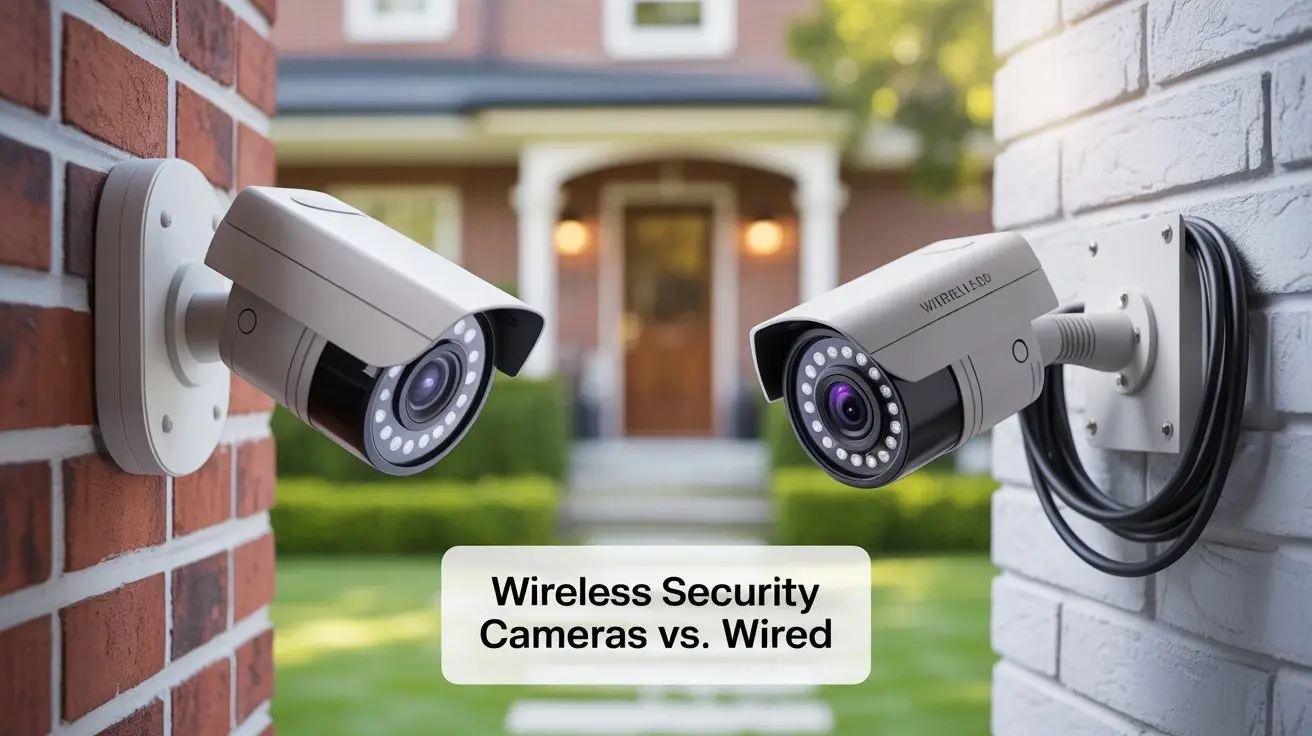
Ring offers a diverse range of doorbell cameras, each with unique features to suit different needs and existing home setups. Understanding these differences is crucial for a successful installation. As of 2025, the lineup continues to evolve, but key models remain popular.
Battery-Powered Options
These are the most flexible and easiest to install, as they don't require existing doorbell wiring. They are ideal for renters or homes where running new wires is impractical.
- Ring Video Doorbell (2nd Gen): A popular entry-level option offering essential features like HD video, motion detection, and two-way talk. Its rechargeable battery pack provides weeks of power on a single charge, depending on usage.
- Ring Video Doorbell 3 & 3 Plus: These models build upon the base model with improved motion detection zones (Near Zone), dual-band Wi-Fi for better connectivity, and the 3 Plus offers Pre-Roll technology, capturing up to four extra seconds of video before motion is detected.
- Ring Video Doorbell 4: The latest iteration in the battery-powered series, featuring color Pre-Roll, enhanced Wi-Fi, and improved battery life.
Wired Options
These doorbells offer continuous power, meaning no battery recharges are needed. They also typically offer more advanced features and a more robust connection.
- Ring Video Doorbell Wired: A more affordable wired option that still provides HD video, motion detection, and two-way talk. It requires existing doorbell wiring to function.
- Ring Video Doorbell Pro & Pro 2: These are premium wired models. The Pro 2, for instance, boasts 1536 x 1536 resolution for a head-to-toe view, color night vision, advanced motion detection with 3D Motion Detection, and dual-band Wi-Fi. They require a compatible transformer and existing doorbell wiring.
Comparison Table: Key Ring Doorbell Features (2025 Models)
| Feature | Ring Video Doorbell (2nd Gen) | Ring Video Doorbell 3 Plus | Ring Video Doorbell Pro 2 |
|---|---|---|---|
| Power Source | Rechargeable Battery | Rechargeable Battery | Wired (Requires Transformer) |
| Video Resolution | 1080p HD | 1080p HD | 1536 x 1536 HD (Head-to-Toe View) |
| Pre-Roll | No | Yes (Black & White) | Yes (Color) |
| Motion Detection | Customizable Zones | Customizable Zones + Near Zone | Customizable Zones + 3D Motion Detection |
| Wi-Fi Connectivity | 2.4 GHz | 2.4 GHz & 5 GHz | 2.4 GHz & 5 GHz |
| Night Vision | Black & White | Black & White | Color Night Vision |
Pre-Installation Checklist: What You Need Before You Start
Before you begin the physical installation, ensure you have everything ready. This will make the process much smoother and prevent frustrating interruptions.
Essential Items
- Your Ring Doorbell Device: Unbox it and ensure all components are present (doorbell, mounting bracket, screws, anchors, charging cable if applicable, user manual).
- Smartphone or Tablet: You'll need this to download the Ring app and complete the setup. Ensure it's connected to your home Wi-Fi network.
- Wi-Fi Network Name (SSID) and Password: You'll need these to connect your Ring Doorbell to your home internet.
- Screwdriver: A Phillips head screwdriver is typically required for mounting.
- Drill and Drill Bits (Optional): May be needed for creating pilot holes or if you need to use wall anchors.
- Level: To ensure your doorbell is mounted straight.
- Pencil: For marking screw hole positions.
- Ladder: If your current doorbell or desired mounting location is high.
For Wired Installations
If you're installing a wired Ring Doorbell, you'll need to verify your existing doorbell system's compatibility.
- Existing Doorbell Wiring: Ring wired doorbells require low-voltage AC power. Check your existing doorbell transformer. Most Ring doorbells are compatible with transformers rated between 8-24V AC, 40VA max. If your transformer is below 8V, you might need to replace it.
- Chime Compatibility: Ensure your existing indoor chime is compatible. Some mechanical chimes may require a specific Ring Chime accessory or may not be compatible with certain advanced features. Digital chimes are generally compatible.
- Voltage Tester (Recommended): To safely check if power is present at your existing doorbell wires.
For Battery-Powered Installations
- Rechargeable Battery Pack: Ensure it's fully charged before installation. The charging cable is usually included.
- Sufficient Wi-Fi Signal Strength: Your Ring Doorbell needs a strong and stable Wi-Fi signal at the mounting location. Test this before drilling any holes.
Setting Up Battery-Powered Ring Doorbells
Battery-powered Ring Doorbells offer the simplest installation path. The primary steps involve charging the battery and then initiating the setup through the Ring app.
Step 1: Charge the Battery
Before you do anything else, fully charge the removable battery pack. Connect the battery to the provided USB charging cable and plug it into a power source. A full charge typically takes 4-6 hours. The LED indicator on the battery will turn green when fully charged.
Step 2: Insert the Battery
Once charged, slide the battery pack into the bottom of your Ring Doorbell until it clicks into place. For models with integrated batteries, this step is skipped.
Step 3: Download the Ring App
If you haven't already, download the Ring app from the App Store (iOS) or Google Play Store (Android). Create a Ring account or log in if you already have one.
Step 4: Set Up Your Device in the App
Open the Ring app, tap "Set Up a Device," and select "Doorbells." Choose your specific Ring Doorbell model from the list. The app will guide you through connecting to your Wi-Fi network. You'll typically be prompted to scan a QR code on the device or in the packaging. Follow the on-screen instructions to complete the initial setup and connect it to your Ring account.
Step 5: Test the Connection
Once connected to Wi-Fi, the app will prompt you to test the doorbell. Press the button to ensure it rings and that you receive a notification on your phone. Check the live video feed to confirm image quality and audio.
Setting Up Wired Ring Doorbells
Wired installations are more involved but provide continuous power and a more stable connection. This process assumes you have existing doorbell wiring.
Step 1: Turn Off Power to Your Doorbell
Crucially, locate your home's circuit breaker and turn off the power to your existing doorbell circuit. This is a critical safety step. If you're unsure which breaker controls your doorbell, turn off the main breaker for your home. Use a voltage tester to confirm there is no power at the doorbell button and chime.
Step 2: Remove Your Existing Doorbell Button
Carefully unscrew and remove your old doorbell button from the wall. Gently pull the wires out from the wall. They should be connected to the terminals on the back of the button.
Step 3: Connect the Ring Doorbell Wires
Your Ring Doorbell will come with a mounting bracket. Before attaching the bracket, feed the existing doorbell wires through the designated opening in the bracket. Connect each wire to one of the two screw terminals on the back of the Ring Doorbell. It doesn't matter which wire goes to which terminal. Ensure the wires are securely fastened under the screws.
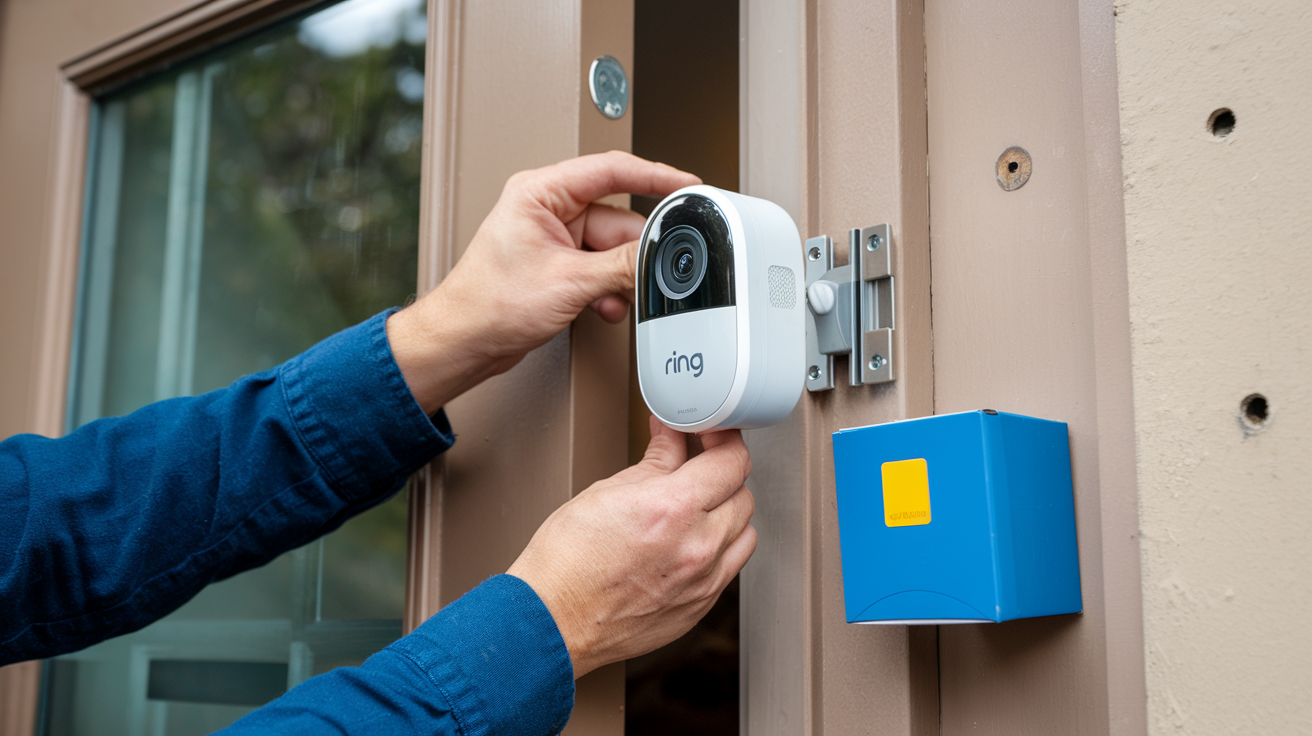
Step 4: Mount the Bracket and Doorbell
Position the mounting bracket on the wall where your old doorbell was. Use a level to ensure it's straight. Mark the screw hole positions with a pencil. If mounting on brick, stucco, or concrete, you'll likely need to drill pilot holes and insert the provided wall anchors. Screw the mounting bracket securely to the wall. Then, slide the Ring Doorbell onto the bracket and secure it with the provided security screw at the bottom.
Step 5: Restore Power
Return to your circuit breaker and turn the power back on to your doorbell circuit. Your Ring Doorbell should power up. The LED ring on the front will typically light up, indicating it's powered on and ready for setup.
Step 6: Download the Ring App and Set Up
Follow the same app setup process as described for battery-powered doorbells: download the Ring app, create an account, tap "Set Up a Device," select "Doorbells," choose your model, and follow the on-screen instructions to connect it to your Wi-Fi network. The app will guide you through testing the button and live view.
Step 7: Connect to Your Chime (Optional but Recommended)
For wired installations, you'll often want to connect your Ring Doorbell to your existing indoor chime. This involves a small wiring step behind your indoor chime unit. The Ring app will provide specific instructions for your model, but generally, you'll need to remove the cover of your indoor chime, connect a jumper wire (often included) to bypass the existing doorbell button, and ensure the Ring Doorbell is correctly wired to activate the chime. If you're uncomfortable with this step, you can always use a Ring Chime accessory.
Connecting Your Ring Doorbell to the Ring App
The Ring app is the central hub for your doorbell's functionality. The setup process within the app is designed to be intuitive, but here's a detailed breakdown.
Initiating Setup
Open the Ring app and tap "Set Up a Device." Select "Doorbells." The app will then ask if you have the device in hand. Confirm and proceed.
Scanning the QR Code
You'll be prompted to scan the QR code located on the back of your Ring Doorbell or on the Quick Start Guide that came with it. Ensure your phone's camera is clear and has good lighting. If the QR code is damaged or unreadable, there's usually an option to set up manually by entering the 5-digit setup code found below the QR code.
Connecting to Ring's Network
Once the QR code is scanned, your Ring Doorbell will broadcast a temporary Wi-Fi network (e.g., "Ring-XXXXXX"). Your phone will temporarily disconnect from your home Wi-Fi and connect to this Ring network. This allows the app to communicate directly with the doorbell for initial configuration.
Connecting to Your Home Wi-Fi
The Ring app will then present a list of available Wi-Fi networks. Select your home Wi-Fi network (SSID) and enter your password. It's crucial to use your primary 2.4 GHz network for best range, though some models support 5 GHz for faster speeds if the signal is strong.
Tip: Ensure your Wi-Fi password is correct. Many setup issues stem from incorrect passwords.
Naming Your Device
You'll be asked to give your doorbell a name (e.g., "Front Door," "Back Porch"). This is helpful if you have multiple Ring devices.
Firmware Updates
After connecting to your Wi-Fi, the Ring Doorbell will likely perform a firmware update. This is essential for security and functionality. Do not unplug the device or close the app during this process. It can take several minutes.
Testing
The app will guide you through testing the doorbell button and the motion detection. Press the button and check for notifications on your phone. View the live stream to ensure the video and audio are working correctly. For wired setups, test the indoor chime.
Mounting Your Ring Doorbell: Best Practices for Placement
Proper placement is key to maximizing your Ring Doorbell's effectiveness and ensuring you capture the most relevant footage.
Optimal Height
Ring recommends mounting your doorbell approximately 4 feet (1.2 meters) from the ground. This height is ideal for capturing faces of visitors and packages left at your doorstep. If you have a particularly steep porch or want to capture more of the ground, Ring offers wedge kits and corner kits that can adjust the viewing angle.
Field of View
Consider the doorbell's field of view. Most Ring doorbells offer a wide-angle lens. Ensure there are no obstructions like bushes, mailboxes, or decorative elements that might block the camera's view.
Wi-Fi Signal Strength
As mentioned, a strong Wi-Fi signal is paramount. Before drilling, use your smartphone to check the Wi-Fi signal strength at your intended mounting location. If the signal is weak, consider moving the mounting location closer to your router, using a Wi-Fi extender, or upgrading to a mesh Wi-Fi system. For wired installations, ensure the transformer can provide adequate power.
Lighting Conditions
Avoid pointing the doorbell directly into bright sunlight, as this can wash out the image. Similarly, consider how night vision will perform. While Ring's night vision is effective, extreme darkness or direct light sources can impact clarity.
Security and Accessibility
Mount the doorbell securely to prevent easy removal. For wired installations, ensure the wires are properly secured and protected. For battery models, ensure the security screw is used to prevent theft.
Using Mounting Accessories
Wedge Kits: These are angled brackets that tilt the doorbell down, useful if your door is set back from the wall or if you want to better capture the ground. They are often included or available for purchase.
Corner Kits: These brackets allow you to mount the doorbell on a corner, providing a wider view of both the street and your walkway.
Extended Life Battery: For battery models, consider purchasing an additional battery pack. This allows you to swap out a depleted battery for a fully charged one instantly, minimizing downtime. As of 2025, battery life can range from 6 months to over a year depending on usage and settings.
Advanced Settings and Customization in the Ring App
The Ring app is where you unlock the full potential of your doorbell. Explore these settings to tailor its performance to your needs.
Motion Detection Zones
This is one of the most powerful features. You can define specific areas within the camera's view where motion should trigger an alert. This allows you to ignore areas like passing cars or swaying trees, reducing false alerts. For models like the Ring Video Doorbell 3 Plus and Pro 2, you can also set a "Near Zone" for closer motion detection.
Motion Sensitivity
Adjust the sensitivity level to fine-tune how much motion is required to trigger an alert. Higher sensitivity means more events will be detected, while lower sensitivity reduces alerts but might miss some activity.
Motion Schedule
Set specific times when you want motion alerts to be active. For example, you might disable them during working hours when you know people will be coming and going, and enable them at night.
Notification Settings
Customize how and when you receive alerts. You can choose to be notified for motion events, doorbell rings, or both. You can also set up "People Only" alerts if your model supports it, which uses AI to distinguish between people and other motion.
Video Quality and Recording
Adjust the video quality (e.g., 1080p, 720p) to balance image clarity with bandwidth usage. Ring Protect Plan subscribers can access recorded videos for up to 60 days (as of 2025), allowing you to review past events.
Two-Way Talk Settings
Configure the microphone and speaker settings for clear communication. You can enable or disable the microphone and adjust speaker volume.
Motion Snooze
If you're expecting a lot of activity (e.g., a party), you can temporarily snooze motion alerts for a set period to avoid constant notifications.
Linked Devices
Link your Ring Doorbell to other Ring devices, such as Ring Cams or other doorbells. This allows for synchronized recording and alerts. For example, if your doorbell detects motion, a nearby Ring Cam can also start recording.
Smart Responses
Some Ring models support Smart Responses, allowing the doorbell to answer common questions like "Can I help you?" or "Please leave the package at the door" automatically when someone approaches.
Customizing the Button Tone
While less critical for setup, you can personalize the sound your Ring Doorbell makes when the button is pressed, if it's connected to a Ring Chime or compatible indoor chime.
Troubleshooting Common Ring Doorbell Issues
Even with a smooth setup, you might encounter occasional issues. Here are some common problems and their solutions.
Issue: Doorbell Not Powering On (Wired Installation)
Cause: No power reaching the doorbell.
Solutions:
- Check Breaker: Ensure the circuit breaker for your doorbell is switched on.
- Verify Transformer: Confirm your transformer is providing adequate voltage (8-24V AC). If it's under 8V, it may need replacement.
- Check Wiring: Ensure the wires are securely connected to the terminals on the back of the doorbell and at the transformer/chime.
- Test Wires: Use a voltage tester to confirm power is present at the doorbell wires.
Issue: Doorbell Not Connecting to Wi-Fi
Cause: Weak Wi-Fi signal, incorrect password, or router issues.
Solutions:
- Router Proximity: Move your router closer to the doorbell, or vice versa, if possible.
- Wi-Fi Extender/Mesh: Consider using a Wi-Fi extender or a mesh network system.
- Correct Password: Double-check your Wi-Fi password.
- Restart Router: Power cycle your router and modem.
- Network Band: Ensure you're connecting to the 2.4 GHz band if your doorbell doesn't support 5 GHz or if the 5 GHz signal is weak.
- Re-Scan QR Code: Sometimes re-scanning the QR code can resolve connection glitches.
Issue: Poor Video Quality or Lag
Cause: Weak Wi-Fi signal, high motion detection settings, or device overload.
Solutions:
- Check Wi-Fi: Improve your Wi-Fi signal strength.
- Lower Sensitivity: Reduce motion sensitivity settings.
- Reduce Motion Zones: Simplify your motion zones.
- Adjust Video Quality: Temporarily lower the video quality setting in the app.
- Router Performance: Ensure your router is not overloaded with too many connected devices.
Issue: No Motion Alerts
Cause: Motion detection settings are too low, motion zones are too restrictive, or alerts are snoozed/disabled.
Solutions:
- Increase Sensitivity: Raise the motion sensitivity level.
- Adjust Motion Zones: Expand your motion zones or ensure they cover the area where motion is occurring.
- Check Motion Schedule: Verify that motion alerts are enabled during the times you expect them.
- Check Ring App Notifications: Ensure notifications are enabled for the Ring app in your phone's settings.
Issue: Battery Draining Too Quickly (Battery Models)
Cause: Frequent motion events, long live view sessions, weak Wi-Fi signal, or extreme temperatures.
Solutions:
- Optimize Motion Settings: Reduce motion sensitivity and refine motion zones to trigger fewer events.
- Limit Live View: Avoid prolonged live view sessions unless necessary.
- Improve Wi-Fi: A weak Wi-Fi signal forces the device to work harder, draining the battery faster.
- Temperature: Extreme cold or heat can impact battery performance.
- Consider a Second Battery: Keep a fully charged spare battery ready for quick swaps.
Issue: Doorbell Button Not Ringing Indoor Chime (Wired Models)
Cause: Incorrect wiring at the chime, incompatible chime, or chime settings in the app.
Solutions:
- Check Chime Wiring: Refer to the Ring app's instructions for wiring your specific chime type. Ensure connections are secure.
- Chime Compatibility: Verify your indoor chime is compatible with Ring. Some older mechanical chimes may not work. Consider a Ring Chime.
- App Settings: Ensure the chime is enabled in the Ring app's device settings.
Ring Doorbell Maintenance and Updates
To ensure your Ring Doorbell continues to perform optimally and remains secure, regular maintenance and awareness of updates are important.
Firmware Updates
Ring regularly releases firmware updates to improve performance, add new features, and patch security vulnerabilities. These updates are typically downloaded and installed automatically when the device is powered on and connected to Wi-Fi. You can check the firmware version in the Ring app under Device Health.
Cleaning the Lens
Over time, the camera lens can accumulate dust, dirt, or smudges, which can degrade video quality. Gently clean the lens with a soft, dry microfiber cloth. Avoid using harsh chemicals or abrasive materials.
Battery Maintenance (Battery Models)
As discussed, keeping batteries charged is key. For optimal performance, it's recommended to keep at least one battery fully charged and ready. If you're storing a spare battery for an extended period, it's best to keep it at around 50% charge.
Checking Wi-Fi Connection
Periodically check the Wi-Fi signal strength in the Ring app's Device Health section. If it has degraded, you may need to troubleshoot your network.
Reviewing Event History
Regularly review your event history in the Ring app. This not only helps you stay informed but also allows you to identify any unusual activity or potential issues with your device's detection settings.
Ring Protect Plan
While not strictly maintenance, subscribing to a Ring Protect Plan is crucial for leveraging many advanced features, including video recording and storage. As of 2025, plans offer cloud storage for recorded events, advanced motion detection features, and professional monitoring options for Ring Alarm systems. Ensure your subscription is active to avoid service interruptions.
Security Best Practices
Use a strong, unique password for your Ring account and enable two-factor authentication (2FA). This is the most critical step in protecting your account from unauthorized access. Regularly review your account activity for any suspicious logins.
Conclusion: Enjoying Your Enhanced Home Security
Setting up your Ring Doorbell camera is a rewarding process that significantly boosts your home's security and connectivity. By following these detailed steps, you can ensure a smooth installation, whether you opt for a convenient battery-powered model or a robust wired solution. We've covered everything from selecting the right device and preparing for installation to connecting to the Ring app, mounting strategically, and customizing advanced settings. Remember to leverage the troubleshooting tips and maintenance advice to keep your doorbell functioning optimally. With your Ring Doorbell properly set up, you gain invaluable peace of mind, knowing you can monitor your doorstep, communicate with visitors, and deter potential threats from anywhere in the world. Embrace the convenience and security that your new smart doorbell brings to your home.