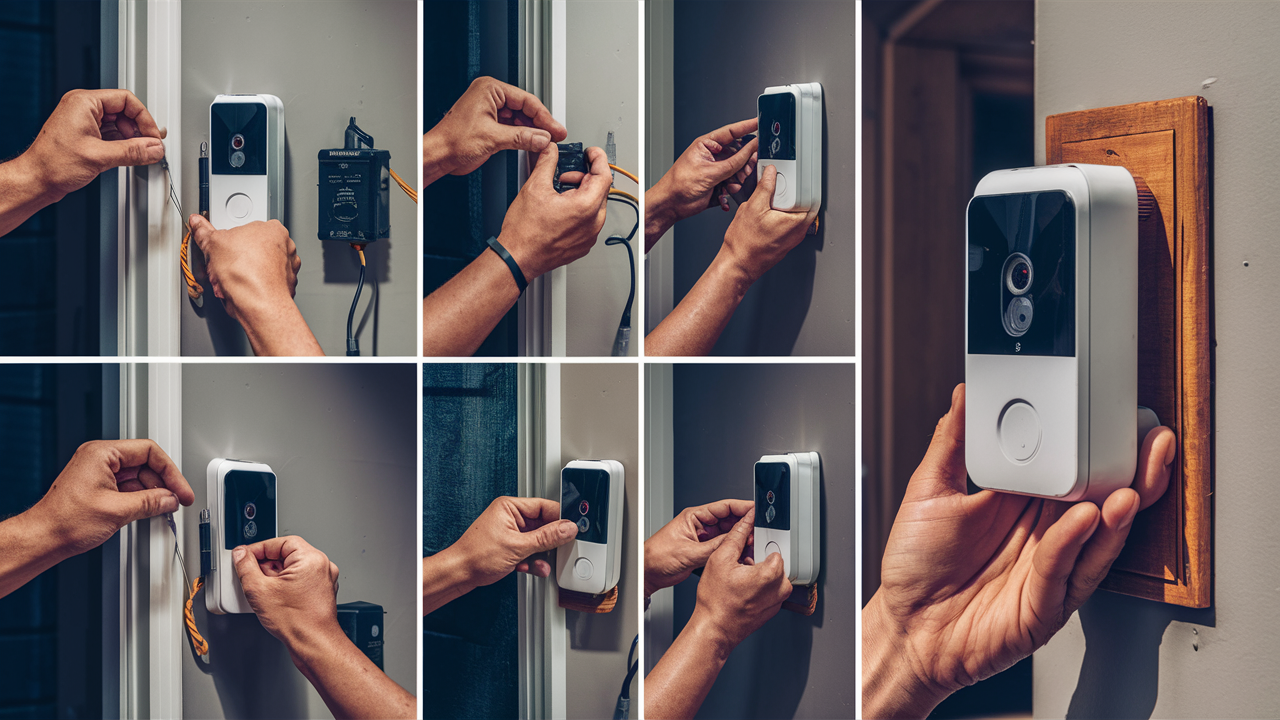
The Blink Video Doorbell Camera is a smart accessory that replaces the existing doorbell and can help to enhance the security of your home, let you see who is at the door from anywhere, and even communicate with the guest if needed when you are not at home. For the most part, installing a video doorbell is relatively simple but there are certain things you should be aware of based on the current wiring of the doorbell you are using. Here are the steps to follow to wire a Blink video doorbell camera system.
What You Need?
- Blink video doorbell camera.
- Small flathead screwdriver
- Wire strippers
- Electrical tape
Prep The Location
The initial step involves switching off the power supply of the old doorbell by going to the breaker box to avoid being shocked while wiring. If you have an old system, then you will need to unscrew the existing doorbell from its housing using a flathead screwdriver. What color both wires are coming out from the wall, you will probably see two wires coming out of the wall. If you do not currently have a wired doorbell, determine where you wish to place your Blink doorbell and whether or not you will require a mount or angle wedge for installation on your door frame or wall.
Connecting The Wires
For a basic wired installation, you do not require anything else aside from the following that comes with the Blink doorbell. The wires and connectors are concealed within the mount for a neat installation. Now, if you have wires from your previous doorbell then you need to attach the wires to the Blink doorbell mount harness. To connect like colored wires just twist the two wires in a clockwise manner and then tighten it using a wire nut. Lastly, use electrical tape to cover all the joints to prevent moisture penetration.
If you do not have existing wires, the Blink doorbell kit comes with connectors that enable the connection of the doorbell to an internal doorbell chime. This may require some basic electrical work such as cutting into the wall cavity and pulling wires through; if you are not comfortable doing this you might want to contact an electrician. Blink has wiring diagrams in the app to assist users on how to connect everything correctly.
Mount The Doorbell
After connecting the wires, you can easily install the bracket firmly on the wall or door frame using screws. Be aware of the ideal mounting heights - recommended heights range from 48 to 60 inches above the ground. Before mounting the Blink doorbell camera, it is critical to install the battery pack that is provided in the package. This will help guarantee that you will receive notifications and you also be able to use live view even if the wires are disconnected.
Connecting To Wi-Fi
Since the doorbell camera is wired and installed, go to the Blink Home Monitor application to sync and configure it with Wi-Fi. Scanning codes, entering Wi-Fi network credentials, and linking the doorbell camera to the Blink account will be described in the application. This tool is very easy to use and takes less than five minutes to set up completely.
Customizing Settings
After connecting, users can configure motion detection zones, sensitivity, live view, and others. By default, the Blink system is set to notify you whenever the doorbell sensor is triggered or there is motion. You can change these notifications in the app as per your requirements. Location and activity zones enable you to define only specific regions you wish to be observed in the camera view.
And that is it – you now have a fully operational, wired Blink video Doorbell up and running and ready to start watching over your home’s entrance! The wireless backup battery simply guarantees that your new smart doorbell system remains connected in the event of a blackout. But with the Blink app, knowing what’s going on at your door – whether you’re at home or on the go – is never more than a tap away.
Protect your home today with ADT’s top-rated security solutions!
Call now at +1 877-470-7879 to get a free consultation and find out how you can secure your home with the best in the business. Don’t wait—ensure your peace of mind with ADT!


