Achieve flawless video capture with the ultimate PTZ camera setup. This guide unveils essential tips and tricks for optimal coverage, ensuring every angle is perfectly framed and every shot is professional-grade, whether for live streaming, broadcasting, or event production.
Understanding PTZ Cameras and Their Advantages
Pan-Tilt-Zoom (PTZ) cameras have revolutionized how we approach video production, offering incredible flexibility and control within a compact, often discreet package. Unlike traditional fixed cameras, PTZ units allow operators to remotely control their pan (horizontal movement), tilt (vertical movement), and zoom (magnification) functions. This capability is invaluable for capturing dynamic shots without the need for multiple camera operators or physically repositioning cameras. In 2025-26, the demand for efficient, high-quality video solutions continues to surge across various sectors, from corporate events and houses of worship to educational institutions and live sports broadcasting. The inherent advantages of PTZ cameras make them a cornerstone of modern video setups, offering cost-effectiveness, ease of deployment, and the ability to cover wide areas with minimal infrastructure.
The Core Benefits of PTZ Technology
The primary appeal of PTZ cameras lies in their operational efficiency and versatility. They empower a single operator to manage multiple camera angles, significantly reducing labor costs and simplifying production workflows. The remote control aspect also means PTZ cameras can be installed in locations that might be difficult or impossible to access for manual operation, such as high ceilings, tight corners, or public spaces where aesthetics are paramount.
Cost-Effectiveness and Scalability
Compared to traditional broadcast cameras that often require dedicated camera operators, tripods, and extensive cabling, PTZ cameras offer a more budget-friendly solution. A single PTZ camera can replace several fixed cameras, and the ability to control them remotely means fewer personnel are needed on-site. This scalability is crucial for businesses and organizations that need to adapt their video production capabilities without significant capital expenditure. By 2025, the market for PTZ cameras is projected to grow by over 15% annually, driven by the increasing adoption in SMBs and educational settings.
Operational Flexibility and Control
The remote control of pan, tilt, and zoom is the defining feature. This allows for smooth, cinematic movements and precise framing that would be challenging with static cameras. Preset positions can be programmed, enabling quick transitions between different viewpoints with just a button press. This is particularly useful for live events where capturing the speaker, the audience, and specific details is essential.
Ease of Installation and Integration
PTZ cameras are designed for straightforward installation. They typically use standard mounting hardware and can often be powered over Ethernet (PoE), simplifying cabling. Integration with existing video production systems, such as switchers and streaming encoders, is also generally seamless, thanks to common protocols like NDI, SDI, HDMI, and IP connectivity.
Discreet and Aesthetic Integration
Their compact size and often neutral design allow PTZ cameras to blend into various environments without being visually obtrusive. This is a significant advantage in settings where aesthetics are important, such as conference rooms, auditoriums, or even high-end retail spaces.
Applications of PTZ Cameras in 2025-26
The versatility of PTZ cameras means they are deployed across a wide spectrum of applications:
- Live Streaming: For events, conferences, webinars, and online services.
- Broadcasting: As supplementary cameras in studios or for capturing action in sports.
- Video Conferencing: Enhancing collaboration in meeting rooms.
- Education: Recording lectures, virtual classrooms, and campus events.
- Houses of Worship: Broadcasting services and capturing congregational moments.
- Security and Surveillance: While not their primary focus, some PTZ models offer advanced surveillance features.
- Medical and Healthcare: For remote consultations, training, and surgical observation.
Strategic Planning for Optimal Coverage
Before diving into hardware selection and placement, a robust strategic plan is paramount. This involves understanding the space, the subject matter, and the desired output. Without careful planning, even the most advanced PTZ camera setup can result in suboptimal coverage, missed shots, or awkward framing. The goal is to anticipate every potential need and angle to ensure a seamless and professional video production.
Defining Your Coverage Goals
What exactly do you need to capture? This fundamental question dictates everything else. Consider the primary subject, the background elements, and any specific actions or details that must be visible. For instance, a lecture hall setup requires capturing the speaker at the podium, the presenter's slides, and potentially audience interaction. A sports broadcast demands tracking fast-moving action from multiple vantage points.
Identifying Key Areas of Interest
Break down the venue into zones that need to be covered. This might include a main stage, audience seating, breakout rooms, or specific points of action. For each zone, determine the necessary shot types: wide shots for context, medium shots for presence, and close-ups for detail.
Understanding Subject Movement and Dynamics
Will your subject be static or mobile? If mobile, how fast will they move? This influences the camera's zoom capabilities, pan/tilt speed requirements, and the number of cameras needed to maintain continuous coverage. For example, a single speaker at a podium is easy to track, but a presenter moving across a large stage requires more dynamic camera control.
Assessing the Venue and Environment
The physical space plays a critical role in determining camera placement and the type of PTZ camera that will perform best. Factors like lighting, acoustics, room size, and existing infrastructure must be considered.
Lighting Conditions
Is the lighting consistent or variable? Are there harsh shadows or bright spots? PTZ cameras vary in their low-light performance and ability to handle challenging lighting. Understanding the ambient light will help in selecting cameras with appropriate sensors and dynamic range, and inform strategies for supplemental lighting if needed.
Room Size and Acoustics
Larger rooms may require cameras with longer zoom ranges and wider pan/tilt angles. Poor acoustics can lead to audio issues, which are critical to consider in conjunction with video coverage. While this guide focuses on video, remember that audio is half the experience.
Obstructions and Sightlines
Identify any potential obstructions that could block camera views, such as pillars, lighting rigs, or decorative elements. Ensure that planned camera positions offer clear sightlines to all critical areas.
Determining the Number of Cameras and Their Roles
Based on coverage goals and venue assessment, decide how many PTZ cameras are needed and what each will be responsible for. A common setup might involve a wide shot camera, a medium shot camera, and a dedicated close-up camera.
Example Scenario: A Conference Room Setup
For a medium-sized conference room (e.g., 20x30 feet), a typical setup might include:
- Camera 1 (Wide Shot): Positioned at the rear, covering the entire table and participants. This camera provides context and ensures no one is missed.
- Camera 2 (Medium/Speaker Shot): Positioned at the front, focused on the presenter or the primary speaker. This camera captures facial expressions and engagement.
- Camera 3 (Optional - Detail/Audience): If the room is larger or there's a specific presentation screen, a third camera might be used to capture screen content or a portion of the audience.
This tiered approach ensures flexibility and professionalism in the final output. By 2025, NDI integration allows for incredibly flexible routing of these camera feeds, making multi-camera setups more manageable than ever.
Pre-Visualization and Shot Planning
Before installation, sketch out your venue and mark potential camera locations. Imagine the shots you'll need from each position. This pre-visualization step can save significant time and effort during the setup and operation phases.
Choosing the Right PTZ Camera for Your Needs
With a clear understanding of your coverage needs, the next crucial step is selecting the appropriate PTZ camera. The market offers a wide range of options, each with different specifications that cater to various requirements and budgets. Making an informed choice will directly impact the quality and effectiveness of your setup.
Key Specifications to Consider
Several technical specifications differentiate PTZ cameras and determine their suitability for different applications. Understanding these will help you navigate the options effectively.
Resolution and Frame Rate
Resolution: Most modern PTZ cameras offer at least Full HD (1080p). For higher detail and future-proofing, consider 4K (2160p) resolution. 4K cameras provide more flexibility in post-production, allowing for digital zooming and reframing while maintaining high quality.
Frame Rate: Standard frame rates are 30fps or 60fps. For smooth motion, especially in sports or fast-paced events, 60fps is preferable. Many cameras offer variable frame rates, allowing for cinematic slow-motion effects if needed.
Optical Zoom vs. Digital Zoom
Optical Zoom: This is the true magnification capability of the lens. A higher optical zoom (e.g., 12x, 20x, 30x) allows you to get closer to distant subjects without losing image quality. This is essential for large venues.
Digital Zoom: This crops into the image, effectively enlarging pixels and leading to a loss of quality. While some cameras offer "lossless" digital zoom by utilizing higher resolution sensors (e.g., 4K to 1080p), optical zoom is always superior for maintaining clarity.
Low-Light Performance and Image Sensor
The size and quality of the image sensor, along with the camera's aperture (f-stop), significantly impact its low-light performance. Look for cameras with larger sensors (e.g., 1/2.3-inch or 1-inch) and wide apertures (low f-numbers) for better performance in dimly lit environments. Features like Wide Dynamic Range (WDR) are also crucial for handling scenes with both bright and dark areas.
Connectivity Options
PTZ cameras offer various output options. The most common include:
- IP (NDI, RTSP, RTMP): Essential for network-based workflows, NDI (Network Device Interface) is particularly popular for its ease of use and ability to transmit video, audio, and control data over a single Ethernet cable.
- SDI: A professional broadcast standard, offering high-quality, uncompressed video over coaxial cables.
- HDMI: Common for consumer and prosumer equipment, offering good quality but typically shorter cable runs than SDI.
- USB: Primarily for direct connection to computers for web conferencing or simple recording.
For 2025-26, NDI is becoming the de facto standard for IP-based PTZ workflows due to its efficiency and integration capabilities.
Pan, Tilt, and Zoom Speed and Range
Consider the speed at which the camera can pan, tilt, and zoom. Faster speeds are needed for tracking dynamic action, while slower, smoother movements are better for cinematic shots. The range of motion (e.g., 340° pan, 120° tilt) determines how much of the scene the camera can cover without needing to be physically moved.
Audio Capabilities
While PTZ cameras are primarily video devices, many now include built-in microphones or audio line-in ports. If you plan to rely on the camera's audio, ensure its quality meets your needs. However, for professional productions, external microphones are almost always recommended.
Comparing Popular PTZ Camera Brands and Models (2025-26 Overview)
Several manufacturers consistently deliver high-quality PTZ cameras. Here's a brief overview of some leading players and their typical offerings:
| Brand | Typical Strengths | Common Use Cases | Key Features to Look For |
|---|---|---|---|
| Sony | Excellent image quality, advanced features, robust build. | Broadcast, high-end corporate, live events. | High optical zoom, superior low-light performance, NDI/IP integration. |
| Panasonic | Reliability, good value, strong integration with broadcast workflows. | Broadcasting, houses of worship, education. | NDI support, good color reproduction, durable construction. |
| Canon | Exceptional lens quality, natural color science. | Corporate video, broadcast, professional AV. | High-quality optics, smooth PTZ movement, various connectivity. |
| PTZOptics | Strong focus on NDI, affordability, ease of use. | Live streaming, education, houses of worship, SMBs. | Extensive NDI support, PoE, comprehensive control software. |
| Vaddio | Designed for AV integration, ease of control. | Conference rooms, education, telehealth. | IP control, advanced conferencing features, robust mounting solutions. |
| Birchwood Technologies (Hypothetical - representative of emerging brands) | Cost-effective, feature-rich for the price point. | Entry-level streaming, small studios, budget-conscious users. | Good 1080p resolution, decent zoom, USB/HDMI outputs. |
When selecting, always check the latest model releases for 2025-26, as manufacturers continuously update their product lines with improved sensors, faster processing, and enhanced connectivity options. For instance, the trend towards 4K NDI cameras with built-in AI subject tracking is rapidly becoming mainstream.
Strategic Mounting and Placement Techniques
The physical placement of your PTZ cameras is as critical as the camera's specifications themselves. Optimal placement ensures that you maximize coverage, avoid obstructions, and achieve the desired shot composition. This section delves into the art and science of positioning your PTZ cameras for maximum impact.
Understanding Camera Angles and Perspectives
Different angles convey different messages and serve distinct purposes. Understanding these will help you determine the best locations.
Eye-Level vs. High Angle vs. Low Angle
- Eye-Level: Generally considered neutral and natural, ideal for speaker shots or general audience views.
- High Angle: Can make a subject appear smaller or less dominant, useful for overview shots or when needing to see over a crowd.
- Low Angle: Can make a subject appear more imposing or authoritative, often used for dramatic effect or to emphasize presence.
The Rule of Thirds and Framing
While PTZ cameras offer flexibility, applying basic compositional rules like the rule of thirds can significantly improve the visual appeal of your shots. Aim to place key subjects off-center, along the lines or at the intersections of a 3x3 grid. This creates more dynamic and engaging images.
Common Mounting Solutions and Their Pros/Cons
The method of mounting your PTZ camera will depend on the venue and the desired aesthetic. Each solution has its advantages and disadvantages.
Ceiling Mounts
- Pros: Discreet, keeps cameras out of the way of people, offers good vantage points for wide shots.
- Cons: Can be difficult to install and maintain, may require professional installation, can be visually intrusive if not carefully planned.
- Best For: Conference rooms, auditoriums, classrooms where a clean aesthetic is desired.
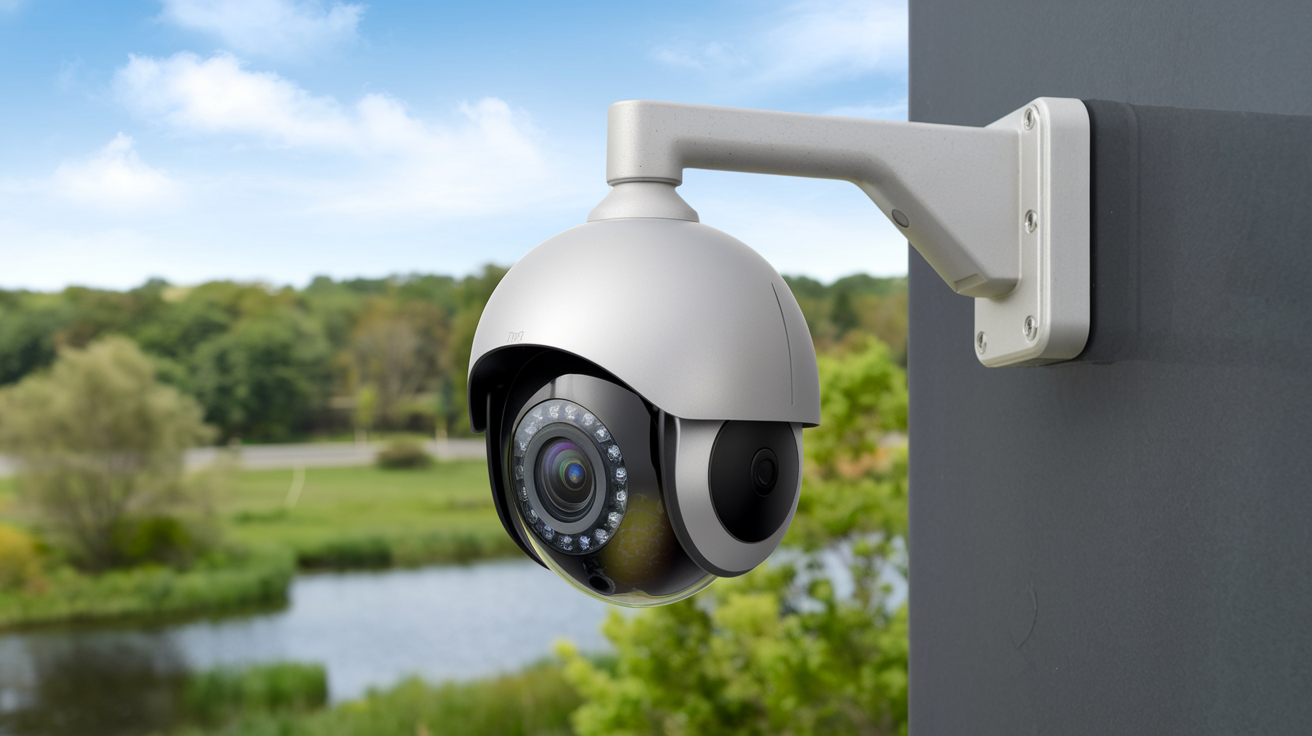
Wall Mounts
- Pros: Accessible for adjustments, can provide good angles, relatively easy to install.
- Cons: Can be visually prominent, may obstruct pathways if placed too low.
- Best For: Covering specific areas like stages, presentation screens, or seating sections.
Pole Mounts/Truss Mounts
- Pros: Versatile, allows for height adjustment, good for temporary setups or large venues.
- Cons: Can be bulky, may require careful rigging for safety.
- Best For: Live events, sports venues, large auditoriums.
Tabletop/Surface Mounts
- Pros: Simple, no installation required, ideal for temporary setups.
- Cons: Limited positioning, can be easily bumped or moved, may look less professional.
- Best For: Small meeting rooms, quick setups, or as supplementary cameras.
Optimizing Placement for Different Scenarios
The ideal placement varies greatly depending on the specific application.
Scenario 1: Lecture Hall/Classroom
- Primary Camera (Front): Mounted on the wall or ceiling at the front of the room, at eye-level with the presenter, focused on the stage and whiteboard/screen. This captures the speaker and presentation content.
- Secondary Camera (Rear): Mounted high on the rear wall or ceiling, providing a wide shot of the entire room, including the audience. This captures the overall atmosphere and engagement.
- Considerations: Ensure clear sightlines to the presenter and any interactive displays. Avoid placing cameras directly in front of bright windows.
Scenario 2: Conference Room
- Primary Camera (End of Table): Mounted on the wall or ceiling at the end of the conference table, angled to capture all participants at eye-level.
- Secondary Camera (Optional - Specific View): A second camera could be placed to focus on a specific presentation screen or a particular section of the table if needed.
- Considerations: Aim for a natural, non-intrusive angle. Ensure the camera can zoom in sufficiently to capture individual faces clearly during discussions.
Scenario 3: Live Event/Stage Production
- Wide Shot Camera (Rear/Truss): Mounted high up to capture the entire stage and audience.
- Medium Shot Camera (Side Stage): Positioned to capture performers or speakers from the side, offering a different perspective.
- Close-Up Camera (Front/Stage Lip): Placed strategically to capture detailed shots of performers, instruments, or speakers.
- Considerations: Rigorous safety checks for truss/rigging. Plan for cable management to avoid trip hazards. Consider remote control accessibility for operators.
Step-by-Step Placement Guide
- Map the Venue: Sketch the room and identify all key areas to be covered.
- Determine Shot Requirements: For each area, decide on the necessary shot types (wide, medium, close-up).
- Identify Potential Mounting Points: Look for stable surfaces, clear sightlines, and accessible locations.
- Consider Power and Data: Plan how cameras will be powered (PoE is ideal) and how video/control signals will be routed.
- Test and Adjust: Mount the cameras temporarily and test their pan, tilt, and zoom ranges. Make adjustments to achieve the desired framing.
- Secure Mounting: Once placement is finalized, securely fasten the mounts.
- Cable Management: Neatly route and secure all cables to prevent hazards and maintain a professional look.
By meticulously planning and executing camera placement, you lay the foundation for a truly effective PTZ camera setup that delivers optimal coverage.
Mastering Connectivity and Control Systems
Once your PTZ cameras are physically in place, the next critical step is establishing reliable connectivity and an intuitive control system. This is where the "magic" of remote operation happens. The way you connect your cameras and the method you use to control them will significantly impact your workflow efficiency and the overall quality of your production.
Understanding PTZ Connectivity Protocols
PTZ cameras communicate using various protocols, each with its own advantages for different applications. Understanding these is key to seamless integration.
IP-Based Connectivity (NDI, RTSP, RTMP)
NDI (Network Device Interface): Developed by NewTek, NDI is rapidly becoming the standard for IP-based video production. It allows for high-quality, low-latency video, audio, and control signals to be transmitted over a standard Gigabit Ethernet network. NDI significantly simplifies cabling, allowing multiple cameras and other NDI-compatible devices to share a single network infrastructure. For 2025-26, NDI|HX and full NDI support are widely available, offering excellent flexibility.
RTSP (Real-Time Streaming Protocol): A network protocol used for streaming video and audio data. It's commonly used for IP cameras and is compatible with many streaming servers and video management systems.
RTMP (Real-Time Messaging Protocol): Primarily used for streaming live video content to platforms like YouTube, Facebook Live, and Twitch. Many PTZ cameras can stream directly via RTMP.
Serial Communication (VISCA, Pelco)
VISCA (Video System Control Architecture): A protocol developed by Sony, widely adopted by many PTZ camera manufacturers. It allows for precise control of camera functions like pan, tilt, zoom, focus, and white balance.
Pelco: Another established serial communication protocol, often found in older or specialized PTZ camera systems.
These protocols typically require dedicated RS-232 or RS-485 cabling running from a central controller to each camera.
HDMI and SDI
While primarily video output formats, HDMI and SDI can sometimes carry embedded control signals, though this is less common for PTZ control compared to IP or serial protocols. They are more focused on transmitting the video feed itself.
Control Methods for PTZ Cameras
There are several ways to control your PTZ cameras, ranging from simple hardware controllers to sophisticated software solutions.
Hardware Controllers (Joysticks and Keypads)
These are dedicated physical devices that offer tactile control over camera movements. They typically feature joysticks for smooth pan and tilt, zoom rockers, and buttons for preset recall, focus, and other camera functions.
- Pros: Intuitive, provides immediate physical feedback, ideal for live operation.
- Cons: Can be expensive, requires direct connection (often via serial or IP), limited to the functions programmed into the controller.
Software Control Interfaces
Many manufacturers provide free or paid software applications that run on a computer. These interfaces offer comprehensive control over all camera functions, including advanced settings, firmware updates, and preset management.
- Pros: Full access to all camera features, often includes advanced features like multi-camera management and visual scene setup, can be controlled remotely via network.
- Cons: Requires a computer, less tactile than hardware controllers, can have a steeper learning curve.
Web-Based Interfaces
Most IP-enabled PTZ cameras have a built-in web server. You can access and control the camera by simply typing its IP address into a web browser. This is useful for initial setup, basic adjustments, and troubleshooting.
- Pros: No additional software needed, accessible from any device on the network.
- Cons: Limited functionality compared to dedicated software, not ideal for live, multi-camera control.
Control Systems and Automation Platforms
For complex setups, PTZ cameras can be integrated into larger control systems (e.g., Crestron, AMX) or automation software. This allows for synchronized control with other AV equipment, event automation, and custom user interfaces.
- Pros: Ultimate flexibility, seamless integration with other systems, can automate complex workflows.
- Cons: Requires specialized programming knowledge, significant investment.
Networking Considerations for IP PTZ Cameras
If you're using IP-based PTZ cameras (especially NDI), proper network setup is crucial for performance and reliability.
Dedicated Network vs. Shared Network
For professional productions, it's highly recommended to use a dedicated Gigabit Ethernet network for your PTZ cameras and other AV-over-IP devices. This prevents interference from general office traffic and ensures consistent bandwidth and low latency. If a dedicated network isn't feasible, ensure your existing network is robust and properly configured for Quality of Service (QoS) to prioritize video traffic.
Power over Ethernet (PoE)
PoE is a game-changer for PTZ camera installations. It allows the camera to receive both power and data over a single Ethernet cable, eliminating the need for separate power supplies and outlets near the camera. Ensure your network switch supports PoE (802.3af or 802.3at) and that your cameras are compatible.
IP Addressing and Subnetting
Each PTZ camera on the network needs a unique IP address. You'll need to plan your IP addressing scheme, often using DHCP for ease of management or static IP addresses for guaranteed stability. Ensure all devices are on the same subnet or that your network is configured for inter-subnet communication.
Example Setup: NDI-Centric Workflow (2025-26)
A modern, efficient setup in 2025-26 often leverages NDI:
- Cameras: Multiple NDI-enabled PTZ cameras are connected to a PoE-enabled Gigabit switch.
- Network: The switch is connected to a dedicated AV network.
- Control: A computer running NDI-compatible software (e.g., vMix, OBS Studio, Tricaster) or a dedicated NDI control surface is used to discover, control, and switch between camera feeds.
- Audio: External microphones or audio mixers are integrated into the NDI network or connected directly to the production system.
This setup offers unparalleled flexibility, allowing cameras to be placed anywhere on the network and easily switched without complex SDI routing.
Fine-Tuning for Superior Image Quality
Even with the best cameras and placement, achieving truly professional video requires meticulous fine-tuning of image settings. This section explores the key parameters you can adjust to ensure your PTZ cameras deliver crisp, well-exposed, and color-accurate footage.
Understanding Exposure Settings
Exposure is fundamental to image quality. It dictates how bright or dark your image appears. The key settings are Aperture, Shutter Speed, and Gain (ISO).
Aperture (f-stop)
The aperture controls the amount of light entering the lens. A wider aperture (lower f-number, e.g., f/1.8) lets in more light, which is beneficial in low-light conditions and can create a shallower depth of field (blurry background). A narrower aperture (higher f-number, e.g., f/5.6) lets in less light but increases the depth of field, keeping more of the scene in focus.
Recommendation: For most PTZ applications, especially in variable lighting, auto-aperture is often sufficient. If manual control is available and lighting is stable, setting a moderate aperture (e.g., f/2.8-f/4) can provide a good balance between light intake and depth of field.
Shutter Speed
Shutter speed controls how long the camera's sensor is exposed to light. Faster shutter speeds (e.g., 1/1000s) freeze motion, while slower speeds (e.g., 1/30s) allow more light but can introduce motion blur.
The 180-Degree Rule: For natural-looking motion blur and smooth video, it's generally recommended to set the shutter speed to approximately half of your frame rate. For 30fps, this is around 1/60s; for 60fps, it's around 1/120s. Deviating from this can make motion appear jerky or unnaturally smooth.
Recommendation: Stick to the 180-degree rule whenever possible. If you need to increase brightness, consider adjusting gain or aperture before significantly slowing down the shutter speed, which can lead to excessive motion blur.
Gain (ISO)
Gain is an electronic amplification of the video signal. Increasing gain brightens the image but also amplifies noise (graininess). Higher ISO values mean more gain.
Recommendation: Use gain as a last resort for brightening the image. Always aim to achieve correct exposure using aperture and shutter speed first. Most PTZ cameras have a usable ISO range up to 3200 or 6400, but noise becomes noticeable above 1600-3200 on many models.
White Balance (WB)
White balance ensures that colors in your video appear natural under different lighting conditions. Incorrect white balance can make whites look blue, yellow, or green.
Auto White Balance (AWB)
AWB is convenient and works well in many situations. However, it can sometimes "hunt" or change mid-shot if the lighting conditions fluctuate, which is undesirable for professional video.
Manual White Balance Presets
Most PTZ cameras offer presets for common lighting conditions like Daylight, Tungsten, Fluorescent, and Cloudy. Selecting the correct preset is often sufficient.
Custom White Balance
For the most accurate results, use the custom white balance function. This involves pointing the camera at a pure white or neutral gray card under the actual lighting conditions and setting the camera to that reference. This ensures true-to-life color reproduction.
Recommendation: If your lighting is consistent, use a custom white balance. If lighting changes frequently, AWB might be necessary, but be prepared to make adjustments.
Focus and Depth of Field
Ensuring your subject is in sharp focus is critical. Depth of field refers to the range of distance within the scene that appears acceptably sharp.
Auto Focus (AF)
Modern PTZ cameras have sophisticated autofocus systems. For general use, AF is often adequate. However, it can sometimes hunt or focus on the wrong subject.
Manual Focus (MF)
For critical shots, manual focus provides complete control. You can lock the focus on your intended subject. Some cameras offer focus-assist features when in manual mode.
Depth of Field Considerations
A wide aperture (low f-stop) creates a shallow depth of field, isolating the subject but requiring precise focus. A narrow aperture (high f-stop) creates a deep depth of field, keeping more of the scene in focus, which is often desirable for PTZ cameras in presentations or group shots where multiple people need to be sharp.
Recommendation: For speaker shots, ensure the speaker's face is in sharp focus. For wider shots in conference rooms or auditoriums, aim for a depth of field that keeps participants in focus from front to back.
Color Settings and Picture Profiles
Beyond white balance, many cameras offer settings to adjust color saturation, contrast, and sharpness.
Saturation
Controls the intensity of colors. Too high can make colors look unnatural; too low can make the image appear washed out.
Contrast
Affects the difference between the darkest and brightest parts of the image. High contrast can lead to clipped highlights or crushed blacks; low contrast can make the image look flat.
Sharpness
Enhances edge detail. Over-sharpening can create artificial-looking artifacts.
Picture Profiles/Gamma Settings
Some advanced cameras offer picture profiles or gamma curves that alter the tonal response of the image. For standard video, a gamma setting like "Standard" or "Rec.709" is typical. For post-production workflows where color grading will be applied, a flatter profile (like Cine or Log) might be used, but this is less common for direct PTZ output.
Recommendation: Start with default settings and make subtle adjustments. If you're unfamiliar, it's often best to leave these settings at their factory defaults unless you have a specific reason to change them.
Utilizing Test Patterns and Monitoring
To effectively fine-tune image quality, you need tools to help you assess your adjustments.
Test Patterns
Some cameras or control software can generate test patterns (e.g., color bars, grayscale ramps) that help evaluate white balance, exposure, and color accuracy.
Waveform Monitors and Vectorscopes
These are advanced tools (often found in professional production switchers or software) that provide objective measurements of video signal levels (luminance and chrominance). They are invaluable for achieving precise exposure and color balance.
Visual Monitoring
The most basic, yet essential, tool is a good quality monitor. Ensure you are viewing the camera feed on a calibrated display to accurately judge image quality.
Recommendation: Regularly check your camera feeds on a reliable monitor. If possible, use waveform and vectorscope tools for critical adjustments.
Advanced Techniques and Common Troubleshooting
Once your PTZ setup is running smoothly, you might want to explore advanced techniques to elevate your productions or troubleshoot common issues that arise. This section provides insights into maximizing your setup's potential and resolving problems efficiently.
Advanced PTZ Control Techniques
Beyond basic pan, tilt, and zoom, there are ways to make your camera movements more sophisticated.
Creating Smooth Transitions with Presets
Instead of manually moving the camera between shots, program key positions as presets. Then, use your controller or software to transition between these presets. Many systems allow you to define the speed of these transitions, creating smooth, professional camera moves that appear as if a skilled operator is at the helm.
Tip: Name your presets descriptively (e.g., "Speaker Wide," "Podium Close-up," "Audience Left") to easily recall them during a live event.
Speed Ramping for Dynamic Shots
Some advanced controllers and software allow for "speed ramping," where the camera accelerates into a move and decelerates as it reaches its destination. This mimics natural camera movement and adds a polished feel to your shots. This is often achievable by programming complex sequences or using controllers with advanced motion profiles.
Integrating PTZ with Other Cameras
In multi-camera productions, PTZ cameras can be seamlessly integrated with traditional manned cameras. The key is to ensure consistent color matching and framing. For example, you might use a manned camera for your primary wide shot and PTZ cameras for dynamic angles or to cover areas the manned cameras can't easily reach.
Tip: Use a video switcher that supports NDI to easily incorporate your PTZ feeds alongside other camera sources.
Troubleshooting Common PTZ Camera Issues
Even the best setups can encounter problems. Here are solutions to common issues:
Issue: Camera Not Responding to Control
- Check Connections: Ensure all cables (Ethernet, serial, power) are securely connected.
- Verify IP Address: For IP cameras, confirm the camera has a valid IP address and is reachable on the network. Try pinging the camera's IP address.
- Controller/Software Settings: Double-check that the controller or software is configured to communicate with the correct camera IP address or serial port and protocol (VISCA, Pelco, etc.).
- Power Cycle: Turn the camera off and on again, and restart your control system.
- Firmware Update: Ensure the camera and control software/hardware are running the latest firmware.
Issue: Poor Image Quality (Grainy, Blurry, Bad Colors)
- Lighting: Is the scene too dark? Consider adding more lighting.
- Focus: Ensure the camera is properly focused on the subject. Test auto-focus and manual focus.
- White Balance: Re-check or re-set the white balance. Auto WB can be problematic in inconsistent lighting.
- Exposure Settings: Review aperture, shutter speed, and gain. Avoid excessively high gain.
- Lens Cleaning: Ensure the camera lens is clean and free of smudges or dust.
- Camera Settings: Reset image settings to default and re-apply necessary adjustments.
Issue: Intermittent Video Feed (Especially with IP/NDI)
- Network Congestion: If using a shared network, other traffic might be interfering. Consider a dedicated network or QoS settings.
- Cable Issues: Faulty Ethernet cables or connectors can cause packet loss. Try swapping cables.
- Bandwidth Limitations: Ensure your network infrastructure can handle the bandwidth required for your video streams.
- Power Issues (PoE): If using PoE, ensure the switch is providing adequate power. Some cameras may drop off if power is unstable.
Issue: PTZ Movement is Jerky or Slow
- Control System Lag: The issue might be with the controller or software, not the camera itself. Check for system resource usage on your control computer.
- Network Latency: High network latency can affect the responsiveness of PTZ commands.
- Camera Settings: Some cameras have settings for maximum pan/tilt speed. Ensure these are not set too low.
- Camera Age/Model: Older or lower-end models may have inherently slower or less smooth PTZ mechanisms.
Maintaining and Updating Your System
Regular maintenance ensures the longevity and optimal performance of your PTZ setup.
Firmware Updates
Manufacturers frequently release firmware updates to improve performance, fix bugs, and add new features. Regularly check the manufacturer's website for updates for your cameras and control devices.
Cleaning and Physical Inspection
Periodically clean camera lenses and check mounts for security. Ensure cables are tidy and not showing signs of wear.
Performance Monitoring
Keep an eye on network performance and control system responsiveness. Proactive monitoring can help identify potential issues before they impact live productions.
Future Trends in PTZ Camera Technology
The PTZ camera market is constantly evolving, driven by advancements in imaging technology, networking, and artificial intelligence. Staying abreast of these trends can help you make informed decisions for future upgrades and investments. By 2025-26, several key developments are shaping the landscape.
AI-Powered Features
Artificial intelligence is increasingly being integrated into PTZ cameras, offering automated capabilities that were once only possible with human operators.
- Auto-Tracking: AI can now detect and automatically track subjects (people, objects) as they move within the frame, keeping them centered and in focus without manual intervention. This is a significant advancement for lecture recording, sports, and event coverage.
- Auto-Framing: AI can analyze the scene and automatically adjust the camera's zoom and pan to create optimal compositions, such as framing all participants in a meeting or highlighting the main speaker.
- Gesture Control: Emerging technologies are exploring the use of hand gestures to control PTZ camera functions, offering a hands-free interaction method.
Enhanced NDI and IP Integration
The adoption of NDI and other IP-based protocols will continue to grow. Expect to see more cameras with full NDI support (not just NDI|HX) offering higher bandwidth and lower latency. Integration with cloud-based production workflows and remote access will also become more prevalent.
Improved Low-Light Performance and Image Sensors
Manufacturers are continually developing larger, more sensitive image sensors and advanced image processing algorithms. This will lead to PTZ cameras that perform exceptionally well in very low-light conditions, reducing the need for extensive additional lighting.
Higher Resolutions and Frame Rates
While 4K is becoming standard, we may see more cameras offering 8K resolution for PTZ applications, providing unprecedented detail and flexibility for cropping and reframing. Higher frame rates (e.g., 120fps or more) will also become more common for ultra-smooth motion and advanced slow-motion capabilities.
Advanced Connectivity and Power Solutions
Expect further simplification of connectivity. USB4 and Thunderbolt integration could offer higher bandwidth and more versatile connections. Advancements in Power over Ethernet (PoE++) or even wireless power solutions could further reduce cabling requirements.
Compact and Discreet Designs
As PTZ cameras become more integrated into architectural designs, expect to see even more compact, discreet, and aesthetically pleasing form factors, making them suitable for a wider range of environments where visual intrusion is a concern.
The Rise of Cloud-Based PTZ Management
Cloud platforms will offer centralized management, configuration, and even remote operation of PTZ cameras, enabling easier deployment and maintenance for distributed installations and remote production teams.
These future trends indicate a move towards more intelligent, automated, and seamlessly integrated PTZ camera systems, making high-quality video production more accessible and efficient than ever before.
In conclusion, mastering the ultimate PTZ camera setup involves a holistic approach, from strategic planning and careful camera selection to meticulous placement, robust connectivity, and fine-tuned image settings. By implementing the tips and tricks discussed, you can transform your video production capabilities, ensuring optimal coverage and professional-quality results for any application. Prioritize understanding your venue, your subject, and your desired outcome, and leverage the power of modern PTZ technology to its fullest potential.


