Considering a DIY home security alarm system? This guide breaks down the benefits, challenges, and essential steps to empower you with smart, affordable protection. Discover if a do-it-yourself approach is the right fit for your home security needs in 2025-26.
What Exactly Are DIY Home Security Alarm Systems?
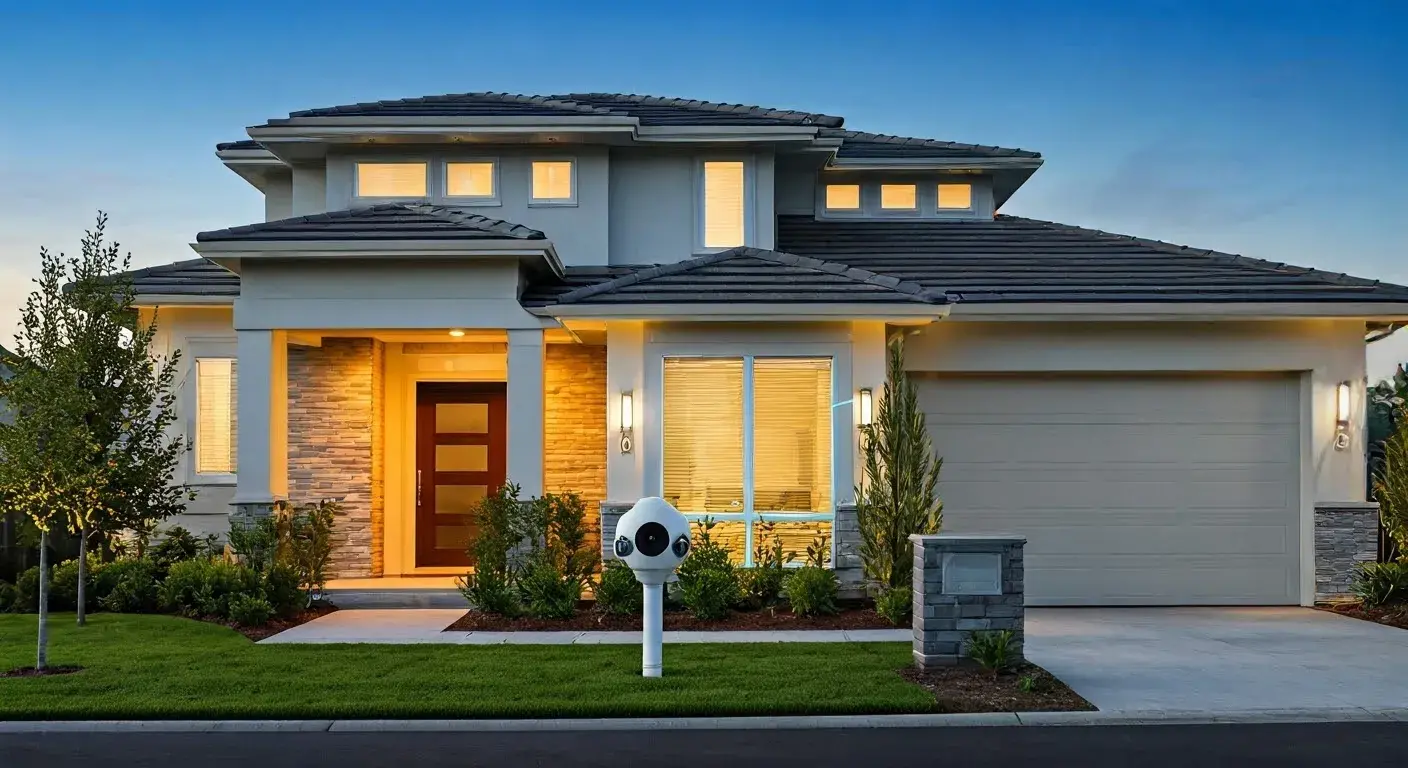
DIY home security alarm systems, often referred to as self-monitored or wireless security systems, are designed for homeowners to install and manage themselves without the need for professional technicians. These systems typically consist of various wireless sensors (door/window contacts, motion detectors, glass break sensors), a central hub or base station, and often a keypad or mobile app for control. Unlike traditional professionally installed systems that require monthly monitoring fees from a security company, many DIY systems offer optional professional monitoring services or rely on self-monitoring, where alerts are sent directly to the homeowner's smartphone. This approach offers greater flexibility, lower upfront costs, and more control over your home's safety.
The Pros and Cons of DIY Home Security Systems
Advantages of DIY Home Security
The appeal of DIY home security systems in 2025-26 lies in their significant advantages, making them a popular choice for budget-conscious and tech-savvy homeowners. These benefits often outweigh the perceived complexities of self-installation.
- Cost Savings: The most prominent advantage is the reduction in upfront installation costs. You bypass the fees associated with professional installers. Furthermore, many DIY systems offer lower or no monthly monitoring fees, especially if you opt for self-monitoring. This can lead to substantial long-term savings. For instance, a typical professional installation might cost $500-$1500, while a comparable DIY system can be purchased for $200-$600.
- Flexibility and Scalability: DIY systems are inherently flexible. You can start with a basic package and add components as your needs or budget allow. Need to secure an additional window or add a camera? It's usually a simple process of purchasing and pairing a new sensor. This adaptability is crucial for renters or those in homes with evolving security requirements.
- Ease of Installation: Modern DIY systems are engineered for simplicity. They typically involve wireless components that pair easily with a central hub via Bluetooth or Wi-Fi. Installation often requires little more than adhering sensors to surfaces and plugging in the base station. Comprehensive instructions and video tutorials are readily available.
- Control and Customization: You have complete control over your system's setup, features, and monitoring preferences. You decide which areas to cover, what types of alerts you receive, and whether to subscribe to professional monitoring. This level of customization ensures the system perfectly fits your lifestyle and security concerns.
- No Long-Term Contracts: Many DIY systems do not require long-term contracts, unlike traditional security providers. This freedom from commitment is a significant draw, allowing you to switch systems or discontinue services without penalty.
- Smart Home Integration: A growing number of DIY systems seamlessly integrate with other smart home devices like smart locks, smart lights, and voice assistants (Amazon Alexa, Google Assistant). This allows for automated security routines, such as lights turning on when a motion sensor is triggered.
Disadvantages of DIY Home Security
While the benefits are compelling, it's important to acknowledge the potential drawbacks of opting for a DIY approach to home security.
- Self-Reliance for Installation and Troubleshooting: The primary responsibility for installation, configuration, and troubleshooting falls on you. While generally straightforward, complex issues might require more technical aptitude than some homeowners possess. You are the first line of defense when something goes wrong.
- Potential for Installation Errors: Incorrect placement of sensors or improper pairing can lead to false alarms or missed events. For example, placing a motion sensor too close to a heat source or a vent can trigger unnecessary alerts.
- Limited Professional Support: While customer support is available, it's not the same as having a technician on-site. You'll rely on phone, chat, or email support, which might not resolve immediate, on-the-spot issues as effectively as a professional.
- Reliance on Home Wi-Fi and Power: Most DIY systems depend on a stable Wi-Fi connection and consistent power supply. An internet outage or power failure (unless the system has battery backup) can render the system temporarily inoperable or limit its functionality.
- Self-Monitoring Limitations: If you choose self-monitoring, you are responsible for responding to every alert. This can be problematic if you're in a meeting, asleep, or unable to access your phone. In a true emergency, immediate professional dispatch might be delayed.
- Perceived Lower Security (in some cases): While modern DIY systems are robust, some may perceive them as less secure than professionally monitored systems, especially if they lack features like cellular backup or advanced encryption.
Key Components of a DIY Home Security System
A comprehensive DIY home security system is built from several interconnected components, each playing a vital role in safeguarding your property. Understanding these elements is crucial for planning and effective installation.
- The Hub/Base Station: This is the brain of the system. It connects to your home's Wi-Fi network and communicates wirelessly with all other sensors and devices. It processes signals from sensors and triggers alarms or sends notifications. Many hubs also have a built-in siren.
- Door and Window Sensors: These are typically two-piece magnetic sensors. When the door or window is opened, the connection between the two pieces is broken, triggering an alert. They are essential for securing entry points.
- Motion Detectors: These sensors detect movement within a specific area, usually a room. They use infrared technology to sense body heat. Pet-friendly models are available to reduce false alarms from animals.
- Keypads: Used for arming and disarming the system. Some systems have physical keypads, while others rely solely on a mobile app.
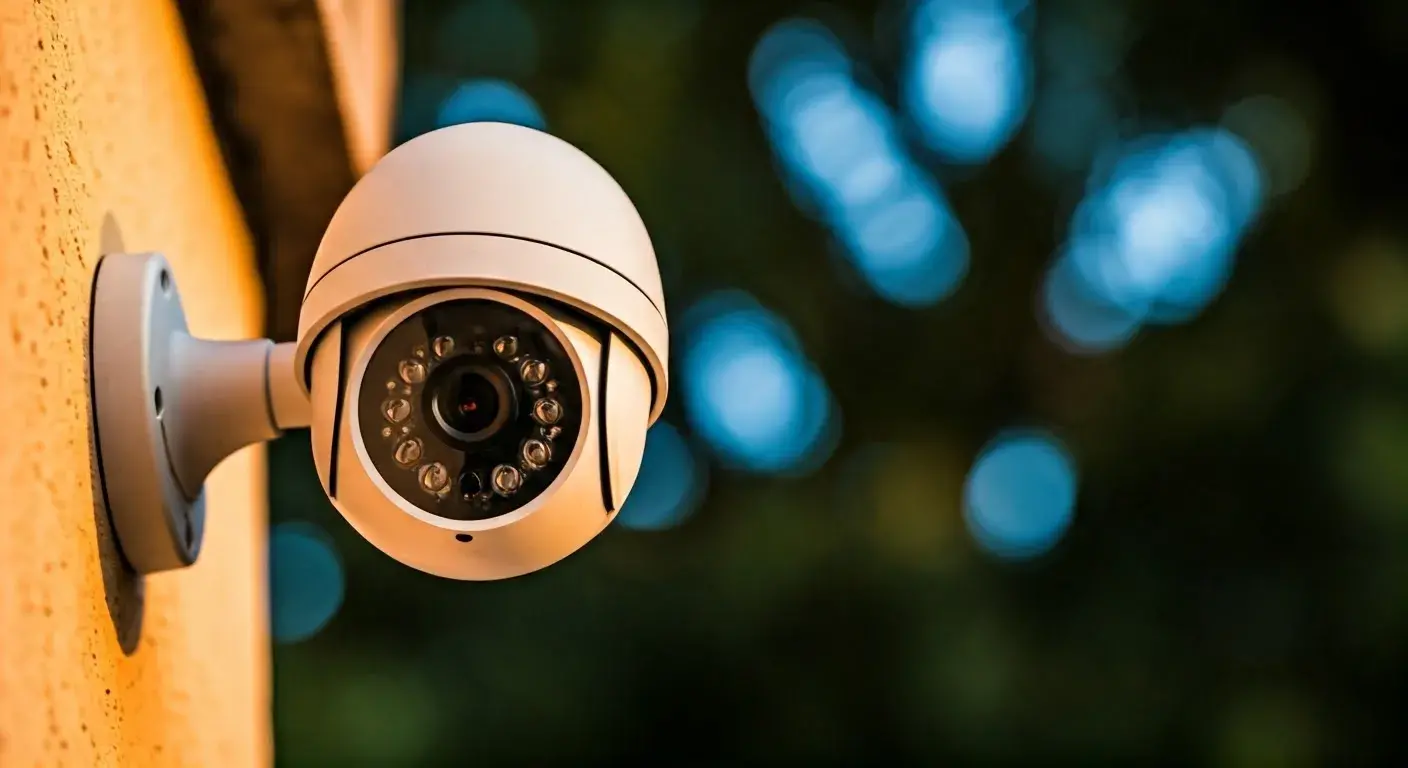
- Security Cameras (Indoor/Outdoor): These can be integrated for visual monitoring. They offer features like night vision, motion detection, two-way audio, and cloud or local storage for recorded footage. In 2025-26, AI-powered person detection is becoming standard.
- Environmental Sensors: These include smoke detectors, carbon monoxide detectors, and water leak sensors. They provide early warnings for potential hazards beyond intrusion.
- Glass Break Sensors: These specialized sensors detect the specific sound frequency of breaking glass, providing an alert before an intruder enters through a window.
- Smart Key Fobs: Small, portable devices that allow for easy arming and disarming of the system without needing to use a keypad or app.
- Yard Signs and Window Decals: While not electronic, these are crucial deterrents, signaling to potential intruders that the property is protected.
Planning Your DIY Home Security System: A Step-by-Step Guide
A well-planned DIY security system is more effective and less prone to issues. Follow these steps to create a robust security solution tailored to your home.
Step 1: Assess Your Home's Vulnerabilities
Walk around your property and identify potential entry points and vulnerable areas. Consider:
- All doors (front, back, patio, garage)
- All accessible windows (ground floor, basement, even upper floors if easily reachable)
- Areas with poor lighting
- Any detached structures like garages or sheds
- High-traffic areas inside the home (hallways, living rooms)
Step 2: Determine Your Security Goals
What do you want your system to achieve?
- Deter intruders?
- Alert you to break-ins?
- Monitor children or pets?
- Detect environmental hazards?
- Integrate with other smart home devices?
Step 3: Choose Your Monitoring Preference
Decide between self-monitoring and professional monitoring.
- Self-Monitoring: You receive alerts directly and are responsible for contacting authorities. This is the most budget-friendly option.
- Professional Monitoring: A third-party service monitors your system 24/7 and dispatches emergency services when an alarm is triggered. This typically involves a monthly fee ($15-$50/month). Many DIY systems offer this as an optional add-on.
Step 4: Select Your Core Components
Based on your assessment and goals, select the essential devices:
- Hub: Choose a hub compatible with the sensors you want.
- Entry Sensors: Install on all accessible doors and windows.
- Motion Detectors: Place in high-traffic areas or rooms with multiple entry points.
- Cameras: Decide on indoor/outdoor placement, resolution, and features like night vision.
Step 5: Consider Additional Components
Enhance your system with specialized sensors:
- Glass break sensors for large windowed areas.
- Environmental sensors (CO, smoke, water).
- Key fobs for easy arming/disarming.
Step 6: Plan Placement and Power
Map out where each sensor will go. Ensure:
- Sensors are within range of the hub.
- Motion detectors have a clear line of sight and are placed at appropriate heights (usually 6-8 feet).
- Cameras have a good view and access to power (or are battery-powered).
- The hub is centrally located and connected to your Wi-Fi.
Step 7: Research System Compatibility
Ensure all chosen components work together. Check if the system supports integration with your existing smart home ecosystem (e.g., Alexa, Google Home, Apple HomeKit).
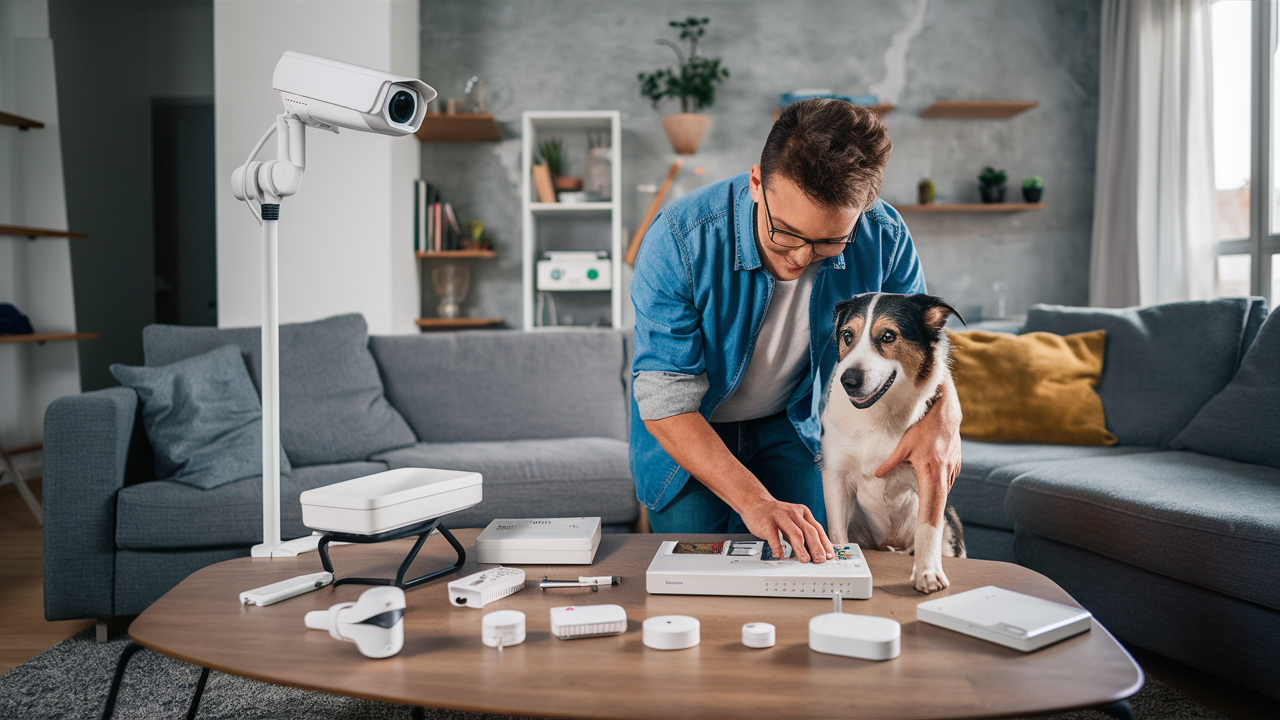
The Installation Process: Making It Work for You
Installing a DIY home security system is designed to be user-friendly. While specific steps vary by brand, the general process is consistent.
Step 1: Unboxing and Familiarization
Carefully unpack all components. Read the user manual thoroughly or watch the manufacturer's installation videos. Familiarize yourself with each device and its intended function.
Step 2: Setting Up the Hub
Plug in the hub and connect it to your home's router using an Ethernet cable (if required) or connect it to your Wi-Fi network via the mobile app. Follow the app's instructions to register the hub and create your account.
Step 3: Pairing Sensors
This is the core of the installation. Most systems use a guided process within the mobile app:
- Select "Add Device" or "Pair Sensor" in the app.
- Follow prompts to activate the sensor (e.g., pull a battery tab, press a button).
- The hub will detect and pair with the sensor.
- Name each sensor descriptively (e.g., "Front Door," "Living Room Window").
Tip: Pair sensors one by one to avoid confusion.
Step 4: Mounting Sensors
Once paired, physically mount the sensors:
- Door/Window Sensors: Clean the surface of the door/window and frame. Use the provided adhesive strips (or screws for a more permanent installation) to attach the two parts of the sensor so they are aligned and close together when the door/window is shut.
- Motion Detectors: Mount in corners of rooms, typically 6-8 feet high, facing away from heat sources or windows that receive direct sunlight.
- Cameras: Mount securely in their desired locations, ensuring they are plugged in or have sufficient battery charge.
Step 5: Installing the Keypad (if applicable)
Mount the keypad near a main entry point. Ensure it's within wireless range of the hub.
Step 6: Configuring Settings
Use the mobile app to customize your system:
- Set entry and exit delays (time to disarm the system after entering or before leaving).
- Configure notification preferences (push alerts, emails, SMS).
- Adjust motion detection sensitivity.
- Set up user codes for arming/disarming.
- If subscribing to professional monitoring, complete the activation process.
Step 7: Testing the System
This is a critical step. Arm the system and deliberately trigger each sensor to ensure it's working correctly and sending alerts. Open doors, walk in front of motion detectors, and test the siren.
Example: Arm the system in "Home" mode (which typically bypasses interior motion detectors but activates perimeter sensors). Open the front door. The system should sound after the exit delay, and you should receive an alert. Then, disarm the system.
Choosing the Right DIY System: Factors to Consider in 2025-26
With a growing market, selecting the best DIY security system requires careful consideration of several factors to ensure it meets your specific needs and provides reliable protection.
Brand Reputation and Reliability
Look for established brands known for quality and customer support. Read reviews from reputable tech sites and user forums. Brands like SimpliSafe, Ring Alarm, Abode, and Wyze are popular choices in the DIY space.
Component Quality and Features
Evaluate the build quality of sensors and the hub. Consider:
- Sensor Range: Ensure sensors can reliably communicate with the hub, especially in larger homes.
- Battery Life: Check the expected battery life for wireless sensors.
- Camera Resolution and Field of View: For video surveillance, higher resolution (1080p or 4K) and a wider field of view are generally better.
- Two-Way Audio: Useful for communicating with visitors or deterring intruders.
- Night Vision: Essential for effective monitoring in low-light conditions.
Connectivity Options
Most DIY systems use Wi-Fi. However, consider systems that offer:
- Cellular Backup: This is a crucial feature. If your internet goes down, cellular backup ensures the system can still communicate with monitoring services or send alerts. This is a standard feature in many higher-tier DIY systems and a key differentiator from basic smart home hubs.
- Ethernet Port: For a more stable connection for the hub.
Mobile App Experience
The mobile app is your primary interface. It should be:
- Intuitive and User-Friendly: Easy to navigate for arming/disarming, checking status, and viewing camera feeds.
- Reliable: Not prone to crashing or freezing.
- Feature-Rich: Offers customization options for notifications, schedules, and user management.
Monitoring Options and Costs
Understand the monitoring plans available:
- Self-Monitoring: Free, but requires your active attention.
- Professional Monitoring: Monthly fees vary. Compare what's included (e.g., cellular backup, emergency dispatch, environmental hazard monitoring). In 2025-26, plans are becoming more comprehensive, often including video verification.
Smart Home Integration Capabilities
If you have or plan to build a smart home, ensure the security system integrates seamlessly with your existing ecosystem (e.g., Amazon Alexa, Google Assistant, Apple HomeKit, Z-Wave, Zigbee devices). This allows for creating automated routines.
Example: "Alexa, arm my security system." or "Hey Google, turn on the porch light when motion is detected outside."
Expandability and Customization
Can you easily add more sensors, cameras, or other devices later? Does the system allow for advanced customization of rules and triggers?
Customer Support and Warranty
Check the availability and quality of customer support (phone, chat, email). A good warranty provides peace of mind.
Advanced Features and Integrations for Enhanced Security
Beyond basic intrusion detection, modern DIY security systems offer sophisticated features that significantly enhance protection and convenience. In 2025-26, these advanced capabilities are becoming increasingly standard.
Video Analytics and AI
Many new DIY cameras incorporate Artificial Intelligence for smarter detection. This includes:
- Person Detection: Differentiates between people, pets, and vehicles, reducing false alarms.
- Package Detection: Notifies you when a package is delivered or removed from your porch.
- Facial Recognition (emerging): Identifies known individuals.
Smart Lock Integration
Connecting smart locks to your security system allows for:
- Automated Arming/Disarming: The system can automatically arm when you lock the door and disarm when you unlock it.
- Remote Access Control: Grant temporary access to guests or service providers via the app.
- Activity Logs: Track who enters and leaves your home and when.
Smart Lighting and Automation
Integrate smart lights to work with your security system:
- Deterrent Lighting: Lights can turn on automatically when motion is detected outside, deterring potential intruders.
- Welcome Home Lighting: Lights can illuminate your path when you disarm the system.
- Simulated Occupancy: Schedule lights to turn on and off randomly when you're away, making it appear as though someone is home.
Environmental Hazard Detection
Expand your system's capabilities beyond intrusion:
- Smart Smoke and CO Detectors: Provide alerts to your phone, even when you're away, and can integrate with professional monitoring services.
- Water Leak Sensors: Place in basements, under sinks, or near water heaters to detect leaks early, preventing costly water damage.
- Freeze Sensors: Alert you to dangerously low temperatures that could cause pipes to burst.
Professional Monitoring with Video Verification
Some DIY systems offer advanced professional monitoring that includes video verification. When an alarm is triggered, the monitoring center can view live or recorded video footage to confirm the threat before dispatching authorities. This can lead to faster police response times.
Geofencing
This feature uses your smartphone's location to automatically arm or disarm the system when you leave or arrive home. For example, you might receive a reminder to arm the system when you leave a certain radius around your house.
Two-Way Audio Integration
Many cameras and some base stations include two-way audio. This allows you to speak to someone at your door or inside your home through the app, useful for deliveries, visitors, or even confronting a potential intruder remotely.
Cost Considerations: Budgeting for Your DIY Security Solution
One of the primary drivers for choosing a DIY security system is cost-effectiveness. However, understanding the various cost components is essential for accurate budgeting.
Upfront Hardware Costs
This is the initial investment in the system's components:
- Starter Kits: Typically range from $150 to $500, including a hub, a few door/window sensors, and a motion detector.
- Individual Components: Extra sensors can cost $15-$40 each, motion detectors $25-$50, and cameras $50-$200+, depending on features.
- Environmental Sensors: Smoke/CO detectors might cost $30-$60, water sensors $20-$40.
Example: A comprehensive system for a 3-bedroom house with 10 entry sensors, 2 motion detectors, 2 cameras, and a smoke detector could range from $400 to $1000+ in hardware costs.
Monthly Monitoring Fees (Optional)
If you opt for professional monitoring:
- Basic Monitoring: Often includes cellular backup and emergency dispatch, ranging from $15 to $30 per month.
- Premium Monitoring: May include video verification, advanced features, or integration with other services, costing $30 to $50+ per month.
- Self-Monitoring: This option is typically free, though some systems might charge a small fee for cloud storage of video footage.
Cloud Storage Fees
If you plan to record and store video footage from your security cameras, you'll likely need a subscription for cloud storage. Prices vary based on the number of cameras and the duration of storage (e.g., 7 days, 30 days). Expect to pay $5-$15 per month per camera, or $10-$30 for a plan covering multiple cameras.
Installation Costs (DIY Savings)
The "DIY" aspect means you save significantly on installation. Professional installation for similar systems can range from $200 to $1000 or more, depending on the complexity.
Potential for Hidden Costs
- Battery Replacements: Wireless sensors require battery replacements periodically (usually every 1-3 years), which is a minor ongoing cost.
- Internet Service: A reliable home internet connection is essential, so ensure your current plan is sufficient.
- App Upgrades/Features: While rare, some systems might introduce premium app features that require an additional subscription.
Long-Term Value
When comparing DIY to professionally installed systems, consider the total cost of ownership over 5-10 years. While the upfront hardware cost for DIY might be higher than some professionally installed systems that offer low initial hardware costs but high monthly fees, the absence of mandatory monthly fees or the option for lower-cost monitoring often makes DIY systems more economical in the long run.
Maintenance and Troubleshooting Your DIY System
Regular maintenance and understanding how to troubleshoot common issues will ensure your DIY security system operates reliably.
Routine Maintenance
- Test Your System Regularly: At least once a month, arm your system and test each sensor to ensure it's functioning correctly and communicating with the hub.
- Check Sensor Batteries: Most systems will alert you when a battery is low, but it's good practice to check periodically. Replace batteries promptly to avoid system failures.
- Clean Sensors and Cameras: Dust and debris can interfere with sensor performance or obscure camera lenses. Wipe them down gently with a soft, dry cloth.
- Update Software/Firmware: Keep your system's mobile app and the hub's firmware up to date. Manufacturers release updates to improve performance, add features, and patch security vulnerabilities.
- Check Wi-Fi Signal Strength: Ensure your hub and wireless devices have a strong, stable connection to your router.
Common Troubleshooting Steps
- Sensor Not Responding:
- Check the battery.
- Ensure the sensor is within range of the hub.
- Try re-pairing the sensor with the hub.
- Check for physical obstructions or interference.
- False Alarms:
- Motion Sensors: Ensure they are not placed near heat sources (vents, radiators), direct sunlight, or moving objects (curtains, pets without pet-friendly settings). Adjust sensitivity if possible.
- Door/Window Sensors: Ensure they are properly aligned and close enough when the door/window is shut. Check for drafts that might cause slight movement.
- Environmental Sensors: Ensure they are not placed in areas prone to steam (bathrooms) or high humidity.
- Hub Offline:
- Check your home internet connection. Reboot your router and modem.
- Ensure the hub is powered on.
- Verify the Wi-Fi password hasn't changed.
- Mobile App Issues:
- Ensure you have the latest version of the app.
- Try logging out and back in.
- Restart your smartphone.
- Siren Not Sounding:
- Check if the siren is enabled in the system settings.
- Ensure the volume is turned up.
- Test the siren during a system test.
When to Contact Support: If you've tried basic troubleshooting and the issue persists, or if you encounter a complex problem, don't hesitate to contact the manufacturer's customer support. They can often provide specific guidance for your system model.
Legal and Privacy Aspects of DIY Home Security
While DIY security systems offer control, understanding the legal and privacy implications is crucial for responsible use.
Data Privacy and Storage
Your Data: When you use a DIY system, especially one with cloud storage for video, your data (footage, activity logs, personal information) is stored by the manufacturer. Review their privacy policy carefully to understand:
- What data is collected.
- How it is stored and secured.
- Who has access to it.
- How long it is retained.
- Whether it is shared with third parties.
Encryption: Ensure the system uses strong encryption (e.g., AES-256) for data transmission and storage to protect against unauthorized access.
Recording Laws and Consent
Audio Recording: Laws regarding audio recording vary significantly by location. In many places, it is illegal to record a conversation without the consent of all parties involved. Be mindful of this if your system has two-way audio or if cameras are placed in areas where conversations might occur.
Video Recording: Generally, recording video on your own property is legal. However, be cautious about cameras that inadvertently capture public areas or neighboring properties. Ensure your cameras are pointed to cover only your property and common areas like your doorstep.
False Alarms and Penalties
Many municipalities have ordinances regarding false alarms. If your system triggers a false alarm repeatedly, you may face fines. This underscores the importance of:
- Proper installation and sensor placement to minimize false triggers.
- Regular system testing.
- Ensuring all household members know how to arm and disarm the system correctly.
- If professionally monitored, ensuring the monitoring company has accurate contact information and protocols.
Access by Law Enforcement
In most jurisdictions, law enforcement will require a warrant or consent to access your security footage. However, if you have professional monitoring, the monitoring company may have protocols for providing footage directly to authorities in certain emergency situations, often after verifying a crime is in progress.
Cybersecurity
DIY systems, like any connected device, are vulnerable to cyber threats. To mitigate risks:
- Use strong, unique passwords for your system's account and your Wi-Fi network.
- Enable two-factor authentication (2FA) if offered.
- Keep your system's firmware and mobile app updated.
- Avoid using default passwords.
DIY vs. Professional Installation: A Comparative Look
Deciding between a DIY and professionally installed home security system involves weighing several factors, primarily cost, convenience, and complexity.
| Feature | DIY Home Security Systems | Professional Installation Systems |
|---|---|---|
| Upfront Cost | Generally lower to moderate hardware cost. No installation fees. | Can be low hardware cost with high monthly fees, or higher hardware cost with lower monthly fees. Significant installation fees ($200-$1000+). |
| Installation | Self-installed, typically wireless and user-friendly. Requires homeowner's time and effort. | Professionally installed by trained technicians. Convenient but requires scheduling. |
| Monitoring | Self-monitoring is standard. Optional professional monitoring available, often at competitive rates. | Mandatory professional monitoring with monthly fees. |
| Contracts | Often no long-term contracts, offering flexibility. | Typically requires long-term contracts (2-5 years). |
| Customization & Scalability | Highly customizable and scalable. Easy to add or remove components. | Less flexible; changes may require technician visits and additional fees. |
| Technical Expertise Required | Minimal; designed for ease of use. Troubleshooting may require some technical aptitude. | None required for installation or initial setup. |
| Support | Customer support via phone, chat, email. Troubleshooting is primarily self-managed. | On-site technician support available, often included in monitoring fees or service plans. |
| System Technology | Wide range of options, including advanced smart home integration and AI features. | Can be robust, but sometimes uses older proprietary technology. |
| Cellular Backup | Commonly available, especially with optional professional monitoring. | Standard feature. |
Who is DIY best for? Homeowners who are comfortable with technology, want to save money on installation and monthly fees, and desire flexibility and control over their security system.
Who is Professional Installation best for? Homeowners who prefer a hands-off approach, want immediate expert setup, value on-site support, and don't mind long-term contracts and potentially higher monthly fees.
The Future of DIY Home Security
The landscape of DIY home security is continuously evolving, driven by advancements in technology and increasing consumer demand for integrated, intelligent, and affordable solutions. In the coming years, we can expect several key trends to shape the DIY security market:
- Enhanced AI and Machine Learning: Expect even more sophisticated AI capabilities in cameras and sensors for highly accurate threat detection, anomaly recognition, and predictive security measures. This will further reduce false alarms and provide proactive alerts.
- Seamless Smart Home Ecosystem Integration: DIY security systems will become even more deeply embedded within broader smart home ecosystems. Interoperability will be paramount, allowing for complex automations and unified control across all connected devices, regardless of brand.
- Increased Focus on Cybersecurity: As systems become more connected, the emphasis on robust cybersecurity will intensify. Manufacturers will invest more in end-to-end encryption, secure authentication protocols, and regular security audits to protect user data and prevent breaches.
- Advanced Wireless Technologies: Innovations in wireless communication, such as improved mesh networking and longer-range protocols, will enable more reliable connectivity for sensors, even in larger or more complex home layouts, reducing the need for signal boosters.
- Subscription Models Evolution: While hardware costs will remain a key DIY differentiator, subscription models will likely evolve to offer more value-added services, such as advanced cloud analytics, proactive system health checks, and premium support tiers.
- Matter Standard Adoption: The Matter smart home standard is poised to simplify device compatibility. DIY security components that adhere to Matter will offer unprecedented ease of integration with a wide array of other smart home devices, breaking down brand silos.
- Energy Efficiency and Sustainability: With a growing focus on environmental impact, expect more DIY security devices to feature improved power efficiency, longer battery life, and potentially solar charging options for outdoor cameras.
These advancements promise to make DIY home security more powerful, intelligent, and accessible than ever before, empowering homeowners with comprehensive protection and smart home control.
Conclusion
The decision to embrace a Do It Yourself home security alarm system in 2025-26 presents a compelling pathway to enhanced home protection, offering significant cost savings, unparalleled flexibility, and greater control. While the initial setup and ongoing management rest on your shoulders, modern DIY systems are engineered for user-friendliness, making installation and operation accessible to most homeowners. By carefully assessing your needs, selecting the right components, and following a structured installation process, you can build a robust security network tailored precisely to your property and lifestyle. Remember to consider advanced features like AI-powered cameras and smart home integrations to maximize your system's effectiveness. Ultimately, a well-planned DIY security system provides peace of mind without the burden of mandatory long-term contracts or excessive monthly fees, proving that smart, effective home security is well within your reach.