Setting up security cameras can significantly enhance your home or business security. This comprehensive guide will walk you through every step, from choosing the right system to final configuration, ensuring you gain peace of mind and robust surveillance.
Choosing the Right Security Camera System
Selecting the ideal security camera system is the foundational step to effective surveillance. In 2025-26, the market offers a diverse range of options, each with unique strengths. Your choice will depend on your specific needs, budget, and technical comfort level. We'll explore the key factors to consider, from camera types to storage solutions, ensuring you make an informed decision that provides optimal protection.
Types of Security Cameras
Security cameras come in various forms, each designed for different environments and purposes. Understanding these distinctions is crucial for selecting the most suitable hardware.
Dome Cameras
Dome cameras are discreet and often vandal-resistant, making them popular for indoor and outdoor commercial applications. Their spherical shape makes it difficult to tell which way they are pointing, adding an element of deterrence. They typically offer a wide field of view.
Bullet Cameras
Bullet cameras are the classic, cylindrical-shaped cameras often seen mounted on walls or eaves. They are highly visible, serving as a strong deterrent. Many are weather-resistant and suitable for outdoor use, offering good directional surveillance.
Turret Cameras (Eyeball Cameras)
Turret cameras are a hybrid, featuring a lens that can be adjusted within a fixed housing. They offer flexibility in aiming and are generally easier to install and maintain than dome cameras, while still providing a discreet profile.
PTZ (Pan-Tilt-Zoom) Cameras
PTZ cameras offer remote control over their movement (pan, tilt) and zoom capabilities. These are ideal for covering large areas and tracking moving subjects, often used in professional security setups where active monitoring is required.
Covert Cameras
These cameras are designed to be hidden within everyday objects, such as smoke detectors, clocks, or even power adapters. They are used when discreet surveillance is necessary, though legal restrictions often apply.
Resolution and Video Quality
The resolution of your security camera directly impacts the clarity of the footage. Higher resolutions mean sharper images, allowing you to identify details like faces or license plates more easily. By 2025-26, 4K (8-megapixel) resolution is becoming increasingly common and affordable, offering exceptional detail.
- 1080p (Full HD): Still a viable option for basic surveillance, offering good clarity for general monitoring.
- 2K (QHD): Offers a significant improvement over 1080p, providing more detail.
- 4K (UHD): The current standard for high-end systems, providing incredibly sharp and detailed video. Essential for identifying fine details.
When evaluating video quality, also consider frame rate (FPS). A higher FPS (e.g., 30 FPS) results in smoother video, especially for capturing fast-moving objects. Night vision capabilities, measured in infrared (IR) range (e.g., 30 meters), are also critical for effective 24/7 surveillance.
Storage Solutions
How your video footage is stored is a critical decision. The primary options are local storage and cloud storage.
Local Storage
This typically involves a Network Video Recorder (NVR) for IP cameras or a Digital Video Recorder (DVR) for analog cameras. Footage is saved onto hard drives within the recorder.
- Pros: No ongoing subscription fees, full control over your data, faster access to footage.
- Cons: Initial hardware cost, requires physical space, risk of theft or damage to the recorder can lead to data loss.
Cloud Storage
Video footage is uploaded and stored on remote servers managed by the camera manufacturer or a third-party provider.
- Pros: Accessible from anywhere with internet, data is protected from local theft or damage, often includes advanced features like AI analytics.
- Cons: Requires a monthly or annual subscription fee, dependent on internet connection speed and reliability, potential privacy concerns regarding data handling.
For 2025-26, hybrid solutions are also gaining traction, offering both local and cloud backup for redundancy.
Power Source
Consider how the cameras will be powered.
- PoE (Power over Ethernet): For wired IP cameras, PoE allows data and power to be transmitted over a single Ethernet cable, simplifying installation.
- AC Power Adapters: Traditional power source, requiring a nearby electrical outlet.
- Battery-Powered: Ideal for wireless cameras where running power cables is difficult, but requires regular recharging or battery replacement.
Planning Your Camera Placement and Installation
Strategic placement of your security cameras is paramount to maximizing their effectiveness. A well-planned layout ensures blind spots are minimized and critical areas are covered. This section will guide you through the planning process, from identifying key zones to considering environmental factors.
Identifying Vulnerable Entry Points
Your primary focus should be on securing all potential entry points to your property. This includes:
- Front and Back Doors: These are the most common entry points for intruders.
- Ground-Floor Windows: Especially those that are easily accessible or hidden from view.
- Garage Doors and Side Doors: Often overlooked, these can be significant vulnerabilities.
- Gates and Fences: For properties with perimeter security, gates are critical access points.
Coverage of High-Traffic Areas
Beyond entry points, consider areas where activity is frequent or where valuable assets are stored.
- Driveways and Parking Areas: To capture vehicle details and activity.
- Main Hallways and Corridors: For internal monitoring.
- Outdoor Storage Areas: Where tools, equipment, or other valuable items are kept.
- Reception Areas or Lobbies: For businesses.
Minimizing Blind Spots
Blind spots are areas that your cameras cannot see. To minimize them:
- Overlap Fields of View: Position cameras so their coverage areas overlap slightly, ensuring continuous monitoring.
- Use Multiple Cameras: For complex areas or large properties, multiple cameras are essential.
- Consider Camera Angles: Mount cameras at angles that provide the widest possible view without distortion.
- Avoid Obstructions: Ensure trees, bushes, or architectural features do not block the camera's view.
Environmental Considerations
The environment where your cameras are installed will impact their performance and longevity.
- Weather Resistance: For outdoor cameras, ensure they have an appropriate IP rating (e.g., IP66 or IP67) to withstand rain, dust, and extreme temperatures.
- Lighting Conditions: Consider areas with poor lighting. Cameras with good low-light performance or infrared night vision are essential. Conversely, avoid pointing cameras directly at bright light sources like the sun, which can cause glare and wash out the image.
- Mounting Surfaces: Ensure the mounting surface is sturdy and can support the weight of the camera.
Power and Network Connectivity
Before mounting, plan for power and network connectivity.
- Power Source: Determine if you'll use PoE, AC adapters, or batteries. For wired systems, ensure you have access to Ethernet ports or can run cables to power outlets.
- Network Access: For IP cameras, ensure a stable Wi-Fi signal or an Ethernet connection is available at the installation site. For NVR/DVR systems, the recorder needs to be connected to your network for remote viewing.
Height and Angle of Installation
The height at which you mount your cameras is a balancing act.
- Too Low: Cameras can be easily tampered with or vandalized.
- Too High: May reduce the ability to capture identifying details like faces or license plates.
A common recommendation is between 8-10 feet (2.5-3 meters) for outdoor cameras. The angle should be adjusted to capture the desired field of view without excessive distortion.
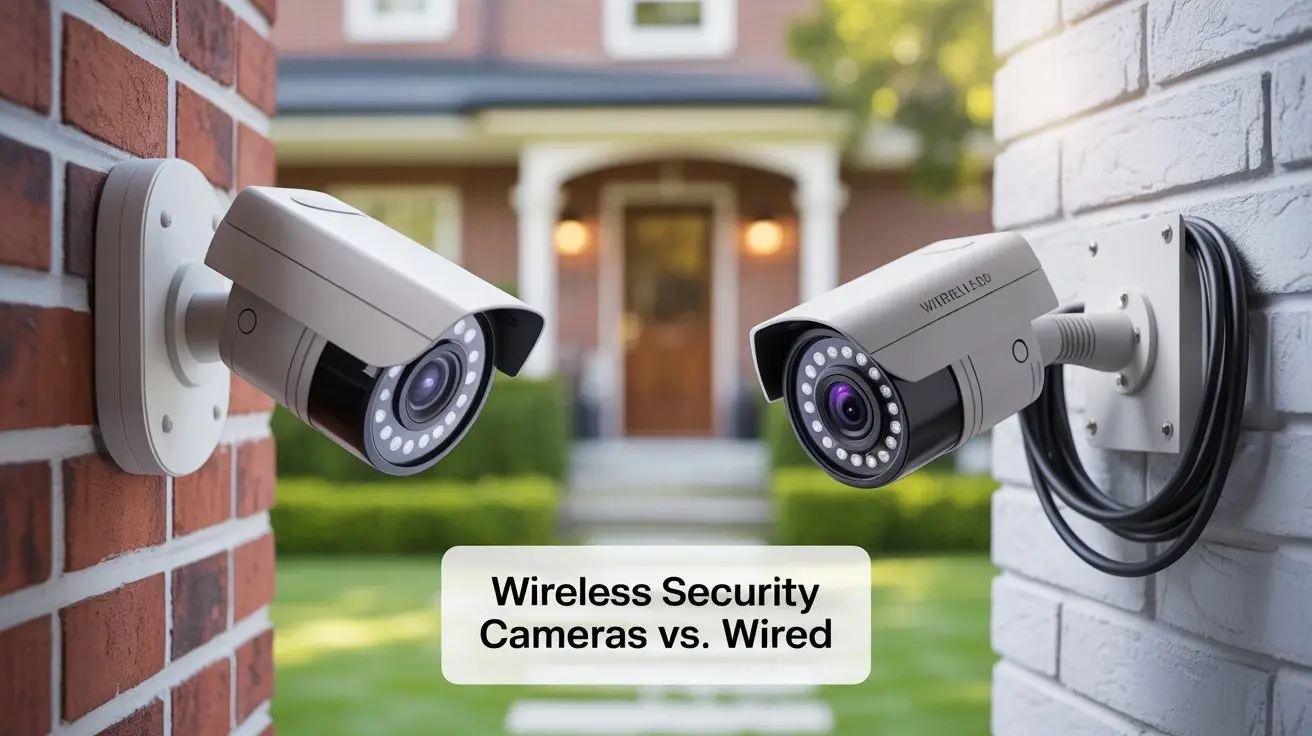
Wired vs. Wireless Security Cameras: A Detailed Comparison
The debate between wired and wireless security cameras is a significant one for anyone setting up a surveillance system. Each type offers distinct advantages and disadvantages that can heavily influence installation complexity, reliability, and overall cost. In 2025-26, both technologies continue to evolve, offering more robust solutions than ever before.
Wired Security Cameras (IP and Analog)
Wired systems rely on physical cables for both data transmission and, often, power. The two main categories are IP (Internet Protocol) cameras and older analog (CCTV) systems that use coaxial cables.
IP Cameras (Wired)
These cameras connect to your network via Ethernet cables. Many support PoE, meaning a single cable can provide both power and data, significantly simplifying installation.
- Pros:
- Superior Video Quality: Generally offer higher resolutions and clearer images.
- Reliability: Less susceptible to interference and signal drops compared to wireless.
- Security: Data transmission is more secure.
- PoE Support: Simplifies wiring and power needs.
- Scalability: Easier to add more cameras to a wired network.
- Cons:
- Installation Complexity: Requires running cables, which can be time-consuming and may involve drilling through walls.
- Cost: Can be more expensive upfront due to the need for NVRs and potentially longer cables.
- Less Flexibility: Placement is limited by the availability of network ports or the feasibility of running cables.
Analog Cameras (DVR Systems)
These older systems use coaxial cables to transmit video signals to a Digital Video Recorder (DVR). While still functional, they generally offer lower resolutions and fewer advanced features compared to IP cameras.
- Pros:
- Lower Cost: Often cheaper than IP systems, especially for basic setups.
- Simpler Infrastructure: Coaxial cables are sometimes easier to run than Ethernet.
- Cons:
- Lower Video Quality: Limited by analog signal and resolution.
- Limited Features: Lacks advanced analytics and smart functionalities.
- Less Secure: Data is more vulnerable to interference.
- Requires Separate Power: Cables typically only transmit video; power needs to be supplied separately.
Wireless Security Cameras
Wireless cameras transmit data over Wi-Fi or other wireless protocols. They still require a power source, which can be an AC adapter or batteries.
Wi-Fi Cameras
These cameras connect to your home's Wi-Fi network. They are popular for DIY installations due to their ease of setup.
- Pros:
- Easy Installation: No need to run data cables; just power and Wi-Fi connection.
- Flexibility: Can be placed almost anywhere with Wi-Fi coverage.
- Cost-Effective: Often more affordable for smaller setups.
- Cons:
- Reliability: Susceptible to Wi-Fi signal interference, dead zones, or network congestion, which can lead to dropped connections or lag.
- Security Concerns: Wireless signals can be more vulnerable to hacking if not properly secured.
- Power Dependency: Still requires a power source (AC adapter or battery), which can limit placement options if outlets are not nearby. Battery-powered models require frequent recharging or replacement.
- Limited Range: Wi-Fi signal strength can degrade over distance.
Battery-Powered Wireless Cameras
These are a subset of wireless cameras that run entirely on rechargeable or disposable batteries, offering maximum placement flexibility.
- Pros:
- Ultimate Placement Freedom: Can be installed anywhere without needing power outlets or data cables.
- Quick Setup: Very easy to install and reposition.
- Cons:
- Battery Life: Frequent recharging or replacement is necessary, especially for cameras with high activity detection.
- Limited Features: Often have fewer features or lower resolution to conserve power.
- Motion-Triggered Recording: Many rely on motion detection to save battery, meaning they might miss the very beginning of an event.
- Potential for Signal Issues: Still relies on Wi-Fi for data transmission.
Comparison Table: Wired vs. Wireless
| Feature | Wired IP Cameras | Wireless Wi-Fi Cameras | Battery-Powered Wireless Cameras |
|---|---|---|---|
| Installation Complexity | High (requires cable running) | Low (requires power and Wi-Fi) | Very Low (requires Wi-Fi, no power cables) |
| Reliability | Very High | Moderate (depends on Wi-Fi) | Moderate (depends on Wi-Fi and battery) |
| Video Quality | Excellent | Good to Excellent | Moderate to Good |
| Security | High | Moderate (requires strong Wi-Fi security) | Moderate (requires strong Wi-Fi security) |
| Cost (Initial) | Higher | Moderate | Moderate to Higher (due to batteries) |
| Ongoing Costs | None (for system) | Potential cloud subscription | Battery replacement/charging costs, potential cloud subscription |
| Flexibility | Low (limited by cabling) | High (within Wi-Fi range) | Very High (limited only by Wi-Fi) |
| Power Source | PoE or separate power | AC adapter or battery | Battery only |
For 2025-26, the trend is towards more robust wireless solutions with improved battery life and mesh networking capabilities. However, for maximum reliability and quality, especially in commercial settings or for critical surveillance points, wired IP cameras with PoE remain the gold standard.
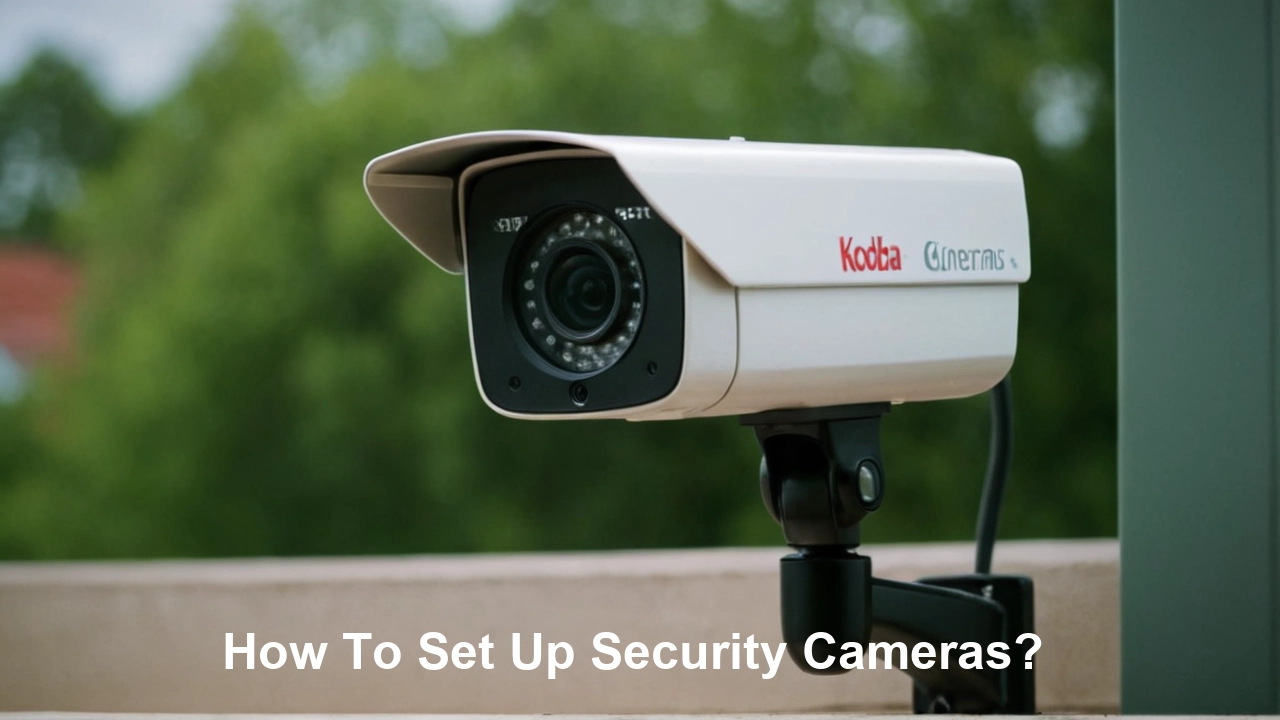
Step-by-Step DIY Security Camera Setup Guide
Setting up your own security camera system can be a rewarding and cost-effective endeavor. This guide breaks down the process into manageable steps, from unboxing your equipment to configuring your system for optimal performance. We'll cover both wired and wireless setups, ensuring you have the knowledge to tackle the installation yourself.
Step 1: Unboxing and Inventory
Before you begin, carefully unbox all components of your security camera system. Check the contents against the packing list to ensure nothing is missing or damaged. This typically includes cameras, mounting hardware, power adapters (if applicable), network cables (for wired systems), and a DVR/NVR or base station.
Step 2: Install the NVR/DVR or Base Station
This is the central hub of your system.
- Placement: Choose a secure, central location that is close to your router (for internet connectivity) and ideally close to where you'll need to run cables.
- Connections:
- Power: Connect the NVR/DVR to a power outlet.
- Network: Connect the NVR/DVR to your router using an Ethernet cable. For wireless systems, the base station might connect wirelessly or via Ethernet.
- Monitor (Optional): Connect a monitor and mouse to the NVR/DVR for initial setup and local access.
Step 3: Install the Cameras
This is where the physical installation happens. Follow the steps relevant to your camera type.
For Wired Cameras (IP/PoE):
- Run Ethernet Cables: Plan the route for your Ethernet cables from the NVR to each camera location. Drill holes if necessary, ensuring cables are protected from damage.
- Connect Cameras: Once cables are in place, connect one end to the camera and the other to the NVR's PoE ports.
- Mount Cameras: Securely mount the cameras using the provided hardware. Adjust the angle to achieve the desired field of view.
For Wireless Wi-Fi Cameras:
- Connect to Power: Plug in the camera's power adapter or ensure batteries are charged.
- Mount Cameras: Securely mount the cameras in their desired locations.
For Battery-Powered Wireless Cameras:
- Charge Batteries: Ensure batteries are fully charged.
- Mount Cameras: Securely mount the cameras in their desired locations.
Step 4: Power Up and Initial Configuration
Once cameras are installed and connected (or powered on), it's time to power up the NVR/DVR or base station.
- Boot Up: Allow the system to boot up completely.
- Initial Setup Wizard: Most NVRs/DVRs and wireless systems will launch a setup wizard. Follow the on-screen prompts. This typically involves:
- Setting a Strong Password: Crucial for system security.
- Network Configuration: Ensuring the system is connected to your network.
- Date and Time: Set accurately for proper recording timestamps.
- Formatting Storage: If using local storage (NVR/DVR), you'll likely need to format the hard drive.
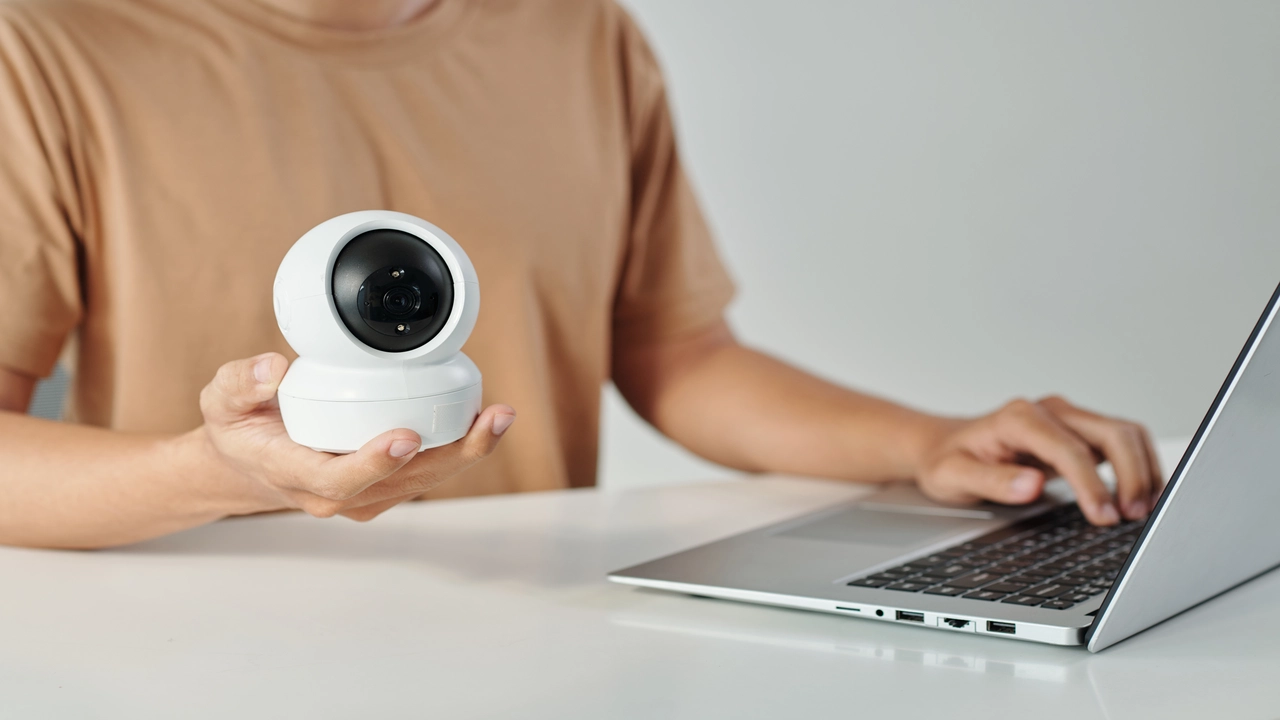
Step 5: Connecting Wireless Cameras to Your Network
For wireless Wi-Fi and battery-powered cameras, you'll need to connect them to your Wi-Fi network.
- Use the Mobile App: Most wireless systems use a smartphone app for setup. Download the app provided by the manufacturer.
- Pairing: Follow the app's instructions to add your cameras. This usually involves scanning a QR code on the camera, pressing a sync button, or entering Wi-Fi credentials.
- Signal Strength: Ensure the camera has a strong Wi-Fi signal at its location. You may need to reposition your router or use a Wi-Fi extender.
Step 6: Configuring Camera Settings
Once cameras are detected and connected, you can configure their individual settings.
- Resolution and Frame Rate: Adjust based on your needs and storage capacity.
- Motion Detection: Set up motion detection zones and sensitivity levels to receive alerts only when necessary.
- Recording Schedules: Configure continuous recording, motion-activated recording, or scheduled recording.
- Night Vision: Ensure IR LEDs are enabled for low-light conditions.
- Alerts and Notifications: Set up push notifications to your smartphone for motion events.
Step 7: Setting Up Remote Access
To view your cameras from outside your home or office, you'll need to set up remote access.
- Mobile App/Desktop Software: Use the manufacturer's app or software.
- Account Creation: You'll likely need to create an account with the manufacturer.
- Port Forwarding (Advanced): For some older or more advanced systems, you might need to configure port forwarding on your router. However, most modern systems use P2P (Peer-to-Peer) technology, which simplifies this process and often doesn't require manual router configuration.
Step 8: Testing and Fine-Tuning
Thoroughly test your system.
- Live View: Check the live feed from all cameras on your app or monitor.
- Playback: Review recorded footage to ensure it's clear and captured as expected.
- Motion Alerts: Trigger motion detection to confirm alerts are received promptly.
- Adjustments: Fine-tune camera angles, motion detection zones, and sensitivity as needed.
DIY setup is feasible for most modern systems, especially wireless ones. However, if you encounter significant challenges with cabling or network configuration, consider professional help.
When to Consider Professional Installation
While many modern security camera systems are designed for DIY installation, there are specific scenarios where engaging a professional installer is highly recommended. Professionals bring expertise, efficiency, and ensure your system is set up for optimal performance and security.
Complex Wiring and Cabling Requirements
For larger properties or buildings with intricate architecture, running cables for wired IP cameras can be a significant undertaking. Professionals have the tools and experience to:
- Navigate difficult spaces (attics, crawl spaces, walls).
- Ensure cables are properly routed and protected from damage.
- Terminate cables correctly for reliable connections.
- Minimize disruption to your property.
Large-Scale or Commercial Installations
Businesses and large residential properties often require multiple cameras, complex network configurations, and integration with existing security infrastructure. Professionals can design and implement a system that meets these demands, ensuring comprehensive coverage and compliance with any regulations.
Integration with Existing Security Systems
If you have an existing alarm system, smart home devices, or access control systems, a professional can ensure your new security cameras integrate seamlessly. This might involve setting up triggers, alerts, or unified control interfaces.
Need for Advanced Features and Customization
While many DIY systems offer good features, professional-grade systems can have more advanced capabilities (e.g., advanced analytics, facial recognition, higher-end PTZ controls). Professionals can help you select and configure these systems to meet specific security objectives.
Lack of Technical Expertise or Time
If you're not comfortable with networking, drilling, or electrical work, or if you simply lack the time, professional installation is the most practical solution. It saves you the frustration and potential mistakes that can arise from a DIY attempt.
Ensuring Optimal Placement and Coverage
Professionals have a trained eye for identifying optimal camera placement to maximize coverage and minimize blind spots. They understand angles, lighting, and potential obstructions better than the average homeowner.
Warranty and Support
Many professional installation services offer warranties on their work and the equipment they install. This provides peace of mind and a reliable point of contact for any future issues or maintenance.
Legal and Compliance Considerations
For businesses, there might be specific regulations regarding video surveillance. Professionals can ensure your installation complies with local laws and privacy standards.
When to Hire a Professional:
- You are installing more than 4-6 cameras.
- Your property requires extensive cable running through walls or difficult-to-access areas.
- You need integration with other smart home or security systems.
- You are installing cameras in a commercial or public space.
- You lack the time, tools, or technical confidence for a DIY installation.
- You require advanced features or a highly customized solution.
While professional installation adds to the overall cost, it can prevent costly mistakes, ensure system longevity, and provide a higher level of security and reliability.
Understanding Advanced Security Camera Features
Beyond basic recording, modern security cameras are packed with advanced features that significantly enhance their effectiveness. By 2025-26, artificial intelligence (AI) is playing a central role in making surveillance smarter and more actionable. Understanding these features can help you choose a system that offers the most value for your security needs.
AI-Powered Detection and Analytics
This is arguably the most significant advancement in recent years. AI allows cameras to do more than just detect motion; they can differentiate between various types of events.
- Person Detection: Distinguishes between humans and other moving objects (like animals or swaying trees), drastically reducing false alarms.
- Vehicle Detection: Identifies cars, trucks, and motorcycles, useful for monitoring driveways or parking areas.
- Package Detection: Alerts you when a package is delivered or removed from your doorstep.
- Facial Recognition: Identifies known individuals or flags unknown faces. This is more common in high-end commercial systems.
- Line Crossing Detection: Triggers an alert when an object crosses a predefined virtual line.
- Intrusion Detection: Identifies when an object enters or leaves a designated virtual zone.
These AI features are often cloud-based, requiring a subscription, but they provide a much more intelligent and less intrusive surveillance experience.
Two-Way Audio
Many modern cameras include built-in microphones and speakers, allowing for two-way communication. This is useful for:
- Speaking to delivery personnel.
- Deterring potential intruders with your voice.
- Communicating with family members or pets.
Color Night Vision
Traditional night vision uses infrared (IR) LEDs to create black-and-white images. Color night vision technology, often using advanced sensors and ambient light, can produce full-color images even in very low light conditions. This provides more detail and makes it easier to identify objects and people.
Wide Dynamic Range (WDR) and High Dynamic Range (HDR)
These technologies help cameras capture clear images in scenes with extreme contrast between light and dark areas. For example, if a camera is pointed at a doorway with bright sunlight outside and a darker interior, WDR/HDR ensures both areas are visible without being overexposed or underexposed.
Pan-Tilt-Zoom (PTZ) Capabilities
As mentioned earlier, PTZ cameras offer remote control over their movement and zoom. In 2025-26, PTZ cameras are becoming more sophisticated with:
- Auto-Tracking: The camera automatically follows a detected moving object.
- Preset Tours: The camera cycles through pre-programmed positions for comprehensive coverage.
Local Storage Options (Edge Storage)
While cloud storage is popular, some cameras offer "edge storage" directly on the camera itself (e.g., via a microSD card). This provides a backup if the internet connection is lost and can be a more private solution for sensitive footage.
Smart Home Integration
Many security cameras now integrate with smart home ecosystems like Amazon Alexa, Google Assistant, or Apple HomeKit. This allows for voice control, integration with other smart devices (e.g., turning on lights when motion is detected), and viewing camera feeds on smart displays.
Cybersecurity Features
With increasing connectivity, cybersecurity is paramount. Look for cameras that offer:
- End-to-End Encryption: Protects data during transmission.
- Two-Factor Authentication (2FA): Adds an extra layer of security to your account.
- Regular Firmware Updates: Essential for patching security vulnerabilities.
- Secure Network Protocols: Ensure the camera uses robust network security.
Local AI Processing
Some advanced cameras perform AI processing directly on the device (edge AI) rather than sending data to the cloud. This can offer faster detection, better privacy, and reduce reliance on internet bandwidth.
Choosing a system with the right advanced features depends on your specific security needs. For instance, if you're tired of false alarms, AI-powered person detection is a game-changer. If you need to monitor a large area actively, PTZ capabilities are essential.
Essential Maintenance and Troubleshooting Tips
Even the best security camera systems require occasional maintenance to ensure they function optimally. Proactive care can prevent issues and extend the lifespan of your equipment. This section covers common maintenance tasks and troubleshooting steps for when things go wrong.
Regular Maintenance Tasks
Performing these simple tasks can save you from bigger problems down the line.
- Clean Camera Lenses: Dust, dirt, pollen, and spiderwebs can obstruct the camera's view. Use a soft, lint-free cloth (like a microfiber cloth) and a lens cleaning solution if necessary. For outdoor cameras, this might be needed quarterly or more often in dusty environments.
- Check Cable Connections: For wired systems, periodically inspect all cable connections (Ethernet, power) to ensure they are secure and free from damage, corrosion, or kinks.
- Update Firmware: Manufacturers regularly release firmware updates to improve performance, add features, and patch security vulnerabilities. Check your system's app or interface for available updates and install them promptly.
- Test Recording and Playback: Regularly review recorded footage to ensure the system is capturing clear video and that playback is smooth. This also helps you verify that motion detection and other settings are working correctly.
- Monitor Storage Space: If you use local storage (NVR/DVR), keep an eye on available disk space. Set up overwriting settings to ensure continuous recording, but be aware of how long your footage is retained.
- Check Battery Levels (for Wireless/Battery Cameras): If you have battery-powered cameras, monitor their battery levels and recharge or replace them as needed. Consider setting up low-battery alerts if your system supports them.
- Verify Network Connectivity: For all connected cameras, ensure they maintain a stable connection to your network. Check Wi-Fi signal strength for wireless cameras.
Common Troubleshooting Scenarios
When your security camera system isn't working as expected, here are common issues and their solutions.
Camera Not Showing Video Feed
- Check Power: Ensure the camera is receiving power (check adapter, PoE connection, or battery).
- Check Network Connection:
- Wired: Verify the Ethernet cable is securely plugged into both the camera and the NVR/router. Try a different cable or port.
- Wireless: Ensure the camera is within Wi-Fi range and connected to the correct network. Restart your router and the camera.
- Restart System: Power cycle the NVR/DVR and the affected camera.
- Check Camera Status: Some systems indicate camera status (e.g., online/offline) in their interface.
- Factory Reset: As a last resort, consider a factory reset of the camera and re-setup.
Poor Video Quality (Blurry, Pixelated)
- Clean Lens: This is the most common cause.
- Check Resolution Settings: Ensure the camera is set to an appropriate resolution for your network bandwidth and storage.
- Network Congestion: If using Wi-Fi, too many devices on your network can degrade performance.
- Low Light: Ensure night vision is enabled and functioning.
- Camera Angle: Ensure the camera is not vibrating or improperly mounted.
Motion Detection Not Working or False Alarms
- Adjust Sensitivity: Lower sensitivity to reduce false alarms from environmental factors (wind, rain, insects). Increase sensitivity if it's missing events.
- Configure Motion Zones: Define specific areas within the camera's view where motion should be detected. Exclude areas prone to false triggers.
- AI Detection: If your system has AI features (person/vehicle detection), ensure they are enabled and configured correctly.
- Firmware Updates: Ensure your firmware is up-to-date, as updates often improve motion detection algorithms.
- Obstructions: Ensure nothing has moved to obstruct the detection zone.
Remote Access Issues
- Check Internet Connection: Ensure both your home/office internet and your remote device's internet are working.
- Verify Account Login: Double-check your username and password for the app/software.
- System Status: Ensure your NVR/DVR or base station is powered on and connected to the internet.
- App/Software Updates: Make sure you're using the latest version of the mobile app or desktop software.
- Router Settings: If you've recently changed your router or network configuration, you might need to re-verify remote access settings (e.g., port forwarding if applicable).
Storage Issues (NVR/DVR)
- Check Hard Drive: Ensure the hard drive is properly installed and recognized by the NVR/DVR.
- Format Drive: If it's a new drive or experiencing errors, formatting might be necessary (this will erase all data).
- Storage Capacity: Ensure you have enough storage space. Adjust recording quality or schedule if needed.
- Overwriting Settings: Confirm that the system is set to overwrite old footage when the drive is full.
For persistent issues that you cannot resolve, consult the manufacturer's support documentation or contact their customer service. Professional installation services may also offer ongoing maintenance and troubleshooting support.
Legal and Privacy Considerations for Security Cameras
Installing security cameras brings significant benefits, but it also comes with legal and privacy responsibilities. In 2025-26, regulations surrounding surveillance are becoming more nuanced, especially concerning data privacy and public spaces. Understanding these considerations is crucial to avoid legal issues and maintain ethical practices.
Recording Audio
The legality of recording audio varies significantly by jurisdiction. In many places, it is illegal to record conversations without the consent of all parties involved (two-party consent states). Most security cameras are designed to record video only, and if audio recording is enabled, ensure you are compliant with local laws.
- Best Practice: Disable audio recording unless you are certain it is legal and necessary for your specific use case.
Privacy of Neighbors and Public Spaces
Your cameras should primarily focus on your own property. Pointing cameras directly into your neighbors' private yards, windows, or common areas where they have a reasonable expectation of privacy can lead to legal disputes and privacy complaints.
- Recommendation: Position cameras to capture your property lines, entry points, and interior spaces. Use privacy masks or adjust angles to avoid capturing sensitive areas of adjacent properties.
Employee Surveillance (Commercial Settings)
If installing cameras in a workplace, employees generally have a lower expectation of privacy. However, there are still rules:
- Notification: Employees should be informed that surveillance is in place and where cameras are located.
- Purpose: Surveillance should generally be for legitimate business purposes (e.g., security, productivity, asset protection).
- Prohibited Areas: Cameras should not be placed in areas where employees have a high expectation of privacy, such as restrooms or break rooms.
Consulting with legal counsel is advisable for commercial surveillance setups.
Data Storage and Security
You are responsible for the security of the footage you collect. If your system is compromised, sensitive video data could be exposed.
- Secure Your Network: Use strong, unique passwords for your Wi-Fi network, router, and camera system. Enable WPA3 encryption if available.
- Regular Updates: Keep camera firmware and system software updated to patch security vulnerabilities.
- Access Control: Limit who has access to your camera system and footage. Use strong, unique passwords for all user accounts.
- Data Retention Policies: Establish clear policies on how long footage is stored and when it is deleted. Comply with any legal requirements for data retention.
Compliance with Data Protection Regulations (e.g., GDPR, CCPA)
If you operate a business or collect data from individuals in regions with strict data protection laws (like the EU's GDPR or California's CCPA), you must comply with these regulations. This may involve:
- Providing clear privacy notices.
- Obtaining consent for data collection where required.
- Allowing individuals to access, correct, or delete their data.
- Implementing robust security measures to protect personal data.
Signage
In some jurisdictions, it may be legally required to post signage indicating that video surveillance is in operation. This serves as a deterrent and informs individuals that they are being recorded.
- Check Local Laws: Research whether signage is mandated in your area.
Use of Footage as Evidence
Video footage from security cameras can be used as evidence in legal proceedings. However, its admissibility depends on factors like:
- Chain of Custody: Ensuring the integrity of the footage from the time of recording to its presentation in court.
- Authenticity: Proving that the footage is unaltered and accurately represents the events.
- Relevance: The footage must be relevant to the case.
Proper system setup, secure storage, and accurate record-keeping are vital if you anticipate using footage as evidence.
It is always recommended to consult with a legal professional to ensure your specific security camera setup complies with all applicable local, state, and federal laws and regulations.
Conclusion
Setting up security cameras is a proactive step towards safeguarding your property, loved ones, or business. By carefully considering your system's type, planning strategic placement, and understanding both wired and wireless options, you can build a robust surveillance network. Whether you opt for a DIY installation or professional expertise, the key lies in comprehensive coverage, reliable technology, and ongoing maintenance. Remember to leverage advanced features like AI detection for smarter alerts and always prioritize cybersecurity and legal compliance. A well-implemented security camera system offers not just surveillance, but invaluable peace of mind in an increasingly complex world.