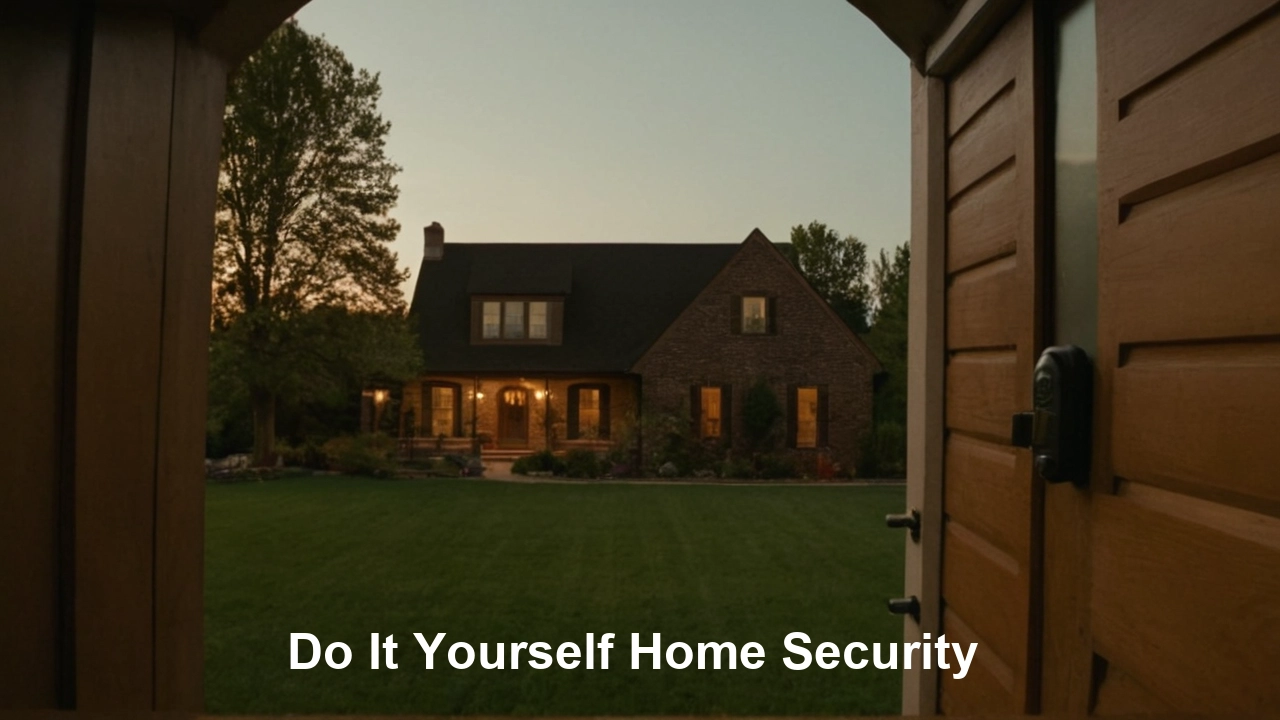
Embrace peace of mind with DIY home security solutions. This comprehensive guide empowers you to design, install, and manage a robust security system tailored to your needs and budget, offering a smart, cost-effective alternative to professional installations.
What is DIY Home Security?
DIY home security refers to the process of selecting, purchasing, installing, and often managing your home's security system without the direct involvement of a professional installation service or a dedicated security company. This approach grants homeowners greater control over their security measures, offering flexibility in component choice, placement, and ongoing management. It's about empowering individuals to build a personalized defense against threats, leveraging readily available technology and straightforward installation processes.
The Advantages of Taking Security into Your Own Hands
Opting for a do-it-yourself home security system offers a compelling array of benefits that resonate with modern homeowners seeking both effectiveness and efficiency. The primary draw is often the significant cost savings compared to professionally installed and monitored systems. Beyond the financial aspect, DIY systems provide unparalleled customization, allowing you to select specific components that address your unique vulnerabilities and preferences. This control extends to the installation process itself, which, with modern smart home technology, is often designed for simplicity and can be completed by most individuals with basic tool knowledge.
Furthermore, DIY security systems offer greater flexibility in terms of scalability and adaptability. As your needs evolve, or as new smart home devices become available, you can easily add or upgrade components without being tied to a specific provider's ecosystem or service contracts. This independence from long-term contracts is another significant advantage, freeing you from monthly fees for monitoring if you choose a self-monitored approach. The sense of accomplishment and empowerment that comes from building and managing your own protective shield is also a valuable, albeit intangible, benefit.
In 2025, the market for DIY home security continues to expand, driven by advancements in wireless technology, user-friendly interfaces, and integrated smart home capabilities. Homeowners are increasingly recognizing that robust security doesn't necessarily require a hefty price tag or complex installation. The ability to receive real-time alerts on your smartphone, remotely arm and disarm your system, and even communicate through video doorbells offers a level of convenience and awareness previously only available through expensive, professionally managed services.
Cost-Effectiveness
The most immediate and tangible benefit of DIY home security is its affordability. Professional installations can incur significant upfront costs for equipment and labor, often followed by ongoing monthly fees for monitoring services. DIY systems typically involve a one-time purchase of equipment, with optional, usually lower-cost, monitoring plans available if desired. For example, a basic DIY starter kit might cost between $200-$500, while professional installations can easily range from $500-$2000 or more, plus monthly fees that can add up to hundreds or even thousands of dollars annually.
Customization and Flexibility
Every home and homeowner has unique security needs. DIY systems excel in their ability to be tailored precisely to your requirements. You can choose the exact number and type of sensors, cameras, and other devices that best suit your property layout and potential risk areas. Whether you need extra motion detectors for a large yard, specific window sensors for vulnerable ground-floor rooms, or a high-definition camera for your driveway, you have the freedom to curate your system. This flexibility also extends to future upgrades; you can easily swap out older components or add new smart devices as technology advances or your needs change, without being locked into a proprietary system.
Ease of Installation
Gone are the days when home security installation required drilling through walls and complex wiring. Modern DIY security systems are designed with the user in mind. Most components are wireless, relying on strong Wi-Fi or proprietary radio frequencies to communicate with a central hub. Installation typically involves mounting sensors with adhesive strips, plugging in a base station, and configuring settings through an intuitive mobile app. Many systems offer step-by-step video tutorials and clear instructions, making the process accessible even for those with limited technical experience. The average installation time for a basic system can range from just a few hours to a weekend, depending on the complexity.
No Long-Term Contracts
A significant advantage of DIY home security is the freedom from restrictive long-term contracts often imposed by traditional security companies. With a DIY system, you own your equipment outright. If you choose to self-monitor, there are no monthly fees whatsoever. If you opt for professional monitoring, these services are typically offered on a month-to-month basis, allowing you to cancel or change plans at any time without penalty. This contractual freedom provides peace of mind and financial flexibility.
Empowerment and Control
Taking charge of your home's security offers a profound sense of empowerment. You have direct control over when your system is armed or disarmed, who has access to it, and how it functions. You receive alerts directly on your smartphone, allowing you to assess situations in real-time and decide on the appropriate course of action. This direct involvement fosters a deeper understanding of your home's security and provides confidence in its protective capabilities.
Building Your Fortress: Essential Components
A robust DIY home security system is a layered defense, composed of various interconnected components working in concert. Understanding the function of each element is crucial for designing an effective and comprehensive security strategy. From the central brain of the system to the individual sensors that detect intrusion, each piece plays a vital role in safeguarding your home and loved ones.
Control Panel/Hub
The control panel, often referred to as the hub or base station, is the central nervous system of your DIY security system. It acts as the communication link between all your sensors and devices, and typically connects to your home's Wi-Fi network to enable remote access and notifications. Many modern hubs also have cellular backup, ensuring your system remains connected even if your internet goes down. This is where you'll arm and disarm the system, and where alerts are processed before being sent to your smartphone or monitoring center.
Door and Window Sensors
These are the most fundamental intrusion detection devices. Typically consisting of two parts – a magnet and a sensor – they are installed on doors and windows. When the two parts are separated (i.e., the door or window is opened), the sensor triggers an alert. They are crucial for securing entry points and are a cornerstone of any effective home security setup. For 2025, expect enhanced versions with longer battery life and improved wireless range.
Motion Detectors
Motion detectors, often using passive infrared (PIR) technology, are designed to sense movement within a specific area. They are ideal for covering larger spaces like living rooms, hallways, or basements. Advanced models may include pet-friendly features to avoid false alarms from animals under a certain weight threshold. Placement is key; positioning them to cover common pathways or entry points maximizes their effectiveness. Some advanced models may also incorporate microwave or dual-technology sensing for increased accuracy.
Security Cameras (Indoor & Outdoor)
Cameras provide visual verification of events and can act as a deterrent. Indoor cameras can monitor activity within the home, while outdoor cameras can survey your property perimeter, driveways, and entry points. Look for features like high-definition resolution (1080p or higher), night vision, two-way audio, and motion-activated recording. For 2025, integrated AI for person detection and facial recognition are becoming more common, reducing false alerts.
Video Doorbells
A popular addition to DIY security, video doorbells allow you to see, hear, and speak to visitors at your front door from anywhere via your smartphone. They often include motion detection, night vision, and HD video. This is invaluable for screening visitors, receiving packages securely, and deterring potential intruders who may be casing your home.
Environmental Sensors
Beyond intrusion, DIY systems can also monitor for environmental hazards. These include:
- Smoke Detectors: Alert you to the presence of smoke, a critical fire safety measure. Many integrate with smart home systems for remote notifications.
- Carbon Monoxide Detectors: Detect the odorless, colorless gas that can be deadly. Essential for homes with fuel-burning appliances.
- Water Leak Sensors: Placed near water heaters, sinks, or washing machines, these alert you to leaks, potentially preventing significant water damage.
- Freeze Sensors: Monitor for dangerously low temperatures that could lead to burst pipes.
Keypads and Key Fobs
While smartphone apps are the primary control method for many, physical keypads and key fobs offer alternative ways to arm and disarm the system. Keypads are often mounted near entry points, while key fobs are small, portable devices. These are useful for family members who may not have a smartphone or for quick arming/disarming when entering or leaving the house.
Sirens
A loud siren is a crucial component for deterring intruders and alerting occupants and neighbors to a breach. DIY systems often include internal sirens integrated into the hub, with options for external, more powerful sirens for greater impact.
Strategic Planning: Designing Your Custom Security Blueprint
Before purchasing any equipment, a well-thought-out plan is essential for an effective DIY home security system. This involves a thorough assessment of your property, understanding potential vulnerabilities, and prioritizing your security needs. A strategic approach ensures you invest in the right components and place them optimally for maximum protection.
Conduct a Thorough Home Vulnerability Assessment
Walk around your property, both inside and out, with a critical eye. Identify all potential entry points:
- Doors: Front, back, side, garage, patio doors. Check for solid construction and secure locks.
- Windows: Ground-floor windows are particularly vulnerable. Consider basement windows as well.
- Garages: Access points from the garage into the home, and the garage door itself.
- Other Access Points: Pet doors, skylights, or any other less obvious entry points.
Map Your Property and Sensor Placement
Draw a simple floor plan of your home and a diagram of your property's exterior. Mark all doors and windows. Then, strategize where to place your sensors and cameras.
- Entry Points: Place door and window sensors on all accessible entry points.
- High-Traffic Areas: Install motion detectors in hallways, staircases, and main living areas where movement is likely.
- Vulnerable Zones: Position cameras to cover driveways, front porches, backyards, and any areas identified as weak points during your assessment.
- Environmental Sensors: Place smoke and CO detectors on each level and near sleeping areas. Water leak sensors should go in basements, laundry rooms, and under sinks.
Prioritize Your Security Needs
What are your biggest concerns? Are you worried about break-ins, package theft, or environmental hazards? Prioritize your needs to guide your component selection.
- Intrusion Detection: Focus on door/window sensors and motion detectors.
- Deterrence and Evidence: Invest in visible cameras and video doorbells.
- Fire and Hazard Safety: Ensure you have adequate smoke, CO, and water leak sensors.
- Remote Monitoring: If you travel frequently or want to check in on pets or family, prioritize cameras and smart home integration.
Consider Your Home's Infrastructure
Assess your home's Wi-Fi signal strength. A weak signal can lead to connectivity issues for wireless sensors and cameras. You may need to invest in a Wi-Fi extender or a mesh network for larger homes or areas with poor coverage. Also, consider power sources for cameras and hubs. While many are battery-powered, some cameras and hubs require AC power.
Evaluate Connectivity Options
Most DIY systems rely on Wi-Fi. However, some offer cellular backup, which is a valuable feature. If your Wi-Fi is down or your internet service is interrupted, a cellular connection can still transmit alerts to you or a monitoring service. This is a critical consideration for ensuring continuous protection.
Research Different Brands and Systems
The DIY home security market is diverse. Research reputable brands and compare their offerings, features, ease of use, and customer reviews. Look for systems that are known for reliability and good app support. Consider systems that integrate with other smart home devices you may already own or plan to purchase, such as smart lights or voice assistants.
Step-by-Step Installation: From Box to Armed
Installing a DIY home security system is designed to be straightforward, but following a systematic approach ensures everything is set up correctly and functions optimally. This guide breaks down the typical installation process, from unboxing to final testing.
Step 1: Unboxing and Inventory
Carefully unpack all components. Check the contents against the packing list to ensure you have everything. Familiarize yourself with each device and its intended function. Read the user manuals for each component; while installation is generally intuitive, specific details can be crucial.
Step 2: Download the Mobile App and Create an Account
Most DIY systems are managed through a dedicated smartphone app. Download the app from your device's app store (iOS or Android). Follow the on-screen prompts to create an account, which will typically involve providing your email address and setting a secure password.
Step 3: Set Up the Hub/Base Station
This is the core of your system. Plug the hub into a power outlet and connect it to your home router using an Ethernet cable (if required) or follow the app's instructions for Wi-Fi connection. The app will guide you through this process, often involving scanning a QR code on the hub or entering a serial number. Ensure the hub is placed in a central location, away from potential interference.
Step 4: Install Door and Window Sensors
Clean the surfaces where you'll mount the sensors. Most sensors come with strong adhesive strips. Separate the two parts of the sensor. Mount one part on the door/window and the other on the frame, ensuring they are aligned and close together when the door/window is closed. The app will guide you through pairing each sensor with the hub. Test by opening and closing the door/window to confirm the sensor is detected by the app.
Step 5: Mount Motion Detectors
Choose strategic locations, typically in corners of rooms or along hallways, at a height recommended by the manufacturer (usually 6-8 feet). Mount them securely using the provided screws or adhesive. Ensure they have a clear line of sight to cover the desired area and avoid pointing them directly at heat sources (like vents or direct sunlight) that could cause false alarms. Pair the motion detector with the hub via the app.
Step 6: Install Cameras and Video Doorbells
For wired cameras or video doorbells, follow the specific wiring instructions. For wireless cameras, ensure they are within Wi-Fi range and have a reliable power source. Mount them securely using the provided hardware. Position them to cover the intended view. Pair the cameras with the hub and app, which often involves connecting them to your Wi-Fi network through the app.
Step 7: Place Environmental Sensors
Install smoke and CO detectors according to local building codes, typically on ceilings or high on walls. Place water leak sensors in areas prone to leaks. Pair these sensors with the hub through the app.
Step 8: Configure System Settings
Once all devices are installed and paired, use the app to configure your system. This includes:
- Entry/Exit Delays: Set how much time you have to disarm the system when entering or to leave after arming.
- Notification Preferences: Choose how you want to receive alerts (push notifications, email, SMS).
- User Codes: Set up unique codes for family members if using a keypad.
- Camera Settings: Adjust motion detection sensitivity, recording schedules, and notification zones for cameras.
Step 9: Test the Entire System
This is a critical step. Arm the system and intentionally trigger each sensor one by one (open a door, walk in front of a motion detector, etc.) to ensure it registers correctly and sends an alert. Test your cameras' live view and recording functionality. If you have professional monitoring, conduct a test call to the monitoring center to ensure they receive signals correctly.
Step 10: Ongoing Monitoring and Maintenance
Regularly check battery levels for wireless sensors and replace them as needed (most apps will notify you). Keep camera lenses clean. Periodically test the system to ensure all components are functioning. Software updates for the hub and app are usually pushed automatically, but it's good practice to check for them periodically.
Elevating Your Defense: Advanced DIY Security Features
As DIY home security technology evolves, homeowners can leverage increasingly sophisticated features to enhance their protection. These advanced options move beyond basic intrusion detection to offer proactive deterrence, smarter automation, and deeper insights into home activity. Integrating these can significantly bolster your security posture.
Smart Home Integration and Automation
The true power of modern DIY security lies in its integration with the broader smart home ecosystem. By connecting your security system with other smart devices, you can create automated routines that enhance both security and convenience. For example:
- Lights and Sound: When a motion detector is triggered outside after dark, your exterior lights could automatically turn on, and an interior siren could sound.
- Door Locks: Automatically lock all smart doors when the system is armed away.
- Voice Assistants: Arm or disarm your system using voice commands (with appropriate security protocols like PINs).
- Smart Blinds/Shades: Close all window coverings when the system is armed.
AI-Powered Video Analytics
Traditional motion detection can sometimes be triggered by non-threatening events like falling leaves or passing animals, leading to false alarms. Advanced DIY security cameras now incorporate Artificial Intelligence (AI) for smarter video analytics. These features can differentiate between:
- Person Detection: Alerts you only when a human is detected, ignoring pets or vehicles.
- Package Detection: Notifies you when a package is delivered or removed from your doorstep.
- Facial Recognition: Some high-end systems can identify familiar faces, distinguishing between family members and strangers.
- Activity Zones: Define specific areas within a camera's view where you want motion alerts to be triggered, ignoring other areas.
Professional Monitoring Options for DIY Systems
While many DIY users opt for self-monitoring, the option for professional monitoring is increasingly available and affordable. This bridges the gap between DIY flexibility and the reassurance of a dedicated security team.
- How it Works: When an alarm is triggered, the system sends a signal to a professional monitoring center. Trained operators then assess the situation, verify the alarm (often by contacting you or reviewing camera feeds), and dispatch emergency services (police, fire, medical) if necessary.
- Cost: These services are typically offered on a month-to-month basis and are considerably less expensive than traditional professionally installed systems, often ranging from $10-$30 per month.
- Benefits: Provides peace of mind, especially when you are unavailable to respond to alerts, and ensures a faster, more reliable response from authorities.
Enhanced Wireless Security Protocols
As wireless technology advances, so do the security protocols protecting your system's communication. Modern DIY systems use robust encryption (like AES-256) to prevent jamming or unauthorized access to sensor signals. Furthermore, many systems employ frequency hopping or other methods to ensure reliable communication even in environments with significant wireless interference.
Battery Backup and Cellular Communication
To ensure continuous operation, most DIY hubs come with a built-in battery backup that can power the system for several hours (often 12-24) during power outages. Many also include cellular communication modules as a backup to your home internet. If your Wi-Fi goes down, the system can still send alerts via the cellular network, providing an essential layer of resilience.
Smart Sensors with Advanced Features
Beyond basic detection, sensors are becoming more intelligent. Some advanced motion sensors include built-in cameras for visual verification of events. Others may incorporate environmental sensing capabilities, such as temperature or humidity monitoring, integrated directly into the motion detection unit. Glass break sensors are also becoming more sophisticated, using acoustic analysis to distinguish the sound of breaking glass from other noises.
DIY vs. Professional Monitoring: Making the Right Choice
The decision between self-monitoring and professional monitoring is a pivotal one when setting up a DIY home security system. Each approach offers distinct advantages and disadvantages, catering to different user needs, budgets, and comfort levels with technology and personal responsibility.
Self-Monitoring Explained
In a self-monitored DIY system, you are solely responsible for responding to alerts. When a sensor is triggered, you receive a notification directly on your smartphone via the system's app. It is then up to you to assess the situation, determine if it's a genuine emergency, and contact the appropriate authorities (police, fire department) if necessary.
- Pros:
- Cost: No monthly fees, leading to significant long-term savings.
- Control: You decide how and when to respond to alerts.
- Privacy: No third party is involved in monitoring your home activity.
- Cons:
- Responsibility: You must be available and able to respond to all alerts.
- Potential Delays: Response time to emergencies depends on your immediate availability and ability to act.
- False Alarms: You are responsible for canceling false alarms with authorities, which can sometimes incur fines.
- Inconvenience: If you are on vacation, in a meeting, or without phone service, you may miss critical alerts.
Professional Monitoring Explained
With professional monitoring for your DIY system, a third-party company monitors your alarm signals 24/7. When an alert is triggered, it's sent to their monitoring center. Trained operators will attempt to verify the alarm (often through automated calls, text messages, or even by viewing live camera feeds if your system supports it) and then dispatch emergency services if they confirm a real threat.
- Pros:
- Peace of Mind: Knowing that trained professionals are watching over your home, even when you can't be.
- Faster Response: Monitoring centers are equipped to quickly dispatch emergency services.
- Reduced Burden: You don't have to constantly monitor your phone for alerts.
- Potential Insurance Discounts: Many insurance companies offer discounts for homes with professionally monitored security systems.
- Cons:
- Monthly Fees: Involves a recurring cost, typically ranging from $10 to $30 per month.
- Less Direct Control: The monitoring center makes the decision to dispatch emergency services based on their protocols.
- Potential for False Alarm Fees: While monitoring centers aim to verify, false alarms can still occur and may incur local fines.
Factors to Consider When Choosing
When deciding between self-monitoring and professional monitoring, consider the following:
- Your Lifestyle: Are you frequently away from home, or do you have a demanding job that makes it hard to respond to alerts promptly? If so, professional monitoring might be a better fit.
- Budget: If cost is a primary concern, self-monitoring offers the lowest ongoing expense.
- Technical Comfort: Are you comfortable managing alerts and making decisions in a stressful situation?
- Dependence on Technology: How reliable is your home internet and smartphone service?
- Insurance Requirements: Check if your home insurance provider offers discounts for monitored systems.
- Peace of Mind: How important is it for you to have a professional backup in place?
Many DIY systems offer a hybrid approach, allowing you to start with self-monitoring and upgrade to professional monitoring later if your needs change, offering ultimate flexibility.
Smart Spending: Budgeting for Maximum Security
One of the biggest advantages of DIY home security is its potential for cost savings. However, it's crucial to budget wisely to ensure you get the most effective system for your money without overspending or compromising on essential features. A well-planned budget ensures you invest in the right components for your specific needs.
Understanding the Cost Breakdown
DIY home security costs generally fall into a few categories:
- Upfront Equipment Costs: This is the primary expense, covering the hub, sensors, cameras, and other devices. Starter kits are often the most cost-effective way to begin.
- Optional Monthly Monitoring Fees: If you choose professional monitoring, this is a recurring cost.
- Potential Add-ons: Costs for extra sensors, upgraded cameras, or smart home accessories.
- Accessories: Batteries, mounting hardware (if not included), Wi-Fi extenders, etc.
Typical Cost Ranges (2025 Estimates)
The cost of DIY security systems can vary widely based on brand, features, and the number of components.
| Component/System Type | Estimated Cost Range (USD) |
|---|---|
| Basic Starter Kit (Hub, 2-3 sensors) | $150 - $300 |
| Mid-Range System (Hub, 5-8 sensors, 1 camera) | $300 - $600 |
| Advanced System (Hub, 10+ sensors, 2-3 cameras, video doorbell) | $600 - $1200+ |
| Individual Door/Window Sensor | $15 - $30 |
| Individual Motion Detector | $25 - $50 |
| Indoor Security Camera | $50 - $150 |
| Outdoor Security Camera | $80 - $200 |
| Video Doorbell | $100 - $250 |
| Environmental Sensors (Smoke, CO, Water) | $30 - $60 each |
| Optional Professional Monitoring (Monthly) | $10 - $30 |
Strategies for Budget-Friendly Security
To maximize your budget and security:
- Start with a Kit: Most brands offer starter kits that provide essential components at a lower price than buying individually. You can always add more devices later.
- Prioritize Entry Points: Focus on securing all doors and accessible windows first.
- Strategic Camera Placement: Invest in cameras for key areas like the front door, back door, and driveway. You don't necessarily need a camera in every room.
- Leverage Self-Monitoring: If you are comfortable and available, self-monitoring eliminates monthly fees entirely.
- Look for Sales and Bundles: Keep an eye out for holiday sales, promotions, and bundled deals from reputable DIY security brands.
- Consider Refurbished or Open-Box Items: Some retailers offer certified refurbished or open-box security equipment at a discount, often with a warranty.
- Buy Components as Needed: If your budget is tight, start with a basic system and gradually add components as your finances allow.
Long-Term Cost Analysis
When comparing DIY to professionally installed systems, always factor in the long-term costs. A professional system with a $50/month monitoring fee over five years costs $3000 in monitoring alone, plus the initial installation. A DIY system with a $20/month monitoring fee over five years costs $1200 in monitoring, plus the upfront equipment cost, often resulting in significant savings. If you opt for self-monitoring, the savings are even more substantial.
Keeping Your System Sharp: Maintenance and Troubleshooting
A well-maintained DIY home security system is a reliable home security system. Regular checks and prompt troubleshooting ensure that your system continues to offer robust protection. Most issues are minor and easily resolved with a bit of attention.
Routine Maintenance Checklist
To keep your system in optimal working condition, follow these simple maintenance steps:
- Battery Checks: Wireless sensors and devices rely on batteries. Most apps will notify you when battery levels are low. Replace batteries promptly with the manufacturer-recommended type. This is typically needed every 1-5 years, depending on the device and usage.
- Clean Sensors and Cameras: Dust and debris can interfere with sensor performance and obscure camera lenses. Wipe down sensors and camera lenses with a soft, dry cloth regularly. For cameras, use a lens cleaner if necessary.
- Test the System Regularly: Perform a full system test at least once a month. Arm the system and intentionally trigger each sensor to ensure it registers and sends an alert. Test cameras' live view and recording capabilities.
- Check Wi-Fi Connectivity: Ensure your hub and wireless devices have a stable connection. If you experience frequent connectivity issues, check your router and consider a Wi-Fi extender.
- Software Updates: Keep your system's mobile app and firmware updated. Manufacturers release updates to improve performance, add features, and patch security vulnerabilities. Most updates are automatic, but it's good to be aware.
- Inspect Physical Mountings: Periodically check that sensors, cameras, and the hub are securely mounted and haven't become loose.
Common Troubleshooting Scenarios
Here are solutions to some common issues encountered with DIY security systems:
| Problem | Potential Cause | Solution |
|---|---|---|
| Sensor Not Registering / Offline | Low battery, out of range, interference, or device malfunction. | Replace battery, move device closer to hub, check for Wi-Fi interference, re-pair device through app. |
| False Alarms | Incorrect sensor placement, high sensitivity settings, environmental factors (pets, drafts, sunlight). | Adjust motion sensor placement, lower sensitivity, use pet-immune sensors, ensure doors/windows are fully closed, check for drafts. |
| App Not Connecting / Notifications Not Received | Poor internet connection, app needs updating, phone notification settings are off, or hub offline. | Check internet, restart phone and app, ensure app notifications are enabled in phone settings, check hub power and connection. |
| Camera Feed Not Loading | Weak Wi-Fi signal, camera offline, or subscription issue (for cloud storage). | Move camera closer to router or use extender, check camera power, restart camera, verify cloud subscription status. |
| System Not Arming/Disarming | A sensor is open or not communicating, or a system error. | Check app for any open sensors, ensure all doors/windows are closed, restart the hub, contact customer support. |
When to Contact Customer Support
While most issues can be resolved with basic troubleshooting, don't hesitate to contact the manufacturer's customer support if:
- You've tried all troubleshooting steps and the problem persists.
- A device appears to be malfunctioning or dead after replacing batteries.
- You suspect a security vulnerability or unauthorized access.
- You need assistance with complex configurations or integrations.
The Evolving Landscape: Future Trends in DIY Home Security
The DIY home security sector is a dynamic and rapidly evolving field. Driven by technological advancements, changing consumer expectations, and the increasing integration of smart home ecosystems, the future promises even more sophisticated, intuitive, and accessible security solutions. Staying abreast of these trends can help homeowners make informed decisions about their current and future security investments.
Increased Integration with Smart Home Ecosystems
The lines between home security and general smart home management will continue to blur. Expect tighter integration with voice assistants (like Alexa, Google Assistant), smart lighting, smart thermostats, and other connected devices. This will enable more complex automation scenarios, where your security system can proactively influence other aspects of your home for enhanced safety and convenience. For instance, a security breach could trigger not only alarms but also unlock smart locks for emergency services, turn on all lights, and shut down HVAC systems.
Advancements in AI and Machine Learning
Artificial Intelligence (AI) and Machine Learning (ML) will play an even more significant role in enhancing the intelligence of DIY security systems. Beyond simple person detection, expect AI to become more adept at:
- Behavioral Analysis: Identifying unusual patterns of activity that might indicate a threat, even if not directly related to an intrusion.
- Predictive Analytics: Potentially identifying high-risk periods or areas based on historical data and external factors.
- False Alarm Reduction: Continuously learning from user feedback and environmental data to drastically reduce false alarms.
- Personalized Security: Systems that adapt their sensitivity and response based on your typical routines and presence.
Greater Emphasis on Cybersecurity
As more devices become connected, the importance of robust cybersecurity for DIY systems will be paramount. Manufacturers will continue to invest in stronger encryption, secure authentication protocols, and regular firmware updates to protect against hacking and data breaches. Consumers will also become more aware of the need to secure their home networks to protect their smart devices.
Edge Computing for Faster Processing
Instead of relying solely on cloud-based processing, more AI and data analysis will be performed directly on the device itself (edge computing). This means faster response times for alerts and analysis, as data doesn't need to travel to a remote server and back. It also enhances privacy, as sensitive data can be processed locally without being transmitted externally.
Modular and Expandable Systems
The trend towards modularity will continue, allowing consumers to build highly customized systems piece by piece. This flexibility ensures that users can start with a basic setup and easily add new components or upgrade existing ones as their needs or budget change, without being locked into a proprietary ecosystem. This also facilitates easier repair and replacement of individual components.
Energy Efficiency and Sustainability
With increasing environmental awareness, manufacturers will focus on developing more energy-efficient devices. This includes longer-lasting batteries for wireless sensors, lower power consumption for cameras, and the use of sustainable materials in product design. The integration of solar power for outdoor cameras is also likely to become more common.
Biometric Authentication
Biometric authentication methods, such as fingerprint scanners or facial recognition integrated into keypads or hubs, could become more common for arming and disarming systems, offering a more secure and convenient alternative to PIN codes or key fobs.
The Rise of Integrated Home Health Monitoring
While not strictly security, the convergence of home safety and health monitoring will grow. DIY systems may incorporate advanced sensors that can detect falls, monitor air quality for health impacts, or even integrate with wearable health devices to provide a holistic view of a home's well-being. This expansion offers a broader definition of home security, encompassing the health and safety of its occupants.
The future of DIY home security is bright, offering homeowners more control, intelligence, and affordability than ever before. By understanding these trends, you can ensure your chosen system remains relevant and effective for years to come.
Conclusion
The journey into DIY home security is an empowering one, offering a tangible path to enhanced safety and peace of mind without the exorbitant costs or contractual obligations of traditional systems. By understanding the essential components, meticulously planning your system's layout, and executing a thoughtful installation, you can construct a robust defense tailored precisely to your home's unique needs. Whether you opt for the complete autonomy of self-monitoring or the added reassurance of professional monitoring, the flexibility and cost-effectiveness of DIY solutions are undeniable.
As we've explored, from smart home integration and AI-powered analytics to budget-friendly strategies and essential maintenance tips, the DIY home security landscape in 2025-26 is rich with innovation. Embrace the opportunity to take control of your security, adapt to evolving threats, and build a safer, more secure environment for yourself and your loved ones. Start planning your DIY system today and experience the confidence that comes with a home protected by your own design.


