Connecting your doorbell camera to Wi-Fi is a crucial step for enhanced home security and convenience. This guide provides a comprehensive, step-by-step walkthrough, ensuring you can easily get your smart doorbell online and functioning optimally, even if you're not tech-savvy.
Understanding Wi-Fi Requirements for Your Doorbell Camera
Before you even unbox your new doorbell camera, understanding the Wi-Fi requirements is paramount. Most modern doorbell cameras operate on the 2.4 GHz Wi-Fi band. This band offers a wider range and better penetration through walls compared to the 5 GHz band, which is crucial for a device often situated at the edge of your home's network. However, some higher-end models might support or even require 5 GHz for faster data transfer, especially for high-definition live streaming. Always check your doorbell camera's specifications to confirm which band(s) it supports. In 2025-26, the trend is towards dual-band support, offering flexibility.
Your Wi-Fi network needs to be stable and have a sufficient signal strength at the installation location. The average Wi-Fi speed required for a doorbell camera is generally around 2 Mbps for upload and download. However, for smooth 1080p or higher resolution live streaming and clear two-way audio, aiming for at least 5 Mbps upload speed is recommended. According to recent industry reports from 2025, the average home internet speed in developed countries has surpassed 100 Mbps download, but upload speeds can still be a bottleneck, especially in areas with older infrastructure. Ensuring your router is relatively modern and capable of handling multiple connected devices is also a factor.
Network security is another critical consideration. Your Wi-Fi network should be secured with WPA2 or WPA3 encryption. Using an open or weakly secured network is a significant security risk, not just for your doorbell camera but for all devices connected to your home network. Many doorbell cameras also require you to create an account with the manufacturer, which adds another layer of security to your device's data. Understanding these prerequisites will save you a lot of frustration during the setup process and ensure your smart home security system is robust.
Preparing for Installation: What You'll Need
A successful installation begins with proper preparation. Gathering all necessary tools and information beforehand will make the process smoother. Here's a checklist of what you'll likely need:
- Your Wi-Fi Network Name (SSID) and Password: This is the most critical piece of information. Ensure you have the correct credentials. If you've forgotten them, you can usually find them on your router or by contacting your internet service provider.
- Smartphone or Tablet: Most doorbell cameras are configured using a dedicated mobile app. Ensure your device is running a compatible operating system (iOS or Android) and has Bluetooth and Wi-Fi enabled.
- The Doorbell Camera and its Accessories: This includes the doorbell unit itself, mounting bracket, screws, wire connectors, and any included tools.
- Screwdriver: A Phillips head screwdriver is typically required for mounting.
- Drill and Drill Bits (optional): If you need to drill new holes for mounting or to pass wires, you'll need a drill.
- Ladder (if necessary): For mounting the doorbell at an optimal height.
- Existing Doorbell Wiring (for wired models): If you're replacing an existing wired doorbell, you'll need to identify your current doorbell wiring and transformer. Ensure your transformer is compatible; most doorbell cameras require a transformer with a voltage output between 16-24V AC and at least 10 VA.
- Chime Kit (for wired models): Some doorbell cameras come with a chime kit to ensure compatibility with your existing indoor chime.
- A Stable Wi-Fi Signal at the Door: Test the Wi-Fi signal strength at the intended mounting location using your smartphone. Many apps have a built-in signal strength test.
For wireless doorbell cameras, you'll also need to ensure the battery is fully charged before installation. For wired models, it's advisable to turn off the power to your existing doorbell at the circuit breaker before you begin any wiring. Safety first!
Wired vs. Wireless Considerations
The choice between a wired and wireless doorbell camera impacts the installation process and ongoing maintenance. Wired doorbell cameras typically offer a more stable power source, eliminating the need for battery charging. They often integrate seamlessly with existing doorbell wiring, making replacement straightforward. However, installation can be more complex, potentially requiring electrical work. In 2025, the market still sees a strong demand for both, with wireless options gaining popularity due to ease of installation, especially for renters.
Wireless doorbell cameras, on the other hand, offer unparalleled installation flexibility. They can be mounted anywhere within Wi-Fi range without needing to run wires. The primary drawback is the reliance on batteries, which need periodic recharging or replacement. Battery life varies significantly based on usage, Wi-Fi signal strength, and camera features. Some high-end wireless models now offer solar charging accessories, mitigating battery concerns. When deciding, consider your home's existing wiring, your comfort level with DIY electrical work, and how frequently you're willing to manage battery maintenance.
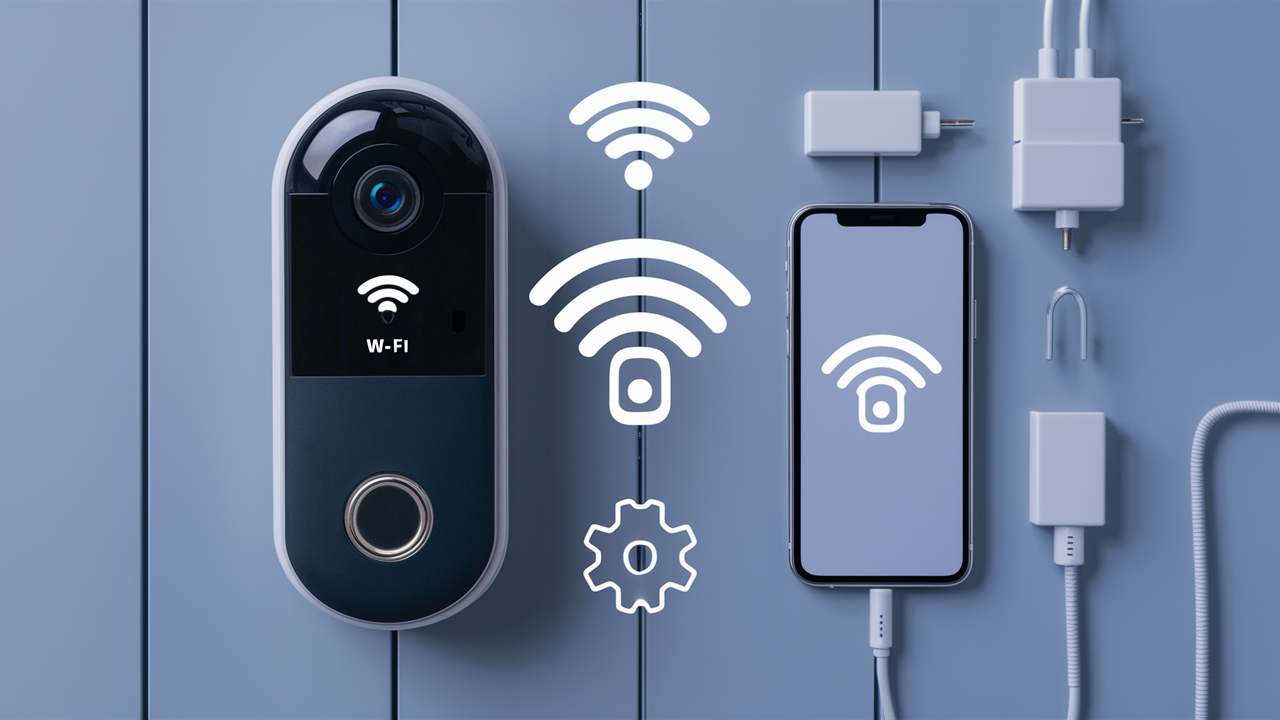
Step-by-Step Guide: How to Connect Doorbell Camera to Wi-Fi
Connecting your doorbell camera to your Wi-Fi network is a straightforward process when you follow these steps. While specific instructions may vary slightly between brands, the general flow remains consistent.
Step 1: Download the App and Create an Account
First, locate the app recommended by your doorbell camera manufacturer. You can usually find this information in the user manual or on the product packaging. Search for the app on the Apple App Store or Google Play Store and download it to your smartphone or tablet. Once installed, open the app and follow the on-screen prompts to create a new user account. This account will be used to manage your doorbell camera, view live feeds, access recordings, and adjust settings.
Step 2: Power On Your Doorbell Camera
For Wired Doorbells: If you are replacing an existing wired doorbell, ensure the power is turned off at the circuit breaker. Then, disconnect the old doorbell and connect the new doorbell camera wires according to the manufacturer's instructions. Once wired, turn the power back on at the circuit breaker. The doorbell camera should power up, often indicated by an LED light or an audible chime.
For Wireless Doorbells: Ensure the battery is fully charged. Insert the battery into the doorbell camera unit. Most wireless models will automatically power on when the battery is inserted or when you press a setup button.
For Plug-in Doorbells: Connect the doorbell camera to a power outlet using the provided adapter and cable. The device should power on automatically.
Step 3: Initiate Setup in the App
With your doorbell camera powered on and your smartphone connected to your home Wi-Fi network, open the manufacturer's app. Look for an option like "Add Device," "Set Up New Device," or a plus (+) icon. The app will guide you through the process. It might ask you to scan a QR code on the doorbell camera or in the manual, or it may use Bluetooth to detect the device.
Step 4: Connect to Your Wi-Fi Network
This is the core step. The app will prompt you to select your home Wi-Fi network from a list of available networks. Enter your Wi-Fi password carefully. Double-check that you are connecting to the correct network (usually 2.4 GHz, unless your device specifies otherwise). Some apps might create a temporary Wi-Fi network from the doorbell camera itself for the initial setup, and then you'll transfer your home Wi-Fi credentials to the camera through that temporary connection.
Step 5: Pairing and Confirmation
Once you've entered your Wi-Fi credentials, the app will attempt to connect the doorbell camera to your network. This process can take a few minutes. You might hear a chime or see an LED indicator on the doorbell camera change color to confirm a successful connection. The app will also display a confirmation message. If the connection fails, don't worry; this is common, and we'll cover troubleshooting steps later.
Step 6: Mount the Doorbell Camera
After successful Wi-Fi connection, you can proceed with mounting the doorbell camera. Choose a location that offers a clear view of your doorstep and any approaching visitors. For wired models, align it with your existing doorbell wiring. For wireless models, consider the optimal angle for the camera's field of view and the Wi-Fi signal strength. Use the provided mounting bracket and screws to secure it firmly. Ensure the doorbell is mounted at a height that captures faces effectively, typically around 4-5 feet from the ground.
Step 7: Configure Settings and Test
Once mounted, return to the app to finalize the setup. You'll likely be prompted to name your device (e.g., "Front Doorbell"). Explore the app's settings to configure motion detection zones, notification preferences, video quality, and any other available features. It's crucial to test the camera by having someone ring the doorbell and by simulating motion to ensure you receive alerts and can view the live feed clearly. Test the two-way audio functionality as well.
Example Setup Process (Ring Doorbell)
For a popular brand like Ring, the process typically involves:
- Downloading the Ring app.
- Creating or logging into your Ring account.
- Tapping "Set Up a Device" and selecting "Doorbells."
- Scanning the QR code on your Ring device.
- Following in-app prompts to power on the device (either by wiring or battery).
- Connecting your phone to the temporary Ring Wi-Fi network.
- Selecting your home Wi-Fi network and entering the password.
- The Ring device will then connect to your home Wi-Fi.
- Mounting the Ring doorbell.
- Configuring motion settings and other preferences in the app.
This mirrors the general steps outlined above, emphasizing the app-driven nature of modern smart home device setup.
Troubleshooting Common Wi-Fi Connection Issues
Encountering Wi-Fi connection problems is a common hurdle during doorbell camera setup. Fortunately, most issues are resolvable with a systematic approach.
Weak Wi-Fi Signal
Symptom: The doorbell camera frequently disconnects, or the app indicates a poor signal strength.
Solution:
- Move your router: If possible, reposition your Wi-Fi router closer to the doorbell camera's location.
- Use a Wi-Fi extender or mesh system: These devices can boost your Wi-Fi signal to hard-to-reach areas. A mesh Wi-Fi system (popular in 2025-26 for whole-home coverage) is often more effective than a single extender.
- Check for interference: Microwaves, cordless phones, and other electronic devices can interfere with Wi-Fi signals. Try to minimize their proximity to the doorbell camera or router.
- Ensure you're on the 2.4 GHz band: For most doorbell cameras, the 2.4 GHz band offers better range. If your router broadcasts both 2.4 GHz and 5 GHz, ensure you're connecting to the 2.4 GHz network.
Incorrect Wi-Fi Password
Symptom: The setup fails immediately after entering the Wi-Fi password.
Solution:
- Double-check the password: Passwords are case-sensitive. Ensure you've entered it exactly as it appears.
- Check for special characters: Some older devices might have issues with complex passwords containing many special characters. Try simplifying your password temporarily if this is suspected.
- Restart your router: Sometimes, a router restart can resolve temporary glitches that prevent password authentication.
Router Settings or Firewall
Symptom: The doorbell camera connects to Wi-Fi but doesn't communicate with the app or the internet.
Solution:
- Check MAC Filtering: Ensure your router's MAC filtering is either disabled or that the doorbell camera's MAC address is added to the allowed list. You can usually find the doorbell's MAC address in its settings or on the device itself.
- Firewall Settings: Some routers have aggressive firewalls that might block new devices. Consult your router's manual or ISP for instructions on adjusting firewall settings to allow the doorbell camera.
- UPnP (Universal Plug and Play): Ensure UPnP is enabled on your router, as many smart devices rely on it for proper network communication.
Device Not Detected by App
Symptom: The app cannot find the doorbell camera during the setup process.
Solution:
- Ensure Bluetooth is enabled: Many devices use Bluetooth for initial detection.
- Proximity: Make sure your smartphone is close to the doorbell camera during the initial pairing stage.
- Restart devices: Try restarting both your doorbell camera and your smartphone.
- Factory Reset: If all else fails, perform a factory reset on the doorbell camera and start the setup process again from scratch. Refer to your manual for factory reset instructions.
Router Firmware Outdated
Symptom: Persistent connectivity issues despite trying other solutions.
Solution:
- Update Router Firmware: Outdated router firmware can cause compatibility problems. Check your router manufacturer's website for the latest firmware updates and follow their instructions for installation. This is a common recommendation in 2025 as routers are updated to support new smart home protocols.
Comparison of Troubleshooting Methods
Here's a quick look at the effectiveness of common troubleshooting steps:
| Issue | Primary Solution | Secondary Solution | Likelihood of Success |
|---|---|---|---|
| Weak Signal | Wi-Fi Extender/Mesh System | Router Relocation | High |
| Incorrect Password | Re-enter Password Carefully | Router Restart | Very High |
| Device Not Detected | Enable Bluetooth & Proximity | Factory Reset | Medium to High |
| Connectivity Issues | Update Router Firmware | Check Firewall/UPnP | Medium |
Remember to consult your specific doorbell camera's manual and your router's documentation for the most accurate troubleshooting advice.
Optimizing Your Wi-Fi for Doorbell Cameras
A stable and robust Wi-Fi connection is the backbone of a functional doorbell camera system. Beyond just connecting, optimizing your network can significantly improve performance, reduce lag, and ensure you never miss an important event.
Router Placement and Configuration
The physical location of your router matters. Ideally, your router should be centrally located within your home, away from obstructions like thick walls, metal objects, and other electronic devices that can cause interference. For optimal doorbell camera performance, consider the following:
- Central Location: Place the router in a central area of your home to distribute the Wi-Fi signal evenly.
- Elevation: Mounting your router higher up (e.g., on a shelf) can improve signal propagation.
- Minimize Interference: Keep the router away from microwaves, cordless phones, Bluetooth devices, and large metal appliances.
- Antenna Orientation: If your router has external antennas, experiment with their orientation. Often, positioning them at 90-degree angles to each other can improve coverage.
Router settings also play a role. Ensure your router is set to use the 2.4 GHz band for your doorbell camera, as it provides better range and penetration through obstacles. If your router supports band steering (automatically switching devices between 2.4 GHz and 5 GHz), you might want to disable it for critical devices like doorbell cameras to ensure they consistently connect to the more reliable 2.4 GHz band.
Using Wi-Fi Extenders and Mesh Systems
If your router is too far from your front door, or if you have a large home, a Wi-Fi extender or a mesh Wi-Fi system can be a game-changer. As of 2025, mesh systems are increasingly preferred for their seamless coverage and ease of management.
- Wi-Fi Extenders (Repeaters): These devices pick up your existing Wi-Fi signal and rebroadcast it, extending the network's reach. They are generally less expensive but can sometimes halve the bandwidth.
- Mesh Wi-Fi Systems: These systems consist of a main router and one or more satellite nodes that work together to create a single, unified Wi-Fi network. They offer superior performance, seamless roaming between nodes, and often come with user-friendly apps for management. For homes larger than 1500 sq ft, a mesh system is often the most effective solution for consistent coverage.
When setting up extenders or mesh nodes, place them strategically between your router and the doorbell camera to ensure a strong, consistent signal. Many doorbell camera apps include a Wi-Fi signal strength test to help you find the optimal placement for these devices.
Network Security Best Practices
Securing your Wi-Fi network is paramount, especially with connected devices like doorbell cameras. A compromised network can expose your personal information and even allow unauthorized access to your home.
- Strong, Unique Password: Use a complex password for your Wi-Fi network that includes a mix of uppercase and lowercase letters, numbers, and symbols. Avoid easily guessable information.
- WPA2/WPA3 Encryption: Ensure your router is using WPA2 or, preferably, WPA3 encryption. These are the most secure protocols available. Avoid WEP, which is outdated and easily cracked.
- Change Default Router Credentials: Always change the default username and password for accessing your router's administration interface.
- Guest Network: Consider setting up a separate guest network for visitors. This isolates them from your main network, adding an extra layer of security.
- Firmware Updates: Regularly update your router's firmware to patch security vulnerabilities.
By implementing these security measures, you significantly reduce the risk of unauthorized access to your home network and your doorbell camera's data.
Managing Bandwidth and QoS
Doorbell cameras, especially those with high-definition video and two-way audio, can consume a significant amount of bandwidth, particularly upload bandwidth. If you have many devices connected to your network, you might experience performance issues.
- Quality of Service (QoS): Many modern routers offer QoS settings. This feature allows you to prioritize certain types of traffic or specific devices on your network. You can configure QoS to give your doorbell camera higher priority, ensuring it receives sufficient bandwidth even when other devices are heavily using the network.
- Limit Other Bandwidth-Intensive Activities: During critical times, consider limiting activities like large file downloads, 4K streaming on multiple devices, or online gaming if you're experiencing issues with your doorbell camera's performance.
- Check Upload Speed: As mentioned earlier, a minimum of 5 Mbps upload speed is recommended. If your internet plan has low upload speeds, consider upgrading, especially if you have multiple connected cameras or other high-bandwidth needs.
By understanding and managing your network's bandwidth, you can ensure your doorbell camera operates smoothly and reliably.
Advanced Features and Integrations
Once your doorbell camera is connected to Wi-Fi, you unlock a world of advanced features and integrations that can further enhance your home security and smart home ecosystem. These capabilities are becoming increasingly sophisticated in 2025-26.
Motion Detection and Notifications
The core function of a doorbell camera, beyond answering the door remotely, is its ability to detect motion. Modern cameras offer highly customizable motion detection:
- Motion Zones: You can define specific areas within the camera's view where motion should be detected. This helps reduce false alerts from passing cars or swaying trees.
- Person Detection: Many advanced cameras use AI to distinguish between general motion and actual human presence, sending more relevant alerts.
- Customizable Alerts: Set up push notifications to your smartphone, email alerts, or even audible alerts on smart speakers when motion is detected or the doorbell is pressed.
- Activity History: Most apps store a history of detected events, allowing you to review past activity.
The accuracy and sophistication of motion detection have significantly improved, with AI-powered features becoming standard in mid-range and high-end models.
Two-Way Audio and Live Streaming
The ability to see and speak with visitors remotely is a key benefit. Two-way audio allows for conversations through the app, whether you're at work, on vacation, or simply in another part of the house.
- Clear Audio: Look for cameras with noise-cancellation technology for clearer conversations.
- Live Streaming: Access a live video feed of your doorstep anytime through the app. This is invaluable for checking on deliveries or simply seeing who is at the door before they ring.
The quality of both audio and video streaming is heavily dependent on your Wi-Fi connection's upload speed and stability.
Cloud Storage and Local Recording
Storing your video footage is essential for reviewing past events. Doorbell cameras typically offer two options:
- Cloud Storage: This is the most common method, where footage is uploaded to the manufacturer's servers. It offers convenience and accessibility from anywhere but usually requires a subscription fee. Subscription costs can range from $3 to $10 per month per device in 2025, with premium plans offering longer storage durations and advanced features.
- Local Recording: Some cameras support local storage via a microSD card or a dedicated base station. This can be a more cost-effective option, as it doesn't require a recurring subscription, but access to footage might be limited when you're away from home.
Many users opt for a hybrid approach, using cloud storage for critical events and local storage for continuous recording if available.
Smart Home Ecosystem Integrations
The true power of a smart doorbell camera often lies in its ability to integrate with other smart home devices and platforms. This allows for automated actions and a more cohesive smart home experience.
- Voice Assistants: Integration with Amazon Alexa and Google Assistant is widespread. You can ask your voice assistant to show you the live feed from your doorbell camera on a compatible smart display (e.g., Echo Show, Google Nest Hub).
- Smart Locks: Imagine receiving a notification that a delivery person is at the door, and then using your voice assistant to unlock your smart lock to allow them to leave the package inside.
- Smart Lights: You can set up routines where your porch light automatically turns on when motion is detected by the doorbell camera after dark.
- IFTTT (If This Then That): This powerful service allows you to create custom applets that connect your doorbell camera to a vast array of other services and devices, enabling complex automations.
As smart home technology evolves, expect even deeper and more intuitive integrations in the coming years.
Choosing the Right Doorbell Camera for Your Needs
With a plethora of options available, selecting the best doorbell camera can be daunting. Consider these factors to make an informed decision that aligns with your requirements and budget.
Key Features to Consider
- Power Source: Wired, wireless (battery-powered), or plug-in. Consider your home's existing wiring and your preference for maintenance.
- Video Quality: Look for at least 1080p resolution for clear images. Higher resolutions (2K, 4K) offer more detail but require more bandwidth.
- Field of View: A wider field of view (e.g., 160 degrees or more) ensures you can see more of your doorstep, including packages left on the ground.
- Night Vision: Essential for monitoring activity after dark. Infrared (IR) night vision is standard, but some offer color night vision for better detail.
- Motion Detection Capabilities: Advanced features like person detection and customizable motion zones are crucial for reducing false alerts.
- Audio Quality: Clear two-way audio is important for communication.
- Storage Options: Decide between cloud storage (with subscription fees) and local storage (microSD card).
- Smart Home Compatibility: If you have an existing smart home ecosystem (Alexa, Google Home), ensure the doorbell camera integrates seamlessly.
- Durability and Weather Resistance: Look for an IP rating (e.g., IP65 or higher) indicating resistance to dust and water.
- Ease of Installation: Consider your DIY skills or the need for professional installation.
Comparing Popular Doorbell Camera Brands (2025-26)
The market is competitive, with several established players and emerging brands offering innovative features. Here's a brief overview of some leading brands and their typical offerings as of 2025-26:
| Brand | Typical Power Source | Video Resolution | Key Features | Subscription Model | Price Range (Approx.) |
|---|---|---|---|---|---|
| Ring | Wired, Wireless, Plug-in | 1080p HD | Advanced motion detection, wide field of view, Alexa integration, extensive accessory options. | Ring Protect Plan ($3-$20/month) | $100 - $250 |
| Google Nest | Wired, Plug-in | 1080p HD, HDR | Intelligent alerts (person, package, animal), familiar face detection (with Nest Aware Plus), Google Assistant integration. | Nest Aware ($6-$12/month) | $150 - $250 |
| Arlo | Wireless (battery), Wired | 1080p HD to 2K HDR | Wire-free installation, advanced AI detection, wide-angle lens, cloud storage options. | Arlo Secure ($3-$15/month) | $150 - $300 |
| Eufy (Anker) | Wired, Wireless (battery) | 1080p HD to 2K | Local storage options (no monthly fees for basic functionality), AI detection, strong battery life. | Optional cloud storage ($3-$10/month) | $100 - $200 |
| Wyze | Wired, Plug-in | 1080p HD | Extremely affordable, basic but functional features, optional Cam Plus subscription for advanced AI. | Wyze Cam Plus ($1.99-$14.99/month) | $30 - $70 |
Note: Prices and features are subject to change and vary by model. Always check the latest specifications and reviews.
Installation Options: DIY vs. Professional
Most doorbell cameras are designed for DIY installation, especially wireless models. The process typically involves mounting the bracket, connecting wires (if applicable), powering on the device, and configuring it via the mobile app. Many users find this process manageable and cost-effective.
However, if you're uncomfortable with electrical wiring, have complex existing setups, or simply prefer a hands-off approach, professional installation is an option. Many manufacturers partner with installation services, or you can hire an independent electrician or handyman. Professional installation can cost anywhere from $50 to $200, depending on the complexity and your location.
By carefully considering these factors and comparing different brands, you can select a doorbell camera that not only connects seamlessly to your Wi-Fi but also provides the security and convenience you need.
Conclusion
Connecting your doorbell camera to Wi-Fi is a foundational step towards a more secure and connected home. By understanding the Wi-Fi requirements, preparing adequately, and following the step-by-step guide, you can successfully integrate your device into your network. Remember to troubleshoot any issues systematically, and consider optimizing your Wi-Fi network for consistent performance. The advanced features and integrations available today, from intelligent motion detection to seamless smart home compatibility, transform a simple doorbell into a powerful security hub. Choosing the right camera based on your needs and installation preferences will ensure you maximize its benefits. With a properly connected and configured doorbell camera, you gain peace of mind and enhanced control over who approaches your home, anytime, anywhere.