Installing a camera doorbell is a smart way to enhance home security and convenience. This comprehensive guide will walk you through every step, from choosing the right model to troubleshooting common issues, ensuring a smooth DIY installation process for homeowners.
Understanding Camera Doorbell Types
The world of smart doorbells has exploded in recent years, offering homeowners a plethora of options to enhance security and connectivity. Before diving into the installation process, it's crucial to understand the different types of camera doorbells available, as this will significantly influence your installation approach. The primary distinctions lie in their power source and connectivity methods.
1. Wired Camera Doorbells
These are the traditionalists of the smart doorbell world. Wired camera doorbells connect directly to your home's existing doorbell wiring. This typically means they draw power from your existing doorbell transformer and connect to your home's Wi-Fi network. The installation for wired models often involves working with low-voltage electrical wiring, which requires a bit more caution and understanding of basic electrical principles.
- Power Source: Existing doorbell wiring (low voltage).
- Connectivity: Wi-Fi.
- Pros: Continuous power supply (no batteries to charge), generally more stable connection, often higher video quality due to consistent power.
- Cons: Installation can be more complex, requires existing doorbell wiring, may need to upgrade transformer if current one is insufficient.
2. Wireless (Battery-Powered) Camera Doorbells
Wireless camera doorbells offer the ultimate in installation flexibility. They are powered by rechargeable batteries and connect to your home's Wi-Fi network wirelessly. This makes them ideal for renters or homeowners who don't have existing doorbell wiring or want to avoid the complexities of electrical work. The main drawback is the need to periodically recharge or replace the batteries.
- Power Source: Rechargeable or replaceable batteries.
- Connectivity: Wi-Fi.
- Pros: Easy installation, no wiring required, portable, ideal for renters.
- Cons: Batteries need regular charging/replacement, potential for intermittent connectivity if Wi-Fi is weak, battery life can be affected by usage and temperature.
3. Wired-to-Wireless Hybrid Doorbells
Some models blur the lines. These might use existing doorbell wiring for power but still rely on Wi-Fi for connectivity. Others might be battery-powered but designed to integrate with existing chime systems through a wireless connection. Understanding the specific model's power and connectivity is key.
4. Power Over Ethernet (PoE) Doorbells
Less common for residential use but worth noting, PoE doorbells use an Ethernet cable to both transmit data and receive power. This offers a very stable and robust connection but requires running Ethernet cables, which is typically a more involved installation, often requiring professional help.
2025-26 Market Snapshot: The smart doorbell market continues to grow, with battery-powered models dominating in terms of new installations due to their ease of use. However, wired models remain popular for those seeking a more permanent and reliable solution. We're also seeing advancements in battery technology, extending the life of wireless doorbells significantly, with many models now lasting 6-12 months on a single charge.
Planning Your Camera Doorbell Installation
A successful camera doorbell installation begins long before you pick up a screwdriver. Careful planning ensures you have the right tools, understand your home's infrastructure, and choose the best location for optimal performance. This phase is critical for a smooth DIY experience and long-term satisfaction.
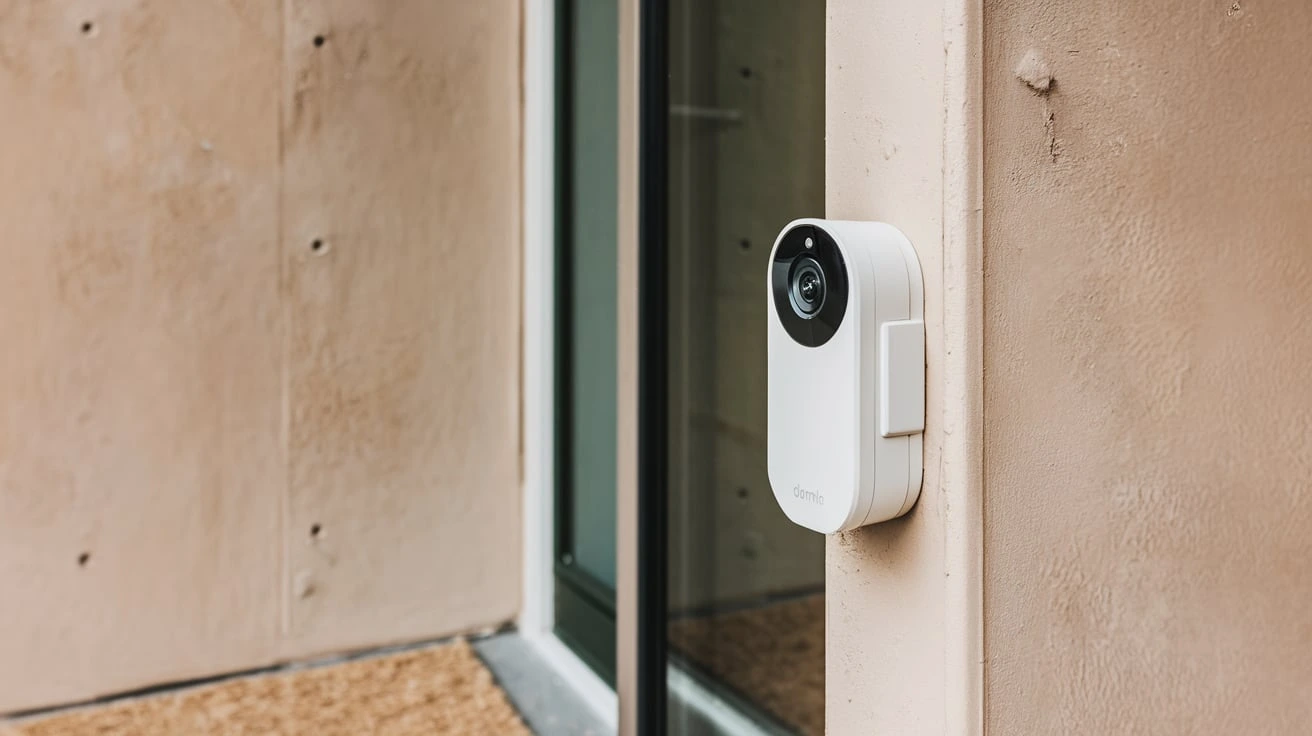
Choosing the Right Location
The placement of your camera doorbell is paramount for its effectiveness. Consider the following factors:
- Field of View: Ensure the camera can see the entire porch, walkway, and any immediate approach areas. Avoid obstructions like bushes or decorative elements.
- Height: The ideal height is typically between 48 and 54 inches (1.2 to 1.4 meters) from the ground. This height captures faces effectively and is also where most existing doorbells are located.
- Proximity to Wi-Fi: For both wired and wireless models, a strong Wi-Fi signal is essential. Test your Wi-Fi strength at the intended mounting location using your smartphone. Most manufacturers recommend a signal strength of at least two bars.
- Power Source Access: For wired installations, ensure you can easily access the existing doorbell wires. For wireless, consider how you will reach the doorbell for battery charging.
- Sunlight and Glare: Avoid mounting the doorbell directly facing intense sunlight, as this can cause glare and make video footage unusable.
- Weather Protection: While most doorbells are weather-resistant, extreme exposure to direct rain or harsh elements can shorten their lifespan. Consider if your chosen spot offers some natural protection.
Assessing Your Existing Doorbell System (for Wired Installations)
If you're opting for a wired camera doorbell, you need to check your existing setup:
- Transformer Voltage: Most smart doorbells require a transformer that outputs between 16-24 volts AC. Your existing doorbell transformer might be lower, especially in older homes. You can usually find the transformer's specifications printed on its casing, often located near your electrical panel or in your basement/attic. If it's below 16V, you'll likely need to upgrade it.
- Chime Compatibility: Wired doorbells often connect to your existing mechanical or digital chime. Check if your doorbell manufacturer provides a compatibility list or specific instructions for your chime type. Some wireless doorbells come with their own plug-in chime.
Gathering Necessary Tools and Materials
Having everything ready before you start will save you time and frustration. Typical tools include:
- Drill with various drill bits (including masonry bits if mounting on brick or concrete)
- Screwdriver set (Phillips and flathead)
- Wire strippers/cutters
- Pliers
- Level
- Pencil or marker
- Safety glasses
- Ladder (if needed)
- Stud finder (if mounting on drywall)
- Caulk (optional, for sealing around the mount)
- Mounting bracket (usually included with the doorbell)
- Mounting screws and anchors (usually included)
- Your new camera doorbell and its accessories
Understanding Your Home's Wi-Fi Network
A robust Wi-Fi network is the backbone of a smart doorbell. Consider these points:
- Signal Strength: As mentioned, test your Wi-Fi at the mounting location. If the signal is weak, you might need a Wi-Fi extender or a mesh Wi-Fi system.
- Network Band: Most smart devices operate on the 2.4GHz Wi-Fi band, which offers better range than 5GHz. Ensure your router is broadcasting a 2.4GHz network.
- Network Security: Ensure your Wi-Fi network is secured with a strong password (WPA2 or WPA3 encryption).
Wired vs. Wireless Installation: Key Differences
The choice between a wired and wireless camera doorbell installation is the most significant decision you'll make, impacting both the installation process and ongoing maintenance. Understanding these differences is crucial for selecting the right type for your home and skill level.
Installation Complexity
Wired: Generally considered more complex. It involves working with low-voltage electrical wires, which means turning off power at the breaker box and ensuring proper connections. If your existing transformer is insufficient, you'll need to replace it, adding another layer of electrical work. The process often involves removing the old doorbell button, feeding wires through the wall, and connecting them to the new doorbell.
Wireless: Significantly simpler. The primary task is mounting the bracket and attaching the doorbell. No electrical wiring is involved, making it a much more accessible DIY project for most homeowners. The main "installation" after mounting is pairing the doorbell with your Wi-Fi network via the manufacturer's app.
Power Management
Wired: Continuous power from your home's electrical system. Once installed correctly, you never have to worry about charging batteries. This ensures uninterrupted recording and functionality.
Wireless: Relies on internal rechargeable batteries. The frequency of charging depends on usage, Wi-Fi signal strength, and ambient temperature. Some models offer solar charging accessories, which can help mitigate battery drain but require direct sunlight.
Reliability and Connectivity
Wired: Typically offers a more stable and reliable connection due to the constant power supply and direct wiring. This can translate to fewer dropped connections and a more consistent performance, especially in areas with fluctuating Wi-Fi signals.
Wireless: Can be susceptible to Wi-Fi dead spots or signal degradation, which might lead to intermittent connectivity or missed events. However, advancements in Wi-Fi technology and doorbell firmware are constantly improving this aspect.
Cost Considerations
Wired: The initial cost of the doorbell itself might be comparable to wireless models. However, if you need to upgrade your transformer or hire an electrician due to complexity, the overall cost can increase. The ongoing cost is minimal, as there are no batteries to replace.
Wireless: The upfront cost is often similar. Ongoing costs can include replacement batteries over time (though many are designed for several years of use) or the purchase of optional accessories like solar panels. Battery replacement is a recurring expense, albeit usually infrequent.
Aesthetic and Mounting Options
Wired: Often has a more traditional doorbell button aesthetic. Mounting is usually flush with the wall, integrated with existing wiring. If you need to add a wedge mount for a better angle, this is usually an optional accessory.
Wireless: Can have a more modern, camera-centric design. Mounting is straightforward, and many models come with angled mounting plates to help direct the camera's view. They can be mounted almost anywhere a screw can go, provided there's a strong Wi-Fi signal.
Comparison Table: Wired vs. Wireless Doorbell Installation
| Feature | Wired Doorbell | Wireless Doorbell |
|---|---|---|
| Installation Complexity | Moderate to High (requires electrical work) | Low (primarily mounting) |
| Power Source | Continuous (existing doorbell wiring) | Rechargeable Batteries |
| Power Management | None required | Periodic charging/battery replacement |
| Reliability | Generally higher due to constant power | Can be affected by Wi-Fi and battery levels |
| Ideal For | Homeowners with existing wiring, seeking maximum reliability | Renters, those without existing wiring, DIY enthusiasts |
| Ongoing Costs | Minimal | Potential battery replacement costs |
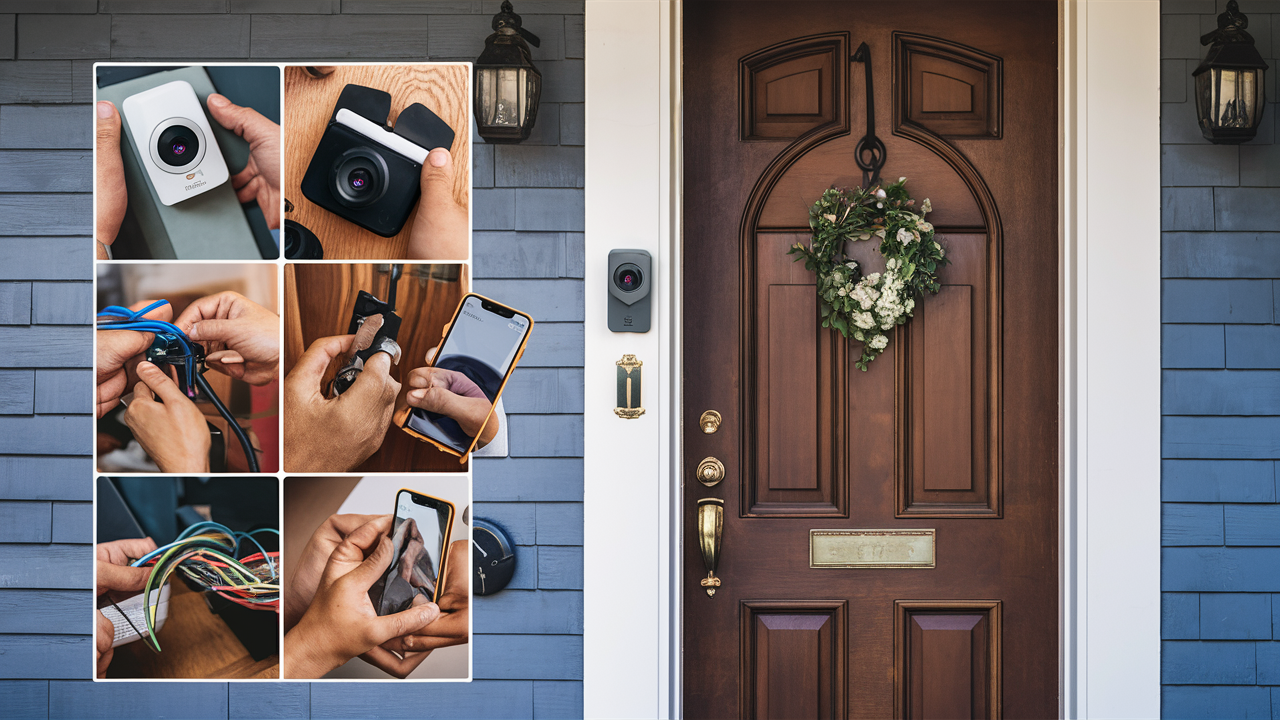
Step-by-Step Camera Doorbell Installation Guide
This guide will cover the installation process for both wired and wireless camera doorbells. Always refer to your specific model's manual for precise instructions, as variations exist between manufacturers.
Step 1: Turn Off Power (Wired Installation Only)
For wired installations: Locate your home's electrical panel and find the breaker that controls your existing doorbell circuit. Flip the breaker to the "OFF" position. It's good practice to test your existing doorbell button to confirm the power is indeed off before proceeding. If you're unsure which breaker it is, you can turn off the main breaker, but this will cut power to your entire home.
For wireless installations: This step is not applicable as you are not working with household electrical wiring.
Step 2: Remove Your Existing Doorbell Button
Gently pry off your old doorbell button from the wall. It's usually held in place by screws. Once the button is loose, pull it away from the wall. You'll see two wires connected to the back of it. Unscrew these wires.
Step 3: Mount the New Doorbell Bracket
For Wired Doorbells:
- Thread the existing doorbell wires through the central opening of the new mounting bracket.
- Hold the bracket against the wall at the desired height. Use a level to ensure it's straight.
- Mark the screw hole locations on the wall with a pencil.
- Drill pilot holes at the marked locations. If mounting on brick or stucco, use a masonry bit and insert wall anchors.
- Feed the wires through the bracket again and then screw the bracket securely to the wall.
For Wireless Doorbells:
- Determine the mounting location, ensuring a strong Wi-Fi signal.
- Hold the wireless doorbell's mounting bracket against the wall. Use a level to ensure it's straight.
- Mark the screw hole locations.
- Drill pilot holes. If mounting on brick or stucco, use a masonry bit and insert wall anchors.
- Screw the mounting bracket securely to the wall. Many wireless doorbells come with angled mounting plates; install these first if needed.
Step 4: Connect the Wires (Wired Installation Only)
For wired installations:
- Take one doorbell wire and connect it to one of the screw terminals on the back of the new camera doorbell. It usually doesn't matter which wire goes to which terminal for basic functionality, but check your manual.
- Take the second doorbell wire and connect it to the other screw terminal.
- Ensure the connections are secure. Tighten the screws firmly but avoid overtightening, which could strip the threads or damage the doorbell.
- Gently push the excess wire back into the wall cavity to keep the doorbell flush against the mounting bracket.
Step 5: Attach the Camera Doorbell Unit
For Wired Doorbells: Align the camera doorbell with the mounting bracket and slide it into place. Most units click or screw into place. Ensure it's securely attached.
For Wireless Doorbells: Insert the charged battery pack into the doorbell unit if it's not already installed. Then, attach the doorbell unit to the mounting bracket. This often involves sliding it down or clicking it into place. Secure it with any provided security screws.
Step 6: Restore Power (Wired Installation Only)
For wired installations: Return to your electrical panel and flip the breaker back to the "ON" position. The doorbell should now receive power.
Step 7: Download and Set Up the App
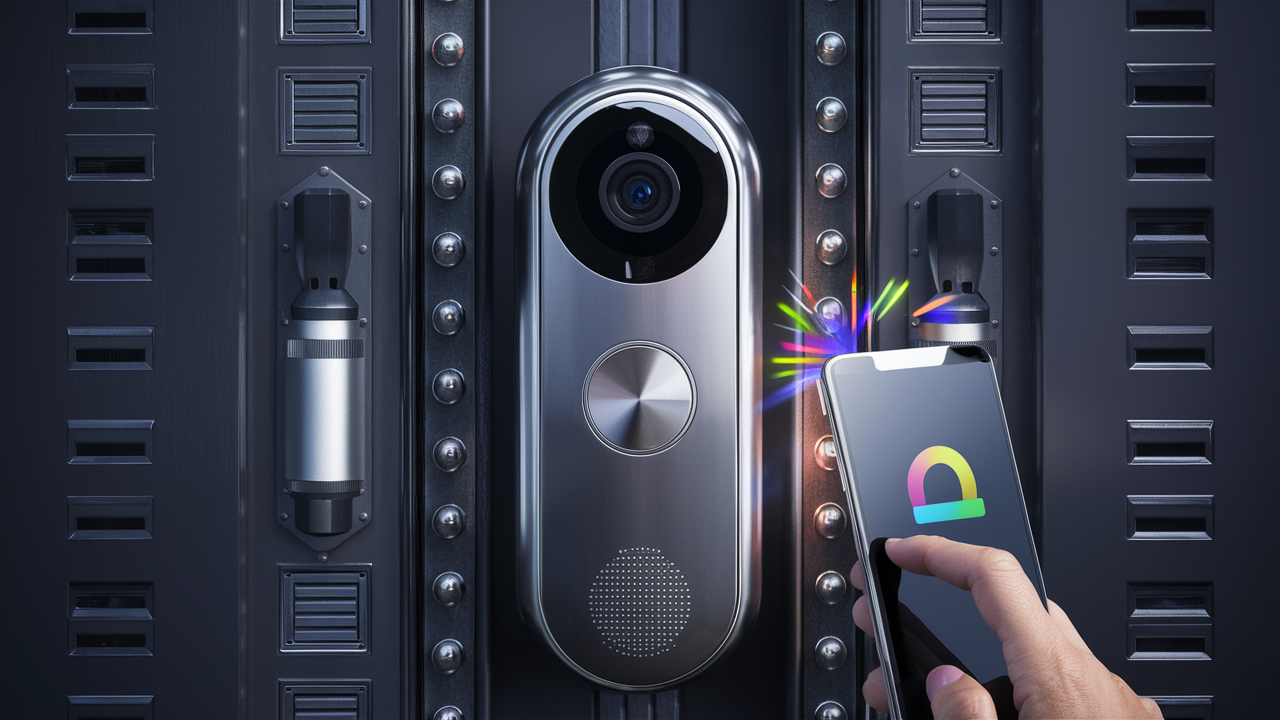
Regardless of whether you have a wired or wireless doorbell, the next step is to set it up using the manufacturer's mobile app.
- Download the app from your smartphone's app store (iOS App Store or Google Play Store).
- Create an account or log in.
- Follow the in-app instructions to add a new device. This typically involves scanning a QR code on the doorbell or its packaging, or manually entering a serial number.
- Connect the doorbell to your home's Wi-Fi network. You'll need to enter your Wi-Fi password. Ensure you select the correct network band (usually 2.4GHz).
- The app will guide you through any firmware updates and initial setup preferences.
Post-Installation Setup and Testing
Once the physical installation is complete and the app is set up, it's time to ensure everything is working correctly and configure your doorbell for optimal performance. This phase is critical for maximizing the security and convenience benefits.
Testing Functionality
Press the doorbell button: Have someone press the doorbell button from the outside.
- Wired: Your indoor chime should ring.
- Wireless: Your plug-in chime (if included) or the app notification should activate.
Check the app:
- Live View: Open the app and access the live view of your camera. Check the video quality, clarity, and field of view. Ensure it captures the intended areas.
- Two-Way Audio: Test the two-way audio by speaking into your phone and listening through the doorbell's speaker, and vice versa. Ensure the audio is clear in both directions.
- Motion Detection: Walk in front of the doorbell at different distances to test the motion detection. You should receive notifications on your phone.
- Night Vision: Test the night vision by observing the camera feed in low light conditions. Most cameras automatically switch to night vision mode.
Configuring App Settings
The mobile app is where you'll customize your doorbell's behavior. Key settings to adjust include:
- Motion Detection Zones: Most apps allow you to define specific areas within the camera's view where you want motion to be detected. This helps reduce false alerts from passing cars or swaying trees.
- Motion Sensitivity: Adjust the sensitivity level to balance between capturing all relevant motion and avoiding nuisance alerts.
- Notification Preferences: Customize how and when you receive alerts. You can often choose between push notifications, email alerts, or even specific times for notifications.
- Video Quality: Select your preferred video resolution. Higher resolutions provide clearer images but consume more bandwidth and storage.
- Recording Settings: Configure how long events are recorded and whether recordings are stored locally (on an SD card) or in the cloud (often requiring a subscription).
- Chime Settings: For wired doorbells, you might be able to adjust the volume or type of chime. For wireless, you can set up and configure any included plug-in chimes.
- Privacy Zones: Some advanced models allow you to mask out specific areas of the camera's view that you don't want to record, such as a neighbor's window.
Optimizing Wi-Fi Performance
If you experience connectivity issues or lag:
- Router Placement: Ensure your Wi-Fi router is centrally located and not obstructed by thick walls or large appliances.
- Wi-Fi Extenders/Mesh Systems: If the signal is weak at the doorbell's location, consider installing a Wi-Fi extender or a mesh Wi-Fi system to boost coverage.
- Channel Optimization: In some cases, changing the Wi-Fi channel on your router can improve performance, especially if you live in a densely populated area with many competing Wi-Fi networks.
- Restart Router: A simple router reboot can sometimes resolve temporary network glitches.
Battery Management (Wireless Doorbells)
For wireless doorbells, monitor battery levels through the app. When a low battery warning appears:
- Recharge: Remove the battery pack and charge it using the provided charger.
- Replace: If you have a spare battery, swap it out to minimize downtime.
- Solar Panel: If you have a solar charger, ensure it's clean and receiving direct sunlight.
2025-26 Battery Life Averages: With optimized settings and good Wi-Fi, many leading wireless doorbell models can achieve 6-12 months of battery life. However, heavy motion detection and frequent live view usage can reduce this significantly, sometimes to as little as 2-4 months.
Troubleshooting Common Camera Doorbell Issues
Even with a successful installation, you might encounter occasional hiccups. Here are solutions to some of the most common camera doorbell problems.
No Power / Doorbell Not Turning On (Wired)
- Check Breaker: Ensure the circuit breaker for the doorbell is switched ON.
- Check Transformer: Verify that your doorbell transformer is providing the correct voltage (16-24V AC). Use a multimeter to test the output. If it's too low, it needs replacement.
- Wire Connections: Double-check that the wires are securely connected to the doorbell terminals and that there are no loose strands touching each other or the mounting bracket.
- Short Circuit: Ensure wires are not touching where they shouldn't be, especially inside the wall.
No Power / Doorbell Not Turning On (Wireless)
- Battery Charge: Ensure the battery is fully charged. Try charging it again.
- Battery Installation: Make sure the battery is correctly inserted into the doorbell unit.
- Faulty Battery: If the battery is old or has been damaged, it might need replacement.
No Wi-Fi Connection / Offline
- Check Wi-Fi Signal: Verify that your Wi-Fi network is active and broadcasting. Test the signal strength at the doorbell's location with your phone.
- Router Reboot: Restart your Wi-Fi router and modem.
- Doorbell Reboot: For wireless, remove and reinsert the battery. For wired, temporarily turn off the breaker, wait 30 seconds, and turn it back on.
- Network Credentials: Ensure you entered the correct Wi-Fi password during setup.
- Distance from Router: If the signal is weak, consider moving your router closer, using a Wi-Fi extender, or a mesh network.
- Firewall/Router Settings: Some advanced router settings or firewalls might block the doorbell's connection. Consult your router's manual.
Poor Video Quality (Blurry, Pixelated)
- Wi-Fi Strength: Weak Wi-Fi is a primary cause. Improve your Wi-Fi signal.
- Lens Cleaning: Ensure the camera lens is clean and free of smudges, dirt, or water spots.
- Lighting Conditions: Extreme lighting (very bright sun, complete darkness) can affect quality. Adjust positioning or use night vision settings.
- Resolution Settings: Check the video resolution setting in the app. Higher resolution requires a better internet connection.
Motion Alerts Not Working or Too Many False Alerts
- Motion Detection Zones: Adjust or refine the motion detection zones in the app to exclude areas with frequent false triggers (e.g., busy street, swaying branches).
- Sensitivity Settings: Lower the motion sensitivity if you're getting too many alerts. Increase it if you're missing events.
- Firmware Updates: Ensure your doorbell's firmware is up to date, as updates often improve motion detection algorithms.
- Obstructions: Check for anything that might be partially obstructing the camera's view and triggering motion detection erratically.
Audio Issues (No Sound, Garbled Sound)
- Microphone/Speaker Obstruction: Ensure the microphone and speaker grilles on the doorbell are not blocked by dirt or paint.
- App Permissions: Verify that the doorbell app has permission to access your phone's microphone and speakers.
- Wi-Fi Bandwidth: Poor Wi-Fi can impact audio quality.
- Device Reboot: Try restarting the doorbell and your phone.
Chime Not Ringing (Wired)
- Power: Ensure the doorbell has power.
- Wiring: Double-check the wire connections to the doorbell and to the chime unit (if accessible).
- Chime Compatibility: Some smart doorbells may not be compatible with all types of chimes. Consult your doorbell's manual. You might need a bypass wire or a digital chime.
- Chime Settings: Some apps allow you to configure chime settings.
Advanced Features and Considerations
Beyond basic installation and functionality, modern camera doorbells offer a range of advanced features that can significantly enhance your home security and smart home integration. Understanding these can help you make the most of your investment.
Cloud Storage vs. Local Storage
Most camera doorbells offer ways to store recorded video footage. The two main options are:
- Cloud Storage: Recordings are uploaded to the manufacturer's servers and accessed via the app. This is convenient and accessible from anywhere, but often requires a monthly subscription fee. Fees vary by provider, with typical plans ranging from $3 to $10 per month per device, offering varying levels of storage and features.
- Local Storage: Recordings are saved to a microSD card inserted into the doorbell or a connected base station. This avoids subscription fees but means you can only access footage when you are at home or have physically retrieved the card, and storage capacity is limited.
2025-26 Trend: Subscription costs for cloud storage are a significant consideration for many users. The trend is towards tiered plans offering more advanced AI features (like person detection) at higher price points.
Artificial Intelligence (AI) Features
Many newer doorbells incorporate AI to provide more intelligent alerts:
- Person Detection: Distinguishes between people, animals, and vehicles, reducing false alerts.
- Package Detection: Notifies you specifically when a package is delivered or removed.
- Facial Recognition: Some high-end models can learn to identify familiar faces, alerting you when a specific person (family member, friend) arrives.
These AI features are often part of premium subscription packages.
Integration with Smart Home Ecosystems
Camera doorbells can be powerful components of a smart home. Check for compatibility with platforms like:
- Amazon Alexa: View live feeds on Echo Show devices, trigger routines based on motion.
- Google Assistant: Similar integration with Google Nest Hubs and voice commands.
- Apple HomeKit: Secure, end-to-end encrypted video streaming and integration with other HomeKit devices.
- IFTTT (If This Then That): Create custom automations, like turning on lights when motion is detected.
Powering Options Beyond Standard Wiring/Batteries
While less common, some advanced setups might involve:
- Solar Panels: For wireless doorbells, solar panels can supplement battery power, extending the time between charges, especially in sunny climates.
- Hardwired with Existing Transformer: As discussed, ensuring your transformer meets the voltage requirements is key.
- Dedicated Power Adapters: Some battery-powered models can be plugged into a standard wall outlet using an optional adapter, effectively turning them into wired devices without using doorbell wiring.
Security and Privacy Considerations
Given that these devices capture video and audio of your home's exterior, security and privacy are paramount:
- Strong Passwords: Always use a unique, strong password for your doorbell account and your Wi-Fi network.
- Two-Factor Authentication (2FA): Enable 2FA on your doorbell account if available.
- Firmware Updates: Keep your doorbell's firmware updated to patch security vulnerabilities.
- Privacy Zones: Utilize privacy zone features to block recording of sensitive areas.
- Data Encryption: Look for manufacturers that use end-to-end encryption for video streams and stored footage.
- Local Laws: Be aware of any local laws or regulations regarding video recording, especially concerning public areas or neighbors.
Professional Installation vs. DIY
While this guide aims to empower DIYers, there are situations where professional installation is recommended:
- Lack of Confidence with Electrical Work: If you are uncomfortable or inexperienced with electrical wiring, it's safer to hire an electrician.
- Complex Wiring: Older homes with intricate wiring systems or if your transformer needs replacement might be best handled by a professional.
- Difficult Mounting Locations: If the mounting location is hard to reach or requires specialized tools.
- Smart Home Integration: If you're integrating the doorbell into a complex smart home system and want expert setup.
Professional installation costs can range from $100 to $300, depending on the complexity and your location.
2025-26 Statistics: Consumer reports indicate that approximately 65% of camera doorbell installations are now DIY. However, the percentage of users opting for professional installation increases significantly for wired models or when complex smart home integrations are desired.
In conclusion, installing a camera doorbell is an achievable project for most homeowners, offering significant benefits in security and convenience. By understanding the different types of doorbells, carefully planning your installation, and following these step-by-step instructions, you can successfully upgrade your home's entryway. Remember to test thoroughly, configure your settings for optimal performance, and utilize advanced features to create a truly smart and secure home. If at any point you feel uncomfortable, especially with electrical work, don't hesitate to seek professional assistance.