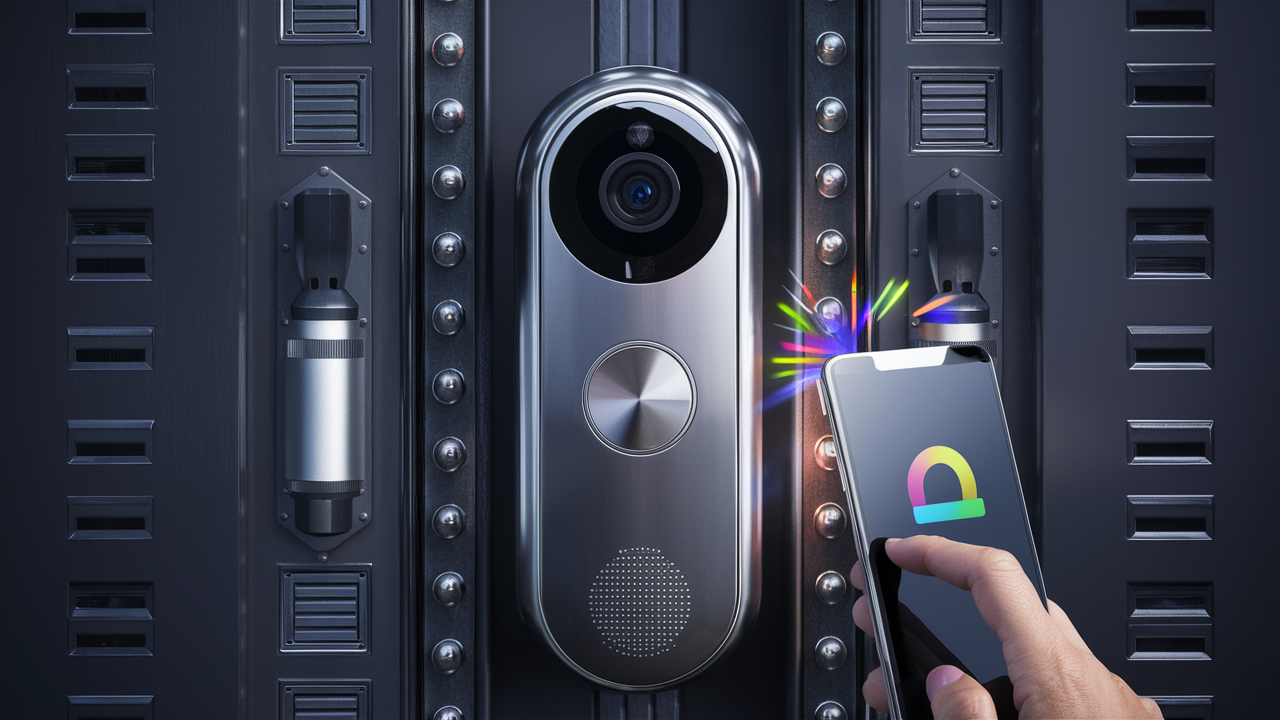
Installing a doorbell camera without existing doorbell wiring might seem daunting, but it's more accessible than ever. This guide will walk you through the straightforward process, empowering you to enhance your home security with modern, wire-free technology. Discover the best options and installation methods to achieve peace of mind.
Understanding Your Options: Battery-Powered vs. Wired Alternatives
When faced with the prospect of installing a doorbell camera without an existing doorbell wire, the primary decision revolves around the power source. Fortunately, the market has responded with innovative solutions that cater to virtually any home setup. The two main categories you'll encounter are battery-powered doorbell cameras and alternative wired solutions that don't rely on traditional doorbell wiring. Understanding the nuances of each will help you make the best choice for your specific needs and home configuration.
Battery-Powered Doorbell Cameras: The Wire-Free Revolution
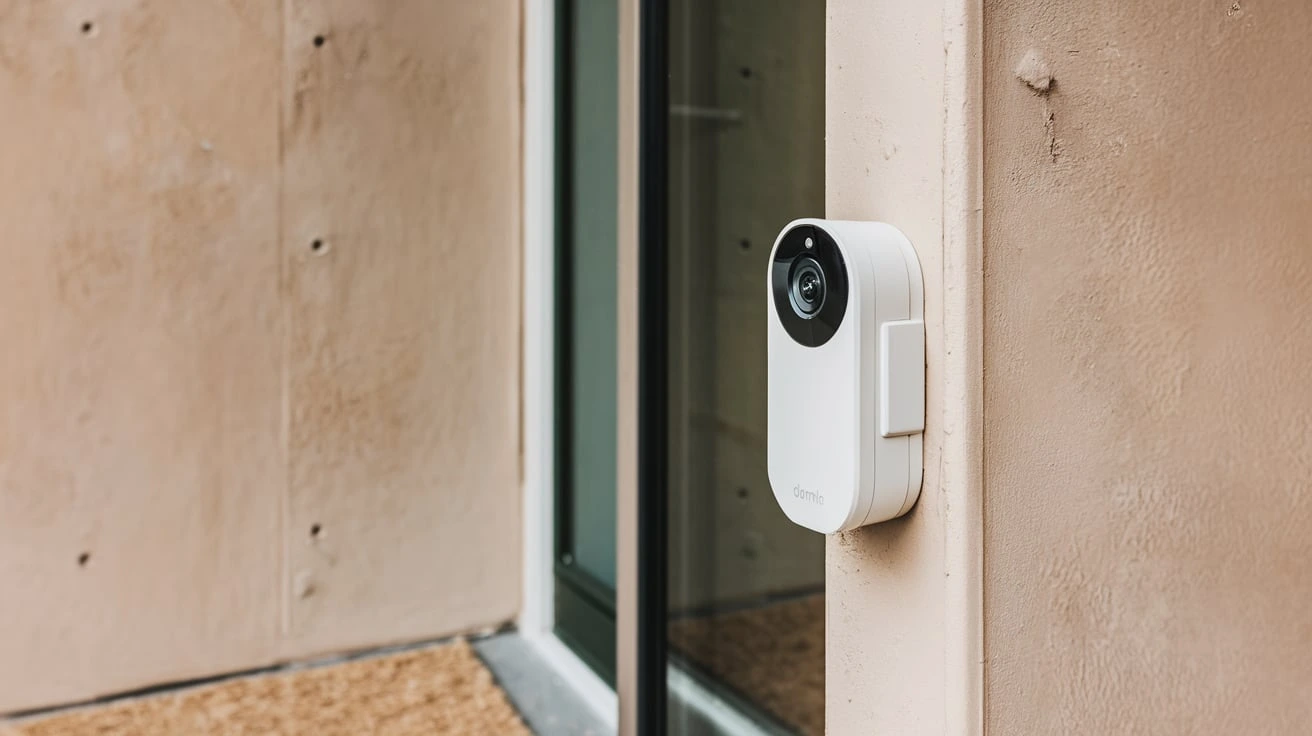
Battery-powered doorbell cameras are the most popular and straightforward solution for homes lacking existing doorbell wiring. These devices are designed for easy installation, requiring no electrical knowledge or complex wiring. They run on rechargeable or long-lasting replaceable batteries, offering maximum flexibility in placement and installation. The rise of these cameras has democratized smart home security, making it accessible to renters and homeowners alike who might not have the option or desire to alter their existing electrical systems.
The convenience factor is undeniable. You can mount them almost anywhere near your front door, provided there's a good Wi-Fi signal. The batteries typically last anywhere from a few months to over a year, depending on usage, settings, and the specific model. Many come with low-battery alerts, ensuring you're never caught off guard.
Wired Alternatives: Leveraging Existing Power Sources
While battery-powered cameras are the most common, there are also wired alternatives that can be adapted for homes without traditional doorbell wiring. These might involve tapping into existing power outlets or using solar panels to maintain a charge. These options often provide a more consistent power supply, eliminating the need for battery replacements, but they can be more complex to install and may require more careful planning regarding placement.
For instance, some systems can be powered by a nearby outdoor electrical outlet. This requires running a low-voltage power cable from the outlet to the camera, which might involve drilling through a wall or using discreet cable management solutions. Solar-powered options are also gaining traction, offering a sustainable and low-maintenance way to keep your doorbell camera operational.
Key Differences at a Glance
To help clarify, here's a quick comparison:
| Feature | Battery-Powered Doorbell Camera | Wired Alternatives (Non-Doorbell Wire) |
|---|---|---|
| Power Source | Rechargeable or replaceable batteries | Nearby electrical outlet, solar panel, or dedicated power adapter |
| Installation Complexity | Very Easy (mount and connect to Wi-Fi) | Moderate to Complex (may involve running cables, drilling) |
| Flexibility | High (placement anywhere with Wi-Fi) | Moderate (limited by power source proximity) |
| Maintenance | Battery charging/replacement | Minimal (unless using solar, then cleaning) |
| Cost | Generally lower upfront, ongoing battery costs | Potentially higher upfront for adapters/solar, lower ongoing costs |
| Reliability | Dependent on battery life and charge level | Consistent power supply (if properly installed) |
In the following sections, we will delve deeper into the most practical and widely adopted solution: battery-powered doorbell cameras, and then explore the nuances of wired alternatives for those who prefer or require them.
Battery-Powered Doorbell Cameras: The Go-To Solution
For homeowners and renters alike, battery-powered doorbell cameras represent the pinnacle of convenience and ease of installation when traditional doorbell wiring is absent. These devices are engineered to be user-friendly, eliminating the need for an electrician or extensive DIY electrical work. Their primary advantage lies in their wire-free nature, allowing for flexible placement and a quick setup process that can typically be completed in under an hour.
How They Work
At their core, battery-powered doorbell cameras function by connecting to your home's Wi-Fi network. Once mounted and powered on, they use your existing internet infrastructure to send notifications to your smartphone or tablet whenever motion is detected or the doorbell button is pressed. This connection enables live video streaming, two-way audio communication, and the storage of recorded footage, either locally on an SD card or, more commonly, in the cloud.
The power comes from integrated rechargeable batteries or easily replaceable standard batteries. Rechargeable batteries are becoming the norm, offering a sustainable solution. Most manufacturers provide a charging solution, such as a USB cable or a charging dock. The battery life is a critical factor, and manufacturers often provide estimates based on typical usage scenarios. Factors like the frequency of motion events, the length of recorded videos, and the strength of your Wi-Fi signal can all influence how long a charge lasts. For example, a camera in a high-traffic area might require charging every 2-3 months, while one in a quieter location could last 6-12 months or even longer on a single charge.
Advantages of Battery-Powered Models
The benefits of opting for a battery-powered doorbell camera are numerous and directly address the challenges of installing without existing wiring:
- Effortless Installation: No need to connect to existing doorbell wires or hire an electrician. The process typically involves mounting the bracket, inserting the battery, and connecting to Wi-Fi via a mobile app.
- Placement Flexibility: You aren't tethered by existing wiring. Mount the camera wherever it offers the best view of your entryway, as long as it has a strong Wi-Fi signal.
- Ideal for Renters: Since no permanent modifications are required, these cameras are perfect for those who don't own their homes.
- Cost-Effective Initial Setup: While some cloud storage fees may apply, the initial purchase price is often competitive, and you avoid potential electrician costs.
- Modern Features: Despite being battery-powered, these cameras are packed with smart features like high-definition video, night vision, motion detection, two-way audio, and mobile alerts.
Disadvantages to Consider
While highly convenient, battery-powered cameras do have some limitations:
- Battery Management: The primary drawback is the need to periodically recharge or replace batteries. This can be an inconvenience, especially if the camera is in a hard-to-reach location.
- Potential for Interruption: If a battery dies unexpectedly, your camera will stop functioning until it's recharged or replaced, leaving a gap in your security coverage.
- Wi-Fi Dependency: Like all smart cameras, a stable Wi-Fi connection is crucial for functionality.
- Slightly Slower Response Time: In some instances, battery-powered cameras might have a fractionally longer delay in sending notifications compared to hardwired systems due to power-saving modes.
Despite these considerations, the overwhelming ease of installation and flexibility makes battery-powered doorbell cameras the preferred choice for the vast majority of users looking to install a doorbell camera without existing wiring. The next section will guide you through the practical steps of setting one up.
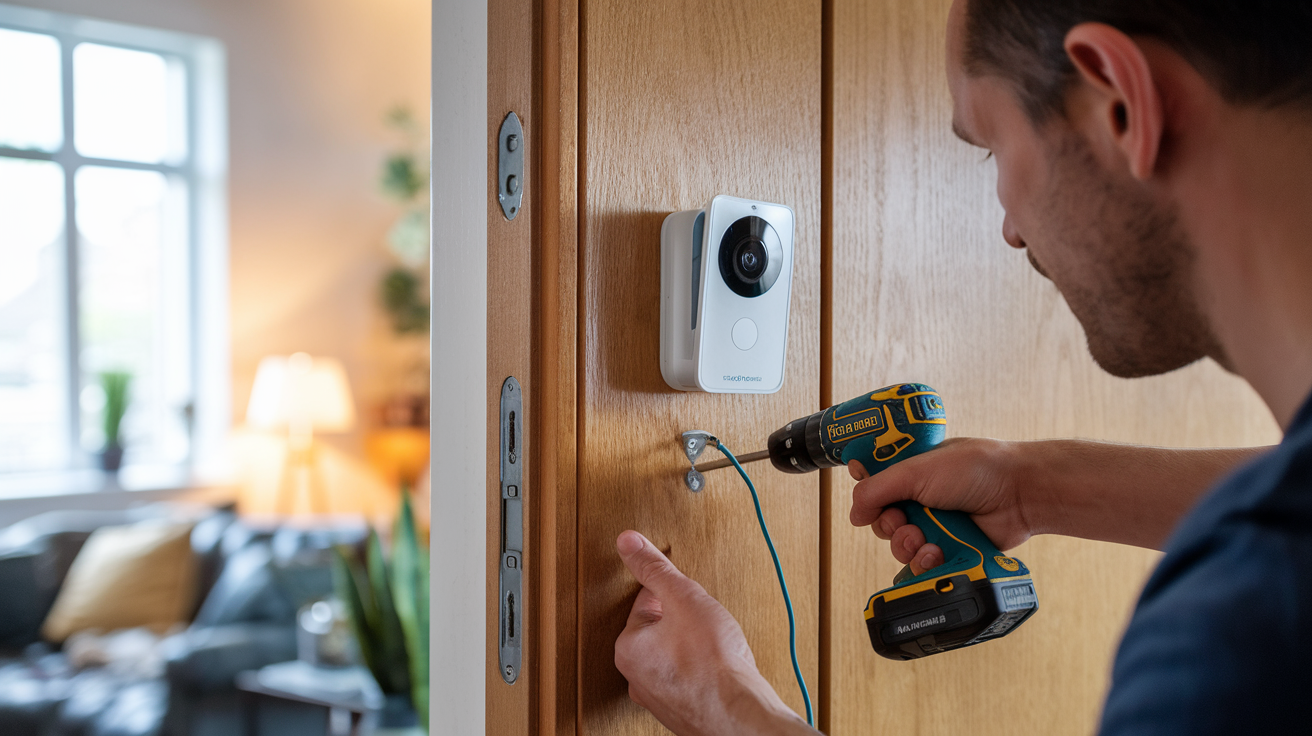
Step-by-Step Installation Guide for Battery-Powered Doorbell Cameras
Installing a battery-powered doorbell camera is designed to be a DIY-friendly process. This guide will walk you through each step, ensuring a smooth and successful setup. Most installations can be completed in under an hour.
What You'll Need
- Your new battery-powered doorbell camera kit (including camera, mounting bracket, screws, anchors, and battery)
- A smartphone or tablet with the manufacturer's app installed
- Your home Wi-Fi network name (SSID) and password
- A drill with appropriate drill bits (if mounting to brick, stucco, or wood)
- A Phillips head screwdriver
- A pencil for marking
- A level (optional, but recommended for a straight installation)
- A ladder (if your mounting location is high)
Step 1: Charge the Battery
Before you begin mounting, ensure the battery is fully charged. Most doorbell cameras come with a rechargeable battery. Connect it to the provided USB cable and a power source. This can take several hours, so it's best to do this while you prepare other aspects of the installation.
Step 2: Download the Manufacturer's App
Search for your doorbell camera's brand in your smartphone's app store (iOS App Store or Google Play Store) and download the official companion app. Create an account or log in if you already have one. This app will guide you through the Wi-Fi connection and setup process.
Step 3: Test Your Wi-Fi Signal at the Mounting Location
Doorbell cameras require a strong and stable Wi-Fi signal to function correctly. Before drilling any holes, take your smartphone to the intended mounting spot and check the Wi-Fi signal strength. If the signal is weak, consider using a Wi-Fi extender or mesh network to improve coverage in that area. A signal strength of at least two to three bars is generally recommended.
Step 4: Position the Mounting Bracket
Hold the mounting bracket against the wall at your desired height and location. Most manufacturers recommend mounting the doorbell camera about 4-5 feet (1.2-1.5 meters) from the ground to capture faces effectively. Use a pencil to mark the screw hole locations. Ensure the bracket is level for a professional look.
Step 5: Drill Pilot Holes and Insert Anchors
If you are mounting to a hard surface like brick or stucco, use a drill with an appropriate masonry bit to create pilot holes at your marked locations. If your kit includes wall anchors, gently tap them into the pilot holes using a hammer or the handle of your screwdriver until they are flush with the surface. These anchors provide a secure base for the screws. If mounting to wood, pilot holes may still be beneficial to prevent splitting.
Step 6: Mount the Bracket
Align the mounting bracket with the pilot holes (and anchors, if used) and secure it firmly to the wall using the provided screws. Ensure the bracket is snug and doesn't move.
Step 7: Insert the Battery and Attach the Doorbell Camera
Once the battery is fully charged, insert it into the doorbell camera according to the manufacturer's instructions. Then, align the doorbell camera with the mounted bracket and slide or snap it into place. Many models have a locking mechanism to secure the camera to the bracket.
Step 8: Connect to Wi-Fi via the App
Open the manufacturer's app on your smartphone. Follow the on-screen prompts to add a new device. The app will typically guide you through a process that involves scanning a QR code displayed on your phone with the doorbell camera, or it may involve putting the camera into a pairing mode. You'll then select your home Wi-Fi network and enter your password.
Step 9: Test the Camera
Once connected, the app should allow you to view a live feed from the camera. Test the motion detection by walking in front of the camera and check if you receive alerts. Press the doorbell button to ensure it registers and sends a notification. Test the two-way audio by speaking through the app and listening for the sound from the camera.
Step 10: Adjust Settings and Finalize
Within the app, you can typically adjust settings such as motion detection sensitivity, notification preferences, video quality, and privacy zones. Familiarize yourself with these options to optimize the camera's performance for your environment.
Congratulations! You've successfully installed your battery-powered doorbell camera. Enjoy the enhanced security and convenience it provides.
Choosing the Right Battery-Powered Doorbell Camera
With the market flooded with options, selecting the best battery-powered doorbell camera can be a challenge. To make an informed decision, consider these key factors that align with your needs and home environment.
Key Features to Prioritize
- Video Quality: Look for at least 1080p HD resolution for clear images. Higher resolutions (like 2K or 4K) offer even more detail but consume more battery and data.
- Field of View: A wider field of view (e.g., 160 degrees or more) ensures you can see more of your porch and any approaching visitors.
- Night Vision: Essential for monitoring your property after dark. Infrared (IR) night vision is standard, but some models offer color night vision for better detail.
- Motion Detection: Advanced motion detection, including customizable zones and person detection, helps reduce false alerts from passing cars or falling leaves.
- Two-Way Audio: Allows you to speak with visitors remotely via your smartphone.
- Battery Life: This is paramount for a battery-powered unit. Check manufacturer estimates and user reviews for real-world performance. Consider if it uses rechargeable or replaceable batteries.
- Durability and Weather Resistance: Ensure the camera has an IP rating (e.g., IP65 or higher) indicating it can withstand various weather conditions like rain, snow, and extreme temperatures.
- Connectivity: Reliable Wi-Fi connectivity is crucial. Some cameras may require a separate Wi-Fi chime or hub for optimal performance.
- Storage Options: Decide between cloud storage (often requires a subscription) or local storage (microSD card). Cloud storage offers convenience and off-site backup, while local storage can be more cost-effective long-term.
- Smart Home Integration: Check compatibility with platforms like Amazon Alexa, Google Assistant, or Apple HomeKit for voice control and integration with other smart devices.
Popular Brands and Models (2025-2026 Insights)
Several brands consistently rank high for their performance, reliability, and features. As of 2025-2026, here are some top contenders:
Ring
Ring offers a wide range of battery-powered models, including the popular Ring Video Doorbell 3 and Ring Video Doorbell 4. They are known for their user-friendly app, extensive ecosystem of smart home devices, and reliable performance. Battery life is generally good, often lasting 6-12 months depending on usage. Their subscription service, Ring Protect, is required for video recording and storage.
Arlo
Arlo is renowned for its high-quality video and robust features. The Arlo Essential Wire-Free Video Doorbell is a strong battery-powered option, offering excellent video clarity and a wide field of view. Arlo cameras often boast impressive battery life, sometimes exceeding a year for less active usage. They also offer cloud storage plans.
Google Nest (formerly Nest Doorbell)
Google's Nest Doorbell (Battery) is a premium option that integrates seamlessly with the Google Home ecosystem. It offers intelligent alerts, including familiar face detection (with a Nest Aware subscription). While its battery life might be slightly less than some competitors due to its advanced AI features, it provides a sophisticated user experience.
Eufy
Eufy is a strong contender for those seeking a balance of features and affordability, often with a focus on local storage. Their battery-powered models, like the Eufy Security 2K Video Doorbell, offer good video quality and impressive battery life, often with no mandatory subscription fees for basic functionality.
Blink
Blink, an Amazon company, offers budget-friendly battery-powered doorbell cameras like the Blink Video Doorbell. They are known for their long battery life (often using AA lithium batteries that can last up to two years) and integration with other Blink devices. While video quality might not be as premium as some higher-end models, they provide solid core functionality.
Making Your Final Choice
Consider your budget, desired features, and existing smart home ecosystem. If you're already invested in Amazon Alexa, Ring or Blink might be ideal. For Google Assistant users, Nest is a natural fit. If local storage and no subscription fees are a priority, Eufy is worth exploring. Arlo offers a premium experience with excellent video quality. Always read recent reviews (2025-2026) to gauge real-world battery performance and reliability.
Wired Alternatives: When Battery Isn't Enough
While battery-powered doorbell cameras are the most straightforward solution for homes without existing doorbell wiring, they aren't the only option. For users who prefer a constant power supply, want to avoid battery maintenance altogether, or have specific installation constraints, alternative wired solutions can be viable. These methods typically involve tapping into a different power source within or near your home.
Option 1: Powering from a Nearby Electrical Outlet
This is the most common wired alternative. If you have an outdoor electrical outlet near your front door, or an indoor outlet that you can discreetly run a low-voltage wire from, you can power your doorbell camera.
How it Works:
You'll need a low-voltage transformer (typically 16-24V AC, similar to what traditional doorbells use) that plugs into the electrical outlet. A low-voltage wire (often 18-gauge or 20-gauge bell wire) is then run from the transformer to the doorbell camera. This wire will need to be connected to the camera's power terminals.
Installation Considerations:
- Wire Routing: This is the most challenging aspect. You'll need to carefully plan how to run the wire from the outlet to the doorbell location. This might involve drilling a small hole through an exterior wall (ensure you know where wires and pipes are!), using existing conduits, or routing the wire along exterior trim with cable clips.
- Transformer Placement: The transformer needs to be plugged into a GFCI-protected outlet, especially if it's outdoors or in a damp location.
- Weatherproofing: All outdoor connections and the transformer itself must be protected from the elements.
- Compatibility: Ensure the transformer's voltage and amperage output are compatible with your chosen doorbell camera. Many cameras designed for battery power can accept a continuous low-voltage feed.
Option 2: Solar Power Integration
Solar-powered doorbell cameras offer a sustainable and low-maintenance approach. While many battery-powered cameras have optional solar panel attachments, some systems are designed with solar as a primary or supplementary power source.
How it Works:
A small solar panel is mounted near the doorbell camera, typically positioned to receive maximum sunlight throughout the day. The solar panel charges an internal battery or a connected battery pack. This stored energy then powers the doorbell camera.
Installation Considerations:
- Sunlight Exposure: The mounting location for the solar panel is critical. It needs unobstructed access to direct sunlight for most of the day. This might limit placement options compared to a purely battery-powered camera.
- Panel Size and Efficiency: The size and efficiency of the solar panel will determine how quickly it can charge the battery, especially in regions with less sunlight or during winter months.
- Weather Resistance: Both the camera and the solar panel must be built to withstand outdoor conditions.
- Supplementary Charging: Even with solar, some systems may have a USB port for occasional manual charging during prolonged periods of low sunlight.
Option 3: Using a Plug-in Power Adapter (Indoor Outlet)
Similar to using a nearby outlet, but specifically for indoor outlets. This method is suitable if you have an indoor electrical outlet close enough to your front door that you can run a wire from.
How it Works:
A plug-in power adapter (often a low-voltage DC adapter) is plugged into an indoor outlet. A wire then runs from the adapter to the doorbell camera. This is often a more straightforward wiring process than using an outdoor outlet, as you might be able to route the wire through a wall or along baseboards.
Installation Considerations:
- Wire Management: Concealing the wire can be a priority for aesthetics. You might need to drill through a wall or use cable raceways.
- Adapter Compatibility: Ensure the adapter's voltage and amperage are correct for the doorbell camera.
- Camera Compatibility: Not all doorbell cameras designed for battery power can be reliably powered by a DC adapter. Check the manufacturer's specifications carefully. Some may have a "wired" mode that optimizes for continuous power.
Choosing the Right Wired Alternative
The best wired alternative depends on your home's layout and your comfort level with DIY electrical work.
- For Simplicity and Existing Outlets: Powering from a nearby electrical outlet (indoor or outdoor) is often the most practical wired solution.
- For Sustainability and Minimal Maintenance: Solar power is an excellent choice, provided you have a sunny mounting location.
- For Indoor-Centric Installations: Using a plug-in adapter from an indoor outlet can simplify the wiring process.
It's crucial to always consult the specific requirements of your chosen doorbell camera model. Some cameras are explicitly designed to work with continuous power, while others might have limitations or require specific adapters. Always prioritize safety and ensure any electrical work is done correctly and in compliance with local building codes.
Installation Guide for Wired Alternatives
Installing a wired doorbell camera without existing doorbell wiring requires more planning and potentially some basic DIY electrical skills. This guide outlines the general steps, focusing on powering from a nearby electrical outlet, which is the most common wired alternative.
Disclaimer: Safety First!
Working with electricity can be dangerous. If you are uncomfortable with any part of this process, it is highly recommended to consult a qualified electrician. Always turn off the power at the circuit breaker before working with any electrical wiring.
What You'll Need
- Your chosen doorbell camera (ensure it supports continuous power or has a compatible adapter)
- Low-voltage transformer (e.g., 16V AC, 24V AC, check camera specs)
- Low-voltage bell wire (18-gauge or 20-gauge, sufficient length)
- Wire strippers
- Screwdriver set
- Drill with appropriate drill bits (masonry, wood)
- Pencil
- Level
- Cable clips or raceways (for neat wire management)
- Wire nuts or Wago connectors
- Electrical tape
- GFCI-protected outlet (essential for outdoor power)
- Smartphone/tablet with the manufacturer's app
Step 1: Plan Your Power Source and Route
Identify a suitable electrical outlet. If using an outdoor outlet, ensure it is GFCI protected. If using an indoor outlet, determine the best path to run the wire to your doorbell location, considering aesthetics and potential obstructions.
Step 2: Turn Off Power
Locate the circuit breaker that controls the outlet you will be using and switch it OFF. Double-check that the outlet is no longer providing power using a voltage tester.
Step 3: Install the Transformer
If the transformer plugs directly into the outlet, simply plug it in. If you are hardwiring the transformer (less common for DIY), follow its specific instructions and ensure all connections are secure and insulated. For outdoor outlets, ensure the transformer and any connections are weather-resistant.
Step 4: Run the Low-Voltage Wire
This is often the most time-consuming step.
- Drilling: If you need to pass the wire through a wall, drill a small hole (just large enough for the wire) from the inside out, or vice versa. Be extremely cautious of existing plumbing and electrical lines within the wall.
- Routing: Use cable clips or raceways to secure the wire neatly along walls, door frames, or under eaves. Avoid running the wire across high-traffic areas where it could be damaged.
- Connecting to Transformer: Strip a small amount of insulation from the ends of the bell wire. Connect one end to the low-voltage terminals on the transformer, ensuring a secure connection. The polarity usually doesn't matter for AC transformers.
Step 5: Mount the Doorbell Camera Bracket
Follow the manufacturer's instructions for mounting the bracket. This will involve marking screw locations, drilling pilot holes, and securing the bracket. Ensure the bracket is positioned to allow the low-voltage wire to connect to the camera.
Step 6: Connect the Wire to the Doorbell Camera
Strip the insulation from the end of the low-voltage wire that will connect to the camera. Connect these wires to the designated power terminals on the back of the doorbell camera. Ensure a firm connection. Some cameras may have screw terminals, while others might use push-in connectors.
Step 7: Attach the Doorbell Camera
Carefully attach the doorbell camera to the mounting bracket.
Step 8: Restore Power and Connect to Wi-Fi
Go back to your circuit breaker and turn the power back ON. Open the manufacturer's app on your smartphone and follow the instructions to connect the doorbell camera to your Wi-Fi network. The camera should power on automatically.
Step 9: Test Functionality
Test the doorbell button, motion detection, and two-way audio through the app. Ensure the video feed is stable and clear.
Step 10: Final Touches and Cable Management
Secure any loose wires, cover drilled holes with sealant or caulk for weatherproofing, and ensure all connections are protected from the elements.
This process requires more effort than battery-powered installation but provides the benefit of continuous power. Always prioritize safety and consult a professional if needed.
Creative Powering Solutions for Doorbell Cameras
Beyond the standard battery-powered and outlet-powered methods, a few creative solutions can ensure your doorbell camera stays operational without traditional wiring. These often involve adapting existing power sources or utilizing renewable energy.
1. Utilizing Existing Low-Voltage Landscape Lighting Transformers
Many homes have low-voltage transformers powering outdoor landscape lights. These transformers typically output 12V or 15V AC, which can sometimes be compatible with doorbell cameras that accept a wide voltage range.
Considerations:
- Voltage Compatibility: Crucially, check your doorbell camera's power requirements. Most doorbell cameras designed for wired installation need 16-24V AC. Using a lower voltage might result in insufficient power or no operation.
- Transformer Capacity: Ensure the landscape lighting transformer has enough capacity (VA rating) to power both the lights and the doorbell camera without overloading.
- Wire Run: You'll need to run a new wire from the landscape transformer to your doorbell location. This might involve trenching or running wires alongside existing low-voltage lines.
- Safety: Always turn off power at the breaker for the landscape lighting circuit before making any connections.
2. Dedicated Plug-in Power Adapters with Extended Cables
While we touched on indoor outlets, some manufacturers or third-party providers offer doorbell cameras with plug-in adapters that come with significantly extended cables (e.g., 25-50 feet).
Considerations:
- Cable Quality: Ensure the cable is durable and rated for outdoor use if it will be exposed to the elements.
- Aesthetics: Running a visible cable, even if long, can be an eyesore. Careful planning with cable clips and raceways is essential.
- Outlet Access: You still need a readily accessible outlet, either indoors or outdoors.
3. Small Solar Kits with Power Banks
For a more DIY approach to solar, you could create a custom setup. This involves a small, efficient solar panel connected to a USB power bank, which then powers the doorbell camera via its USB charging port (if applicable).
Considerations:
- Power Output: The solar panel must be powerful enough to charge the power bank sufficiently to keep the camera running, especially overnight or during cloudy days.
- Weatherproofing: Both the solar panel and the power bank (if placed outdoors) need to be adequately weatherproofed.
- Complexity: This requires more technical know-how than a standard integrated solar solution.
- Camera Compatibility: The doorbell camera must be able to run continuously from a USB power source without needing a full battery charge to operate.
4. Exploring "Wired" Versions of Battery Cameras
Some manufacturers offer "wired" versions of their popular battery-powered doorbell cameras. These cameras are designed to be powered continuously via a wired connection (often using a plug-in adapter or a specific transformer) and may offer slightly faster response times or additional features enabled by constant power.
Considerations:
- Specific Model: You need to ensure you purchase the "wired" variant, as the battery-powered version will not work with continuous power without modification.
- Power Requirements: Always verify the voltage and amperage requirements for the wired version.
Important Safety and Compatibility Notes
- Always Check Manufacturer Specifications: Before attempting any wired installation, meticulously review your doorbell camera's manual and specifications. Ensure it explicitly supports the voltage and type of power source you intend to use. Using an incompatible power source can damage the device and void the warranty.
- Circuit Breaker Safety: Never work on electrical wiring without turning off the power at the circuit breaker. Use a voltage tester to confirm power is off.
- Weatherproofing: Any outdoor electrical connections must be properly weatherproofed to prevent short circuits and damage from moisture.
- Professional Help: If you are unsure about any aspect of electrical wiring or routing, do not hesitate to hire a qualified electrician. Safety should always be your top priority.
These creative solutions offer flexibility for those who cannot use traditional doorbell wiring but still desire the benefits of a continuously powered doorbell camera.
Smart Home Integration and Key Features to Consider
Beyond basic functionality, modern doorbell cameras offer a wealth of smart features and integration capabilities that can significantly enhance your home security and convenience. When choosing a doorbell camera, especially one installed without existing wiring, consider how it fits into your broader smart home ecosystem.
Seamless Smart Home Integration
The ability to connect your doorbell camera with other smart devices can create powerful automation and streamline your daily routines.
- Voice Assistants (Amazon Alexa, Google Assistant): Most major doorbell cameras integrate with popular voice assistants. This allows you to:
- Ask Alexa or Google to "show me the front door" to view the live feed on compatible smart displays (like Echo Show or Google Nest Hub).
- Receive voice alerts when someone is at the door.
- Communicate with visitors using voice commands.
- Smart Locks: Integrate your doorbell camera with smart locks to remotely unlock your door for trusted visitors after verifying their identity via video.
- Smart Lights: Program your outdoor lights to turn on automatically when motion is detected by the doorbell camera, enhancing security and deterring potential intruders.
- Home Automation Platforms (IFTTT, SmartThings): For advanced users, platforms like IFTTT (If This Then That) allow for custom applets and complex automations, such as sending a text message to your phone or triggering a siren when specific conditions are met.
Advanced Features for Enhanced Security and Convenience
Modern doorbell cameras offer features that go far beyond simple video recording:
- Person Detection: This intelligent feature differentiates between people, animals, and vehicles, sending you more relevant alerts and reducing nuisance notifications. Many advanced models released in 2025-2026 offer improved AI for more accurate detection.
- Package Detection: Some cameras can specifically detect when a package is delivered to your doorstep, sending an alert so you know it has arrived and can monitor it.
- Customizable Motion Zones: Define specific areas within the camera's view where you want motion to be detected. This is crucial for eliminating alerts from busy streets or sidewalks while ensuring you capture activity at your door.
- Pre-Roll Recording: This feature records a few seconds of video *before* motion is detected or the button is pressed. This provides crucial context for events, showing what happened just prior to the alert.
- Advanced Night Vision: While standard infrared night vision is common, some cameras offer color night vision, which uses ambient light or small LEDs to provide color images in low-light conditions, offering better detail and facial recognition.
- Two-Way Talk with Noise Cancellation: High-quality microphones and speakers, often with noise cancellation, ensure clear communication with visitors, even in noisy environments.
- Privacy Features: Many manufacturers offer features like configurable privacy zones (blacking out certain areas of the feed) or the ability to disable recording during specific times for added peace of mind.
Subscription Services: What to Expect (2025-2026)
Most smart doorbell cameras, especially those offering cloud storage and advanced AI features, require a subscription service. These services typically offer:
- Cloud Video Storage: Access to recorded video clips stored securely online. Plans usually vary based on the number of cameras covered and the length of storage (e.g., 7 days, 30 days, 60 days).
- Advanced AI Features: Services often unlock features like person detection, package detection, and familiar face recognition.
- Extended Warranty: Some plans include an extended warranty for your devices.
- Professional Monitoring (Less Common for Doorbells): While more common for full security systems, some services might offer optional professional monitoring.
When evaluating doorbell cameras, factor in the ongoing cost of these subscription services. Some brands, like Eufy, differentiate themselves by offering robust functionality with minimal or no mandatory subscription fees, often relying on local storage.
By considering these smart home integration options and advanced features, you can select a doorbell camera that not only solves the "no existing wiring" problem but also significantly elevates your home's security and connectivity.
Troubleshooting Common Installation Issues
Even with the most user-friendly installations, you might encounter a few hiccups. Here’s a guide to troubleshooting common issues encountered when installing a doorbell camera without existing wiring.
Issue 1: Doorbell Camera Won't Connect to Wi-Fi
Possible Causes & Solutions:
- Weak Wi-Fi Signal:
- Solution: Move your Wi-Fi router closer to the doorbell location, or use a Wi-Fi extender or mesh network. Test the signal strength at the mounting location with your phone before installation.
- Incorrect Wi-Fi Password:
- Solution: Double-check that you entered the Wi-Fi password correctly. Passwords are case-sensitive.
- Network Compatibility:
- Solution: Ensure your doorbell camera is connecting to a 2.4GHz Wi-Fi network. Many smart home devices do not support 5GHz networks. If you have a dual-band router, make sure the 2.4GHz band is enabled.
- Router Settings:
- Solution: Some routers have MAC filtering enabled, which only allows specific devices to connect. You may need to temporarily disable this or add the doorbell camera's MAC address to your router's allowed list. Check your router's manual.
- Device Needs Reset:
- Solution: Try resetting the doorbell camera to its factory default settings and restart the setup process.
Issue 2: Battery Drains Too Quickly
Possible Causes & Solutions:
- High Motion Activity:
- Solution: Reduce motion detection sensitivity or adjust motion zones to avoid frequent recordings triggered by passing cars, pedestrians, or trees.
- Frequent Live Viewings:
- Solution: Limit how often you manually access the live stream.
- Weak Wi-Fi Signal:
- Solution: A weak Wi-Fi signal forces the camera to work harder to maintain a connection, consuming more battery. Improve your Wi-Fi signal strength.
- Cold Weather:
- Solution: Battery performance is reduced in cold temperatures. If possible, relocate the camera to a more sheltered spot or consider a wired solution for winter.
- Outdated Firmware:
- Solution: Ensure your doorbell camera's firmware is up to date via the app, as updates often include battery optimization improvements.
- Faulty Battery:
- Solution: If the battery is relatively new and draining exceptionally fast, it might be defective. Contact the manufacturer for a replacement.
Issue 3: Poor Video Quality (Blurry, Grainy, Dark)
Possible Causes & Solutions:
- Dirty Lens:
- Solution: Gently clean the camera lens with a soft, microfiber cloth.
- Low Light Conditions:
- Solution: Ensure night vision is enabled. If the area is very dark, consider adding external lighting.
- Weak Wi-Fi Signal:
- Solution: A poor Wi-Fi connection can lead to dropped frames and lower video quality. Improve your Wi-Fi signal.
- Incorrect App Settings:
- Solution: Check the video quality settings within the app. Ensure it's set to a suitable resolution for your network.
- Camera Placement:
- Solution: Ensure the camera is not directly facing a bright light source (like the sun) which can wash out the image.
Issue 4: No Notifications Received
Possible Causes & Solutions:
- App Notification Settings:
- Solution: Verify that notifications are enabled for the doorbell app in your smartphone's system settings and within the app itself.
- Do Not Disturb Mode:
- Solution: Ensure your smartphone is not in "Do Not Disturb" mode or a similar setting that silences notifications.
- Power Saving Modes:
- Solution: Some aggressive battery-saving modes on smartphones can prevent apps from running in the background and sending notifications. Adjust your phone's power settings for the doorbell app.
- Connectivity Issues:
- Solution: Both the camera and your phone need an internet connection to receive notifications. Check both.
- Subscription Service Issues:
- Solution: If your camera relies on a cloud subscription for alerts, ensure your subscription is active and in good standing.
Issue 5: Wired Alternative Not Powering On
Possible Causes & Solutions:
- Power Turned Off:
- Solution: Ensure the circuit breaker for the outlet is switched ON.
- Loose Connections:
- Solution: Double-check all wire connections to the transformer and the doorbell camera. Ensure they are secure and properly stripped.
- Incorrect Voltage:
- Solution: Verify that the transformer's output voltage matches the doorbell camera's requirements. Use a multimeter to test the transformer's output.
- Faulty Transformer or Wire:
- Solution: Test the transformer's output voltage. If it's correct, the issue might be with the wire run or the doorbell camera itself.
- Camera Not Compatible with Continuous Power:
- Solution: Ensure the specific model of doorbell camera you are using is designed to accept continuous power. Some battery-powered models may not function correctly when wired.
By systematically addressing these common issues, you can ensure your doorbell camera is installed correctly and functions reliably, providing the security and convenience you expect.
Maintenance and Care for Your New Doorbell Camera
To ensure your doorbell camera continues to operate optimally and provides reliable security for years to come, regular maintenance and care are essential. This is particularly true for battery-powered models and those exposed to the elements.
Battery Maintenance (for Battery-Powered Cameras)
- Regular Charging: Keep an eye on battery level indicators within the companion app. Recharge batteries when they reach approximately 10-20% to prevent them from dying completely.
- Battery Rotation: If your camera uses removable batteries, consider having a fully charged spare ready to swap in quickly, minimizing downtime.
- Cleaning Battery Contacts: Periodically (e.g., every 6 months), gently clean the battery contacts on both the battery and inside the camera with a dry cloth or a pencil eraser to ensure a good connection.
- Temperature Considerations: In extreme cold or heat, battery performance can be affected. If possible, bring battery packs inside to charge in a moderate temperature environment.
Cleaning the Camera and Lens
- Exterior Cleaning: Regularly wipe down the exterior of the doorbell camera with a soft, damp cloth to remove dust, dirt, cobwebs, and pollen. Avoid using harsh chemicals or abrasive cleaners, which can damage the casing.
- Lens Cleaning: Use a clean, lint-free microfiber cloth (like those used for eyeglasses or camera lenses) to gently wipe the camera lens. For stubborn smudges, you can lightly dampen the cloth with water or a specialized lens cleaner. Ensure the lens is completely dry before the camera is exposed to rain.
- Microphone and Speaker Grills: Gently clean any debris from the microphone and speaker grills using a soft brush or compressed air to ensure clear audio transmission.
Checking Wi-Fi Connectivity
- Periodic Signal Checks: Occasionally, check the Wi-Fi signal strength in the app. Environmental changes (like new foliage or construction nearby) can sometimes interfere with signals. If the signal weakens, consider repositioning your router or using a Wi-Fi extender.
Software and Firmware Updates
- Enable Automatic Updates: Most manufacturers offer automatic firmware updates. Ensure this feature is enabled in your app settings. These updates often include performance enhancements, bug fixes, and security patches.
- Manual Checks: If automatic updates are not enabled, periodically check for updates manually within the app.
Physical Security and Mounting
- Check Mounting Bracket: Ensure the mounting bracket remains securely fastened to the wall. Vibrations or weather can sometimes loosen screws over time.
- Camera Security: If your camera has a locking mechanism, ensure it's engaged. Some manufacturers offer anti-theft mounts or alarms if the camera is tampered with.
Reviewing Settings and Alerts
- Adjust Sensitivity: As seasons change or your environment evolves, you may need to readjust motion detection sensitivity and zones to maintain optimal performance and reduce false alerts.
- Review Event History: Regularly reviewing your event history can help you identify patterns, potential issues, or simply stay informed about activity around your home.
For Wired Installations
- Inspect Wiring: Periodically check exposed wiring for any signs of damage, fraying, or corrosion, especially if it's routed outdoors.
- Transformer Functionality: Ensure the plug-in transformer is still working correctly and hasn't been dislodged.
- Weatherproofing: Confirm that any outdoor connections or enclosures remain properly sealed against moisture.
By incorporating these simple maintenance practices into your routine, you can significantly extend the lifespan of your doorbell camera, ensure its continuous operation, and maintain the peace of mind that comes with a secure home.
Conclusion: Securing Your Home with Confidence
Installing a doorbell camera without existing doorbell wiring is no longer a barrier to enhanced home security. As we've explored, the advent of advanced battery-powered and adaptable wired solutions makes this upgrade accessible to virtually everyone. Whether you opt for the unparalleled ease of a wire-free, battery-operated model or choose a more customized wired alternative, the benefits are clear: increased awareness of who is at your door, remote communication capabilities, and valuable recorded evidence.
Prioritize your needs—whether it's ultimate convenience, long-term cost savings, or seamless integration with your existing smart home setup. With options ranging from long-lasting batteries and solar power to discreet outlet connections, you can find a power solution that fits your lifestyle and home. Remember to choose a camera with features like high-definition video, robust motion detection, and reliable night vision, and always check for compatibility with your smart home ecosystem.
By following the installation guides, understanding the available options, and performing basic maintenance, you can confidently equip your home with a doorbell camera. This simple yet powerful addition will not only deter potential intruders but also provide invaluable peace of mind, ensuring you're always connected to what matters most at your doorstep. Embrace the future of home security today.