How To Install Camera Doorbell?
Installing a camera doorbell is a straightforward DIY project that significantly enhances home security and convenience. This comprehensive guide will walk you through every step, from choosing the right doorbell to troubleshooting common issues, ensuring you can confidently secure your entryway.
Understanding Camera Doorbells
Camera doorbells, also known as video doorbells, are smart home devices that combine a traditional doorbell with a built-in camera, microphone, and speaker. They offer a revolutionary way to monitor your front door, allowing you to see, hear, and speak to visitors from anywhere via a smartphone app. In 2025, the adoption of smart home security devices, including camera doorbells, continues to surge. Data from Statista indicates that the global smart home market is projected to reach over $200 billion by 2026, with video surveillance devices like doorbells forming a significant segment. This growth is driven by increasing concerns about home security, the desire for convenience, and advancements in smart home technology.
The primary function of a camera doorbell is to provide peace of mind. Whether you're at work, on vacation, or simply in another room of your house, you can receive an alert when someone approaches your door. This allows you to see who is there before deciding whether to answer. Beyond security, they offer convenience, enabling you to direct deliveries, communicate with guests, and deter potential intruders. The integration with other smart home ecosystems, such as Amazon Alexa and Google Assistant, further enhances their utility, allowing for voice control and integration into broader home automation routines.
The technology behind these devices has evolved rapidly. Early models offered basic video feeds, but modern camera doorbells boast high-definition video (1080p or higher), wide-angle lenses for a broader view, infrared night vision for clear visibility in low light, two-way audio for direct communication, and advanced motion detection with customizable zones. Many also offer cloud storage for recorded footage, allowing you to review events even if you missed the live alert. Understanding these features is crucial when selecting the right device for your needs.
Types of Camera Doorbells
Choosing the right camera doorbell depends on your existing home infrastructure and personal preferences. The two primary categories are wired and wireless, each with its own installation process and power source.
Wired Camera Doorbells
Wired camera doorbells leverage your home's existing doorbell wiring. This typically means they connect to the low-voltage transformer that powers your traditional doorbell chime. This type of installation generally offers a more stable power supply and often provides a more robust connection, leading to fewer connectivity issues.
Pros:
- Consistent, reliable power supply.
- No need to worry about battery life.
- Often higher video quality and faster response times due to stable power.
- Typically more advanced features are available due to consistent power.
Cons:
- Installation can be more complex, requiring basic electrical knowledge.
- May require existing doorbell wiring to be in good condition.
- Placement options are limited by existing wiring.
Wireless Camera Doorbells
Wireless camera doorbells, also known as battery-powered doorbells, offer greater flexibility in placement as they don't rely on existing wiring. They are powered by rechargeable or replaceable batteries.
Pros:
- Easy installation, ideal for renters or those without existing doorbell wiring.
- Flexible placement options.
- No need to mess with electrical wiring.
Cons:
- Battery life is a concern; requires regular charging or replacement.
- May experience occasional connectivity issues if Wi-Fi signal is weak.
- Video quality or features might be slightly limited to conserve battery.
Hybrid Options
Some wireless doorbells can be hardwired to supplement battery power, offering the best of both worlds: flexibility with a backup power source. This can extend battery life significantly and ensure continuous operation.
Pre-Installation Checklist
Before you begin the installation process, a thorough checklist ensures a smooth and successful setup. Skipping this step can lead to frustration and delays.
Assess Your Existing Doorbell System (for Wired Installations)
If you're opting for a wired camera doorbell, you'll need to check your current setup. Most wired video doorbells require a transformer that outputs between 16-24 volts AC and at least 10 VA (Volt-Amps). Your existing doorbell transformer might be located in your basement, garage, or near your electrical panel. If it's insufficient, you'll need to replace it with a compatible one. Many DIY guides and manufacturer instructions provide specific voltage requirements.
Checklist Items:
- Locate your existing doorbell transformer.
- Identify its voltage and VA rating.
- Ensure it meets the requirements of your chosen camera doorbell.
- If not, plan to purchase and install a new transformer.
Check Your Wi-Fi Signal Strength
A strong and stable Wi-Fi signal is paramount for both wired and wireless camera doorbells. The doorbell needs to connect to your home network to send alerts and video feeds to your smartphone. Test your Wi-Fi signal strength at the intended installation location. Most modern smartphones have built-in Wi-Fi analyzers, or you can use third-party apps.
Checklist Items:
- Perform a Wi-Fi speed test at the doorbell's mounting location.
- Aim for a download speed of at least 2 Mbps and an upload speed of 1 Mbps for smooth video streaming.
- If the signal is weak, consider a Wi-Fi extender or mesh network system.
Gather Necessary Tools and Materials
Having all the tools ready will prevent interruptions during the installation. The exact tools may vary slightly depending on the doorbell model, but a general list includes:
Essential Tools:
- Screwdriver set (Phillips and flathead)
- Drill with appropriate drill bits (for pilot holes and potentially masonry)
- Wire strippers (for wired installations)
- Wire nuts (for wired installations)
- Level
- Pencil
- Chisel (optional, for recessing wiring)
- Safety glasses
Materials:
- Your chosen camera doorbell and all included mounting hardware
- Compatible doorbell transformer (if replacing)
- Wire extender (if needed for wired connections)
- Caulk or sealant (to seal exterior holes)
Download the Manufacturer's App
Most smart camera doorbells require a dedicated mobile app for setup, configuration, and daily use. Download the app onto your smartphone or tablet before you start the physical installation. This allows you to familiarize yourself with the interface and be ready to connect the device once it's mounted.
Checklist Items:
- Identify the correct app for your doorbell model.
- Download and install it from your device's app store.
- Create an account or log in if you already have one.
Charge Wireless Doorbells
If you have a wireless camera doorbell, ensure the battery is fully charged before installation. This will prevent you from having to remove it immediately after mounting to charge it.
Wired vs. Wireless Installation
The installation process differs significantly between wired and wireless camera doorbells. Understanding these differences will help you choose the method that best suits your home and DIY comfort level.
Wired Installation Overview
Wired installations involve connecting the camera doorbell to your home's existing low-voltage doorbell wiring. This typically requires turning off the power to your doorbell circuit at the breaker box, removing the old doorbell button, and connecting the new device. The power from your transformer will then continuously supply the camera doorbell.
Key Steps:
- Turn off power: Locate your home's electrical panel and switch off the breaker for your doorbell circuit.
- Remove old doorbell: Unscrew and detach your existing doorbell button.
- Connect wires: Connect the wires from your home's system to the terminals on the new camera doorbell.
- Mount the doorbell: Secure the mounting bracket to the wall.
- Attach the doorbell: Snap or screw the camera doorbell onto the bracket.
- Restore power: Turn the breaker back on.
Wireless Installation Overview
Wireless installations are generally simpler and more flexible. The doorbell is powered by a battery pack, and it communicates with your home Wi-Fi network wirelessly. Installation usually involves mounting a bracket and then attaching the doorbell itself. Some wireless models may come with an optional chime that plugs into a wall outlet and connects wirelessly to the doorbell.
Key Steps:
- Charge battery: Ensure the battery is fully charged.
- Mount the bracket: Screw the mounting bracket to the wall at your desired location.
- Attach the doorbell: Secure the doorbell to the bracket.
- Connect to Wi-Fi: Use the manufacturer's app to connect the doorbell to your home Wi-Fi network.
- Optional chime setup: If included, plug in and pair the wireless chime.
Choosing the Right Method
For homeowners with existing, functional doorbell wiring, a wired installation often provides a more reliable and feature-rich experience. It eliminates the need for battery maintenance and ensures a constant power supply. However, if you're a renter, have no existing wiring, or prefer a simpler setup, a wireless doorbell is an excellent choice. The convenience and ease of installation of wireless models are significant advantages. As of 2025, battery technology has improved, offering longer life cycles for wireless doorbells, making them a more viable option than ever before.
Installing a Wired Camera Doorbell
Installing a wired camera doorbell requires a bit more care due to the electrical connections. Always prioritize safety by turning off the power at the breaker. This guide assumes you have existing doorbell wiring. If you don't, you'll need to run new wires, which is a more complex task often requiring professional help.
Step 1: Turn Off Power
Locate your home's electrical panel. Identify the breaker that controls your doorbell circuit. It might be labeled "Doorbell," "Chime," or be part of a general lighting circuit. Flip the breaker to the "OFF" position. To be absolutely sure, you can test your existing doorbell button; it should no longer ring.
Step 2: Remove Existing Doorbell Button
Carefully unscrew your existing doorbell button from the wall. Gently pull it away from the surface. You will see two wires connected to the back of the button. These are the wires that carry the low-voltage current.
Step 3: Disconnect Old Wires and Inspect
Disconnect the wires from the old doorbell button. You may need to unscrew small terminals or pull them out of push connectors. Inspect the wires; they should be in good condition, not frayed or corroded. If they are damaged, you may need to trim them back and strip a small portion of insulation to expose fresh wire.
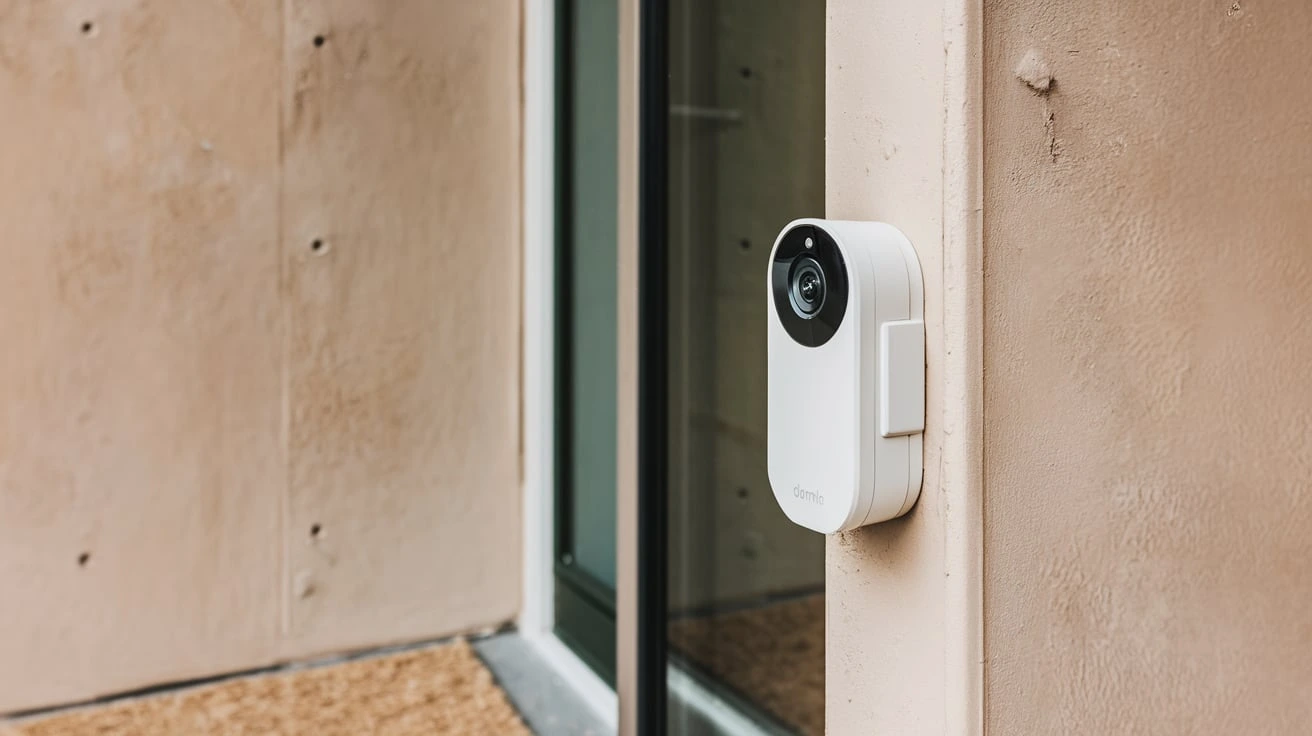
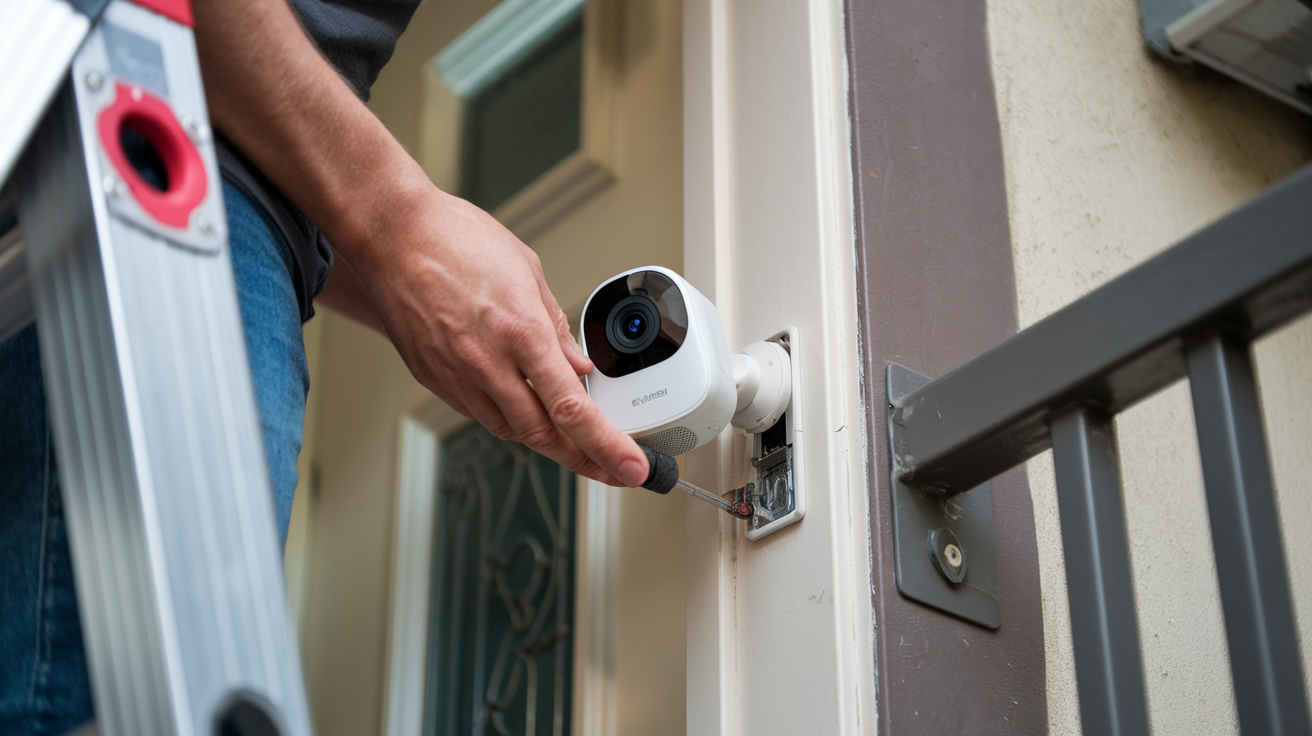
Step 4: Mount the Camera Doorbell Bracket
Most camera doorbells come with a mounting bracket. Position the bracket on the wall where the old doorbell was. Use a level to ensure it's straight. Mark the screw hole locations with a pencil. If you're mounting on brick or stucco, you'll need to drill pilot holes and insert wall anchors. For wood surfaces, pilot holes are usually sufficient.
Tip: Some camera doorbells come with angled mounting plates. These are useful if your door is set back from the main wall, allowing you to adjust the camera's field of view to better capture visitors.
Step 5: Connect the Wires
This is the most critical step. Your camera doorbell will have two terminals on the back or bottom. Take the two wires from your wall and connect them to these terminals. The order of connection typically doesn't matter for most doorbells, but consult your specific model's manual to confirm. You might screw the wires into terminal blocks or use wire nuts. Ensure the connections are secure and that no bare wire is exposed, which could cause a short circuit.
Example Connection:
| Wire from Wall | Terminal on Doorbell |
|---|---|
| Wire 1 | Terminal 1 |
| Wire 2 | Terminal 2 |
Step 6: Mount the Camera Doorbell
Carefully tuck the wires back into the wall cavity. Align the camera doorbell with the mounting bracket and secure it according to the manufacturer's instructions. This usually involves snapping it into place or using small screws.
Step 7: Restore Power and Test
Return to your electrical panel and flip the breaker back to the "ON" position. Your camera doorbell should power up. Follow the manufacturer's instructions in their app to connect the doorbell to your Wi-Fi network and complete the setup.
Installing a Wireless Camera Doorbell
Wireless camera doorbells offer a simpler installation process, making them ideal for a quick upgrade or for those who aren't comfortable with electrical wiring. The primary consideration is battery life and Wi-Fi signal strength.
Step 1: Charge the Battery
Before you begin, ensure the battery for your wireless doorbell is fully charged. Connect it to its charger and leave it until the indicator light shows a full charge. This can take several hours.
Step 2: Download the App and Create Account
As mentioned in the checklist, download the manufacturer's app and create your account. This is where you'll initiate the Wi-Fi connection process.
Step 3: Mount the Bracket
Choose the location for your doorbell. Ensure it's within a good Wi-Fi range. Hold the mounting bracket against the wall and use a level to ensure it's straight. Mark the screw hole locations with a pencil. For most surfaces, you'll drill pilot holes and use the provided screws. If mounting on masonry, use appropriate wall anchors.
Important: Many wireless doorbells come with a wedge or corner mount. These are useful for angling the camera to get a better view of your entryway, especially if the doorbell is mounted on a narrow surface or at an awkward angle.
Step 4: Install the Battery and Attach the Doorbell
Once the bracket is securely mounted, insert the charged battery into the doorbell unit. Then, attach the doorbell to the mounting bracket. This usually involves sliding it into place or securing it with a small security screw.
Step 5: Connect to Wi-Fi
Open the manufacturer's app on your smartphone. Follow the on-screen prompts to add a new device. The app will guide you through connecting the doorbell to your home's Wi-Fi network. This often involves putting the doorbell into pairing mode and entering your Wi-Fi password.
Step 6: Test the Doorbell and Motion Detection
Once connected, test the doorbell by pressing the button. You should receive an alert on your phone, and if you have an indoor chime, it should ring. Walk in front of the camera to test the motion detection and ensure you receive alerts and recordings.
Post-Installation Setup and Testing
The physical installation is only half the battle. Proper setup and thorough testing ensure your camera doorbell functions as intended, providing maximum security and convenience.
Configuring App Settings
Dive into the manufacturer's app to customize your doorbell's settings. This is where you tailor its behavior to your specific needs.
Key Settings to Configure:
- Motion Detection Sensitivity: Adjust how sensitive the motion sensor is. Too high, and you'll get alerts for passing cars or swaying branches; too low, and you might miss important events.
- Motion Zones: Define specific areas within the camera's view where you want motion to be detected. This helps filter out irrelevant activity.
- Notification Preferences: Choose how you want to be alerted – push notifications, email, or both. Set "do not disturb" times if needed.
- Video Quality: Select your preferred video resolution (e.g., 1080p) and frame rate, balancing quality with data usage.
- Night Vision: Ensure infrared night vision is enabled for clear footage after dark.
- Two-Way Audio: Test the microphone and speaker to ensure clear communication.
- Cloud Storage/SD Card: Configure recording settings. Decide whether to use cloud storage (often subscription-based) or a local SD card for saving footage.
Testing All Features
Don't just assume everything works. Systematically test each function:
- Doorbell Ring: Have someone ring the doorbell from the outside while you are inside with your phone. Verify you receive the alert and can see and hear the visitor.
- Two-Way Talk: Engage in a conversation with the person at the door using the app. Check audio clarity in both directions.
- Motion Detection: Walk in front of the camera at different distances and speeds. Confirm that you receive motion alerts and that recordings are captured.
- Night Vision: After dark, test the camera's ability to see clearly in low light conditions.
- Live View: Access the live stream from your app at various times to ensure a stable connection.
- Recording Playback: Review recorded events from both doorbell presses and motion detection to ensure the footage is clear and accessible.
Integrating with Smart Home Ecosystems
If your camera doorbell supports integration with platforms like Amazon Alexa or Google Assistant, set this up now. This allows for voice control (e.g., "Alexa, show me the front door") and inclusion in smart home routines.
Example Integration:
- Alexa: Link your doorbell account to Alexa. You can then ask Alexa to show the doorbell feed on compatible Echo Show devices or announce when someone is at the door.
- Google Assistant: Connect your doorbell to Google Home. You can view the feed on Nest Hub devices and receive announcements.
Firmware Updates
Manufacturers frequently release firmware updates to improve performance, add new features, and patch security vulnerabilities. Check the app for any available updates and install them promptly. Keeping your device updated is crucial for optimal security and functionality.
Troubleshooting Common Issues
Even with careful installation, you might encounter issues. Here are common problems and their solutions.
Issue: Doorbell Not Powering On (Wired)
Possible Causes:
- Power breaker is still off.
- Incorrect wiring connections.
- Faulty transformer.
- Doorbell itself is defective.
Solutions:
- Double-check the circuit breaker is ON.
- Verify all wire connections are secure and correct according to the manual.
- Test the transformer's output voltage with a multimeter. If it's below the required range (e.g., below 16V AC), it needs replacement.
- Contact the manufacturer for a replacement if the doorbell is suspected to be faulty.
Issue: Poor Wi-Fi Connection or Frequent Disconnects
Possible Causes:
- Weak Wi-Fi signal at the doorbell's location.
- Router is too far away or obstructed.
- Interference from other devices (microwaves, cordless phones).
- Outdated router firmware.
- Doorbell firmware needs updating.
Solutions:
- Move your Wi-Fi router closer to the doorbell, or vice-versa, if possible.
- Consider installing a Wi-Fi extender or a mesh Wi-Fi system.
- Ensure the doorbell is not placed near sources of interference.
- Update your router's firmware.
- Check for and install any available firmware updates for the doorbell via its app.
- If wireless, ensure the battery is sufficiently charged, as low battery can sometimes impact connectivity.
Issue: No Motion Alerts or Notifications
Possible Causes:
- Motion detection is turned off in the app.
- Sensitivity is set too low.
- Motion zones are not configured correctly.
- App notification settings are disabled on your phone.
- Doorbells with battery power may have specific motion detection limitations to save battery.
Solutions:
- Verify motion detection is enabled in the doorbell's app settings.
- Adjust the sensitivity level upwards.
- Redefine your motion zones to cover the desired areas.
- Check your smartphone's notification settings to ensure the doorbell app has permission to send notifications.
- For battery-powered models, review the battery status and charging schedule.
Issue: Poor Video Quality (Blurry, Grainy)
Possible Causes:
- Low light conditions without adequate night vision.
- Dirty camera lens.
- Insufficient Wi-Fi bandwidth.
- Incorrect video quality settings.
Solutions:
- Ensure night vision is enabled and functioning correctly.
- Clean the camera lens gently with a soft, microfiber cloth.
- Check your internet upload speed. If it's consistently low, it can affect video quality.
- Adjust video quality settings in the app, balancing quality with available bandwidth.
Issue: Two-Way Audio Not Working
Possible Causes:
- Microphone or speaker muted in the app.
- App permissions for microphone access are denied on your phone.
- Poor Wi-Fi connection affecting real-time audio.
Solutions:
- Ensure the microphone and speaker are unmuted within the app.
- Grant microphone access permissions to the doorbell app in your phone's settings.
- Test audio quality with a stable Wi-Fi connection.
Advanced Considerations
Beyond basic installation and setup, several advanced aspects can further enhance your camera doorbell experience and address specific home security needs.
Powering Options and Upgrades
For wired installations, ensuring you have the correct transformer is key. As of 2025, many modern video doorbells recommend transformers with at least 16-24V AC and 30VA to ensure consistent power for high-resolution video and features like Wi-Fi connectivity. If your existing transformer is older or underpowered, upgrading it is a worthwhile investment. This involves turning off power at the breaker, disconnecting the old transformer (usually found near your electrical panel or furnace), and wiring in the new one. Always follow electrical safety guidelines or hire an electrician if you're unsure.
For wireless doorbells, battery management is crucial. Consider purchasing a spare battery pack so you can swap it out quickly when one needs charging, minimizing downtime. Some users also opt to hardwire their wireless doorbells if existing wiring is present, using it as a trickle charge to extend battery life significantly.
Chime Compatibility
If you're installing a wired camera doorbell, it will typically use your existing mechanical or digital chime. However, some older mechanical chimes might not be compatible with the power draw of modern video doorbells, leading to a weak or no sound. Many manufacturers provide a small adapter or bypass module that connects to your chime to regulate power. For wireless doorbells, an optional wireless chime that plugs into an outlet is often available, providing an audible alert inside the house without relying on existing wiring.
Storage Solutions: Cloud vs. Local
Cloud Storage: Most camera doorbells offer cloud storage plans, usually on a subscription basis. This stores your recorded footage on remote servers.
- Pros: Accessible from anywhere, data is safe even if the doorbell is stolen or damaged, often includes advanced features like AI person detection.
- Cons: Ongoing subscription costs, requires a stable internet connection, potential privacy concerns for some users.
Local Storage: Some doorbells support microSD cards for local storage.
- Pros: No recurring fees, greater control over your data.
- Cons: Limited storage capacity (requires periodic clearing or larger cards), footage is lost if the doorbell is stolen or damaged, access may be limited when away from home.
The choice depends on your budget, privacy preferences, and how you intend to access recordings. As of 2025, subscription costs for cloud storage typically range from $3 to $10 per month per device, with tiered plans offering more storage and features.
Advanced Features and AI Integration
The smart home landscape is rapidly evolving, and camera doorbells are at the forefront. In 2025 and beyond, expect more sophisticated features:
- AI-Powered Person Detection: Differentiates between people, pets, vehicles, and general motion, reducing false alerts.
- Package Detection: Specifically alerts you when a package is delivered or removed from your doorstep.
- Facial Recognition: Some advanced models can recognize familiar faces and notify you accordingly.
- Integration with Smart Locks: Allows you to remotely unlock the door for trusted visitors.
- Two-Way Talk Enhancements: Features like noise cancellation and clearer audio transmission.
When choosing a doorbell, consider which of these advanced features are most important to you and your household's security needs.
Legal and Privacy Considerations
Be mindful of local laws and privacy regulations regarding video surveillance. Ensure your camera's field of view does not inadvertently capture public areas or neighboring properties without consent, as this could lead to legal issues. Clearly visible signage indicating that the area is under video surveillance can also be beneficial.
In conclusion, installing a camera doorbell is an accessible and highly beneficial upgrade for any home. By following these detailed steps, from understanding your options to performing a thorough installation and post-setup, you can significantly enhance your home's security and convenience. Whether you choose a wired or wireless model, the peace of mind and control offered by a video doorbell are invaluable in today's world. Invest the time to do it right, and enjoy a more secure and connected home.