Choosing the best DIY home security system in 2025-26 involves balancing affordability, advanced features, and ease of installation. This guide will help you navigate the options, understand key components, and select a system that offers robust protection without professional installation fees, empowering you to secure your home effectively.
Understanding DIY Home Security Systems
The landscape of home security has dramatically shifted, with DIY (Do-It-Yourself) systems emerging as a powerful and accessible alternative to traditional professionally installed and monitored setups. In 2025-26, DIY security systems offer a compelling blend of cutting-edge technology, user-friendly interfaces, and significant cost savings, making robust home protection achievable for a wider audience. Unlike their predecessors, these systems are designed for straightforward self-installation, often requiring no more than a smartphone and a few basic tools. This empowers homeowners to take direct control over their security, choosing components that best suit their needs and budget, and avoiding the recurring monthly fees associated with professional monitoring in many cases.
The core appeal of DIY security lies in its flexibility and affordability. You purchase the hardware upfront, and while optional professional monitoring plans are often available, many systems offer self-monitoring through mobile apps, sending alerts directly to your smartphone. This model has democratized access to advanced security features, including smart sensors, high-definition cameras with AI detection, and seamless integration with other smart home devices. As crime statistics continue to evolve, with reports from the FBI indicating a persistent need for vigilance, DIY systems provide an effective and proactive solution for homeowners seeking peace of mind.
Furthermore, the evolution of wireless technology and cloud-based platforms has made these systems more reliable and easier to manage than ever before. From simple alarm systems to comprehensive smart home hubs that control lighting, locks, and thermostats alongside security, the options are vast. This guide aims to demystify the world of DIY home security, helping you identify the best system to meet your specific needs and budget in the current market.
Key Components of a DIY System
A robust DIY home security system is typically comprised of several interconnected components, each playing a vital role in safeguarding your property. Understanding these individual parts is crucial for selecting a system that offers comprehensive coverage and meets your unique security requirements. In 2025-26, the sophistication and integration of these components have reached new heights, offering enhanced functionality and user experience.
The Central Hub or Base Station
This is the brain of your DIY security system. The hub connects wirelessly to all your sensors and devices, processes their signals, and communicates with you and any optional monitoring service. It typically connects to your home's Wi-Fi network and may also have a cellular backup for uninterrupted connectivity, even if your internet goes down. Modern hubs often include built-in sirens to deter intruders.
Door and Window Sensors
These are small, two-piece magnetic sensors. When a door or window is opened, the magnetic connection is broken, triggering an alert. They are essential for detecting unauthorized entry at the perimeter of your home. Placement is key – ensure they are properly aligned when the door or window is closed.
Motion Detectors
Motion detectors use infrared technology to sense body heat and movement within a specific area. They are ideal for covering larger rooms or hallways. Many advanced motion detectors in 2025-26 include pet-friendly features to avoid false alarms from animals weighing under a certain threshold (e.g., 40-80 lbs). Some also incorporate "smart" detection algorithms to differentiate between human and other heat sources.
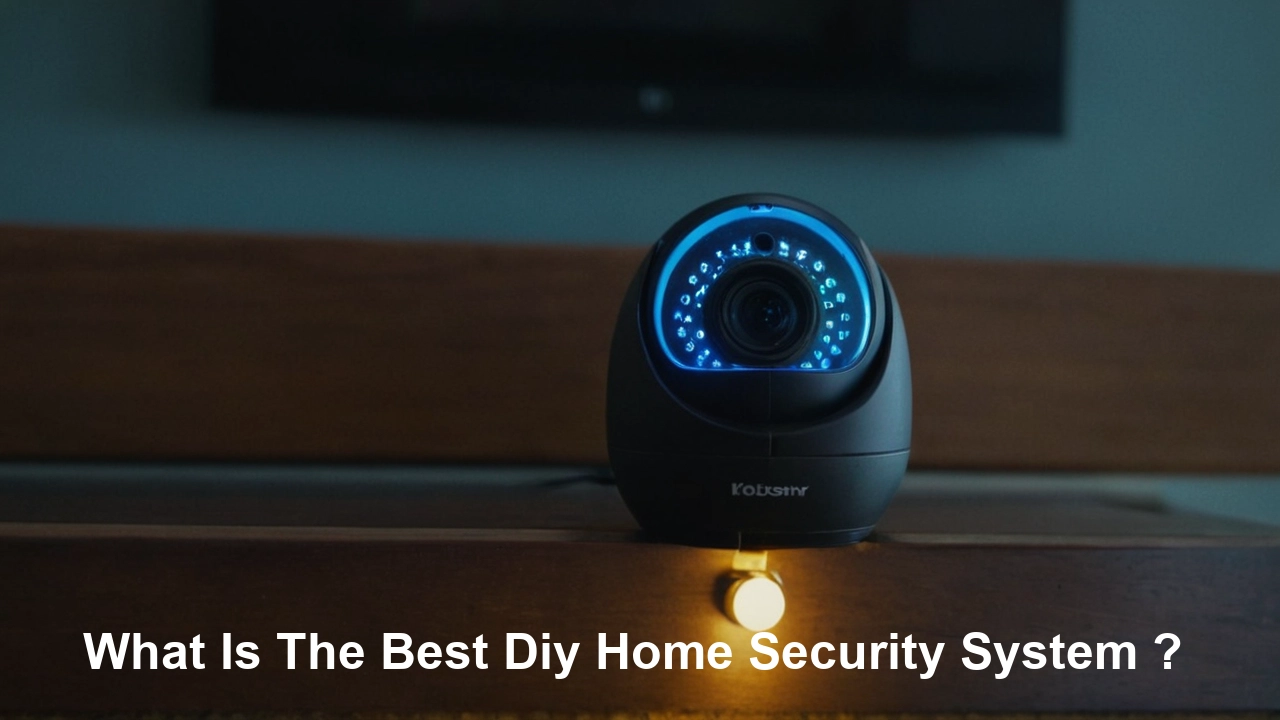
Security Cameras (Indoor and Outdoor)
Cameras are crucial for visual verification and evidence. DIY systems offer a range of options, from simple indoor cameras for monitoring pets or children to robust outdoor cameras with weatherproofing, night vision, and motion-activated recording. High-definition (1080p or higher) resolution, wide-angle lenses, and two-way audio are common features. Advanced AI capabilities for person detection, package detection, and facial recognition are becoming increasingly standard, reducing unnecessary alerts.
Smart Keypad or Control Panel
While many DIY systems are controlled via smartphone apps, a physical keypad or touch-screen panel provides an alternative way to arm and disarm the system, especially for guests or family members who may not have the app. Some keypads also include panic buttons for immediate emergency alerts.
Environmental Sensors
Beyond intrusion detection, many DIY systems offer sensors to protect against environmental hazards. These include:
- Smoke and Carbon Monoxide Detectors: Integrated smart detectors that alert you to fire or dangerous gas levels, often sending notifications to your phone even when you're away.
- Water Leak Sensors: Placed near water heaters, washing machines, or under sinks, these detect moisture and can prevent significant water damage.
- Temperature Sensors: Useful for monitoring extreme temperature fluctuations that could damage sensitive equipment or pipes.
Smart Locks and Doorbells
These components enhance convenience and security. Smart locks allow you to remotely lock/unlock doors, grant temporary access codes, and receive notifications when doors are opened. Smart video doorbells combine a camera, microphone, and speaker, allowing you to see, hear, and speak to visitors from anywhere via your smartphone, and often trigger recording upon motion detection.
Yard Signs and Window Stickers
While seemingly simple, these are powerful deterrents. Visible signs indicating a security system is in place can discourage potential intruders from targeting your home. They are a low-cost, high-impact addition to any security setup.
Top DIY Home Security Systems for 2025-26
The DIY home security market in 2025-26 is vibrant, offering a range of solutions from basic alarm kits to comprehensive smart home security ecosystems. When selecting the "best" system, it's crucial to consider your specific needs, budget, and desired level of integration. Here’s a look at some of the leading contenders, highlighting their strengths and ideal use cases.
System A: The All-Rounder - Ring Alarm Pro
Ring, now owned by Amazon, continues to be a dominant force in the DIY security space. The Ring Alarm Pro is a standout option for its seamless integration with the broader Ring ecosystem (cameras, doorbells, lights) and its unique inclusion of Eero Wi-Fi 6 mesh router technology. This means the base station not only powers your security system but also enhances your home's Wi-Fi network, providing a more stable connection for all your smart devices, including security cameras.
- Key Features: Built-in Eero Wi-Fi 6 router, cellular backup, battery backup, loud siren, Z-Wave and Alexa integration, wide range of sensors and cameras.
- Pros: Excellent smart home integration (especially with Alexa), robust camera options, reliable performance, the added benefit of Wi-Fi enhancement.
- Cons: Professional monitoring requires a subscription (Ring Protect Pro), some users might find the app interface busy with multiple Ring devices.
- Best For: Users already invested in or planning to build a comprehensive Amazon/Ring smart home ecosystem, those seeking enhanced Wi-Fi coverage.
System B: The Smart Home Hub - SimpliSafe
SimpliSafe has long been a favorite for its user-friendly design and strong emphasis on security. Their systems are known for their straightforward setup and reliable performance. The SimpliSafe system is highly modular, allowing users to customize their kit with a variety of sensors, cameras, and even environmental detectors. They offer both self-monitoring and optional 24/7 professional monitoring with fast response times.
- Key Features: Easy setup, wireless components, customizable kits, optional professional monitoring with no long-term contracts, motion sensors, glass break sensors, water/temperature sensors.
- Pros: Extremely easy to install and use, highly reliable, good range of sensors, flexible monitoring plans.
- Cons: Camera quality is good but not always class-leading compared to dedicated camera brands, limited smart home integration outside of their own ecosystem.
- Best For: Individuals and families prioritizing ease of use, reliability, and a straightforward security solution without complex smart home integrations.
System C: The Feature-Rich Contender - Abode
Abode positions itself as a premium DIY security solution, offering robust features and extensive smart home compatibility. Their systems support multiple protocols (Wi-Fi, Z-Wave, Zigbee, HomeKit) allowing for broad integration with a wide array of smart devices from various manufacturers. Abode offers tiered monitoring plans, including a pay-as-you-go option for short-term professional monitoring, which is unique in the market.
- Key Features: HomeKit compatibility, Z-Wave and Zigbee support, cellular and battery backup, built-in siren, wide range of sensors, optional professional monitoring with flexible plans.
- Pros: Excellent smart home compatibility, advanced automation possibilities, flexible monitoring options, sleek design.
- Cons: Can be slightly more complex to set up for absolute beginners due to its extensive features, camera quality is good but may not match dedicated security camera brands.
- Best For: Smart home enthusiasts looking for deep integration capabilities, users who want a highly customizable and versatile system.
System D: The Budget-Friendly Option - Wyze Home Monitoring
Wyze has made a name for itself by offering incredibly affordable smart home devices, and their home monitoring system is no exception. While the hardware is budget-friendly, it doesn't skimp on core security functions. The system is designed for simplicity and integrates with Wyze's popular range of cameras and other smart home products.
- Key Features: Very affordable hardware, optional low-cost professional monitoring, integrates with Wyze cameras and smart plugs, motion sensors, door/window sensors.
- Pros: Extremely cost-effective, easy to expand with other Wyze devices, reliable basic security functions.
- Cons: Limited range of specialized sensors compared to premium brands, professional monitoring response times can vary, app experience can sometimes feel less polished.
- Best For: Budget-conscious individuals and families, renters, or those looking for a basic, reliable security system to complement existing Wyze devices.
Comparison Table: Top DIY Systems 2025-26
| Feature | Ring Alarm Pro | SimpliSafe | Abode | Wyze Home Monitoring |
|---|---|---|---|---|
| Ease of Installation | Very Easy | Very Easy | Easy to Moderate | Very Easy |
| Smart Home Integration | Excellent (Alexa) | Basic | Excellent (HomeKit, Z-Wave, Zigbee) | Good (Wyze Ecosystem) |
| Professional Monitoring | Optional (Subscription) | Optional (No Contracts) | Optional (Flexible Plans) | Optional (Low Cost) |
| Camera Quality | Very Good | Good | Good | Good |
| Unique Features | Built-in Eero Wi-Fi 6 | No Contracts | Multi-Protocol Support, Pay-as-you-go Monitoring | Exceptional Value |
Factors to Consider When Choosing Your System
Selecting the "best" DIY home security system is a highly personal decision, dependent on your unique circumstances and priorities. In 2025-26, the sheer variety of options means careful consideration of several key factors will lead you to the most suitable solution. Overlooking these can lead to dissatisfaction or a system that doesn't quite meet your needs.
Your Budget
DIY systems offer significant cost savings, but the upfront hardware investment can vary widely. Determine how much you're willing to spend on the initial kit and any additional sensors or cameras you might need. Also, consider ongoing costs: will you opt for professional monitoring, and what are the monthly fees? Some systems offer cloud storage for camera footage, which may also incur a subscription fee. Compare the total cost of ownership over 2-3 years.
Installation Complexity
While all DIY systems are designed for self-installation, the complexity can differ. Some systems use simple peel-and-stick adhesives and plug-and-play components, making them ideal for renters or those less technically inclined. Others might require more involved setup, such as mounting cameras with screws or configuring advanced network settings. Read reviews and watch installation videos to gauge the difficulty level.
Monitoring Options
This is a critical decision. Do you want to self-monitor, receiving alerts on your phone and deciding how to respond? Or do you prefer the peace of mind that comes with 24/7 professional monitoring, where a central station dispatches emergency services if an alarm is triggered? Many systems offer both options, with varying subscription costs and contract lengths. Consider your comfort level with managing alerts and the potential need for immediate professional response.
Smart Home Integration Capabilities
If you already have or plan to build a smart home ecosystem, compatibility is key. Does the security system integrate with your existing smart assistants (like Alexa or Google Assistant), smart lights, locks, or thermostats? Systems like Abode and Ring Alarm Pro excel in this area, offering broad compatibility. If your primary concern is security and you have minimal other smart devices, this might be a less critical factor.
Coverage Area and Sensor Needs
Walk through your home and identify key areas that need protection. Consider all entry points (doors, windows), high-traffic areas (hallways, living rooms), and any vulnerable spots (basement windows, detached garages). This will help you determine the number and type of sensors (door/window, motion, glass break) and cameras you'll need. Don't forget environmental sensors like smoke, CO, and water leak detectors if they are important to you.
Camera Features
If cameras are a priority, consider the required resolution (1080p is standard, 2K or 4K offer more detail), field of view, night vision capabilities (infrared or color night vision), two-way audio, and whether they are indoor or outdoor rated. Advanced features like person detection, package detection, and activity zones can significantly reduce false alarms and provide more relevant notifications. Storage options (local SD card vs. cloud subscription) are also important.
Mobile App Experience
You'll likely interact with your system primarily through its mobile app. The app should be intuitive, reliable, and provide easy access to arm/disarm the system, view camera feeds, check sensor status, and manage notifications. Look for apps with good user reviews regarding stability and ease of navigation.
Scalability and Expandability
Will the system grow with your needs? Can you easily add more sensors, cameras, or other devices later on? Most DIY systems are designed to be modular, allowing you to expand your setup as your security requirements evolve or your budget allows.
Customer Support and Warranty
Even with DIY systems, good customer support can be invaluable, especially during installation or if you encounter technical issues. Check the warranty period offered on the hardware and the availability of support channels (phone, chat, email).
DIY Installation and Setup: A Step-by-Step Guide
Installing a DIY home security system is designed to be manageable for most homeowners. While specific instructions vary by brand, the general process follows a logical sequence. Following these steps diligently will ensure your system is set up correctly and functions reliably, providing the peace of mind you expect.
Step 1: Plan Your System Layout
Before you unbox anything, map out your home. Identify all potential entry points (doors, windows on the ground floor and accessible upper floors), high-traffic areas, and any specific zones you want to monitor. Decide where you want to place your base station (ideally centrally located, near your router, and out of sight but accessible), keypads, and cameras. Consider the range of your wireless sensors and the power source for cameras.
Step 2: Unpack and Inventory
Carefully unpack all components. Check them against the packing list to ensure everything is present and undamaged. Familiarize yourself with each piece: the base station, sensors, keypad, cameras, and any included accessories (mounting hardware, power adapters).
Step 3: Install the Base Station
Place the base station in its intended location. Connect it to your home's router using an Ethernet cable (if applicable) or ensure it's within good Wi-Fi range. Plug in the power adapter. If your system has cellular backup, follow the instructions to activate it. Many systems will have a status light or app prompt to confirm connectivity.
Step 4: Download the Mobile App and Create an Account
Most DIY systems are managed via a smartphone app. Download the official app for your chosen system from your device's app store (iOS or Android). Follow the on-screen prompts to create an account and link your base station to your account. This usually involves scanning a QR code on the base station or entering a serial number.
Step 5: Install and Pair Sensors
This is often the most hands-on part. For door and window sensors:
- Clean the surface where the sensor will be mounted.
- Attach one part of the sensor to the door/window and the other part to the frame, ensuring they are aligned and close together when the door/window is closed (usually within 1 inch). Most use strong adhesive strips, but some may offer screw mounts for added security.
- For motion sensors: Mount them in corners of rooms or hallways, typically 6-8 feet high, facing common pathways. Ensure they are not pointed directly at heat sources (like vents or windows with direct sunlight) to avoid false alarms.
Pairing: Once physically installed, each sensor needs to be paired with the base station. This is usually done through the mobile app. The app will guide you through putting the base station into pairing mode and then activating each sensor (often by pulling a battery tab or pressing a button). The app will confirm successful pairing and allow you to name each sensor (e.g., "Front Door Sensor," "Living Room Motion").
Step 6: Install and Configure Cameras
For indoor cameras, place them in desired locations and plug them in. For outdoor cameras, you may need to mount them using provided hardware. Ensure they have a clear view of the area you want to monitor and are within range of your Wi-Fi signal. Follow the app's instructions to connect each camera to your Wi-Fi network and pair it with your system. Configure settings like motion detection zones, recording schedules, and notification preferences.
Step 7: Set Up Keypads and Other Devices
If your system includes a keypad, mount it near a main entry point. Follow the app's instructions to pair it with the base station. Install any other components like smoke detectors, water sensors, or smart locks according to their specific instructions.
Step 8: Test Your System Thoroughly
This is a crucial step often overlooked. Arm your system (in test mode if available, or at a low sensitivity) and then deliberately trigger each sensor. Open doors and windows, walk in front of motion detectors, and check that the base station registers the event and that you receive notifications on your app. Test your cameras to ensure they are recording and streaming live video. If you have professional monitoring, inform them you are testing your system.
Step 9: Customize Settings and Notifications
Go through the app settings to customize your preferences. Set up entry and exit delays, arming/disarming schedules, notification preferences (which events trigger alerts and how you receive them), and user access codes for family members or trusted individuals.
Step 10: Review and Refine
After a few days of use, review your system's performance. Are there any false alarms? Are there any blind spots? Do you need to adjust sensor sensitivity or camera placement? DIY security is an iterative process; don't hesitate to make adjustments to optimize your protection.
Leveraging Advanced Features and Smart Home Integrations
The true power of modern DIY home security systems in 2025-26 extends far beyond simple intrusion detection. Advanced features and seamless integration with the broader smart home ecosystem transform your security system into a central hub for convenience, automation, and enhanced safety. Understanding and utilizing these capabilities can significantly elevate your home's security and your quality of life.
AI-Powered Video Analytics
Security cameras have evolved dramatically. Many DIY systems now incorporate Artificial Intelligence (AI) to intelligently analyze video feeds. This includes:
- Person Detection: Differentiates between people, animals, and vehicles, sending alerts only when a person is detected, drastically reducing nuisance notifications.
- Package Detection: Notifies you when a package is delivered to your doorstep, adding a layer of convenience and security for deliveries.
- Facial Recognition: Some high-end systems can recognize familiar faces, allowing you to distinguish between family members and strangers.
- Activity Zones: Allows you to define specific areas within a camera's view where motion detection should be active, ignoring activity elsewhere.
These AI features mean your cameras are not just recording; they are actively understanding and interpreting events, providing more relevant information and fewer false alarms.
Smart Home Automation and Routines
The real magic happens when your security system talks to your other smart devices. This is achieved through integrations with platforms like Amazon Alexa, Google Assistant, Apple HomeKit, and through automation protocols like Z-Wave and Zigbee.
- "Goodnight" Scene: With a single voice command or tap in an app, you can arm your system in "Stay" mode, turn off lights, lock doors, and adjust the thermostat.
- "Away" Mode Activation: When you leave, the system can automatically arm itself, turn off all lights, and ensure all doors are locked.
- Triggered Automations: For example, if a smoke detector is triggered, the system can automatically turn on all lights to help with evacuation, unlock doors for easier escape, and send alerts to emergency contacts.
- Conditional Actions: If a motion sensor detects movement outside after 11 PM, the outdoor lights can turn on, and a notification can be sent to your phone.
These automations create a more responsive and intelligent home environment, enhancing both convenience and security.
Voice Control and Virtual Assistants
Most modern DIY systems integrate with popular voice assistants. This allows you to:
- Arm or disarm your system (often requiring a voice PIN for disarming).
- Check the status of sensors.
- View live feeds from your security cameras.
- Control integrated smart locks and lights.
This hands-free control adds a significant layer of convenience, especially when your hands are full.
Geofencing Capabilities
Some systems offer geofencing, which uses your smartphone's location to automatically arm or disarm your system when you leave or arrive home. For instance, when your phone leaves a predefined radius around your home, the system can automatically arm itself in "Away" mode. When your phone enters the radius upon your return, it can disarm the system or switch to "Home" mode.
Advanced Sensor Types
Beyond basic door/window and motion sensors, advanced DIY systems offer:
- Glass Break Sensors: Detect the specific sound frequency of breaking glass, providing an earlier alert than motion sensors might.
- Water Leak and Freeze Sensors: Crucial for preventing costly damage from burst pipes or leaks, especially in basements, laundry rooms, or near water heaters.
- Temperature Sensors: Monitor for extreme heat or cold, useful for protecting sensitive equipment or preventing pipe bursts.
- Smoke and CO Detectors: Smart versions that integrate with your security system, sending mobile alerts and potentially triggering sirens or other actions.
Cellular Backup and Battery Power
Reliability is paramount. Most reputable DIY systems include battery backup for the base station (lasting several hours) and optional cellular backup. Cellular backup ensures your system can still communicate with you or a monitoring center even if your home internet connection is down or power is out. This is a critical feature for uninterrupted security.
Two-Way Audio
Many security cameras and video doorbells feature two-way audio. This allows you to not only see and hear visitors but also to speak to them remotely via your smartphone app. This is useful for greeting guests, instructing delivery personnel, or even deterring potential intruders by letting them know they've been seen and heard.
Cost Analysis and Long-Term Value of DIY Systems
One of the primary drivers for choosing a DIY home security system is its cost-effectiveness compared to traditional professionally installed and monitored solutions. In 2025-26, the value proposition of DIY systems is stronger than ever, offering a sophisticated blend of features at a significantly lower overall cost, especially over the long term.
Upfront Hardware Costs
The initial investment for a DIY system typically involves purchasing the base station, sensors, cameras, and keypads. These costs can range from around $150-$300 for a basic starter kit (e.g., Wyze, Ring Alarm) to $300-$600 or more for more comprehensive kits with multiple cameras and advanced sensors (e.g., higher-end Ring, SimpliSafe, Abode packages). While this is a tangible expense, it's a one-time purchase for the hardware itself.
Professional Monitoring Fees (Optional)
This is where DIY systems truly shine. Many DIY systems offer optional 24/7 professional monitoring for a monthly fee, which is generally much lower than traditional services. These fees can range from $10 to $30 per month. For example, Ring Protect Pro might cost around $20/month, while SimpliSafe's top-tier plan is similar. This is significantly less than the $40-$60+ per month often charged by legacy security companies.
Self-Monitoring vs. Professional Monitoring
If you opt for self-monitoring, the ongoing cost can be as low as $0 per month, beyond the initial hardware purchase. You receive alerts directly on your smartphone and are responsible for assessing the situation and contacting emergency services if necessary. This is ideal for those who are comfortable managing their own security and want to minimize recurring expenses. Professional monitoring offers the added peace of mind that trained personnel will respond to alarms, dispatching police, fire, or medical services as needed.
Cloud Storage and Subscription Services
Many DIY security cameras require a subscription for cloud storage of video footage. These plans typically start around $3-$10 per month per camera or offer tiered plans for multiple cameras. For instance, Ring Protect Plus offers unlimited cameras for one location for about $20/month. While this is an additional cost, it's often bundled with other benefits like professional monitoring and extended warranties.
Long-Term Cost Comparison (Illustrative Example)
Let's consider a hypothetical scenario over 3 years (36 months):
- Traditional Professionally Installed System:
- Upfront Installation Fee: $0 - $300
- Monthly Monitoring Fee: $50
- Total over 3 years: ($50/month * 36 months) + $150 (average install fee) = $1,800 + $150 = $1,950
- DIY System with Professional Monitoring:
- Upfront Hardware Cost: $300
- Monthly Monitoring Fee: $20
- Monthly Cloud Storage (2 cameras): $10
- Total over 3 years: $300 (hardware) + ($30/month * 36 months) = $300 + $1,080 = $1,380
- DIY System with Self-Monitoring:
- Upfront Hardware Cost: $300
- Monthly Cloud Storage (2 cameras): $10
- Total over 3 years: $300 (hardware) + ($10/month * 36 months) = $300 + $360 = $660
As this example illustrates, even with professional monitoring, a DIY system can be significantly cheaper over three years than a traditional system. The savings are even more substantial with self-monitoring.
Added Value Beyond Security
Many DIY systems are part of larger smart home ecosystems. Features like integrated Wi-Fi routers (Ring Alarm Pro), smart home automation capabilities (Abode), and the ability to control lights, locks, and thermostats add convenience and value that extend beyond basic security. These integrated systems can sometimes reduce the need for separate smart home hubs, further consolidating costs and simplifying management.
Resale Value
A well-installed and maintained DIY security system can be a selling point for your home, potentially increasing its resale value. Unlike professionally installed systems that might be tied to a specific contract or company, DIY systems are generally transferable and can be a clear benefit to prospective buyers.
Troubleshooting Common DIY Security System Issues
While DIY home security systems are designed for ease of use, occasional hiccups can occur. Fortunately, most common issues are relatively straightforward to diagnose and resolve. Proactive troubleshooting can save you time and ensure your system remains operational and reliable.
Issue 1: Sensor Not Responding or Showing as Offline
Possible Causes:
- Low battery
- Sensor is too far from the base station
- Interference from other wireless devices
- Sensor is damaged or faulty
Troubleshooting Steps:
- Check Battery: The most common culprit. Open the sensor and replace the battery with a fresh one of the correct type. Many apps will show battery levels for sensors.
- Check Range: Ensure the sensor is within the recommended wireless range of the base station. If it's borderline, consider relocating the base station or adding a wireless range extender if your system supports it.
- Check for Interference: Other wireless devices (microwaves, cordless phones, certain Wi-Fi routers) can sometimes interfere. Try temporarily turning off other devices to see if the sensor reconnects.
- Re-pair the Sensor: Remove the sensor from your system via the app and then go through the pairing process again.
- Inspect for Damage: Check if the sensor has been physically damaged.
Issue 2: False Alarms from Motion Sensors
Possible Causes:
- Pets moving in the detection zone
- Curtains or blinds moving in drafts
- Sunlight or heat sources (vents, lamps) hitting the sensor
- Incorrect mounting height or angle
- Firmware bugs
Troubleshooting Steps:
- Adjust Sensitivity: Most motion sensors have adjustable sensitivity settings in the app. Lowering the sensitivity can help ignore minor movements.
- Pet-Friendly Settings: If your sensor has pet-friendly features, ensure they are enabled and correctly configured for your pet's weight.
- Reposition the Sensor: Ensure it's not pointed at windows, vents, or direct sunlight. Mount it at the recommended height (usually 6-8 feet) and angle. Avoid placing it where curtains can easily move across its field of view.
- Check for Obstructions: Ensure nothing is blocking the sensor's view.
- Update Firmware: Check if there are any firmware updates available for your motion sensors or base station via the app.
Issue 3: Camera Not Connecting or Streaming
Possible Causes:
- Weak Wi-Fi signal
- Incorrect Wi-Fi password
- Camera is too far from the router
- Router issues
- Camera needs a reboot or reset
Troubleshooting Steps:
- Check Wi-Fi Signal Strength: Ensure the camera is within a strong Wi-Fi range. If not, consider moving the router closer, using a Wi-Fi extender, or a mesh system.
- Reboot Router and Camera: Unplug your router and modem for 30 seconds, then plug them back in. Once the internet is restored, reboot your camera by unplugging its power for 10 seconds.
- Verify Wi-Fi Credentials: Double-check that you entered the correct Wi-Fi network name (SSID) and password during setup.
- Factory Reset Camera: If all else fails, perform a factory reset on the camera (refer to your camera's manual for instructions) and set it up again from scratch.
- Check Router Settings: Ensure your router is not blocking the camera (e.g., MAC address filtering).
Issue 4: Base Station Offline
Possible Causes:
- Internet connection is down
- Power outage
- Ethernet cable is loose or faulty
- Wi-Fi connection lost (for Wi-Fi connected hubs)
Troubleshooting Steps:
- Check Internet Connection: Verify that your home internet is working by testing it with another device. If not, troubleshoot your modem and router.
- Check Power: Ensure the base station is plugged in and receiving power. Check the battery backup if applicable.
- Check Ethernet Cable: If wired, ensure the Ethernet cable is securely plugged into both the base station and the router. Try a different cable if possible.
- Check Wi-Fi Connection: If your hub uses Wi-Fi, ensure it's still connected to your network. You may need to re-enter Wi-Fi credentials if your network name or password has changed.
- Cellular Backup: If you have cellular backup, the system should still function and alert you even if the internet is down. If it's completely offline, there might be a cellular service issue or a problem with the base station itself.
Issue 5: App Not Receiving Notifications
Possible Causes:
- Notifications are disabled in the app settings
- Notifications are disabled in your phone's system settings
- Do Not Disturb mode is active on your phone
- App needs to be updated
Troubleshooting Steps:
- Check App Notification Settings: Go into your security system's app settings and ensure that notifications are enabled for the events you want to receive.
- Check Phone Notification Settings: Go into your smartphone's system settings and ensure that notifications are allowed for the security app.
- Disable Do Not Disturb: Make sure your phone is not in "Do Not Disturb" or a similar silent mode that blocks notifications.
- Update the App: Ensure you have the latest version of the security system's app installed.
- Reinstall the App: As a last resort, uninstall and then reinstall the app.
For persistent issues, always refer to your system's specific user manual or contact the manufacturer's customer support. Most companies offer extensive online knowledge bases and responsive support channels.
Conclusion
The quest for the "best" DIY home security system in 2025-26 culminates in a personalized solution that aligns with your unique needs, budget, and technical comfort level. As we've explored, the market offers a compelling array of options, from feature-rich integrated systems like Ring Alarm Pro and Abode, to user-friendly stalwarts like SimpliSafe, and budget-friendly innovators like Wyze. The key takeaway is that robust, modern home security is more accessible and affordable than ever before.
By carefully considering factors such as installation ease, monitoring preferences (self vs. professional), smart home integration capabilities, and the specific components required for your home's layout, you can confidently select a system that provides optimal protection. The ability to customize your setup with a variety of sensors, cameras, and environmental detectors, coupled with advanced features like AI video analytics and seamless smart home automation, empowers you to create a truly intelligent and secure living environment.
Ultimately, the best DIY home security system is the one that gives you peace of mind. Invest time in research, understand the components, and don't hesitate to leverage the wealth of information available. With the right DIY system, you can effectively safeguard your home and loved ones, enjoying the benefits of cutting-edge technology without the burden of professional installation or exorbitant monthly fees.


